
Adjusting the Field of View of MV22 and MV72 Cameras
By Geraldine Baniqued
Overview
The MV22 and MV72 cameras have three fundamental ways of adjusting their field of view (FoV):
- optical zoom
- digital zoom
- sensor crop
Sensor crop is explained in more detail in the MV Sensor Crop article. After the FoV is adjusted to cover the desired area, refer to Focusing MV22/72 and MV21/71 Cameras on how to adjust the focus.
It is important to know the differences between these three features and how to use them together to achieve the best image quality.
Camera Basics
In order to understand the difference among these FoV adjusting methods, it is important to understand how an image is captured on a camera.
Light within a certain field of view will enter the lens of the camera. The focal length of the camera will dictate the field of view. Cameras can either have a fixed or varifocal lens. Varifocal lenses adjust the focal length to have a wider or narrower field of view. This is how optical zoom is implemented. Fixed lenses do not have optical zoom because the lens cannot be adjusted and will have the same field of view.
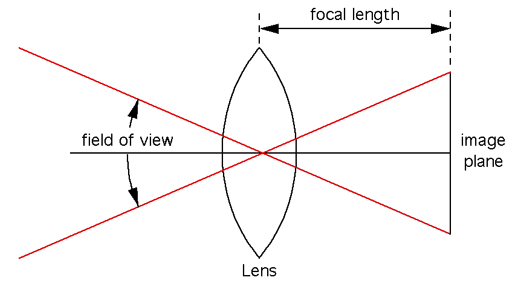
After light enters the lens, it is captured on the image sensor (image plane). After being captured, it is then scaled down to the desired resolution (720p or 1080p) to produce the stream. This is where sensor crop is implemented.
Upon viewing the stream, you can use digital zoom to crop a region to view within dashboard.
Definitions
Optical Zoom
Optical zoom moves the lenses to magnify a far-off image. It magnifies the image to fill the entire image sensor. The number of available pixels to capture an image remains the same at any zoom level.
Sensor Crop
The camera stores video at 1080p or 720p, two common resolutions which offer a balance between fine detail and extended retention times. The camera's sensor, however, captures raw video at a resolution of 4 megapixels (1520p), which is then scaled down to the desired streaming resolution. Below is an image of scaling in normal operation.
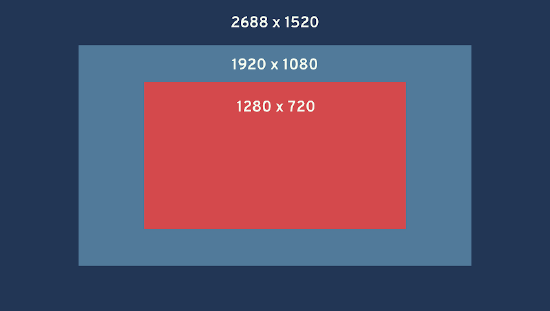
Sensor Crop allows the user to select a region of the frame before scaling is applied, resulting in a zoom of up to 1.4x (1080p) or 2.1x (720p). Unlike digital zoom (explained below), the video is never scaled up. This means there is never any pixelation or loss of image quality.
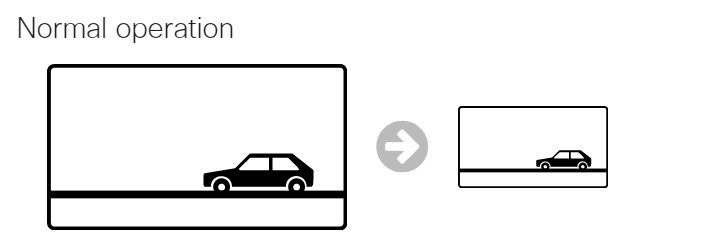
The full frame is scaled down to the desired resolution for streaming and storage.

The frame is cropped before scaling, resulting in zoom without any loss of image quality.
Digital Zoom
Digital zoom is when you use a processor to crop the captured image and “stretch out” or the pixels. Within dashboard, this is done by bilinear interpolation which adds new pixels in between existing pixels based on the values of the nearest neighbors. As a result, digital zoom does not add any additional detail to the photo.
Comparison & Recommendation
|
Optical Zoom |
Sensor Crop |
Digital Zoom |
||
|---|---|---|---|---|
|
How it Works |
What is changed? |
Focal length of the lens (optics) |
Region to scale for the desired resolution (after optics, but before processing) |
Region seen on the dashboard video stream (post-processing) |
|
Requires physical moving parts? |
Yes |
No |
No |
|
|
What it Does |
How does it affect the FoV? |
Narrower or wider field of view |
Cropped regions are not captured |
It does not affect the image, but stretches out pixels within dashboard |
|
Adds detail? |
Yes |
Yes |
No |
|
|
Supported cameras |
MV22, MV72, MV21, MV71 |
MV12, MV22, MV72 |
MV12, MV22, MV72, MV21, MV71 |
|
The recommendation is to configure with optical zoom to capture only the field of view that you are interested in, and then use sensor crop to remove any areas on the top, bottom or sides that you are not interested in. Lastly, during operation you can use digital zoom within the dashboard to have a closer look at specific areas of your image.
.png?revision=1&size=bestfit&width=350&height=260)
During Configuration
Navigate to the camera's Settings page. The example images in the steps below are taken with the MV72 camera.
STEP 1: Optical Zoom
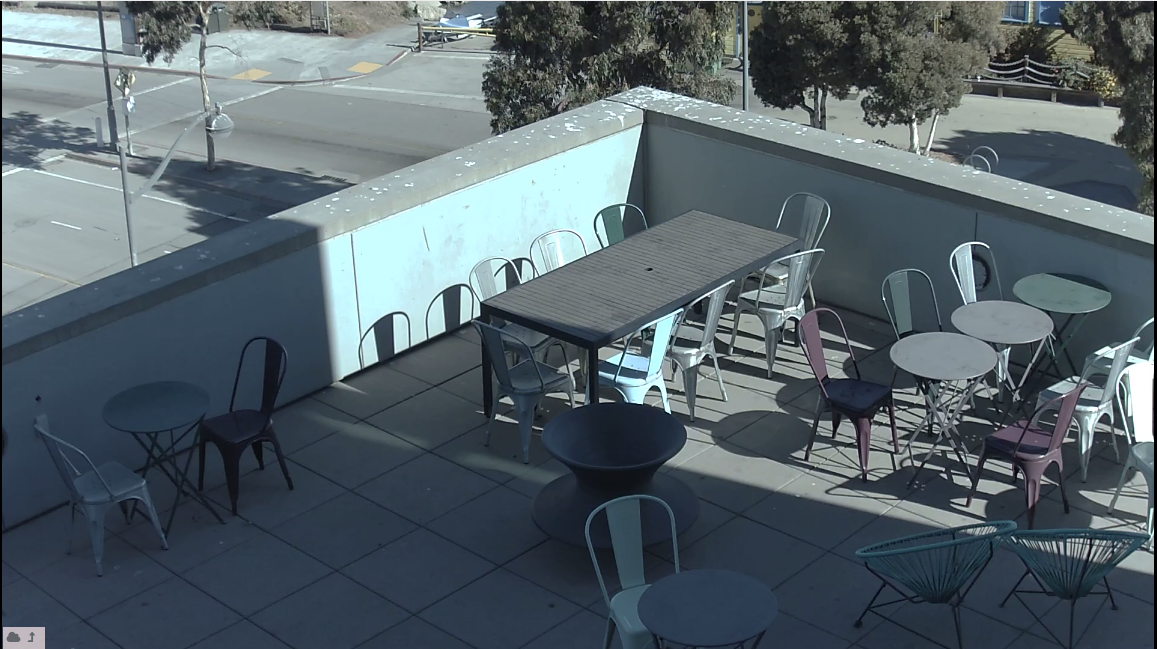
As shown on the dashboard:

0% zoom:
99% zoom:
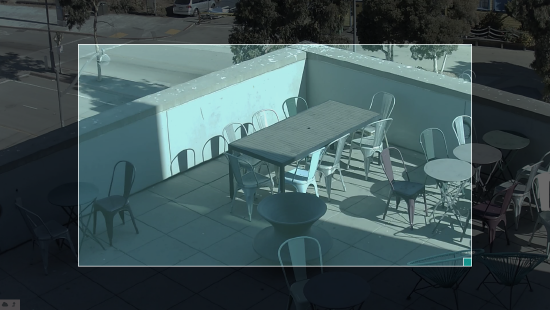
STEP 2: Sensor Crop
As shown on the dashboard:
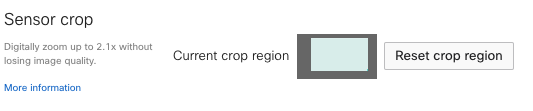
Before sensor crop (with crop region shown):
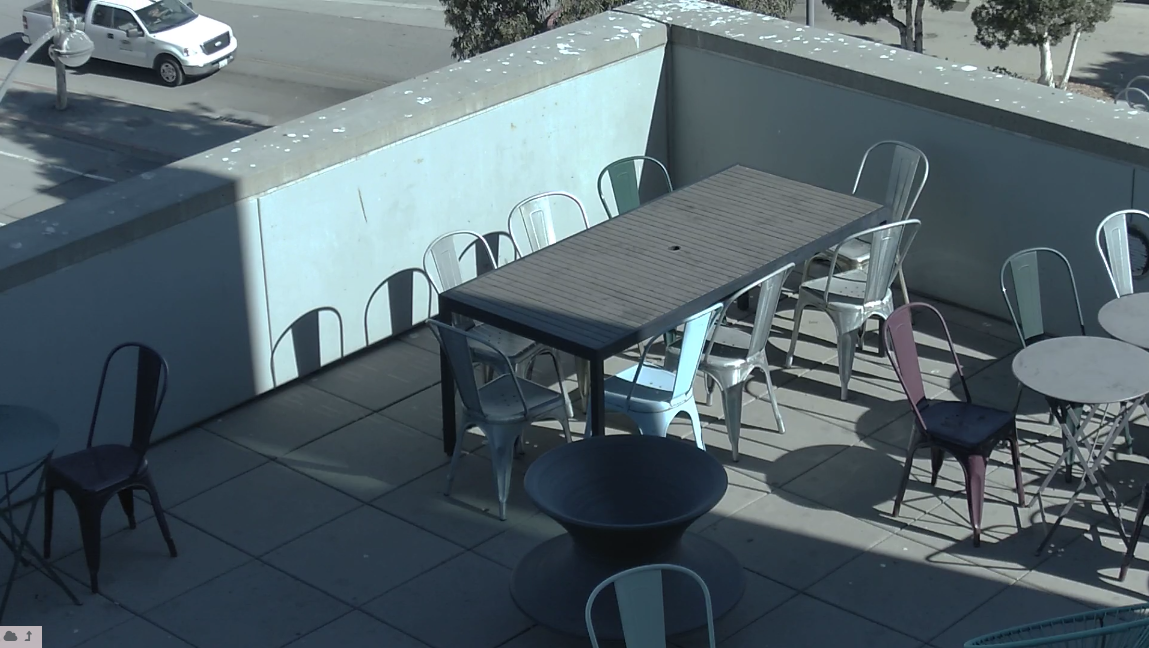
After sensor crop:
During Operation: Digital Zoom
As shown on the dashboard:
.gif?revision=1)