Android Enterprise Deployment Guide
Introduction
This article provides deployment guidance for Android Enterprise (formerly Android for Work) with Cisco Meraki's System Manager. Android Enterprise is a platform for devices running on the Google Android mobile operating system that allows IT to manage and secure business applications using a work-specific profile. Android Enterprise comes in two different types of deployments:
- Work Profile or BYOD. In BYOD mode administrators only have control over work managed applications and settings. Systems Manager will containerize all corporate data and represent it using an orange badge icon. An administrator will have complete control over these applications, but have no visibility or control over personal applications on the device.
- Device Owner mode. In Device Owner mode administrators have complete control of the device. This type of deployment is primarily used on institutionally owned devices and include special features such as kiosk mode. (Device Owner mode can be thought of as the "Supervised" state for those familiar with iOS.)
Requirements
Managing Android Enterprise devices through Systems Manager requires:
- A bound domain: either a Gmail address used for administration for Meraki-managed domain, or a G Suite account for Google-managed domain. The following section describes these two in more depth.
- Android Android 10 (Quince Tart) +
- Device support for Google Play Services version 21.42.58+ (as of this writing)
- Device support for Google Mobile Services (GMS) especially the device_admin and managed_users feature flags. The latest requirements defined by Google can be found here.
Your devices must also support the work profile and work managed modes. If you are using an OEM device that is not listed in the following catalog, or is on an older version of Android, it may not support the full Android Enterprise suite of features available through Systems Manager.
For device compatibility recommendations, see Google's official Enterprise Device Catalog
For more info on enrollment options for Android devices, reference our article here. More information about Android Enterprise can be found here: https://www.android.com/work
The email address that is used to bind a work domain to an account is considered an admin email. Changing this email by going to Organization > Configure > MDM > Android Enterprise and clicking on unenroll, and then introducing a new admin email, will require the re-enrollment of all Android devies into the existing SM network.
Deployment Considerations
There are 5 main stages in an Android Enterprise deployment on Systems Manager:
- Determine and Bind a Work Domain
- Enable Authentication as a part of Enrollment
- Enroll a Device
- Enable Device Restrictions
- Push Applications
Determine and Bind a Work Domain
There are two flavors of Android Enterprise: Google Managed Domain and Meraki Managed Domain.
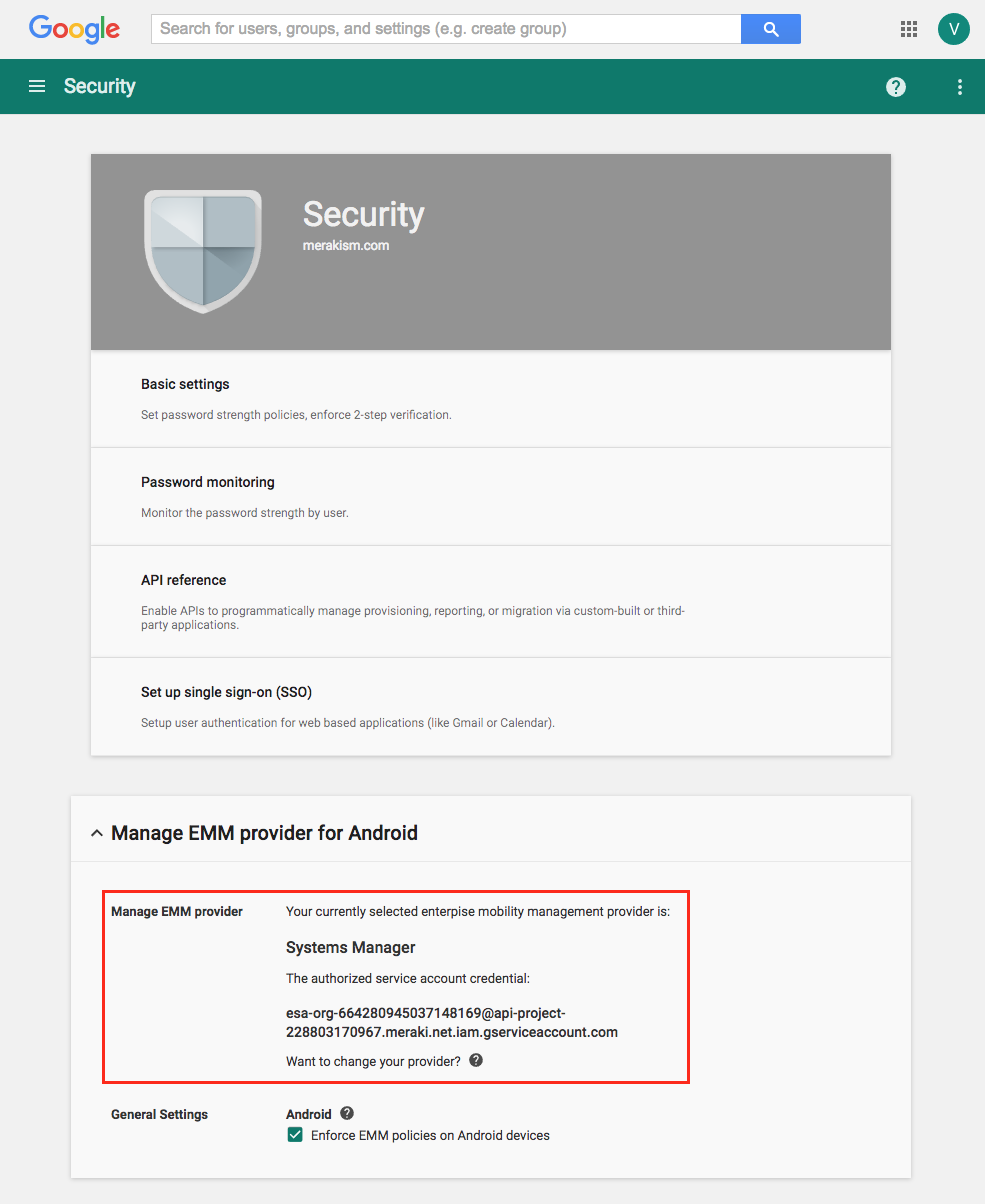
- Google Managed Domain - This is an Android Enterprise deployment that capitalizes on existing Google services. If services such as Gmail, Google Calendar, Google Docs, etc. are being used, it is likely a Google Managed Domain. This can be enabled in the Google Admin Console as a super administrator. Navigate to Devices > Mobile & endpoints > Settings > Third-party integrations and copy the token. This will be entered in the first step of the process. Check the "Enforce EMM policies on Android Devices" to require SM be installed on the device in order to access Google services.
If the free Android Enterprise subscription has not already been added to the Google Domain please reference the following article to enable it. The section that states "If you are a G Suite customer" provides more information about enabling the free subscription: https://support.google.com/work/andr.../6174046?hl=en
- Meraki Managed Domain - If no Google services are currently being used, Meraki can generate a Managed Domain for your Android Enterprise deployment, which may be preferable to setting up a G Suite domain that otherwise may not be used. All that is needed is a Google supported administrative email address (i.e. any @gmail.com account). In Google documentation this is referred to as an Android Enterprise account (as these accounts can only be used for Android Enterprise).
More about this can be read here: https://support.google.com/googlepla..._topic=7042018
Google Managed Domain
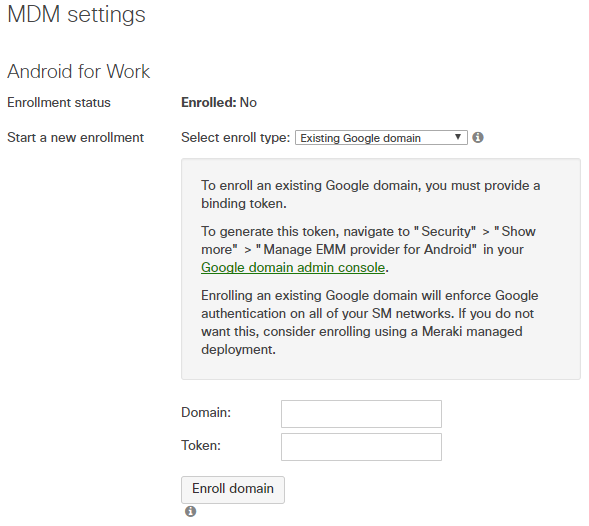
To bind an existing Google Managed Domain navigate to Organization > MDM, enter the domain name (e.g. 'meraki.com'), followed by the token copied from the Google Admin Console and click "Enroll Domain."
Meraki Managed Domain
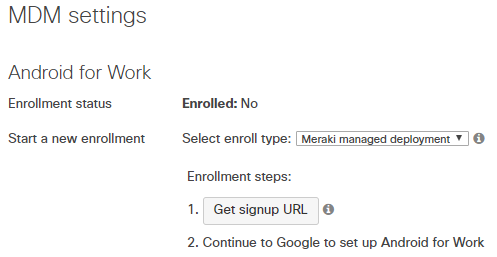
To bind a Meraki Managed Domain navigate to Organization > MDM and click "Get signup URL".
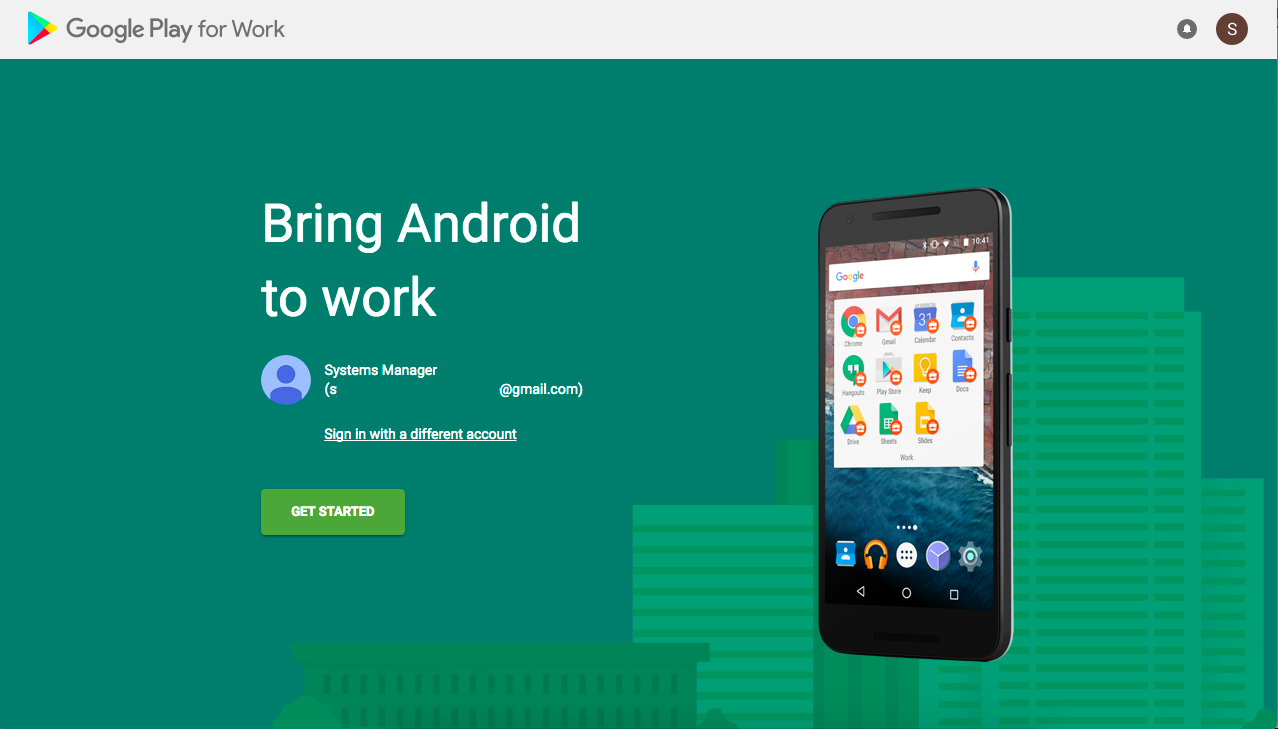
Next click the URL generated that appears in step 2 and it will redirect to the "Bring Android to Work" page. Click through the form to complete and create a Meraki Managed account. If possible, it is recommended to use a Gmail account associated with your organization and not a personal account.
Once the "Complete Registration" button has been clicked, return to the Meraki Dashboard. Under Organization > MDM, there should now be a bound domain associated to the email used to complete the "Bring Android to Work" page.
Enable Authentication as a part of Enrollment
Adding authentication is a necessary step in order to associate a user to the Android Enterprise profile placed onto a device. To enable authentication in Systems Manager, navigate to Systems Manager > General and select an option in the section labeled User authentication settings.
If a Google Managed Domain was used SM will automatically authenticate (via O-auth) against the associated Google domain. However if a Meraki Managed Domain was used, please select "Managed: User Meraki hosted accounts." If no user accounts have been created, click on the Configure Meraki hosted user, after clicking Save. The username and password entered as a Meraki Owner is what SM will authenticate against.
Enrolling a Device
As mentioned earlier there are two ways to deploy Android Enterprise: BYOD mode or Device Owner mode. Each of these modes have different enrollment paths detailed below. Additional details and recommendations on choosing between the two for your deployment can be found in this article.
Google requires that Android 5.0+ devices be encrypted when using Android Enterprise. This is important for both general device security as well as application specific data security.
BYOD Enrollment
Enrolling a BYOD device into Systems Manager is a simple 2-step process:
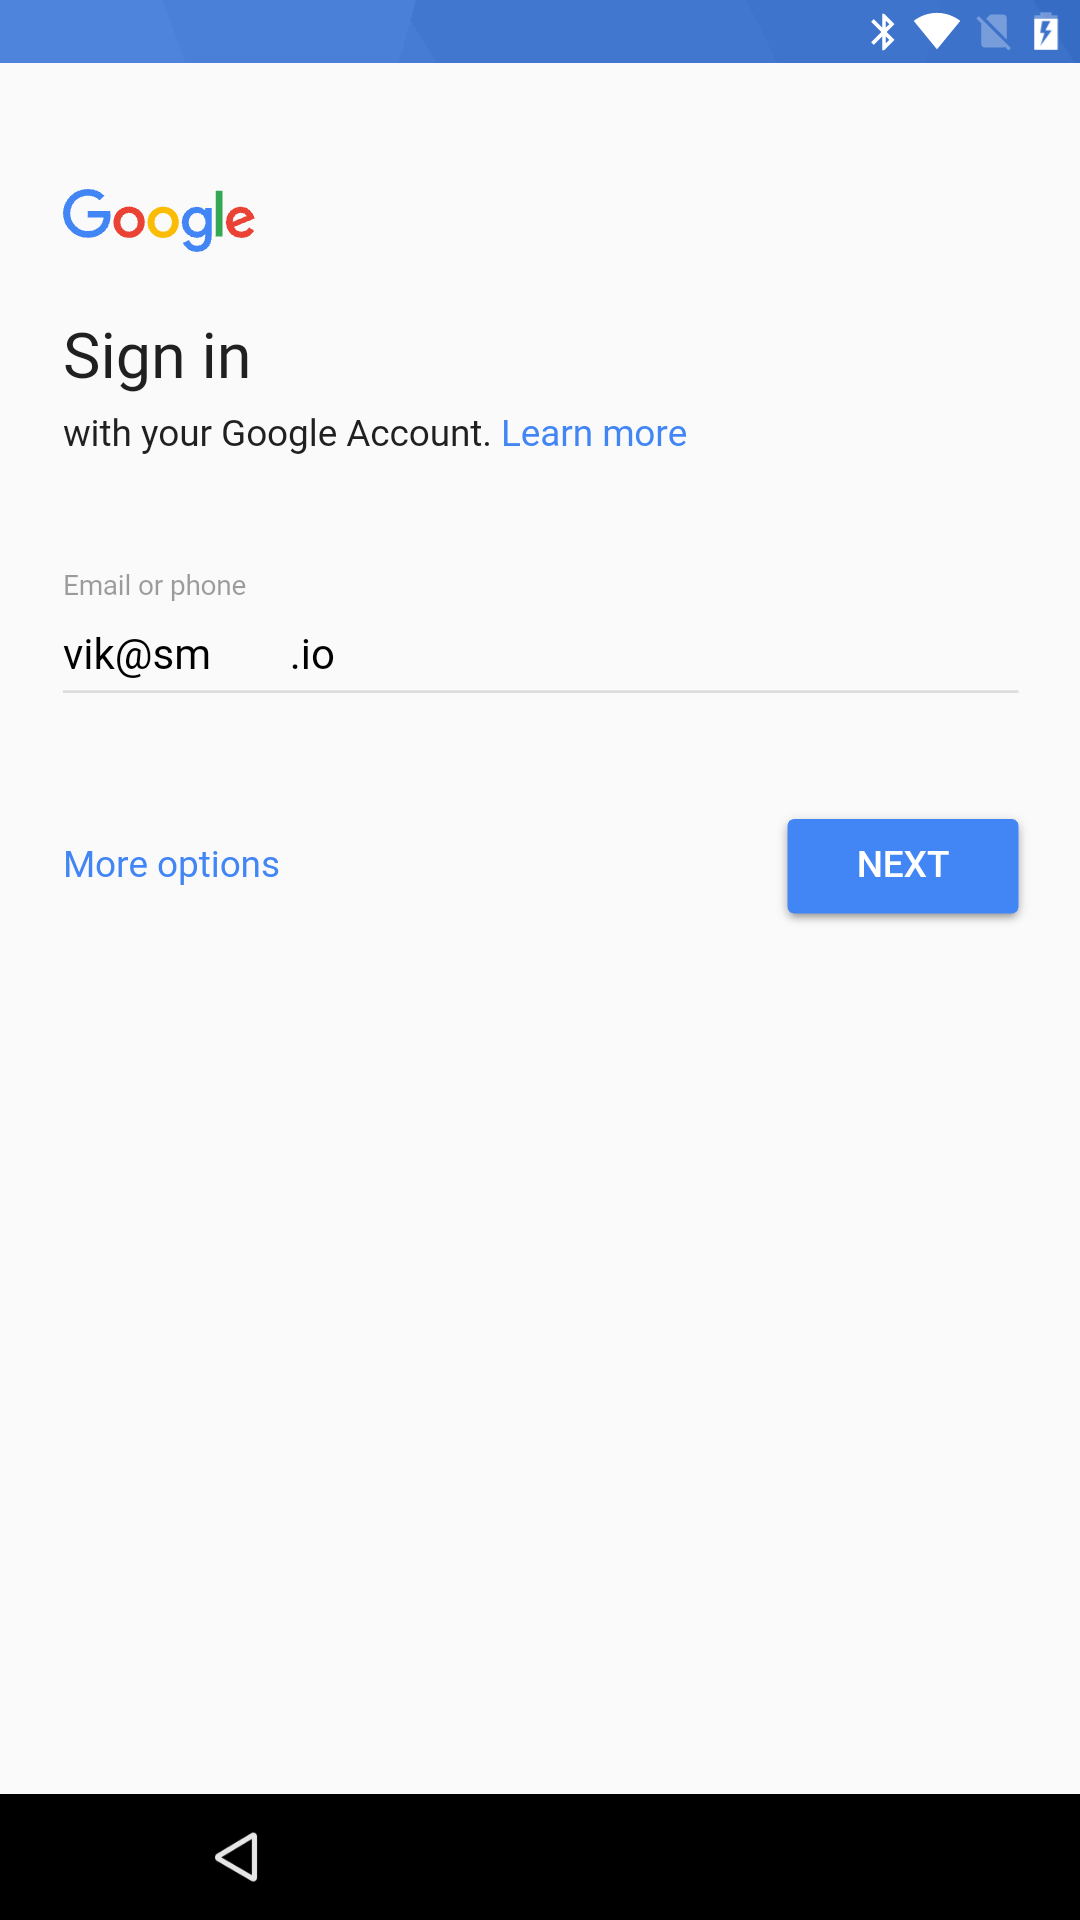
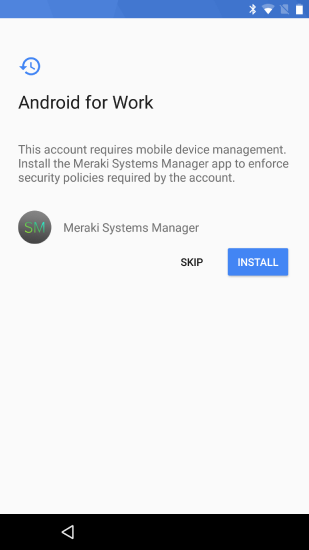
1. Install the Systems Manager app - This can be done two ways. Using a Google Managed domain, simply add a Google account in the bound domain and it will prompt the user to install the SM app. Alternatively, a Meraki Managed domain can download the SM app from the Google Play Store. The app can be found here: https://play.google.com/store/apps/d...=com.meraki.sm or downloaded directly here if the Google Play Store is unavailable. Regardless of the domain type, once the app is installed, follow the steps provided on the device to complete enrollment.
2. Sign in / Authenticate - When the app is opened two options will appear: Google and Meraki. These refer to the domain types that were bound to Dashboard.
- If Google is selected, it will prompt the user to login with their Google domain credentials, or select an account that has already signed into the device. The app will then automatically enroll in the correct Dashboard network.
- If Meraki is chosen, it will prompt to enter an enrollment code (this can be found in Dashboard under Systems Manager > Manage > Add Devices > Android Tab) and subsequently ask for a username and password.
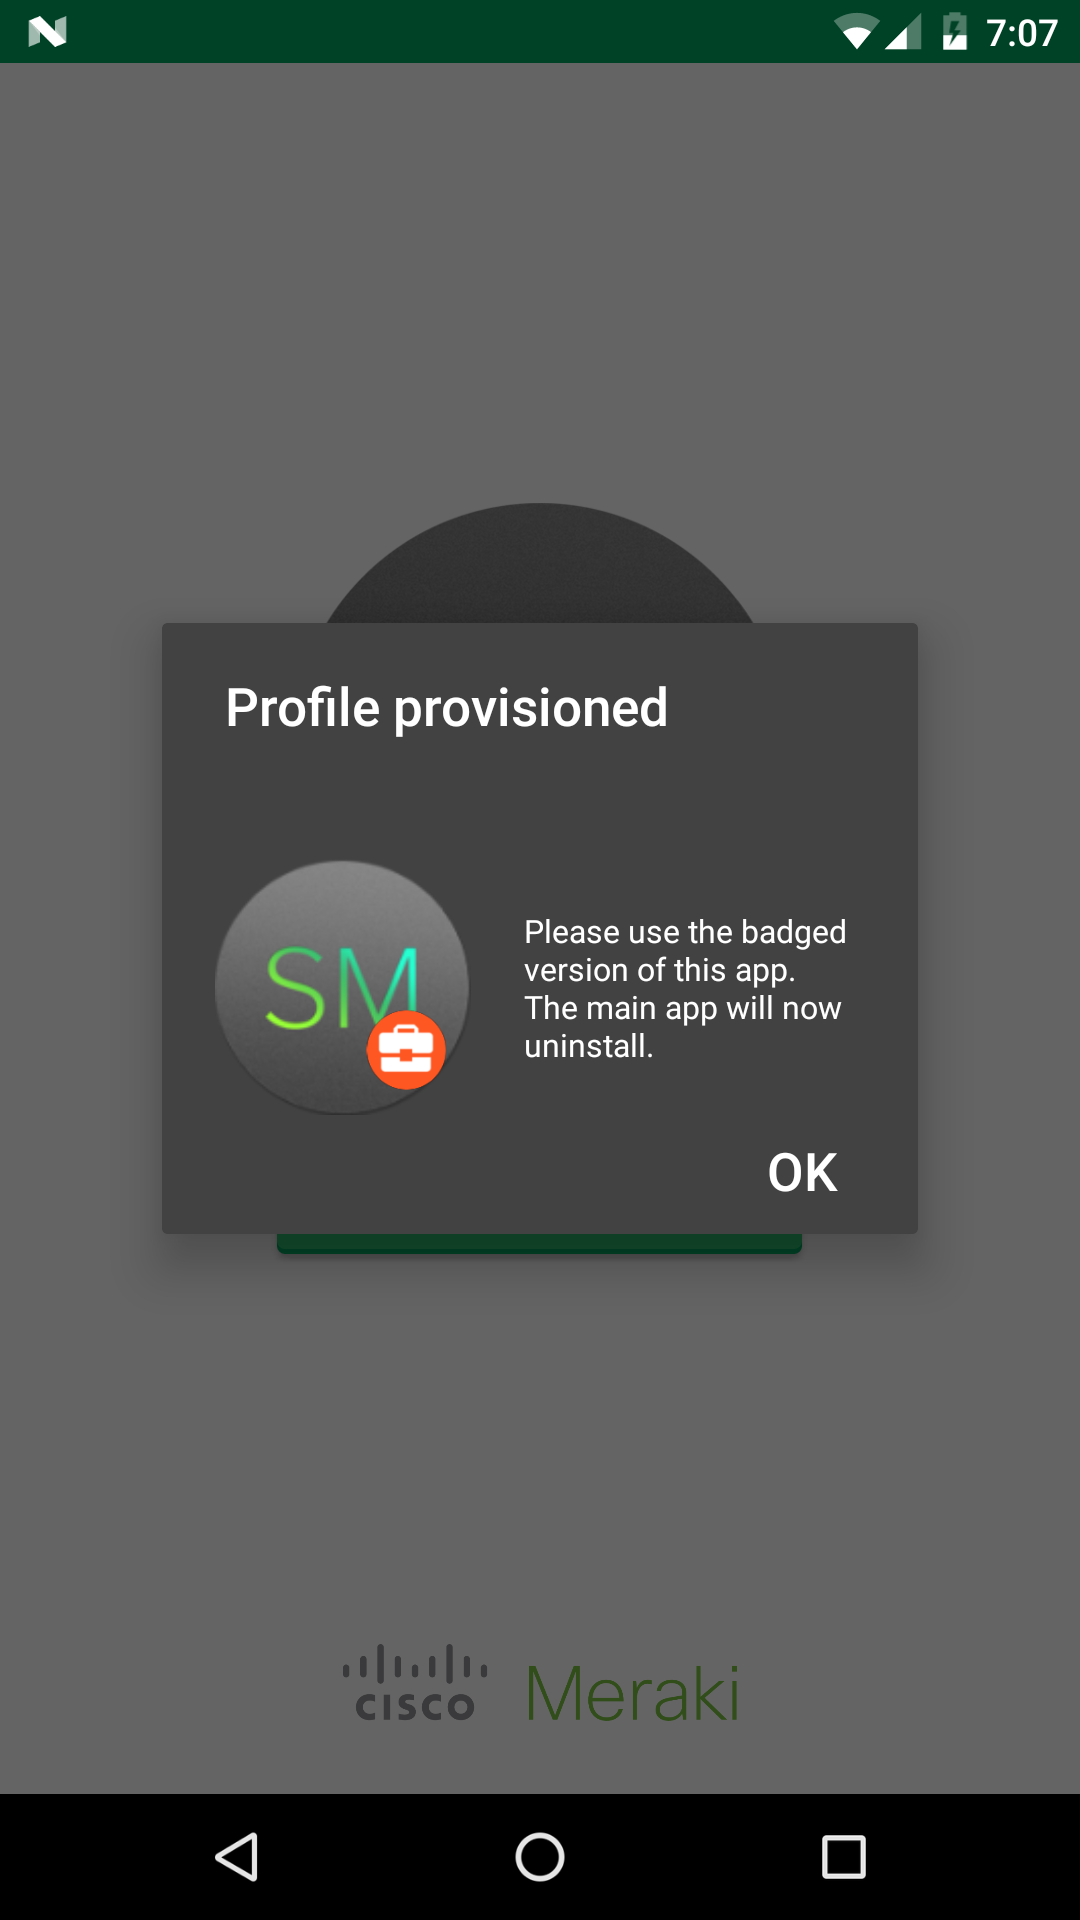
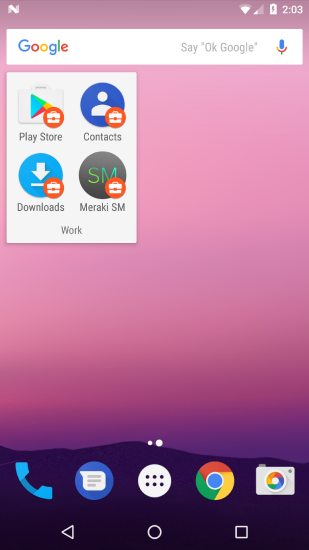
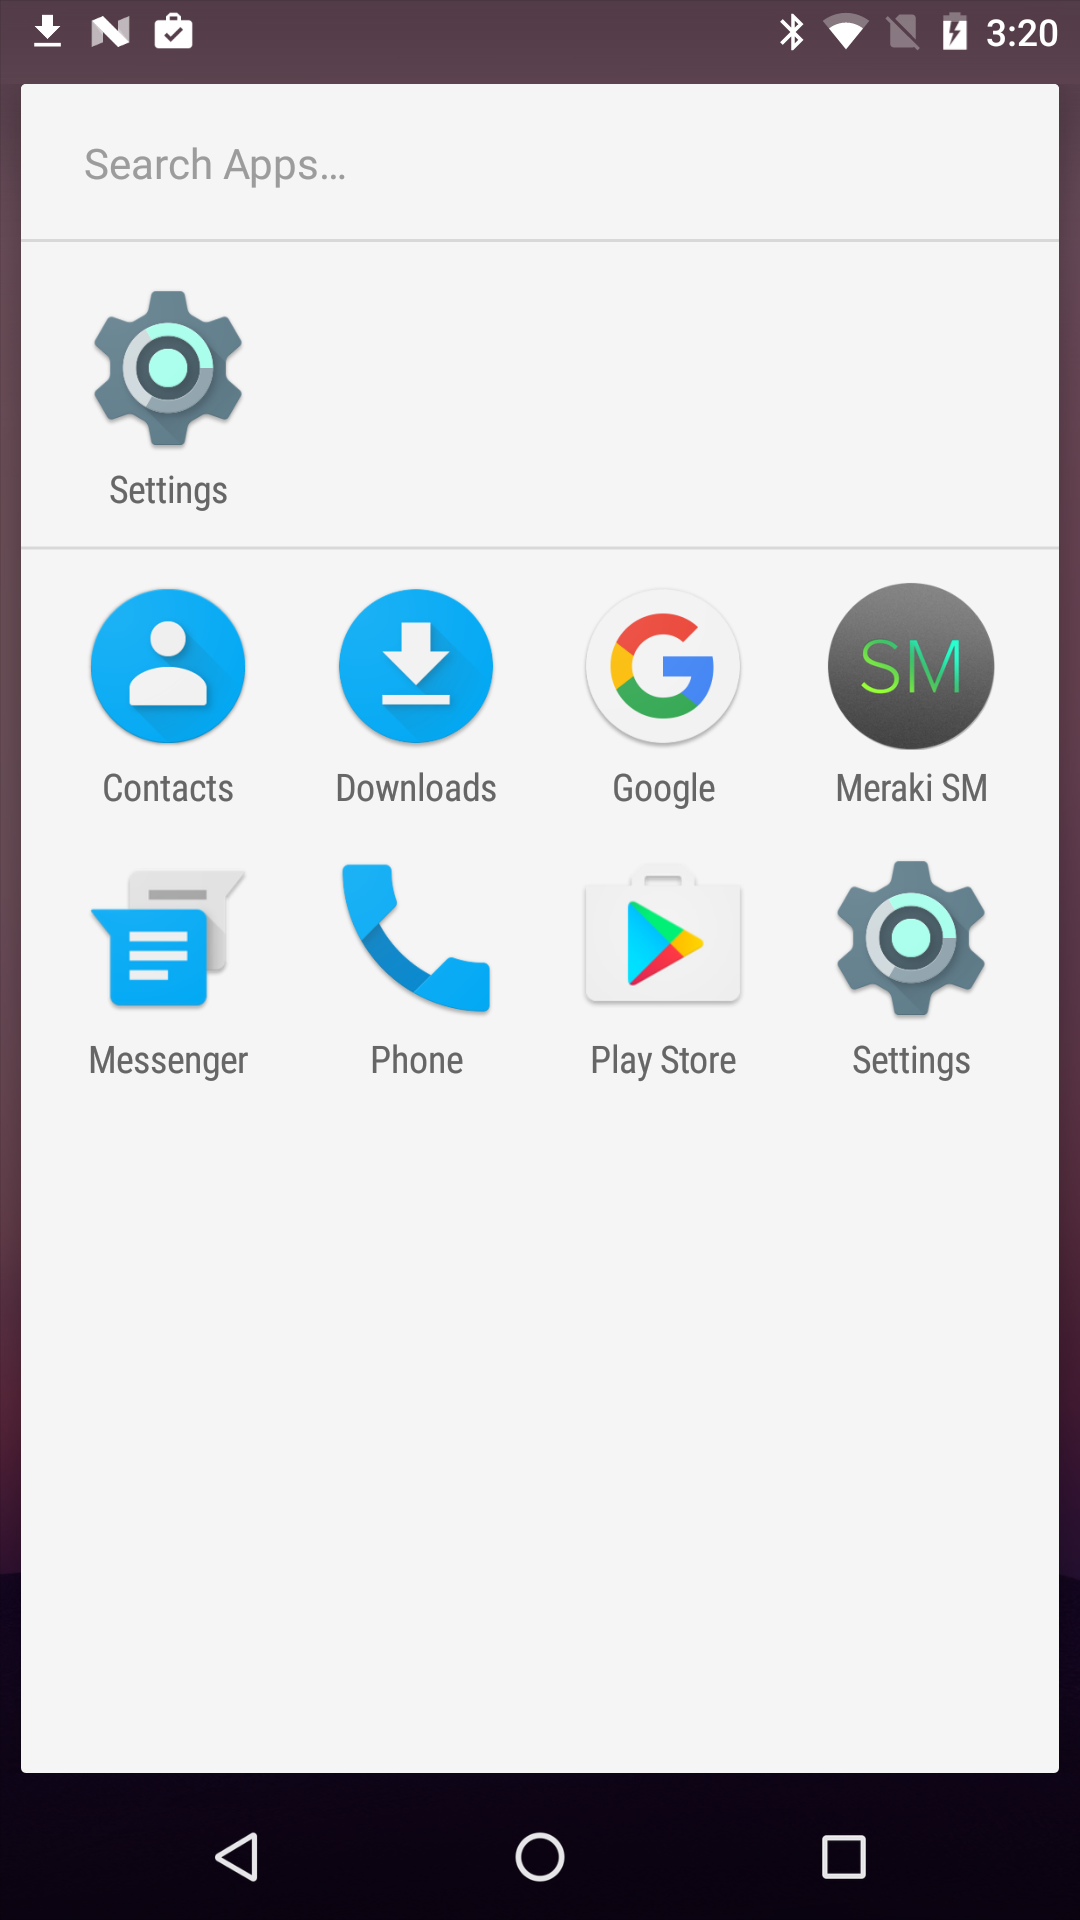
3. Provision the container - Once authenticated, the app will go through a quick loading screen and will be setup for Android Enterprise. A successful BYOD enrollment will result in icons on the device with an orange badge or a "Work" folder being created on the device home screen. You can uninstall the non-badged copy of the Systems Manager app, if desired, as all functionality now takes place within the badged copy of the app. To control which badged apps are provisioned, see the below section.
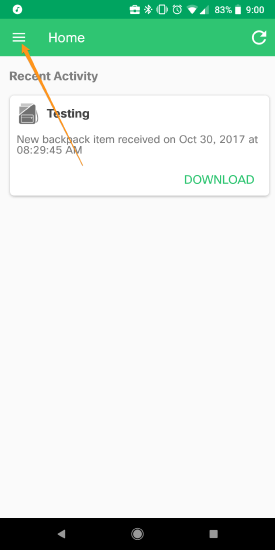
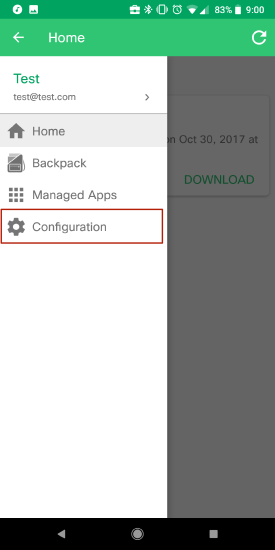
A sample of the screens are shown below:
Device Owner Enrollment
Device Owner mode is designed for institutionally owned devices with additional restrictions and control. Enrollment follows a similar process to BYOD, but everything is done in one step after a factory reset of the device. This step behaves slightly different depending on if a Google Managed or Meraki Managed domain is bound to Dashboard.
Device Owner mode can only be enabled after the factory reset of a device, and by default will disable all system apps unless configured otherwise. See the following section on controlling system apps.
If you have a Lollipop device (Android 5.0+) please reference this article for how to enable device owner mode.
- Google Managed - After a factory reset, follow the steps on screen until prompted for a Google Account. Sign in with an account that belongs to the bound Google Domain. This will prompt the installation of the SM app and automatically enroll the device in Dashboard.
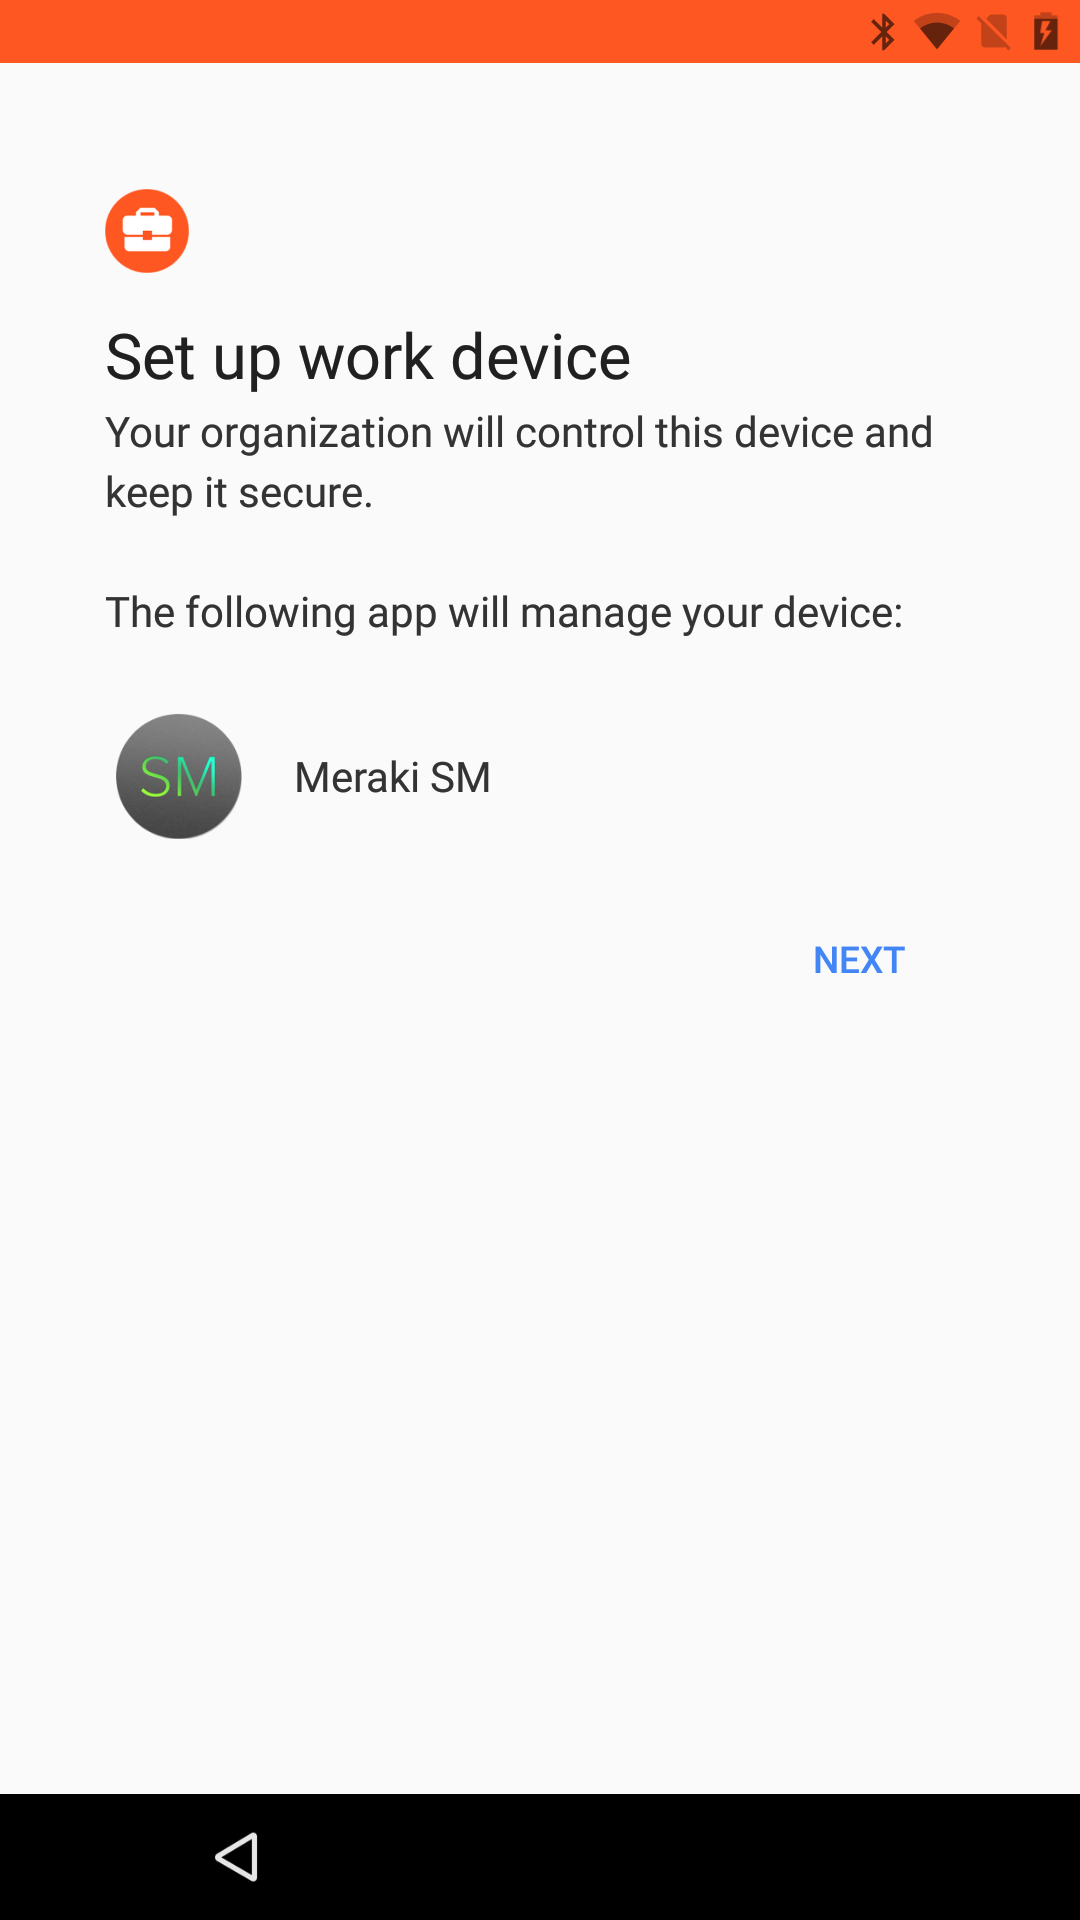
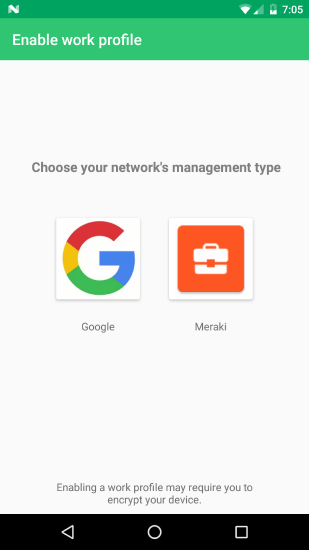
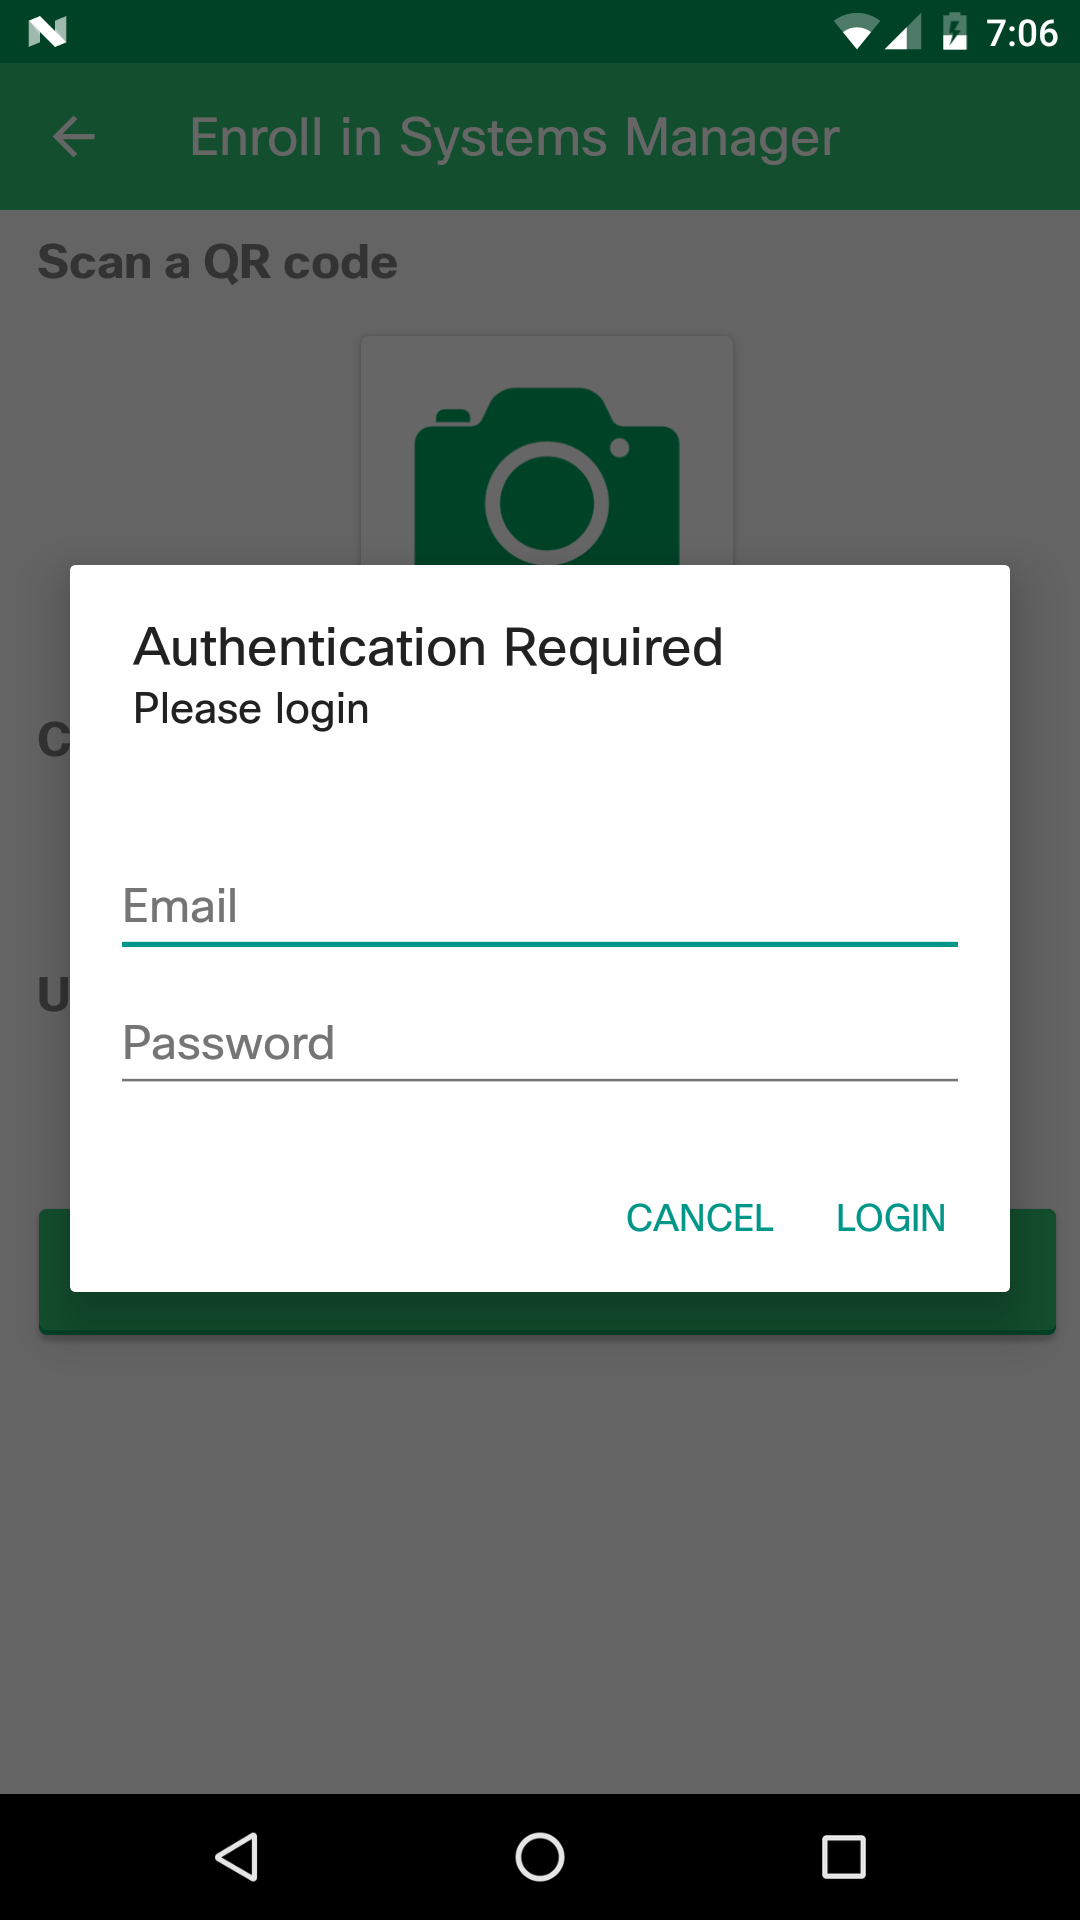
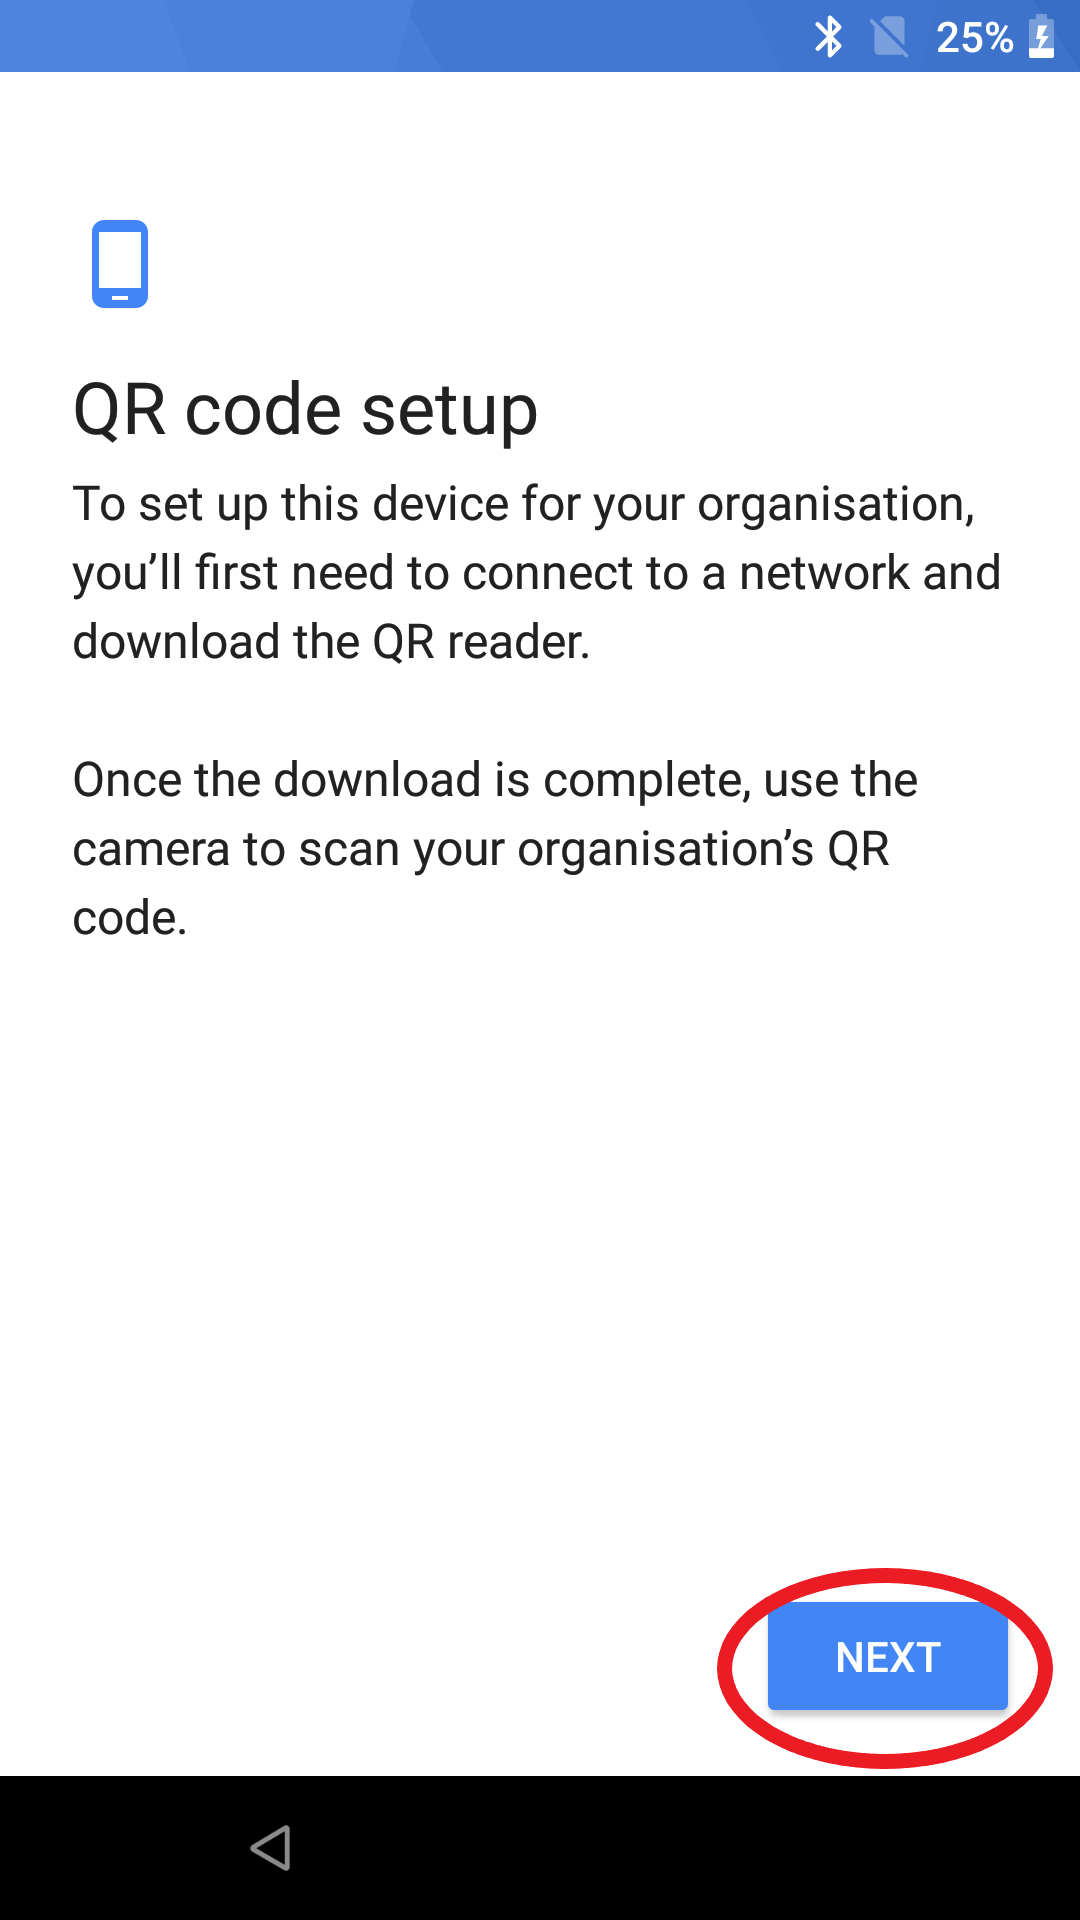
- Meraki Managed - After factory reset and on the very first screen displayed at startup, tap six times in a row anywhere on the screen (six times in one spot). This should launch the camera in a QR code scan mode, and force the device into its Android Enterprise enrollment setup. Scan the QR code from the SM > Add devices page for the device to trigger its Android Enterprise enrollment into the desired network. The app will prompt the end user for authentication, if enabled, and finish setup.

As shown in the last image, enabling Device Owner mode removes all non-essential apps from the device.
Controlling Native System Apps
By default, all apps will be disabled when enrolling in Device Owner mode, including the default SMS and phone dialing apps. In Work Profile mode, Systems Manager will automatically create a work version of default apps, indicated with the orange briefcase, into the work profile. The applications that are installed by default or treated as 'system apps' will vary by device manufacturer - for example, Samsung devices use different dialer, camera, and SMS apps from Google Nexus or Pixel devices.
To customize which default Android apps are provisioned into Device Owner mode, or duplicated into the managed work profile, see the Controlling Android System Apps article.
Note: Stacking multiple Android System Apps payloads on a single device is not a supported configuration.
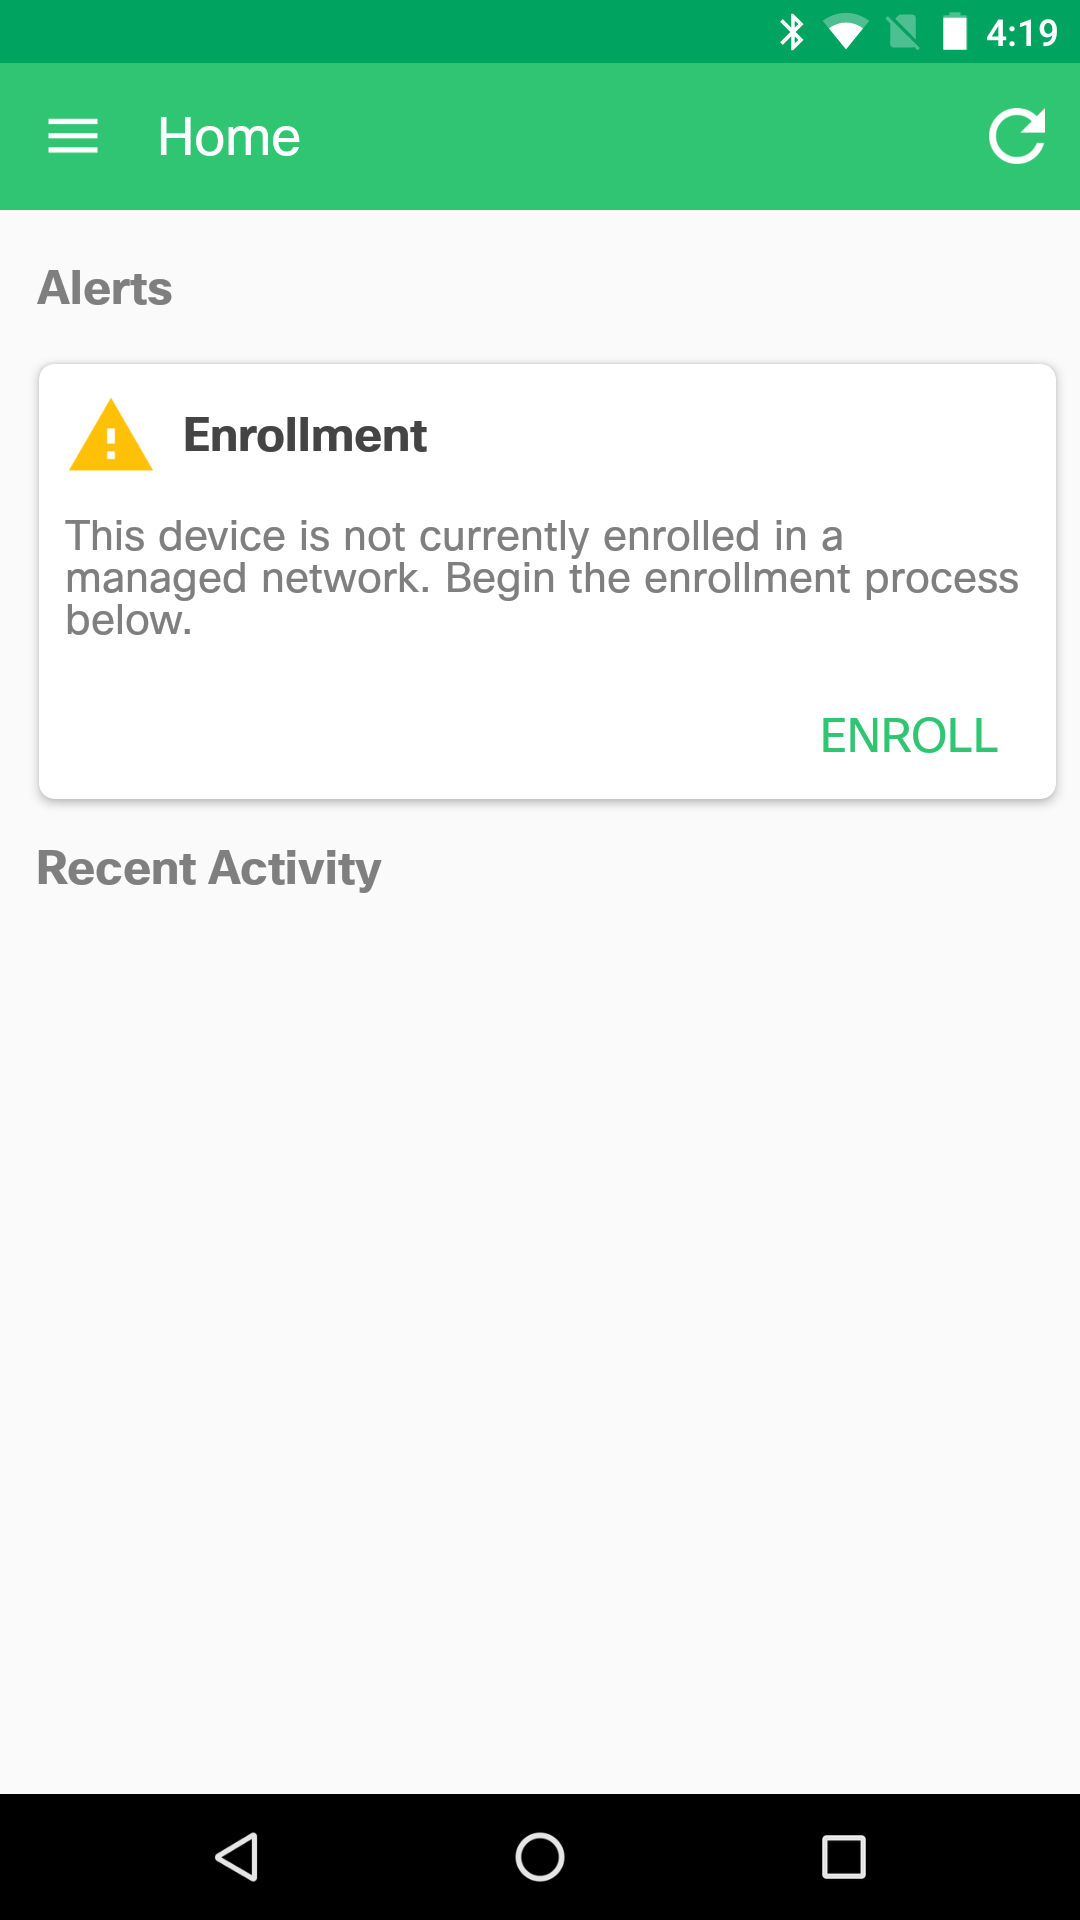
Troubleshooting Enrollment
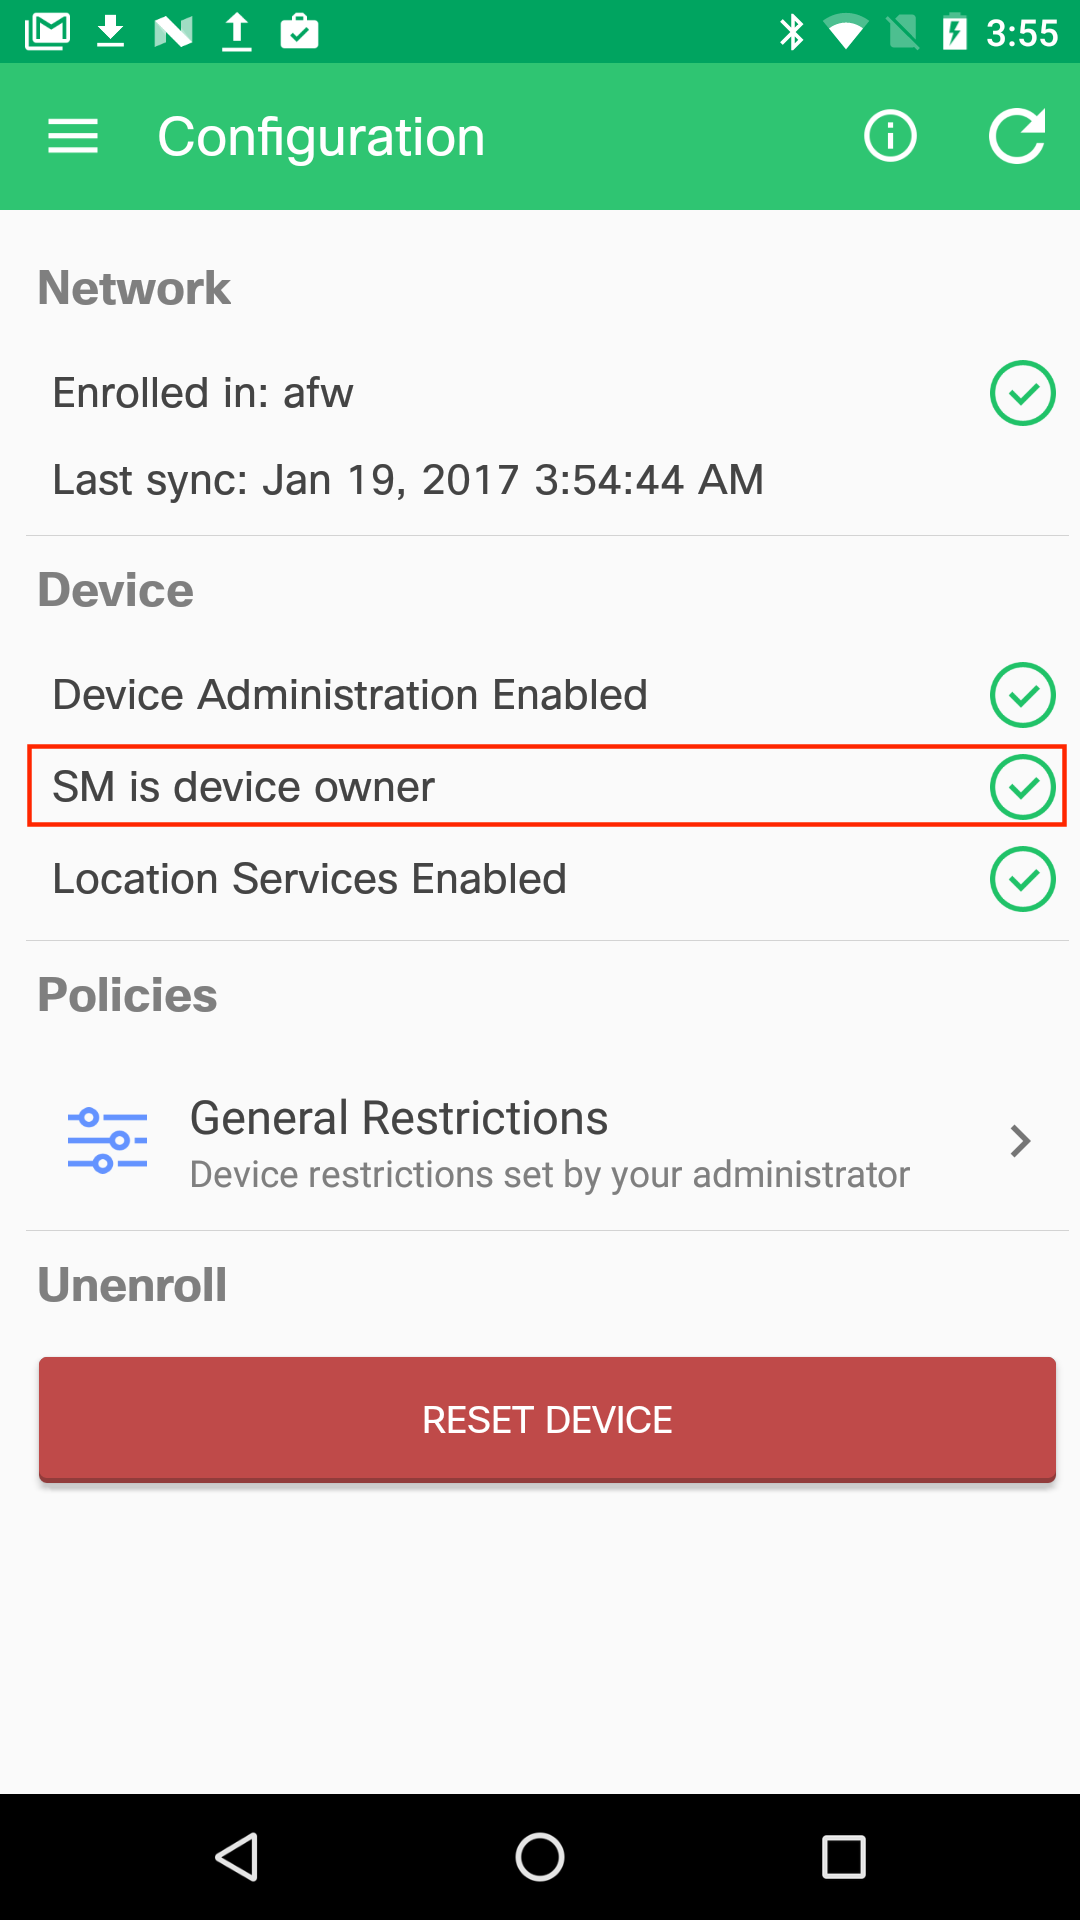
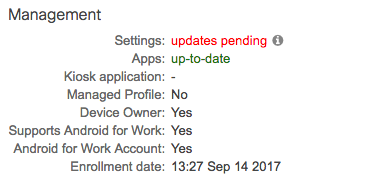
To verify whether a client device is enrolled, check the client page by navigating to Systems Manager > Monitor > Devices. Select the client from the list and check the Management section in the left-hand column near the top of the client details page. If the organization is successfully enrolled/synced, there will be a field called Android for Work Account. If the device is enrolled in Android Enterprise, it will say Yes. If this field does not exist, then it is likely that the organization is not enrolled in Android Enterprise correctly yet.
Troubleshooting Device Playstore Account
Verify the device has successfully set up a Playstore account by launching the SM app and confirming that 'AFW account enabled' has a green checkmark. If you see a warning icon here instead of a green checkmark, tap the icon to have the SM app reprovision the local Android Enterprise Playstore account on the device. This will be downloaded at next check-in, and should install after a few minutes. The below images show a device enrolled through Work Profile mode that has been successfully enrolled with the AFW account enabled.

It is important to have a unique owner on every device for System Manager's app installation tag scoping to function as designed. When using Meraki Managed (in Org > MDM) the Owner of the device generates a local Playstore account on the device. Each device requires a unique owner, so they can have a unique Playstore account installed. If you are unsure if your device has a unique Playstore account, perform the following steps:
- Click on the device in Systems Manager > Devices.
- If the device already has an owner set, click on "Edit details" and then "Clear owner". If the device doesn't have an Owner currently set move to the next step.
- Add a new Owner. This Owner needs to be an Owner that is new, and not currently the Owner of another Android device.
- When the device performs its next check-in to Dashboard, it will automatically install a new Playstore account on the device.
Note: to create new owners and assign them to devices on a mass scale, use Owner .csv importing to assist.
Using the Android Restriction or Android Device Owner setting "Disable modifying accounts" will prevent the AFW account from being enabled/installed. Please make sure Android devices do not have this restriction enabled, or the Android device will be unable to provision the local PlayStore account onto the device.
Enable Device Restrictions
Device restrictions for Android Enterprise enabled devices can be found in Systems Manager > Manage > Settings by searching for 'Android Restrictions'. Some other Android settings include: App permissions, Restrictions, Device Owner, Kiosk Mode.
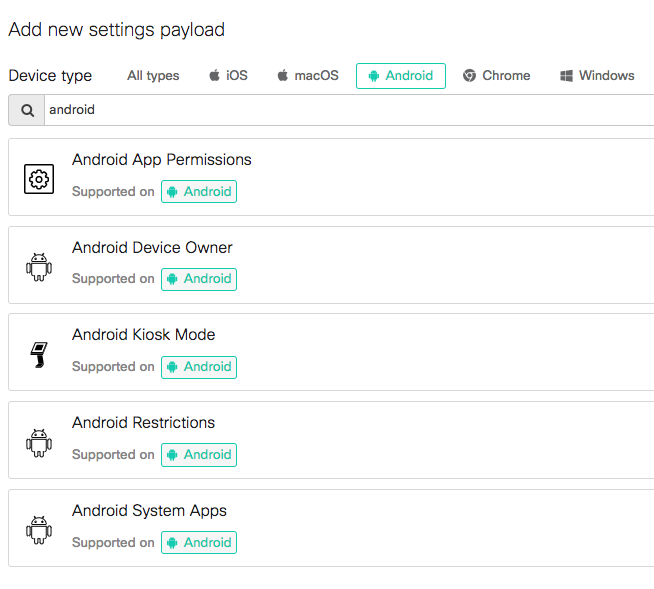
- App permissions - This setting allows for custom application permissions. Examples include denying an application access to the device's contacts, saved payment methods and even network access. Application permissions vary from app to app and a list of relevant permissions can be found using the "Fetch permissions" button that appears once an app has been selected.
-
Restrictions - These are general settings that can apply to all devices using Android Enterprise, both BYOD and Device Owner mode.
- Device Owner - These are a special set of restrictions that can only be applied to Android devices that are provisioned in Device Owner mode.
- Kiosk Mode - Kiosk mode allows an administrator to lock a device into a particular application. This can only be used with Android 6+ devices in Device Owner mode. See more info here.
- App permissions are not to be confused with App Settings. More about App Settings for Android Enterprise devices can be found here.
- The general Restrictions (not the one found under More Android) only apply to KNOX devices using the older version of Systems Manager.
Recommended Android Settings
In Android Device Owner and Work Profile enrollments, many things are disabled by default. To re-enable these settings, There are various Android Settings which can be applied, so please experiment with these settings to obtain the desired configurations for your organization. However, there are a few Android Settings which may result in unexpected behavior if the device does not have them applied. Adding an empty Android Device Owner payload, an empty Android Restrictions payload, and an Android Systems App blacklisting only a single app (so all other System apps are allowed) can setup the Android devices as desired.
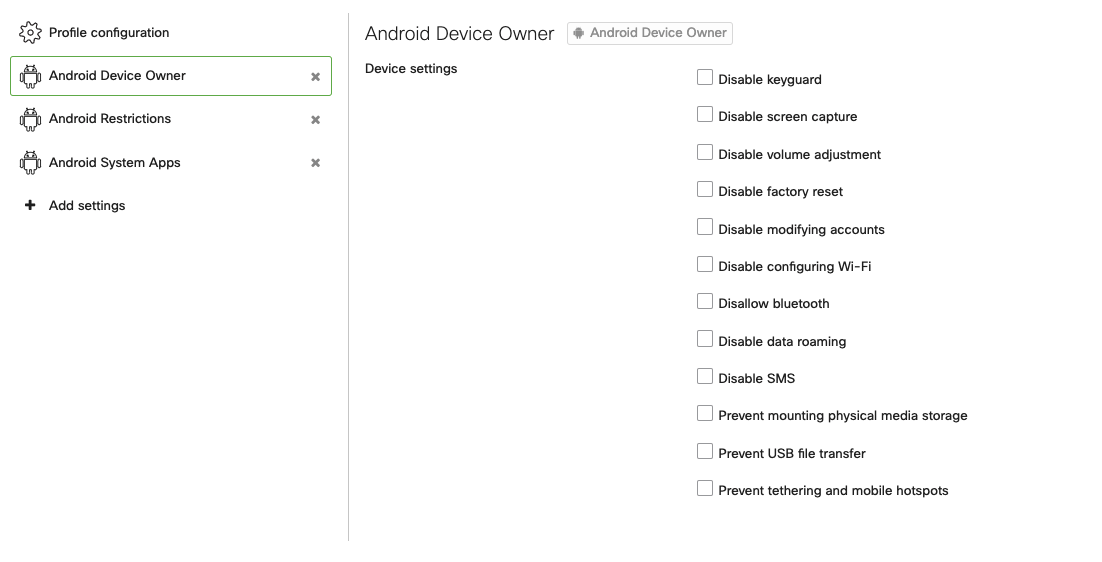
An empty Android Device Owner payload, like in the above example, can be important to uncheck the "Disable modifying accounts" restriction and others. After devices are setup, feel free to lock them down further if desired.
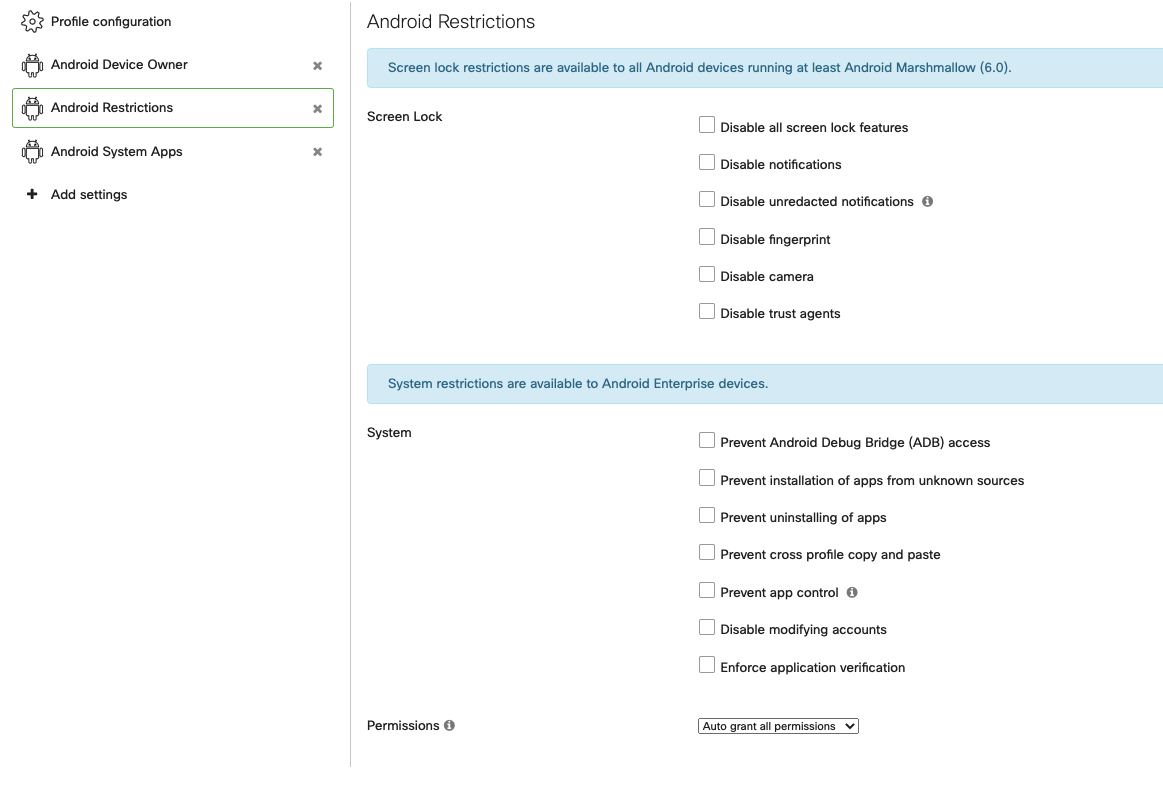
An empty Android Restrictions payload, like in the above example, will allow all other System apps to show on the device(s). Without this, Android Device Owner mode may block all system apps by default.
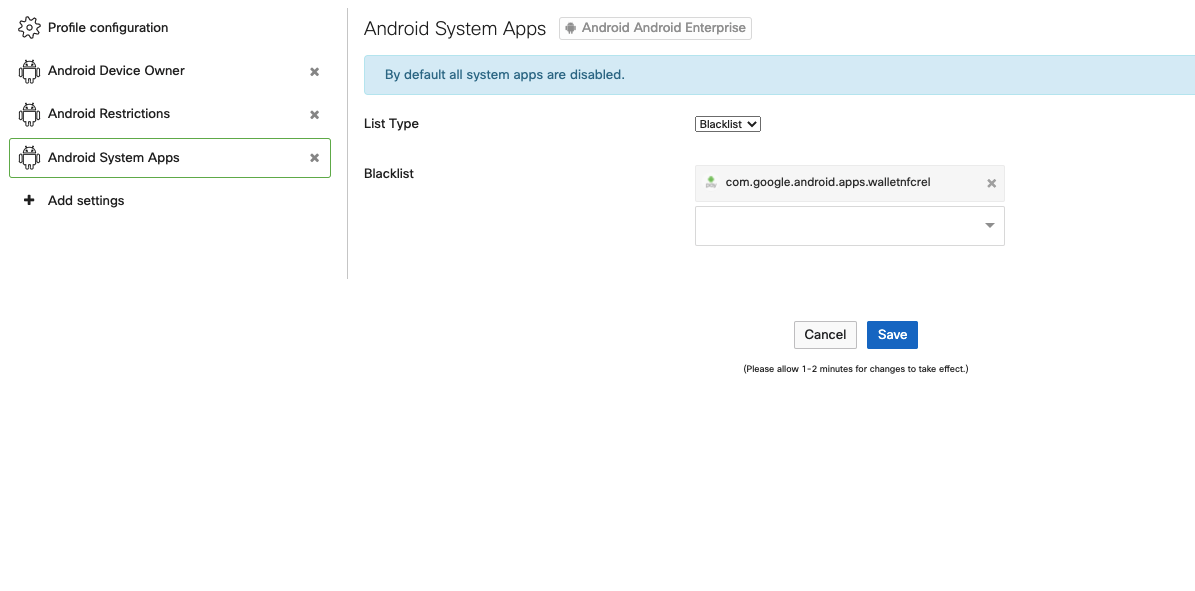
Blacklisting one app, like in the above example, will allow all other System apps to show on the device(s). Without this, Android Device Owner mode may block all apps. For more information on this, see Controlling System Apps.
Installing Applications
Applications can be pushed to all Android Enterprise enabled devices in either Work Profile and Device Owner mode for publicly listed Google Play Store apps, or custom .apk Android apps. On Work Profile enrolled devices, a notification may appear when the app install command is sent.
Play Store Apps
We've recently updated the application search interface for Android Google Play store apps, you can now search for your application in the Google Play store directly in Dashboard.
Region Restricted Applications - The Google Play Store will return applications that can be installed in the same region that the administrator is accessing Dashboard from i.e. accessing Dashboard from the United States will show applications that can be installed world-wide & US-only.
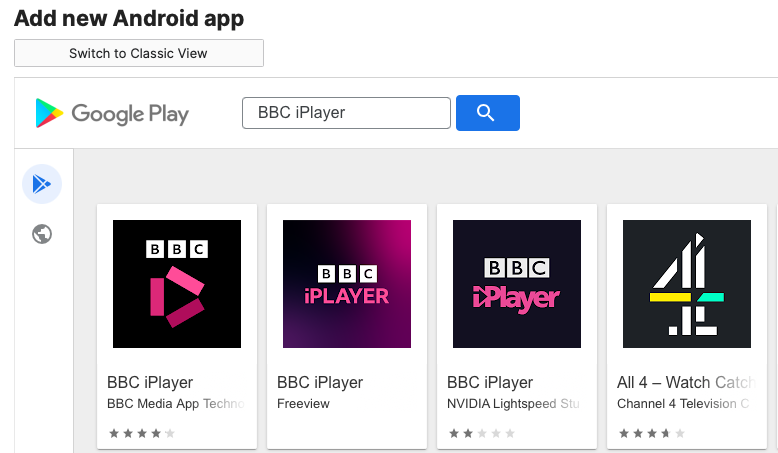
Once you have found the chosen application, click "Select", this will populate the identifier and other fields below the Google Play frame.
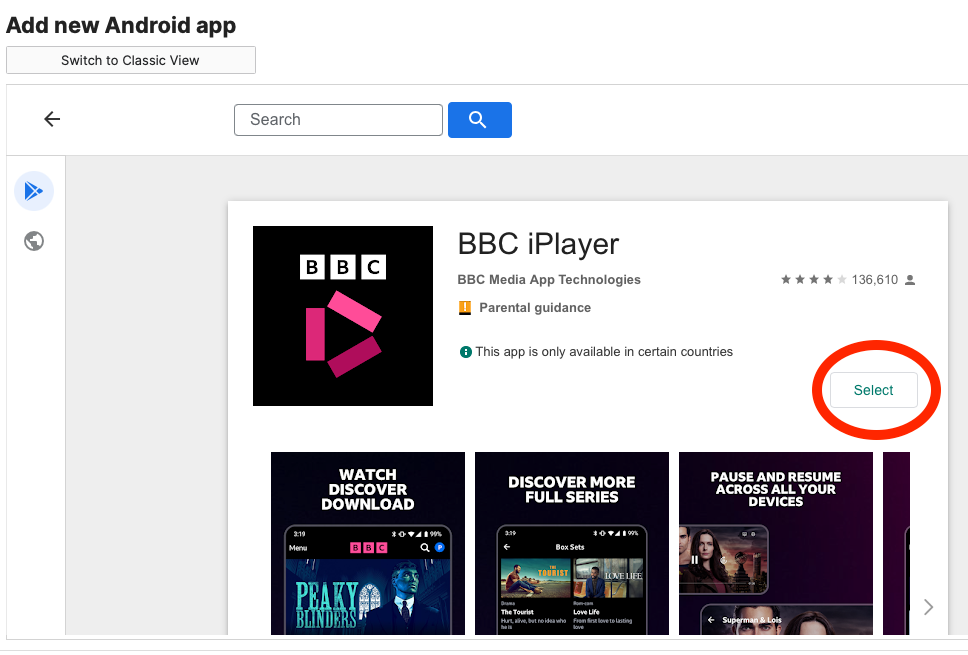
Note: Dashboard does not allow the adding of multiple apps with the same app identifier (i.e. com.carrotcreative.Ham-Horn in the above image). To check which app identifiers have already been added, navigate to the Systems Manager > Manage > Apps page, click on the wrench icon on the right, and add the "Identifier" column.
For more information regarding deploying Android Store Apps please refer to this document.
Scoping
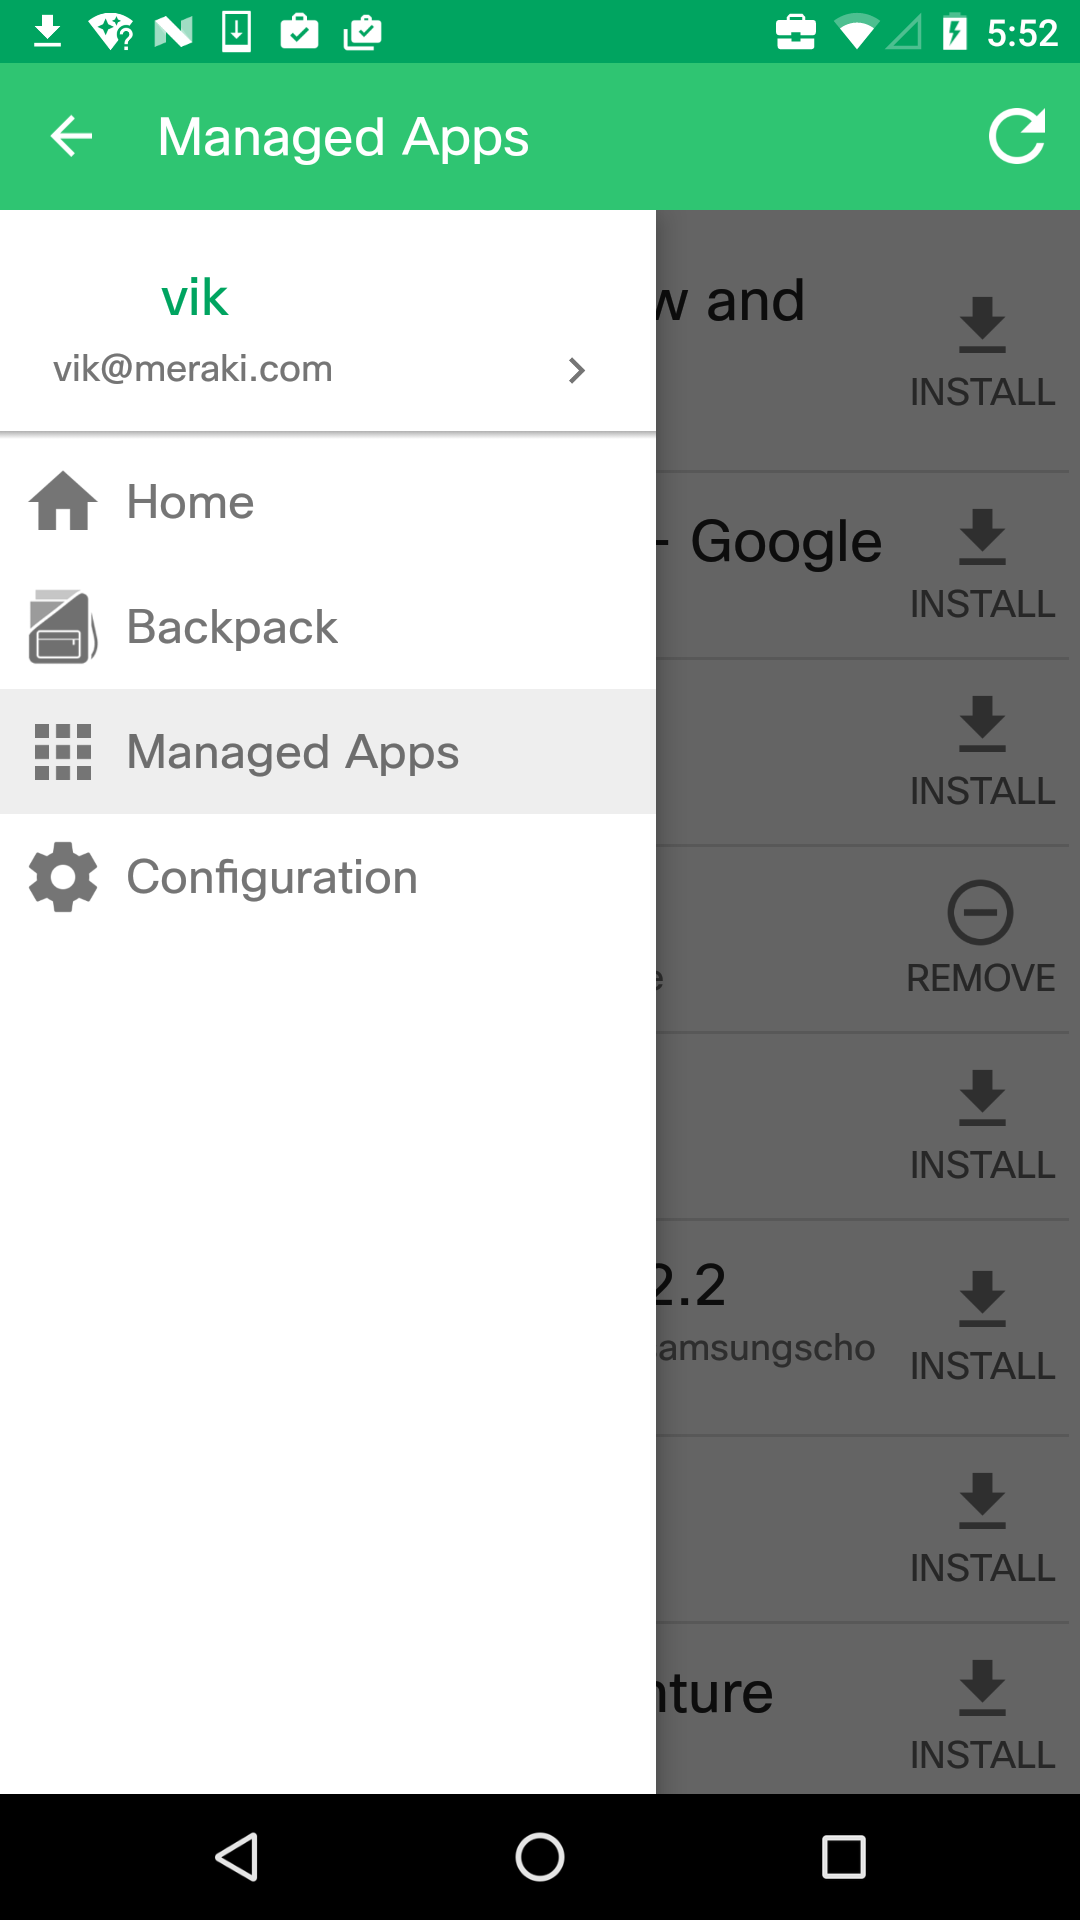
Once applications have been approved for an Android Enterprise organization they need to be scoped to devices to appear in the device app store. Approved applications (which have been scoped to devices via tags) will appear in both the Meraki Systems Manager App under "Managed Apps" as well as in the Play Store. Approved applications for the Work Play Store essentially create a white list of applications a device can download and use. Once pushed to a device, these applications will silently install.
See this article for information on app configuration settings.
Apps that have been added into Dashboard but not approved may be listed in the Play Store, but will not be available to download until approved.

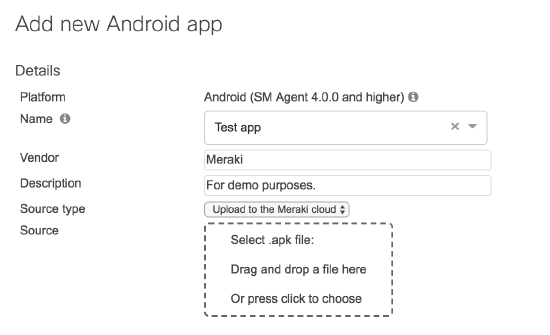
Custom (Enterprise) Applications
To upload custom .apk files to the Managed Play Store please follow this Google article.
Additionally, there is the option to distribute the .apk file directly through the Meraki Dashboard. In Systems Manager > Manage > Apps, click Add new > Android > Custom app. Fill in the fields as desired and either link to a URL where your .apk is hosted, or upload it directly to the Meraki Cloud.
See this article for information on app configuration settings.