
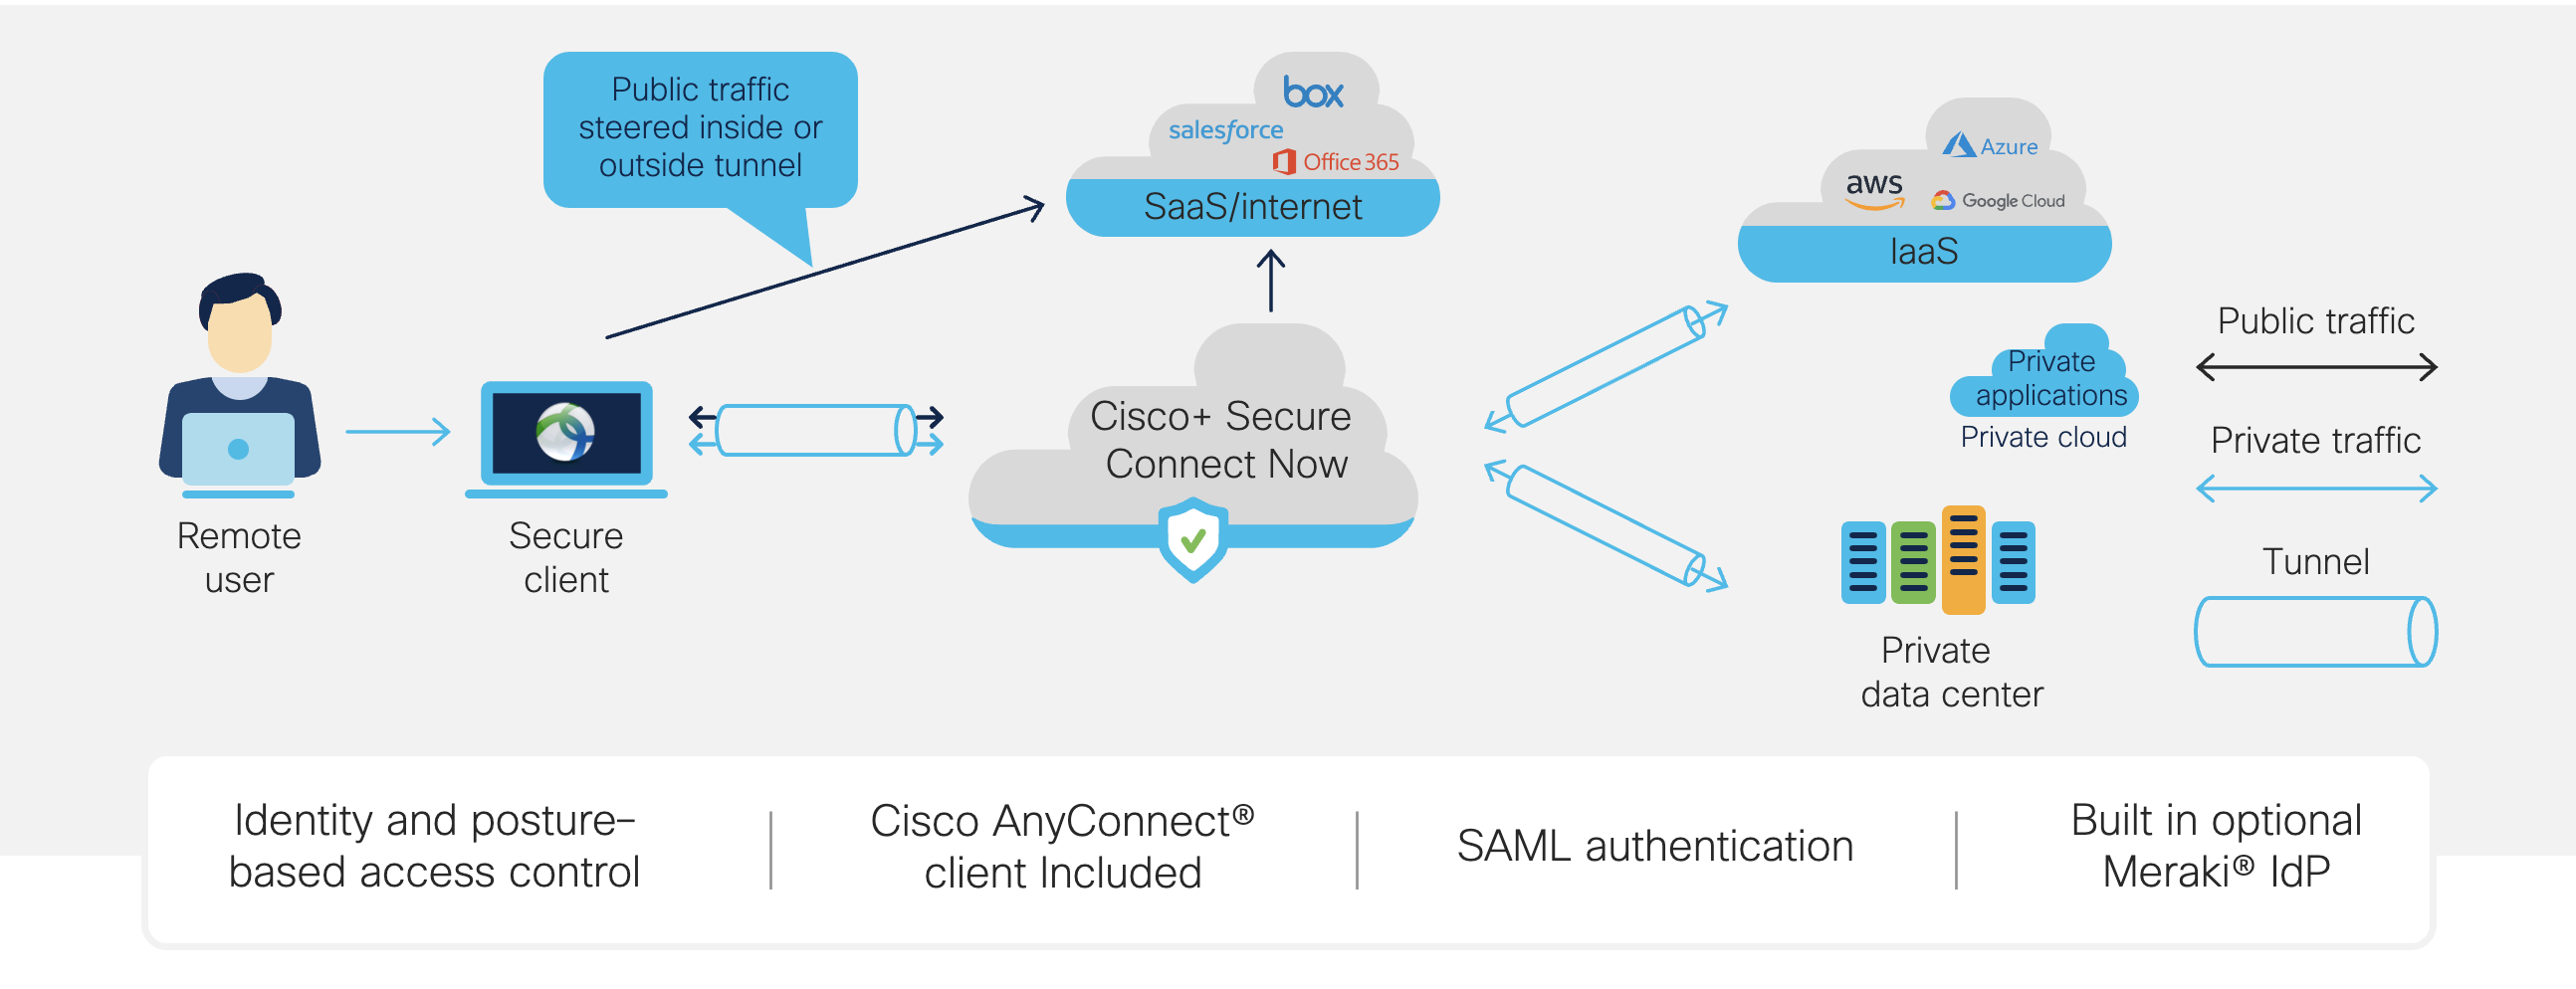
Cisco+ Secure Connect - Quick Start
Learn more with these free online training courses on the Meraki Learning Hub:
Prerequisites
|
Requirement |
Details |
|---|---|
| Private DNS server IP addresses | Servers used to resolve private application names |
| Corporate domain name | Domains that must be resolved to access private applications |
| Client IP address pools | North America and Europe have 4 data centers each. Each region specified must have a complete set (4) contiguous private address pools. These pools cannot overlap with existing internal addresses/subnets in use on the internal customer network. One region is required, a second region is optional |
| Any subnets that require tunnel bypass | You may want to direct specific traffic, such as DNS, to bypass (route outside of) the tunnel |
| Datacenter VPN termination device ( only if configuring other than Meraki ) | The physical or software device on the data center side of the VPN connection. Any IKEv2 compatible device is supported, however, configuration details will vary. Physical device example: Router or Firewall. Software Example: AWS Virtual Private Gateway for Site to Site IPSec. |
| Customer-premises equipment (CPE) device Public IP* | The internet-routable IP address for the device's external interface |
| Tunnel IKEv2 pre-shared key | The PSK is needed configure the CPE device with the IPSec tunnel. |
*public IP only required for devices that do not support IKEv2 email identities.
Onboarding
In order to begin, you'll first need to tie Cisco Meraki and Cisco Umbrella management together for a seamless experience. For further instructions, see Cisco+ Secure Connect Onboarding
Remote Access Setup (Get Started)
- Get Started with Secure Connect from the main homepage and click - Set up Remote Access
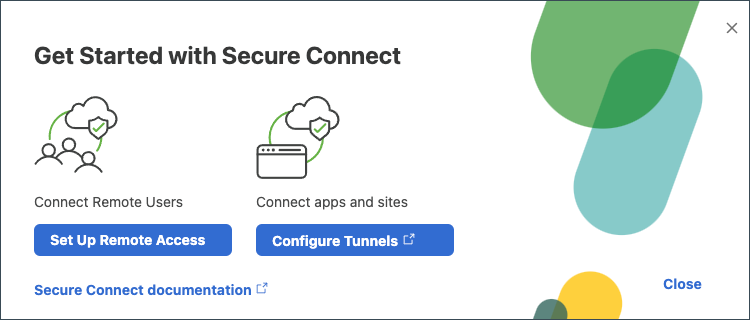
Figure 1: Get Started with Secure Connect Pop-Up
Alternately, Navigate to Secure Connect -> Configure ->Remote Access Setup to begin the setup process
- This "checklist" guides you through the main remote access configuration tasks. As each task is completed, the progress bar advances. These tasks can be done in any order, however, the steps below begins at top of this checklist at Setup Remote Access Service
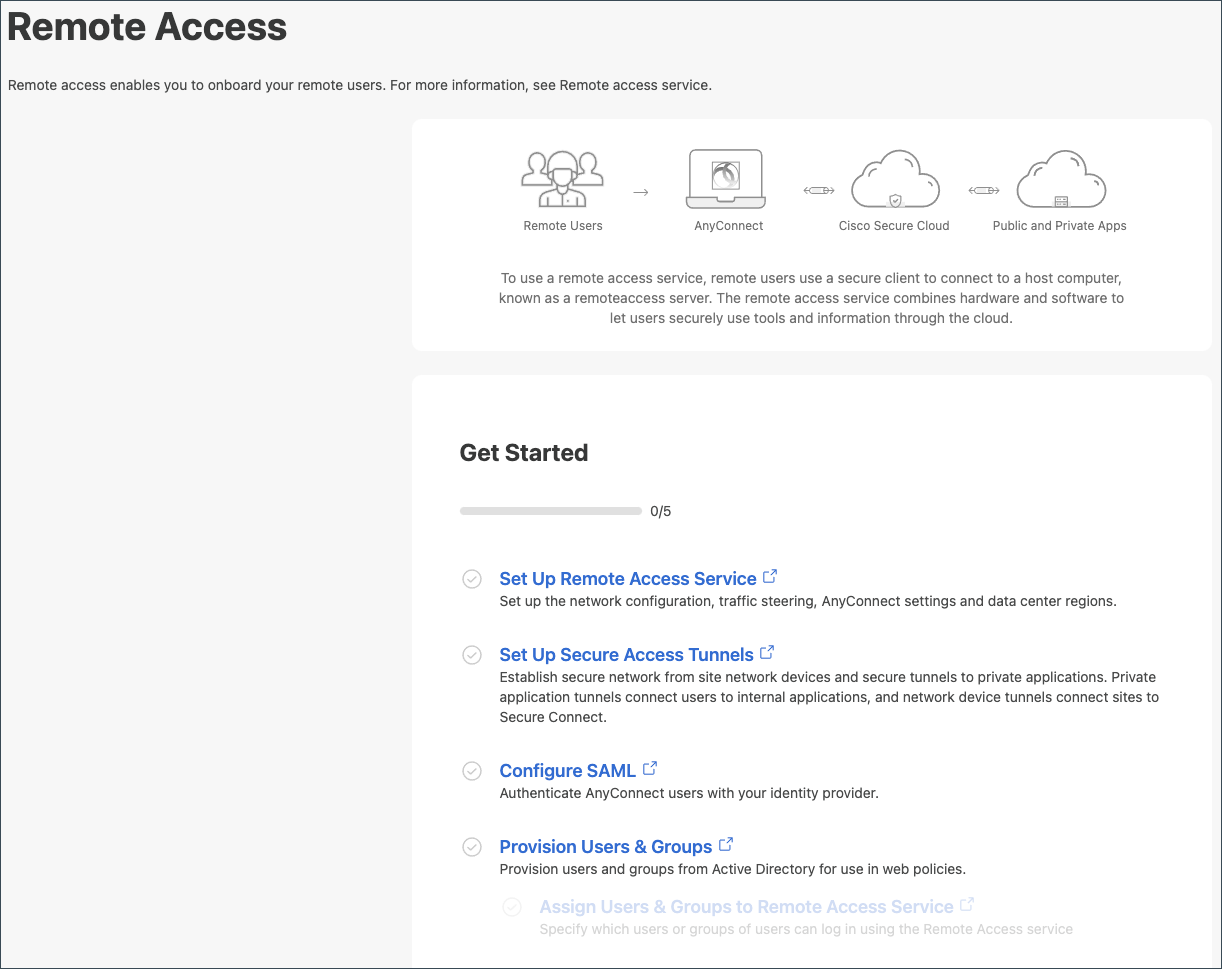
Figure 2: Remote Access Get Started Checklist
Set Up Remote Access Service
Purpose: Setup the network configuration, traffic steering, AnyConnect settings and, Datacenter regions.
- Click Set Up Remote Access Service. To set up remote access see : Remote Access Service Setup
Set Up Secure Access Tunnels
-
Click Set Up Secure Access Tunnels. For integration with Meraki see- Cisco Secure Connect Foundation Meraki SD-WAN Integration
For integration with Non-Meraki : Setting Up Secure Access Tunnels ( Non- Meraki )
Configure SAML
- To Configure Meraki Cloud Auth, See this Meraki Cloud Auth
- If Configuring a third party Identity provider, Click Add SAML
-
Click ADD in the upper right hand corner of the screen
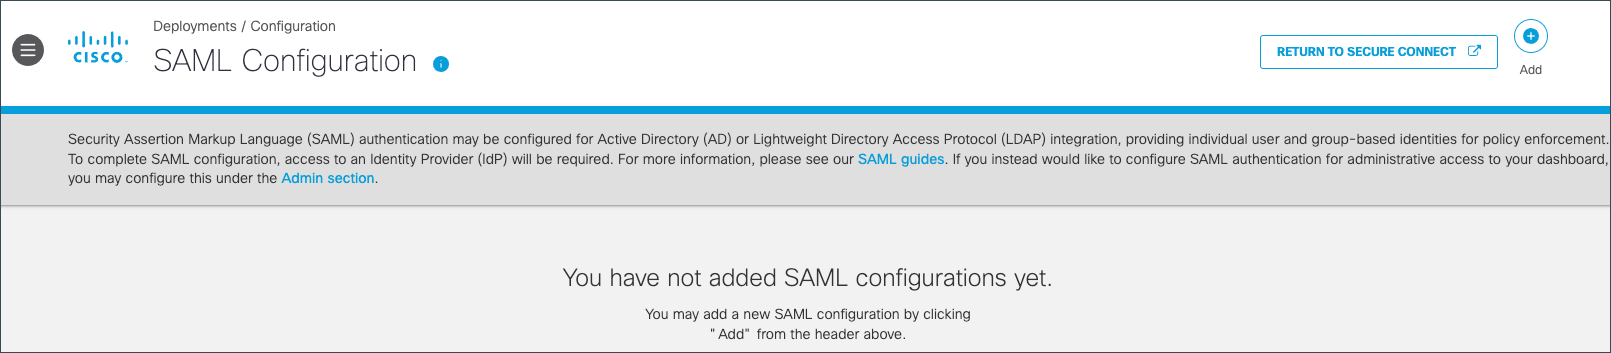
Figure 3: Begin SAML configuration
- Follow the wizard to configure a SAML IDP. For more information, please see our SAML Guides
-
In the upper right-hand corner of the screen, click Return to Cisco Plus Secure Connect

Figure 4: Return to Secure Connect
Provision Users and Groups
Provision users and groups from your selected SAML IDP for use in Umbrella policies and for user identification in reports
- Select your identity provider and follow the integration instructions referenced here: https://docs.umbrella.com/umbrella-user-guide/docs/introduction-4
-
Follow the instructions to complete provisioning
-
Once provisioning is complete, you will see the list of users and groups downloaded from the identity provider.

Figure 5: Active Directory Provisioning Example
-
In the upper right-hand corner of the screen, click Return to Cisco Plus Secure Connect
Figure 6: Return to Secure Connect
AnyConnect Client
-
Ensure the AnyConnect client device is running 4.10.X or later
-
Note one of the remote access location’s FQDN from Deployments > Configuration > Remote Access
-
After a client connects for the first time it will download all available locations
-
Add the FQDN as a new VPN connection in the AnyConnect client
-
Only use the FQDNs. Using an IP address will not work