
MA-UMNT-MR-A2 Universal Mounting Adapter Installation Guide
Overview
The MA-UMNT-MR-A2 is a universal mounting adapter designed to simplify the transition from Cisco EN access points to Cisco Meraki access points. This mount works with MR33, MR42/42E, MR44, MR52, MR53/53E, MR45/55, MR36/46/46E/56 indoor access points. The universal mounting adapter can be attached directly to the Cisco universal bracket without the need to remove this bracket from its current mounting location.
Note: The MA-UMNT-MR-A2 is not compatible with any outdoor MR access point.
Note: The MA-UMNT-MR-A2 cannot mount Meraki access points by itself; it must be paired with a Cisco mount (AIR-AP-BRACKET-2, AIR-AP-BRACKET-1)
Package Contents
The universal mount's standard package includes the following equipment:
-
1x MA-UMNT-MR-A2 universal mounting adapter
-
2x M3.5 7mm Phillips head screws

Additional Required Tools
You will need the following additional tools to install the universal mounting adapter:
1x Phillips head screwdriver

Installation Instructions
- Remove the current Cisco EN access point from the Cisco universal bracket
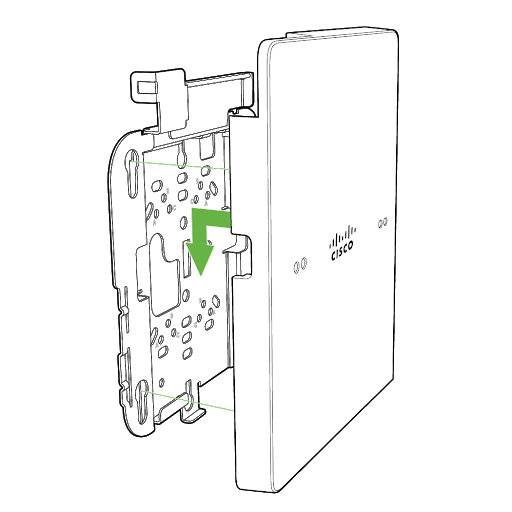
- Position the universal mounting adapter to align with the currently installed Cisco universal bracket. Next, slide the adapter and attach it to the Cisco universal bracket.
3. Use the two screws included in the mount kit to attach your Meraki mount cradle to the adapter.


4. Attach your Meraki access point to the Meraki mount cradle by lining up the top edge of the AP with the top tab of the mount cradle. Since the cradle is already mounted to the universal mounting adapter, guide the AP towards the top tab and insert the top tab into the AP slot.

Then adjust your AP to guide the bottom slot into the cradle’s bottom tab until it clicks into place.

Once in place, secure the AP to the cradle by using one of the included screws in the cradle’s bottom tab.

5. Run Ethernet cable(s) to the LAN access ports of your Meraki access point and connect into the appropriate LAN access port(s). Note that some Meraki APs have 1x LAN port and some have 2x LAN ports.
