Static IP Assignment
MX appliances and Z-series teleworker gateways can use either dynamic or static network connection information. You may configure a static IP address on a Cisco Meraki MX or Z-series device from Dashboard or locally.
Static IP Assignment via Dashboard
Note: The MX security appliance must be able to communicate with the Meraki cloud in order to apply this configuration change. If the MX is offline it will not receive the static IP information from the Meraki dashboard until it is able to download its configuration file from the cloud.
- Browse to dashboard.meraki.com and login to Dashboard.
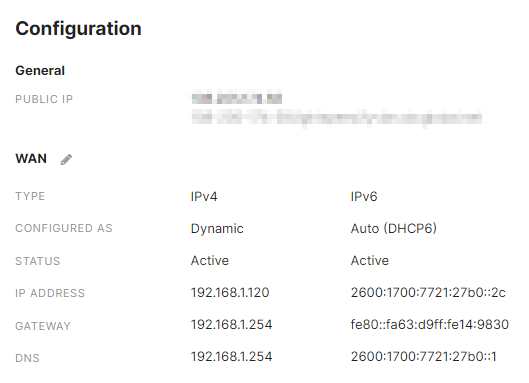
- Navigate to Security & SD-WAN > Monitor > Appliance status and click the uplink tab.

- The uplink tab allows for viewing status information about the uplinks, as well as performing uplink configuration.
Note: MX security appliance and Z-series teleworker gateway devices do not support /32 subnet mask on a WAN interface
- Next, click the pencil icon to expand the WAN IP configuration for that uplink.
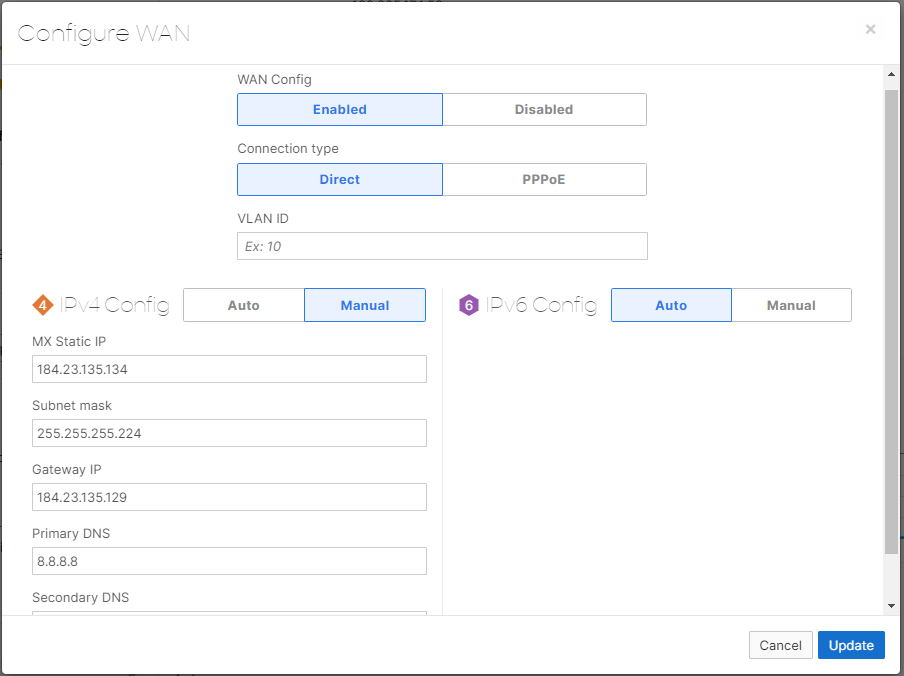
- Input the appropriate connection information and click the "Update" button.
If a VLAN is specified in the static IP configuration, traffic from the MX will be sent out tagged with 802.1Q for that VLAN.
If the MX is not able to reach the default gateway on this static assignment, it will fall back to DHCP.
Local IP Assignment
- Connect a client to the MX. The local status page can be accessed via the management port or via the LAN ports.
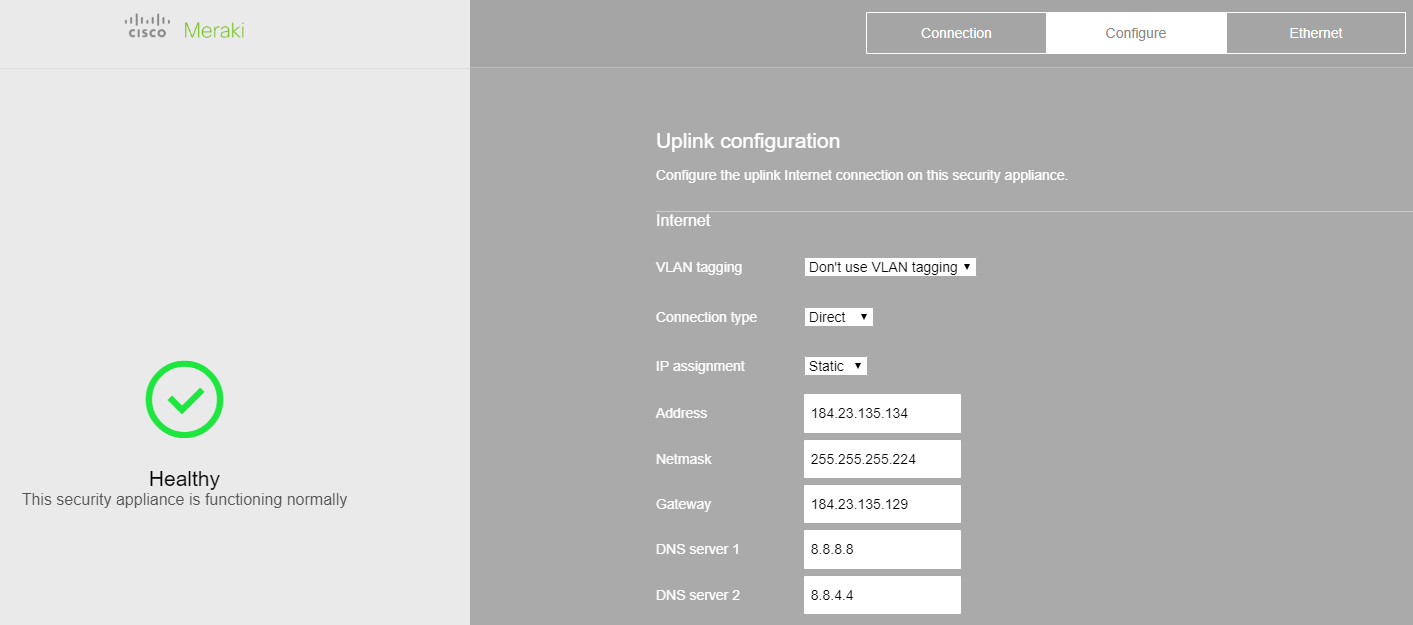
- Once you have obtained an IP address, browse to the url wired.meraki.com.
- On this page, click Configure.
- The page should now prompt for login credentials. If local login credentials were configured via Dashboard, please use these credentials. Otherwise, the default login is the device's serial number as the username and a blank password.
Each device is labeled with its serial number on the bottom label. - On the Configure page, set the needed connection information.