Managing and Troubleshooting AnyConnect Certificates
Managing AnyConnect Certificates
This guide covers all that relates to MX Appliance support, configuration and troubleshooting of certificates with AnyConnect. For more details on other AnyConnect configuration items, refer to the AnyConnect configuration guide.
AnyConnect uses the TLS formally known as SSL for tunnel negotiation, hence the requirement for certificates. Certificates are used in two main ways on the AnyConnect Server: The Server Certificate and Client authentication certificate
AnyConnect Server certificate
This certificate identifies the AnyConnect Server. This certificate is mandatory for AnyConnect Server to function. The Server certificate can be provisioned in two ways, it can either be Auto-generated (auto-enrolled) or Custom (Manually generated)
-
Auto-generated Server certificate
This is the default configuration when AnyConnect is enabled on the Dashboard. The MX Appliance will automatically enroll in a publicly trusted Server certificate using the DDNS hostname of the Meraki network e.g. boston-njndubu.dynamic-m.com. This publicly trusted certificate renews automatically. This means Dashboard administrators do not have to worry about managing DNS records or interacting with public CAs to get a signed certificate. The DDNS hostname is not easy to remember, hence, it is highly recommended to use an AnyConnect profile to create a DDNS alias to simplify user experience. For more information on creating profiles see, how to create a profile.

DDNS hostname is configurable on MX Appliances in Passthrough/VPN Concentrator mode when AnyConnect is enabled.
Automatic certificate generation is not supported for networks hosted on dashboard.meraki.cn
If the MX is in HA mode with a virtual IP and behind a NAT device, we recommend using the custom certificates feature to enable certificate and DNS records management. The automatic DDNS hostname certificates may not suffice.
-
Custom Server certificate
This option gives admins the ability to use a DNS name of their choice, however the admin will be responsible for certificate renewals, managing DNS records and signing of the certificate with a certificate authority.
- Requires MX firmware 16.16+
- Custom hostname certificates do not renew automatically. Administrators will need to renew certificates manually in addition to managing their DNS record (to enable their hostname resolve to the MX IP on the Internet)
- Custom certs is supported in High Availability mode. Administrators are required to download CSRs and upload certificates for both Primary and Spare MX Appliances. The custom certification upload tab for both Primary and Spare is only visible when the MX Appliance is in High Availability mode.
- Custom certificates require generating a CSR on the MX device and then having it signed by a certificate authority. Supplying a certificate without using the MX device to generate the CSR is not possible.
For a high-availability AnyConnect VPN setup using a Virtual IP, ensure each firewall has a unique Common Name (CN) and includes the shared DNS name in the Subject Alternative Name (SAN) field. For example:
- Primary firewall certificate: CN=primaryvpn.company.com with SANs including primaryvpn.company.com, vpn.company.com.
- Secondary firewall certificate: CN=secondaryvpn.company.com with SANs including secondaryvpn.company.com, vpn.company.com.
This configuration allows users to connect to vpn.company.com and maintain a trusted connection, whether they reach the primary or secondary firewall.
Wildcard certificates are not supported. Example, instead of vpn.company.com to be *.company.com.
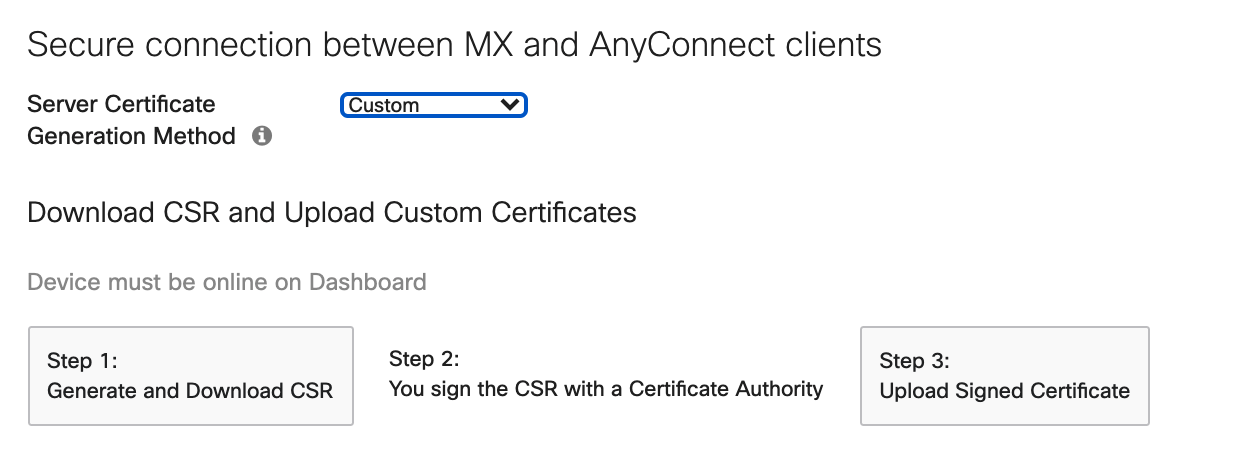
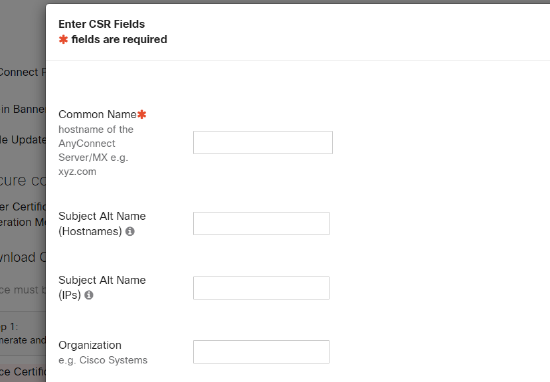
Downloading CSR: Administrators can generate a certificate signing request (CSR), that can be signed by a public Certificate Authority.
Uploading the Signed Certificate:
A PEM-encoded certificate like .pem .crt is required for upload. A PEM-encoded certificate looks like this in notepad/text editor:

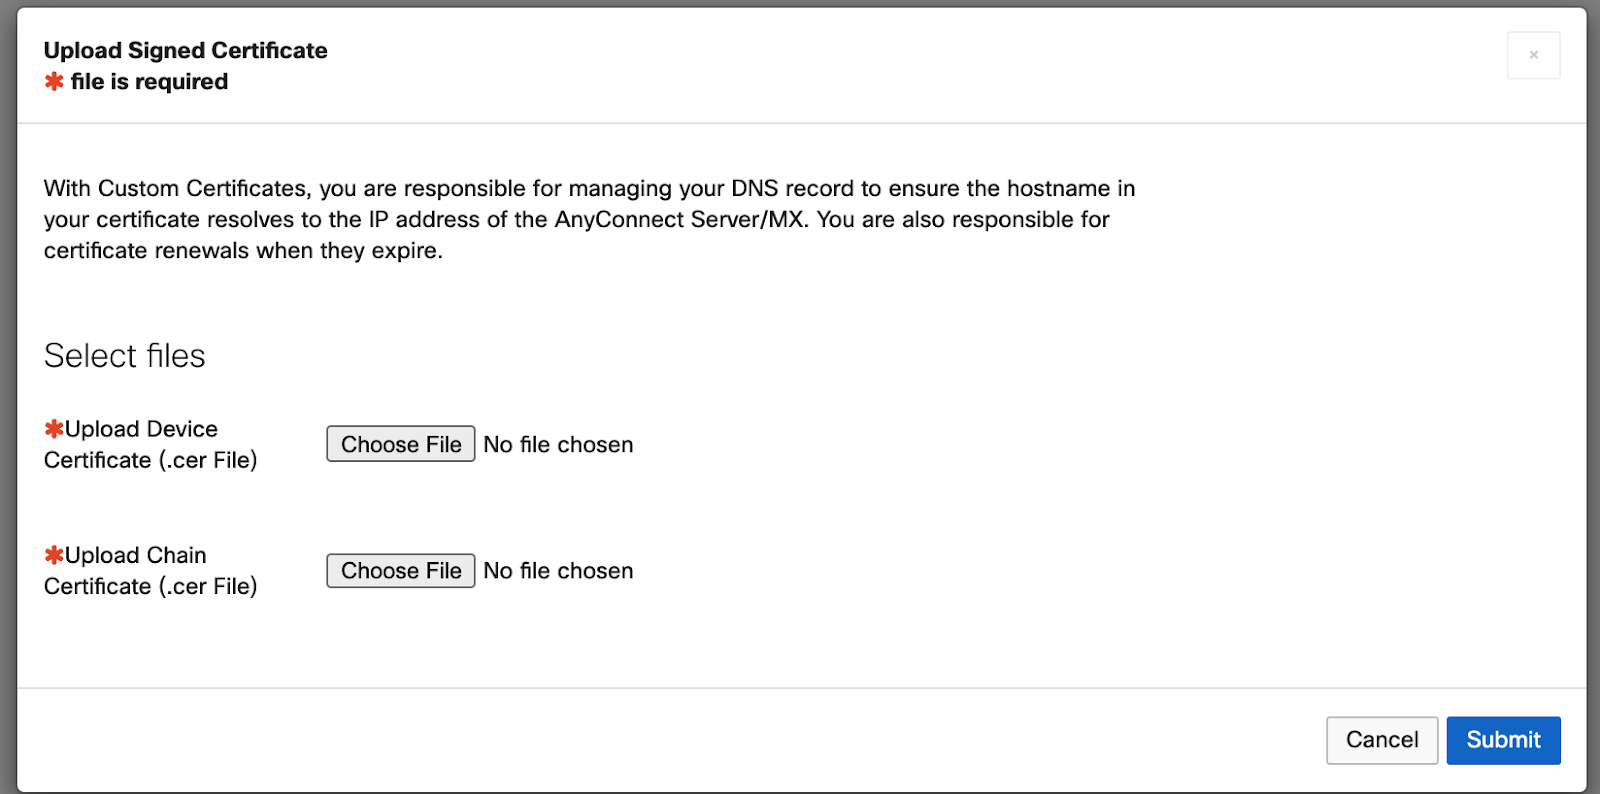
Upload Device certificate option: This field is used to upload the certificate that will identify your appliance to AnyConnect clients. The CommonName, and AlternateName information provided in the Subject fields of this certificate should match what you have configured your AnyConnect clients to accept, and the Issuer information on this certificate must match the Subject of the certificate you upload in the next step.
Upload CA certificate or chained certificate: This option is required to establish a full chain of trust to the CA. In some cases a CA certificate will suffice, in other cases intermediate or a certificate chain will be required depending on the sub CA that signed the certificate. The Dashboard will only accept a PEM-encoded certificates like .pem or .crt.
*Note: A chain certificate must establish a full chain of trust back to a root certificate authority. Such certificates are self-signed by the CA providing them, as the following example demonstrates:
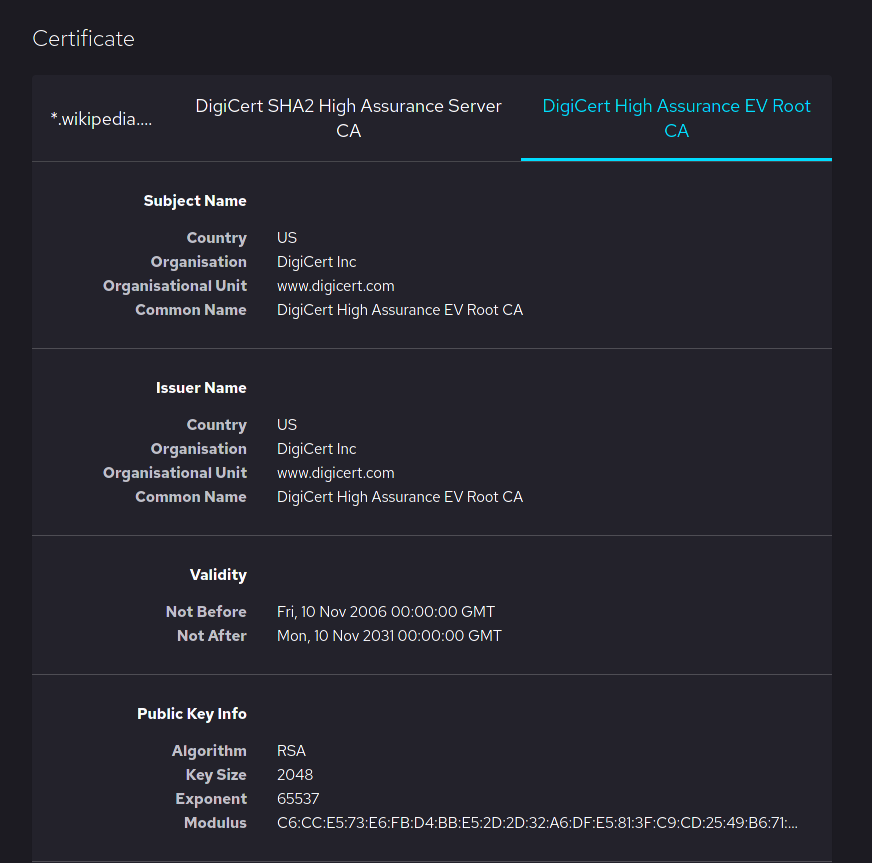
Image courtesy of Mozilla Software Foundation and Wikipedia
Note that both the Subject Common Name and Issuer Common name are equal.
An incomplete or invalid chain of trust will result in the error "Failed verifying Device Cert with Cert Chain" being seen on Dashboard when you go to upload the certificates.
Questions on how to obtain such a certificate should be brought up to whatever entity is providing the ones in question.
Client Certificate authentication
The AnyConnect server on the MX supports client certificate authentication as a factor of authentication. This is an optional feature. If certificate authentication is enabled, the AnyConnect server will use the uploaded trusted CA certificate to validate authenticating clients before requesting for the users' credentials.
With certificate authentication, the administrator uploads a .pem, or .crt file of the Root CA certificate to the MX, and upload a certificate signed by the same Root CA to the end user's device.
Certificate Authentication configuration:
A PEM-encoded certificate like .pem .crt is required for upload. A PEM-encoded certificate looks like this in notepad/text editor:

Upload CA certificate required to authenticate users.

Client device configuration:
After configuring the AnyConnect Server, you can now provision the user's device with certificates signed by the CA certificate that was uploaded to the AnyConnect Server. For example on a Windows Machine, run MMC, add Certificates Snap-in, navigate to Personal > Certificates folder and import or request a new certificate.

Once the certificate has been provisioned, only devices that have a certificate signed by the Root CA on the AnyConnect Server will successfully authenticate to VPN. A common use case for client certificate authentication is for filtering non-corporate devices from authenticating to the VPN.
Please note that AnyConnect on the MX does not support certificate-only authentication at this time. Authenticating users must input credentials once certificate authentication succeeds. If certificate authentication fails, the AnyConnect client will report certificate validation failure and no user credentials will be requested.
Certificate Store Override—Allows an administrator to direct AnyConnect to utilize certificates in the Windows machine (Local System) certificate store for client certificate authentication. Certificate Store Override only applies to SSL, where the connection is initiated, by default, by the UI process. When using IPSec/IKEv2, this feature in the AnyConnect Profile is not applicable.
You must have a predeployed profile with this option enabled in order to connect with Windows using a machine certificate. If this profile does not exist on a Windows device prior to connection, the certificate is not accessible in the machine store, and the connection fails.
Troubleshooting AnyConnect Certificates
Troubleshooting Auto-generated Certificates
When AnyConnect is configured on your MX, it generates a temporary self-signed certificate to start receiving connections. Then the MX initiates enrollment for a publicly trusted certificate; this will take about 10 minutes after AnyConnect is enabled for the certificate enrollment process to be completed. If you try to make a connection before a publicly trusted certificate is available, you will see the “Untrusted Server Certificate” message. Once the public certificate enrollment is complete, the AnyConnect server will swap out the self-signed certificate with the publicly trusted certificate.
What if the user continues to get an "Untrusted Server Certificate" message 10 minutes after the AnyConnect was enabled?
-
Ensure the device is online on Dashboard
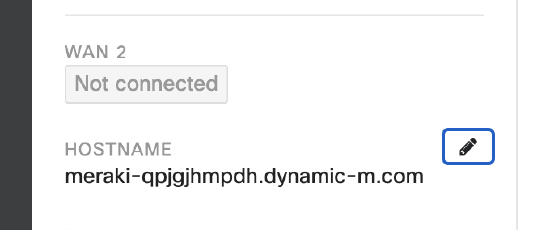
-
Ensure Dynamic DNS is enabled and resolves to the MX IP
-
Ensure you are connecting with the DDNS hostname not the IP of the MX. Connecting with the IP will throw off certificate error even if there is a publicly trusted certificate on the MX
-
Connect to the MX with different devices to see if they all report the MX as an “Untrusted Server.” Devices should have HydrantID Server CA O1 certificates by default. If this is seen on some devices, check the Trusted CA folder on your client device. If you do not see the HydrantID certificates, you should update your browser to the latest version
-
In rare cases, you may need to download the Root CA certificate and push it to the end device in order for it to trust the AnyConnect Server certificate. To identify what Root CA to download, try connecting to the DDNS hostname or IP of the MX, when the Untrusted Server message pops up, click details, look at the Issuer field to identify the Root CA required. The Root CA certificate can then be downloaded from the internet and pushed to the client
Troubleshooting Custom Certs
A PEM-encoded certificate like .pem .crt is required for upload. You can open the certificate in notepad or in a text editor to verify the format. A PEM-encoded certificate looks like this in notepad/text editor:

-
Ensure your MX Appliance is running at least 16.16+ or 17.6+ firmware and Anyconnect clients are connecting using the custom DNS name and not the MX DDNS hostname.
- If CSR signed by the CA does not match what is on the MX, a Dashboard error is reported and the customer has to regenerate and sign a new CSR. This could happen if the original CSR was overridden by generating a new one.
- Invalid signed certificate or chain file, If an invalid chain or certificate is uploaded, there will be a Dashboard error. Re upload the Root CA certificate.
Troubleshooting Client side - client certificate authentication
- Verify that there is a certificate that was signed by the Trusted CA uploaded to the MX in the Personal > Certificates folder of the device attempting to connect.

-
A PEM-encoded certificate like .pem .crt is required for upload on the "Client certificate authentication option" on the AnyConnect Settings page.
A PEM-encoded certificate looks like this in notepad/text editor:


