Creating and Deleting Wireless Networks in Meraki Go
Meraki Go allows you to have four (4) wireless networks configured at once. This guide will walk you through creating and deleting those wireless networks.
Creating a New Network
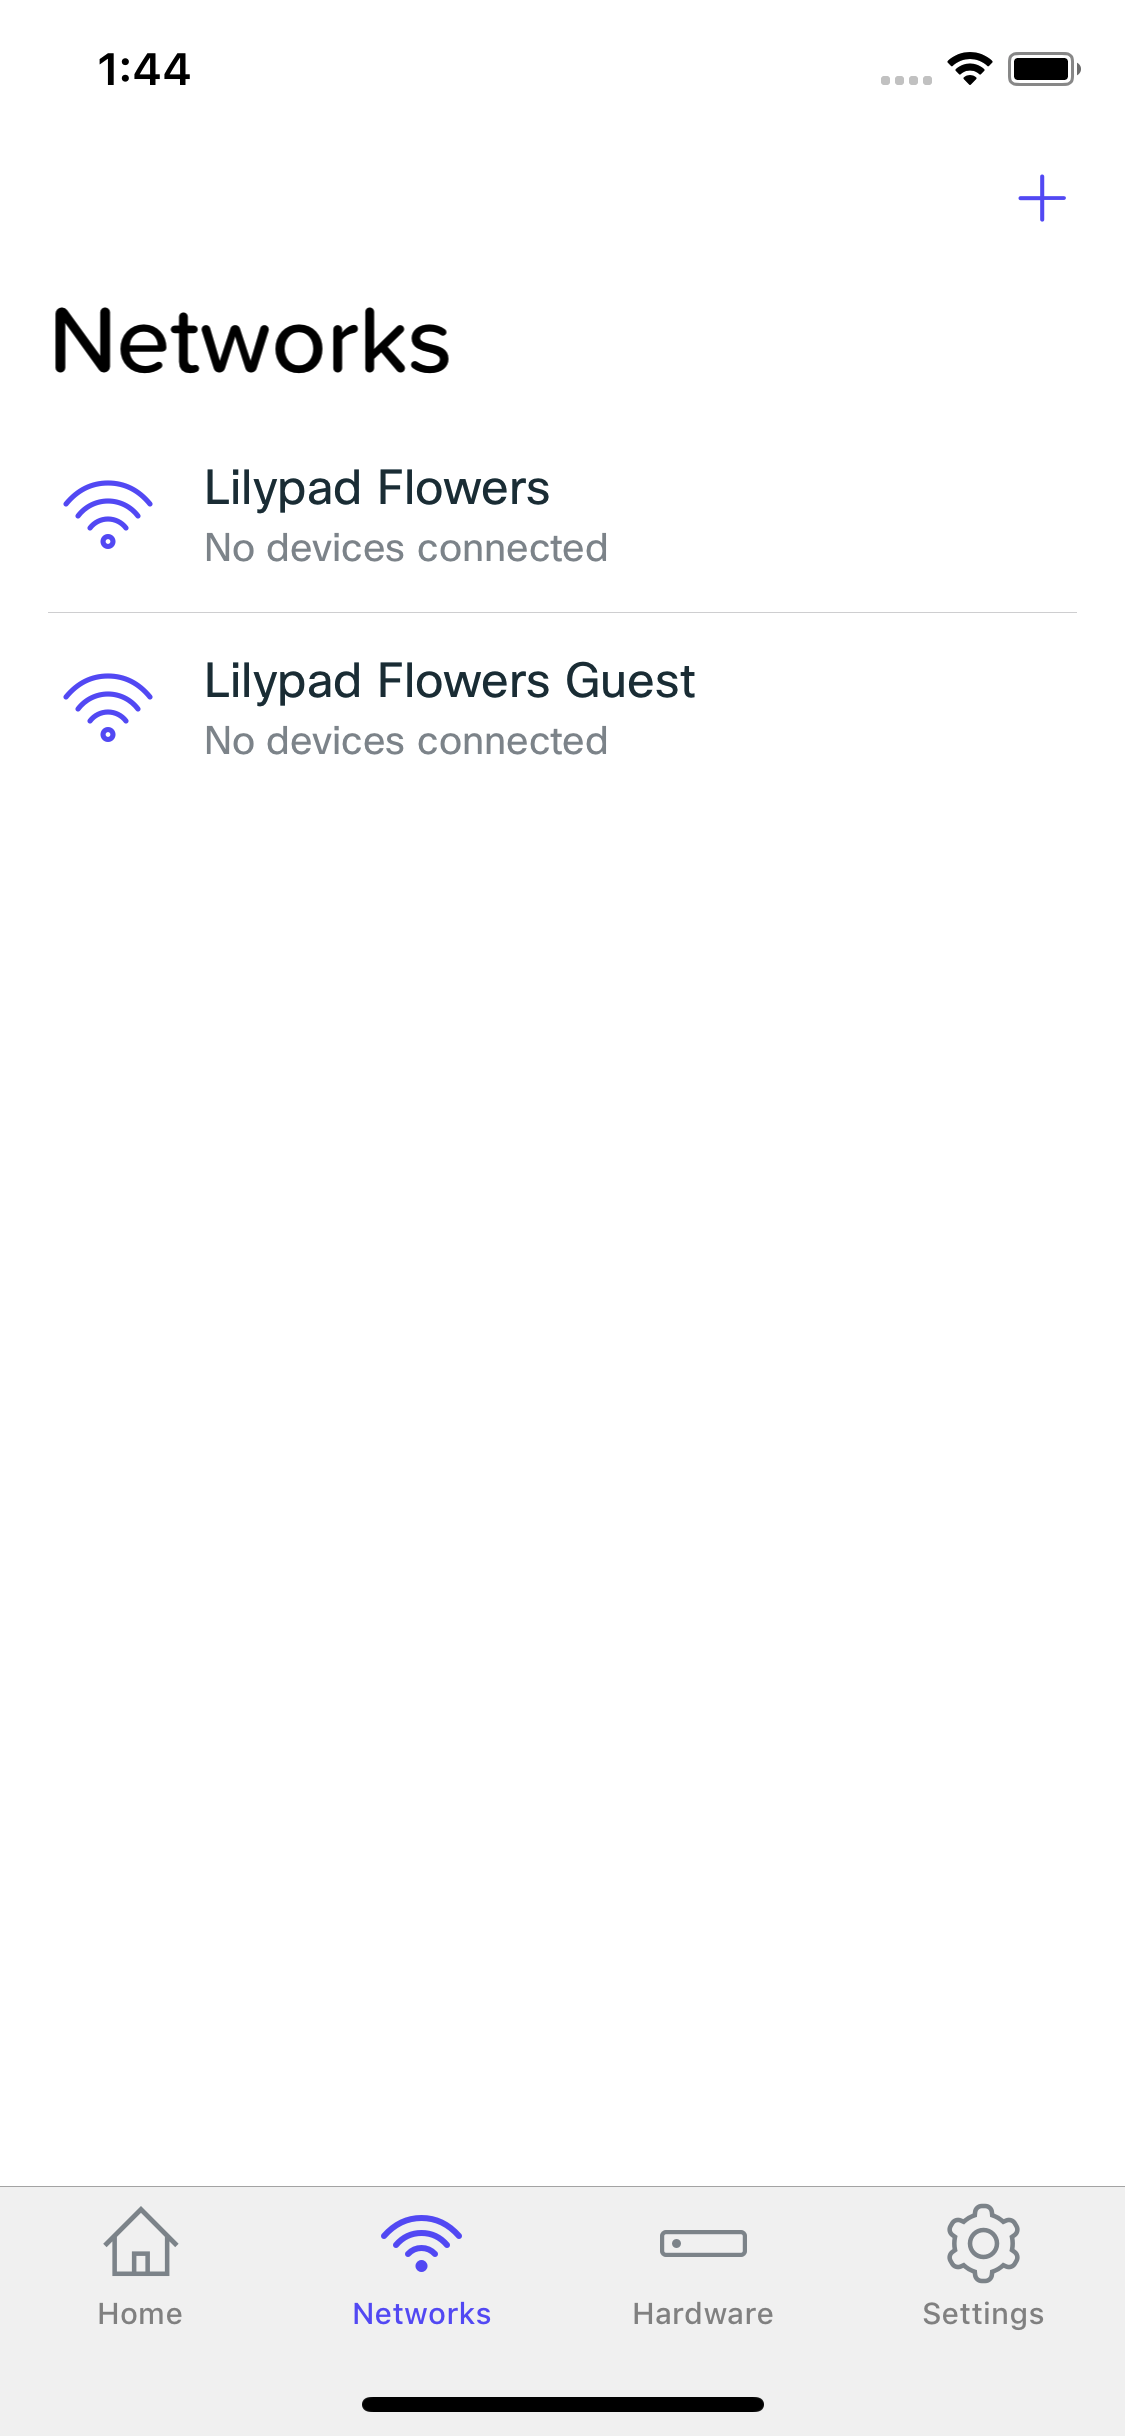
You can create a new network by clicking Networks in the bottom panel, and then +.
NOTE: if you already have four networks, you will not be able to create more. Either delete or reconfigure an existing network.
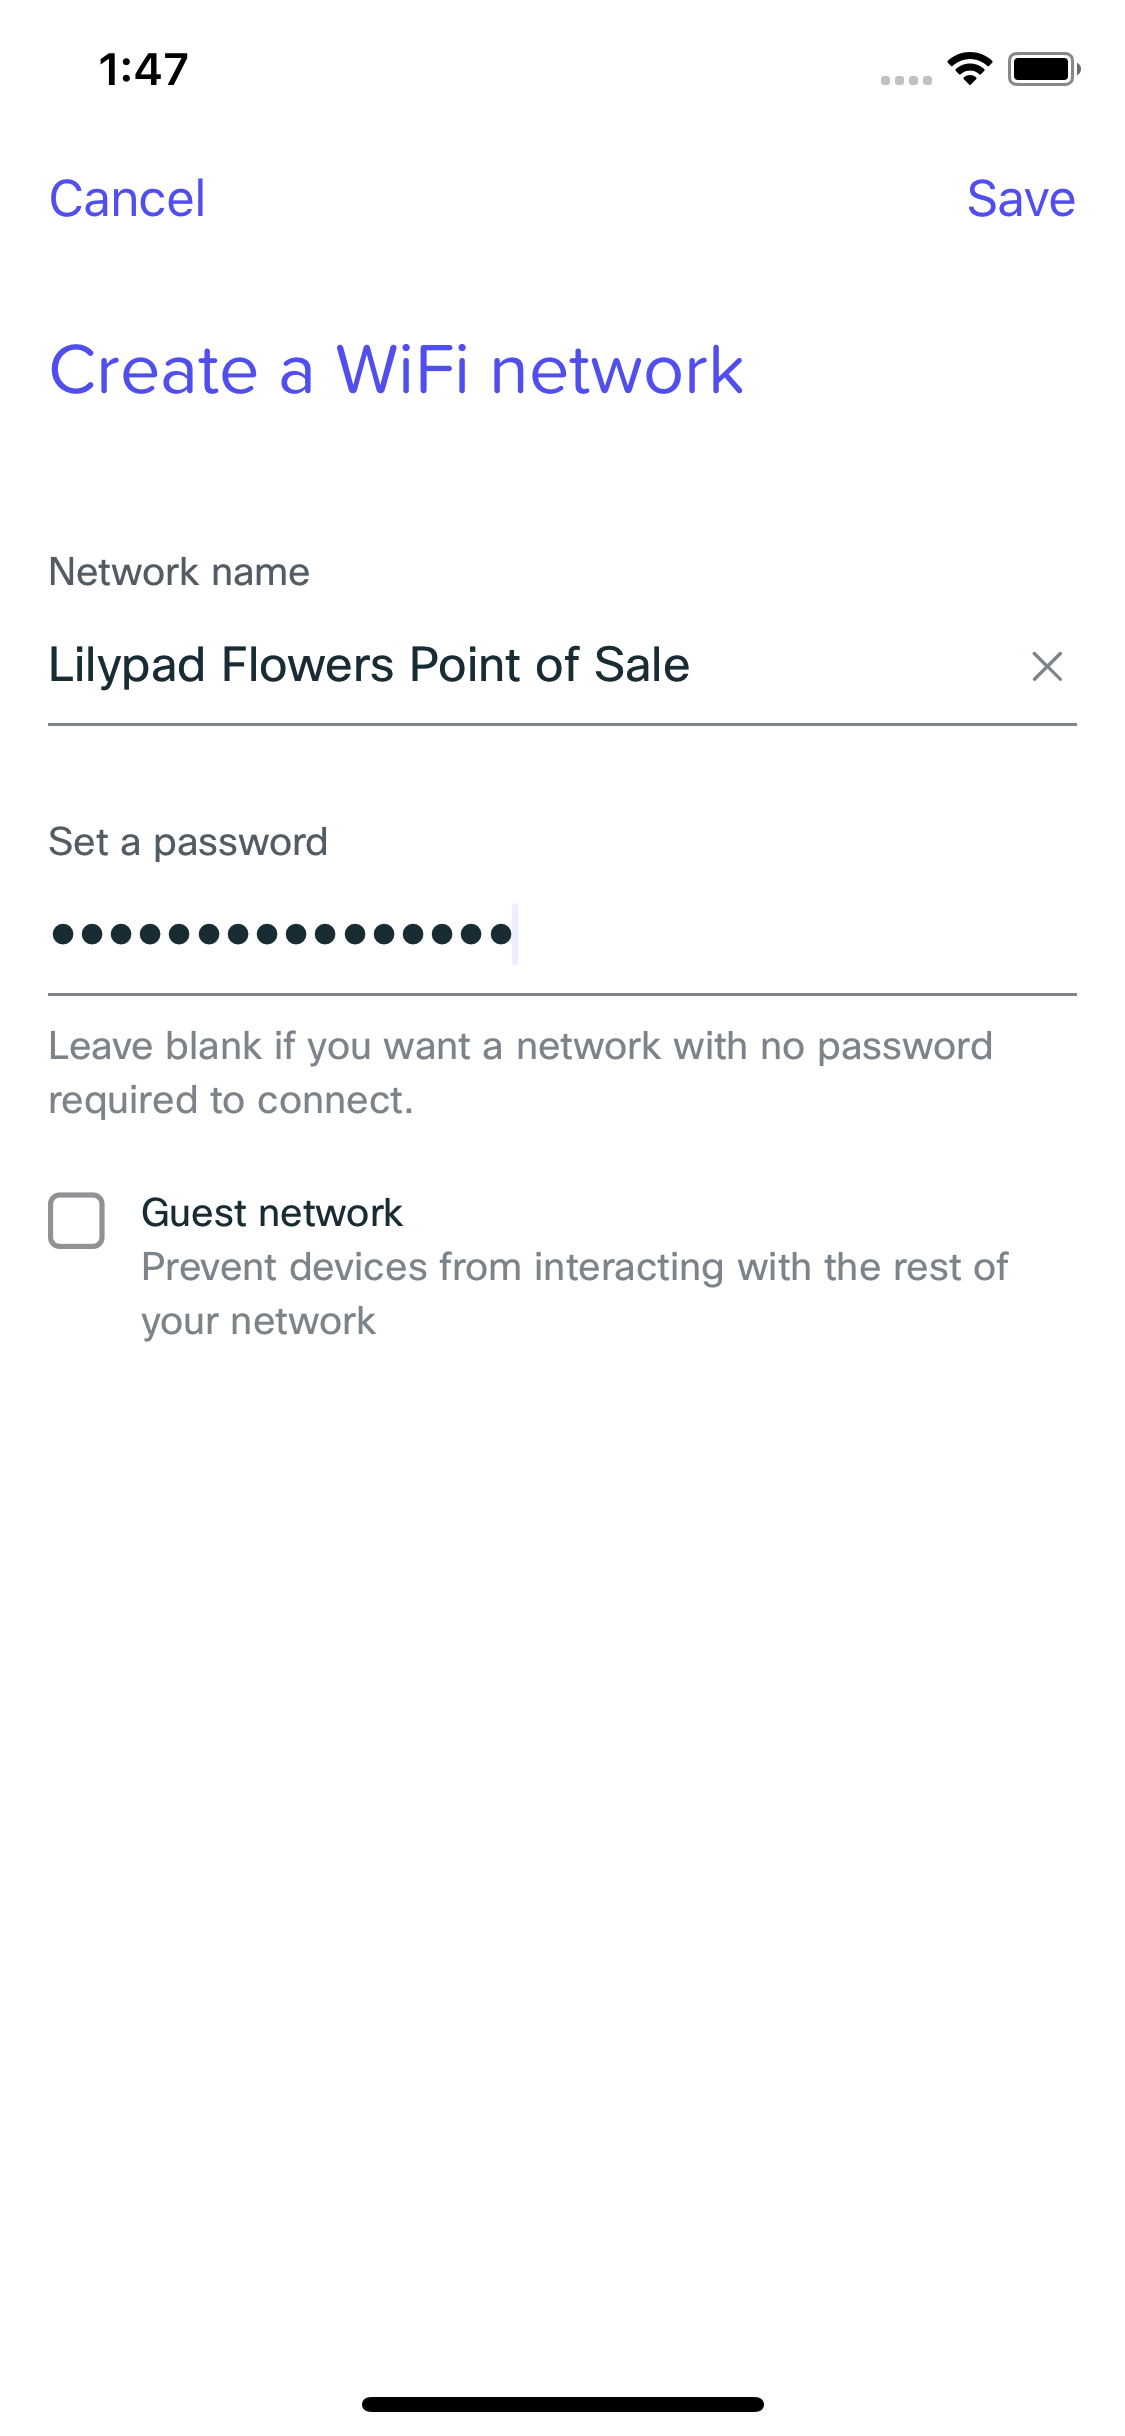
You should now be on the Create a WiFi network screen, which will prompt you for the following:
- Network name: The name of the network you will be connecting to. This is what you will see in your WiFi network lists.
- Password: A password for the network. If you do not want a password, and want to allow anyone to connect without any sort of security, leave this blank.
- Guest network: If you select this, all clients connecting to this network will only be able to communicate with the internet and not with each other.


Deleting a New Network
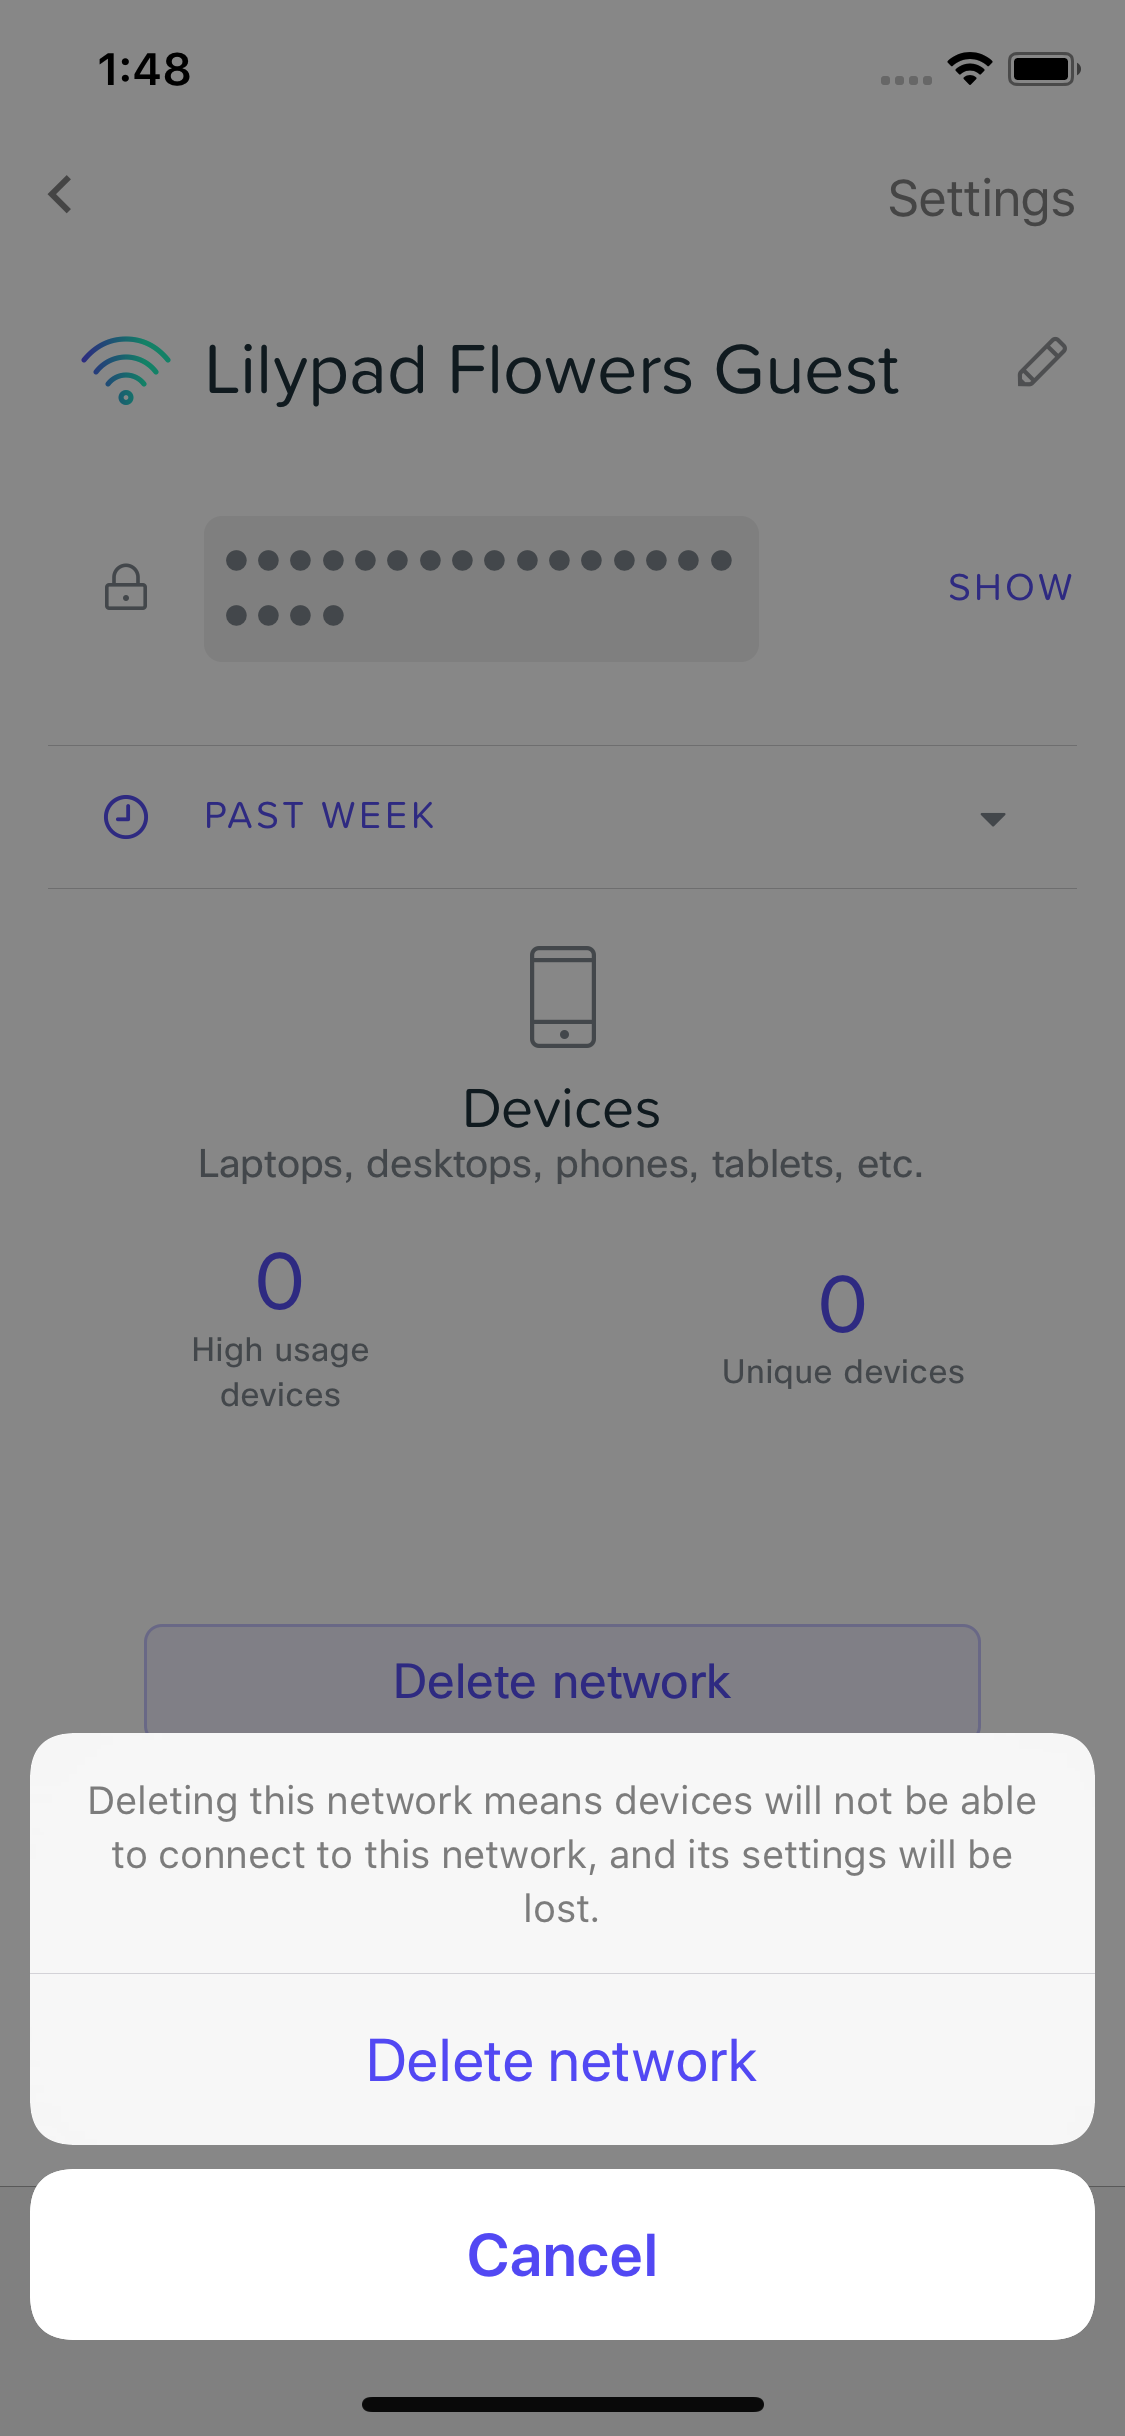
If you no longer need a network, and do not want it listed in your network list, you can delete it.
NOTE: This will delete all client usage data for the network (you will no longer be able to see things like application usage graphs, etc.)
To delete a network, go to Networks in the bottom panel, and then select the wireless network you want to delete. Once selected, scroll down to Delete network. You will need to confirm that you want to delete the network. Once completed, the network will no longer be listed.


