
Video Exports: Overview and Management
What is an Export?
An Export is a downloadable MP4 video file generated from a Meraki MV camera's recorded footage. While standard video is stored on the camera's local hardware, an export is uploaded to the Meraki Cloud, allowing administrators to share, download, and archive specific incidents without consuming the camera's local storage or requiring the camera to be online for viewing.
Exports are retained in the Meraki cloud ecosystem for up to one year unless deleted earlier by an authorized administrator. Downloaded copies retained outside Dashboard are managed by the customer.
There are three types of exports:
- Single Export: A clip from one camera for a specific time range.
- Combined Export: Multiple clips merged into a single chronological file.
- Scheduled Export: Clips automatically generated based on a recurring schedule.
Note: The 'View and export any footage' permission is required to create or delete exports. Learn more about camera permissions here.
Creating an Export
Exports can be created from the Vision Portal, Dashboard, or Mobile app. Before you can manage or download video from the Exports page, you must first generate a clip from a camera's timeline.
- Navigate to your desired camera.
- On the video timeline, locate the footage you need.
- Export your footage:
- Dashboard: Click the Share button (square with an arrow) and select Export.


- Vision Portal: Select Export from the side Drawer.
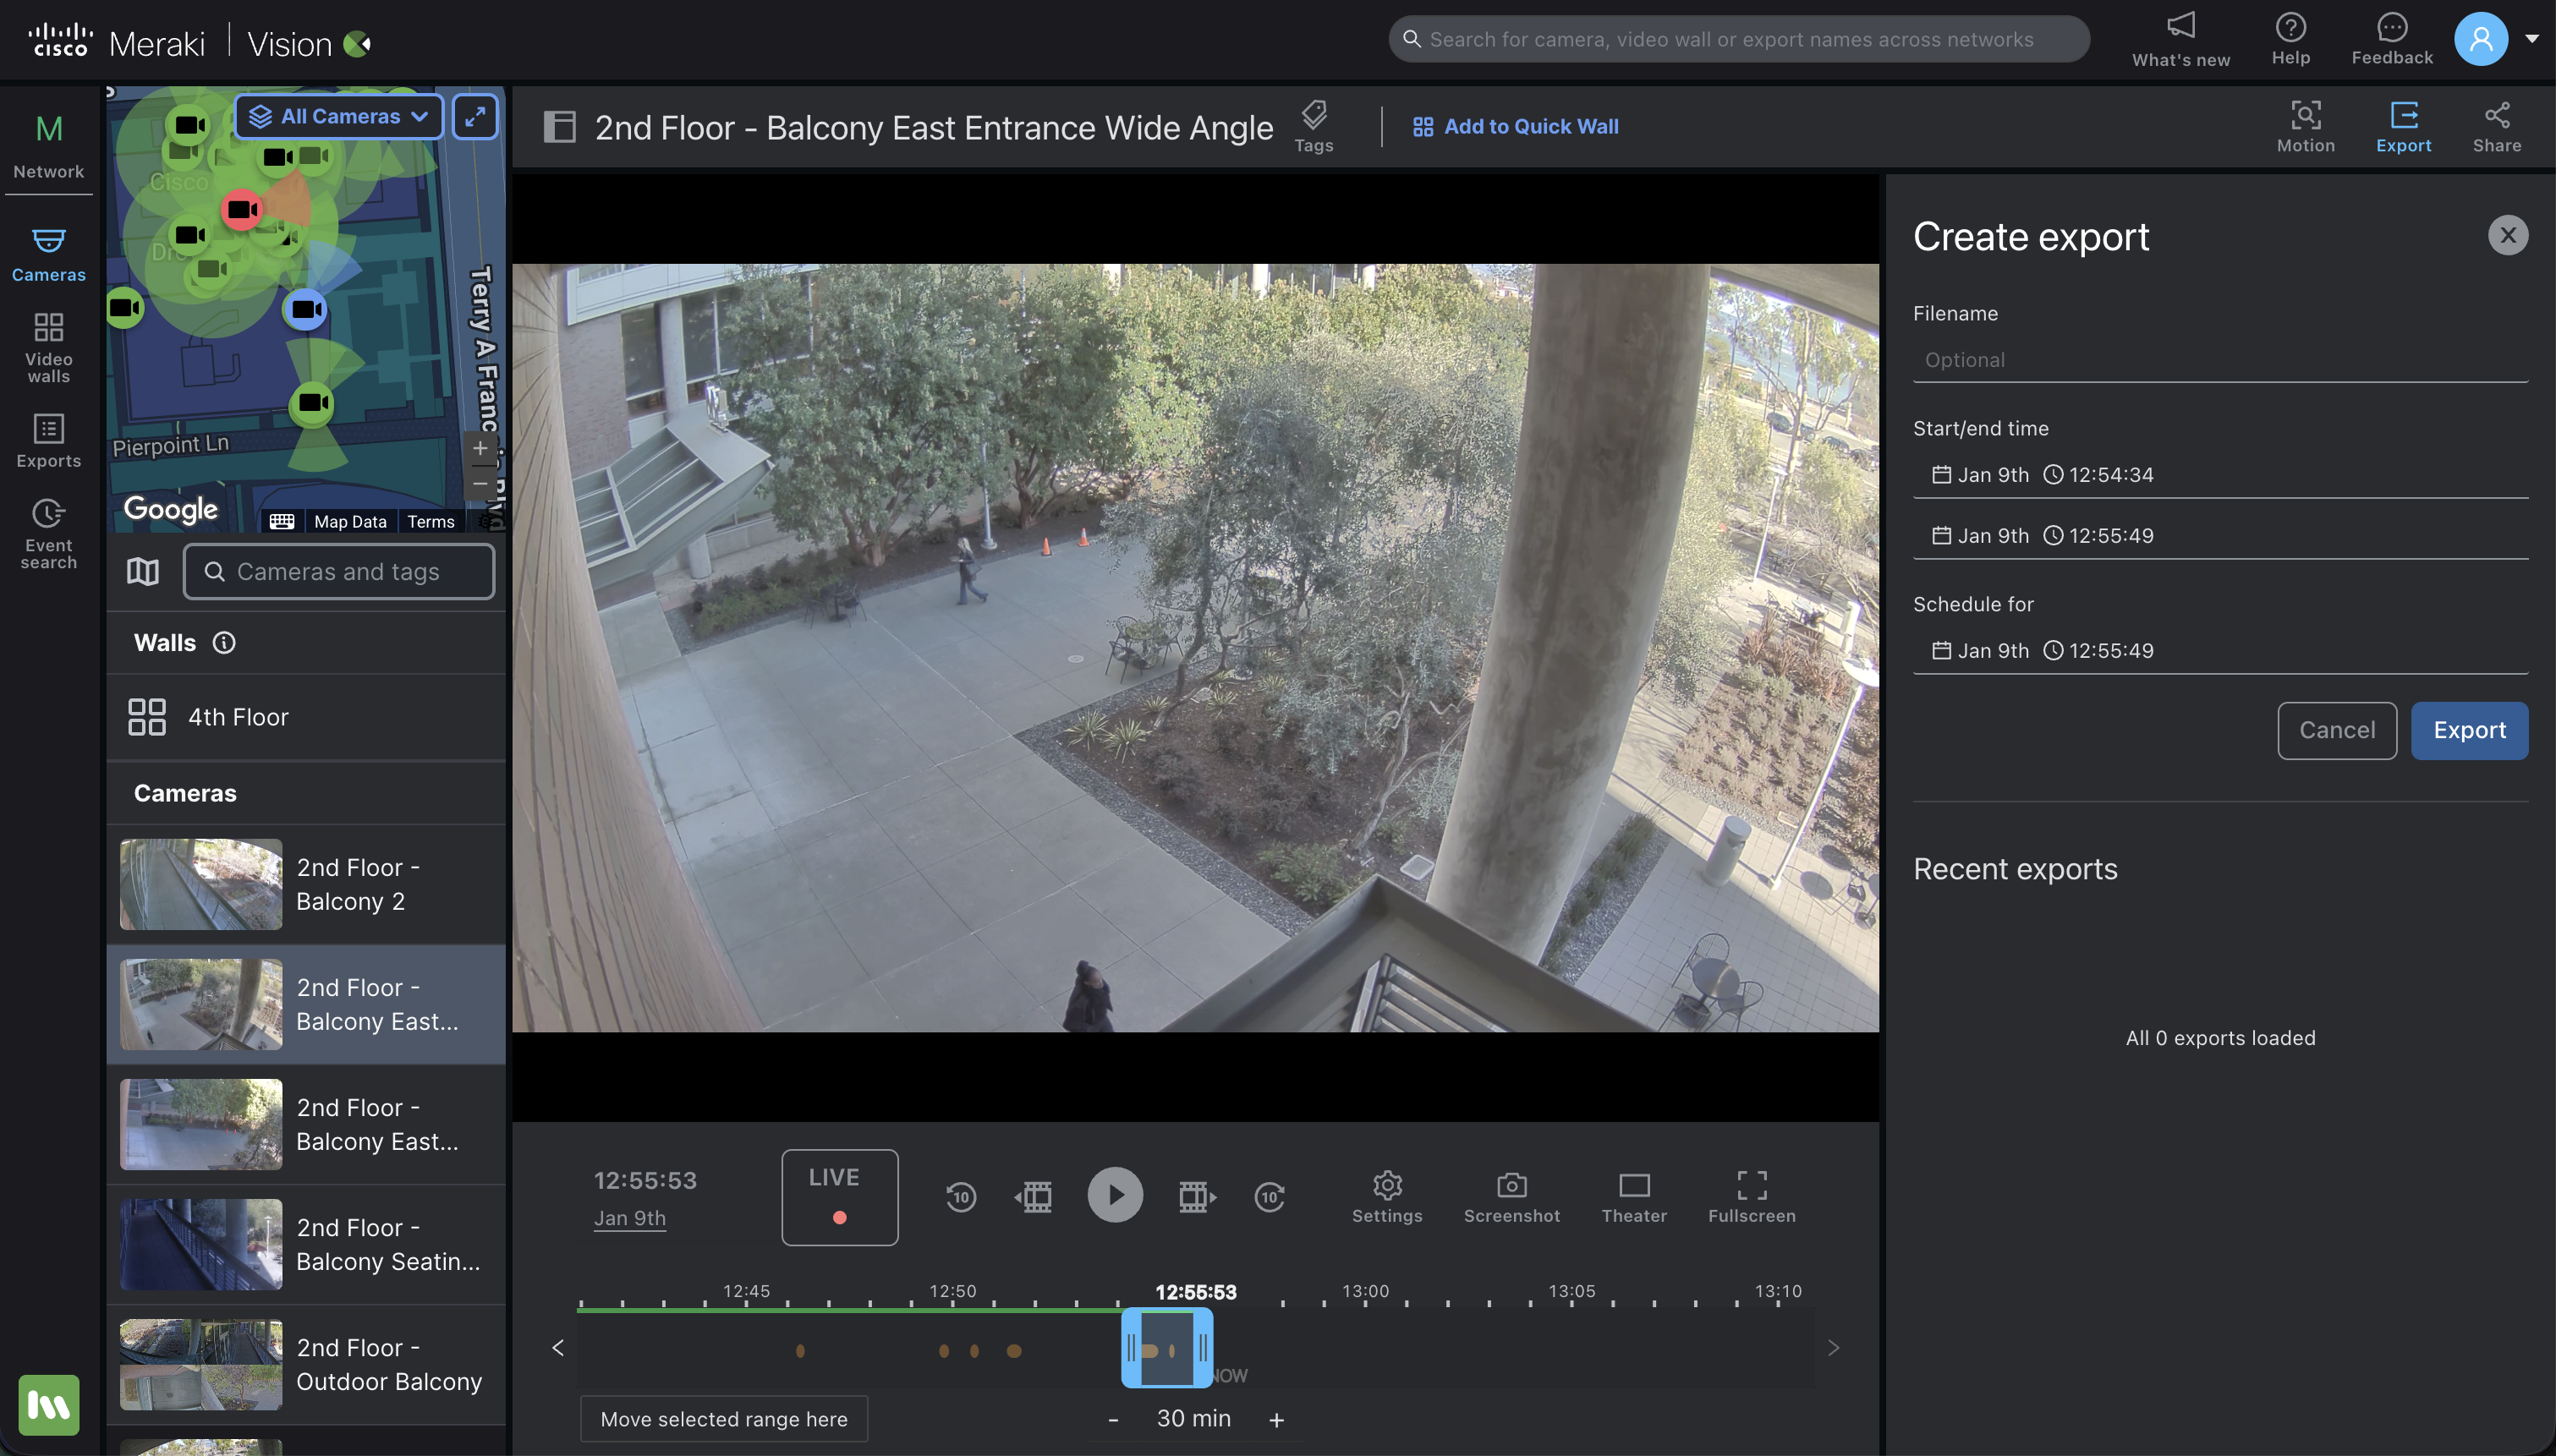
- Mobile: Select Share icon at the top of the video player, and in the Exports page, select a desired duration.


- Define the Range:
- Dashboard + Vision: Use the sliders on the video player or enter a specific date and time.
- Mobile: Define the the duration.
- Note: Clips can be between 5 seconds and 12 hours long.
- Click Export. The system will begin fetching the video from the camera and uploading it to the Meraki Cloud. You can track its progress on the Exports page.
The Exports Page
The Exports page provides a central view of all exports in the network. Users can combine, manage, and monitor these exports, and create a single playable file for the entire incident. You can manage all your saved clips through: The Vision Portal, Dashboard, or Mobile App.
Vision Portal: Click the Exports icon in the left-hand sidebar.

Dashboard: Navigate to Cameras > Monitor > Exports.

Mobile: Navigate to Cameras > Exports

This page provides a list of all exports from the network, including the below details:
- Camera: which camera the export was taken from
-
Type: Single or multiple exports (see 'Combining Exports').
-
User: Displays the user account that created the export.
-
Created: Shows the export creation time. Defaults to the scheduled time if a specific start time wasn't assigned.
-
Scheduled: The time at which the export was scheduled, or the current time if no specific start time was assigned.
-
Selected times: Time ranges of exported video.
-
Status: Displays the status of the export as well as a description of any error, if applicable.
The current minimum time allowed for a single export is 5 seconds and the maximum time allowed is 12 hours. Video exports are trimmed to the requested size with no buffer. If an invalid time range is selected, the export will automatically default back to 30 seconds to provide a valid export. The download link for an export is valid for one hour from the time of page load. Refreshing the dashboard page generates a new download link. Video exports exceeding 3 hours will be automatically divided into segments, each containing up to 3 hours of footage.
Managing Exports
Date Filter and Text Search
The Exports page allows users to filter exports by timeframe and search for specific cameras (by name) or combined exports (by filename).
Vision Portal

Dashboard

Mobile
There are no Date and Text filter options available in the Mobile app.
Downloading Exports
Single Camera Downloads
Clicking on an individual export allows users to download the file, copy a shareable link to the clipboard, calculate checksums, or delete the export.
Vision Portal

Dashboard

Mobile

Bulk Downloads
To download multiple exports select one or more clips with an 'Export Complete' status and click the Download button. Up to 100 exports can be selected and downloaded at the same time.

The download button will only be enabled if:
- 1 or more exports are selected.
- The export status is complete.
Error Messages and Retry
If an export fails, an error message appears in the Dashboard and Vision Portal. Hover over the exclamation icon in the Vision Portal to see the reason for the failure. See below for common errors and actions to resolve:
Vision Portal

Dashboard

| Error Message | Action |
|---|---|
| No footage exists for the selected time range. Adjust the start and end times to a range which contains recorded footage, and try again. | Adjust the start and end times to a range that contains recorded footage, and try again. Ensure there is video available for the time you are exporting. Check retention duration and motion-based retention settings. |
| Camera was offline. Ensure the camera is powered on and able to connect to the Meraki Dashboard, then try again. | Ensure the camera is powered on and able to connect to the Meraki Dashboard, then try again. Ensure the camera was powered on and recording video during the timeframe you are attempting to export. Once confirmed, retry the export using the retry button. |
| Network connection from the camera was interrupted during video export. Check the camera's uplink connection, then try again. | Check the camera's uplink connection, then try again. Ensure the camera status is green and there are no network interruptions between the camera and the Meraki cloud. Once confirmed, retry the export by clicking the retry button. |
| Unexpected error, please contact support. | If you have followed the above steps and the error persists, click the retry button once again. If the export continues to fail, contact Meraki Support for further assistance and troubleshooting, |
Priority Exports
On the Vision Portal's Exports page, you can immediately start a scheduled or queued export by clicking "Start Now," overriding the current queue. This prioritizes the selected export if its scheduled time is more than two minutes away. Prioritizing may affect the processing time of other exports, and a confirmation dialogue will appear.
The 'Priority Exports' feature is only available on Vision Portal.


Combining Exports
Combining video evidence from multiple cameras is crucial for building a cohesive incident "story." For example, a theft investigation might require footage of the suspect's entry, the theft itself, and their exit. The "combine" feature makes this easy by merging individual exports into a single sequence. Here's how:

- Access the Vision Portal by logging in with a user account with appropriate permissions and Navigating to Cameras > Monitor > Meraki Vision Portal
- Navigate to the Exports page from the icon, and check the boxes next to the exports you want to combine.
- Click on the 'Combine Exports' button in the top left corner.
- Add a name (optional) for the combined export, such as 'Bike_Theft_Mon_June_8'.
After selecting your exports, you can rearrange them to create the desired sequence. This allows you to present a clear and chronological story of the incident, making analysis easier.
Vision Portal

Dashboard

Vision Portal

Dashboard

Vision Portal

Dashboard

Example of a combined and exported video (Fast-Forwarded in this clip)
