
IPv6 Support on MG
Overview
This guide is an introduction to the MG’s IPv6 functionality and is designed to explain how the MG is configured and what IPv6 information is visible on Dashboard.
Requirements
Supported Models
-
MG52, MG52E, MG51, MG51E, MG41, MG41E, MG21, and MG21E
Firmware Version
-
MG 3.0+
Cellular Provider
- Service Provider needs to support IPv6
Dashboard Configuration
There are two ways to enable or disable IPv6 on the MG which will be covered below. By default the MGs will have IPv6 settings set to enabled.
Option 1 - Settings page
This is the recommended method to enable or disable IPv6 for the LAN, as well as adjust IPv6 settings for all MGs in a network.
Configuration:
Navigate to Cellular gateways > Settings
-
Change the IPv6 settings to either Disable or Enabled
-
When IPv6 is enabled the UI will update to show the IPv6 icon in the subnet configuration table
-
IPv6 subnet configuration is automatically set to Auto addressing
-
-

-
The MG IPv6 address typically populates on Dashboard within a few minutes, but this can take up to 15 minutes to be displayed.

Option 2 - Cellular gateway page
Unless specifically required by your carrier or plan, we do not recommend changing your APN settings
Configuration:
- Go to Cellular gateways > Select an MG > then click Uplink. Click EDIT for either SIM 1 or SIM 2.
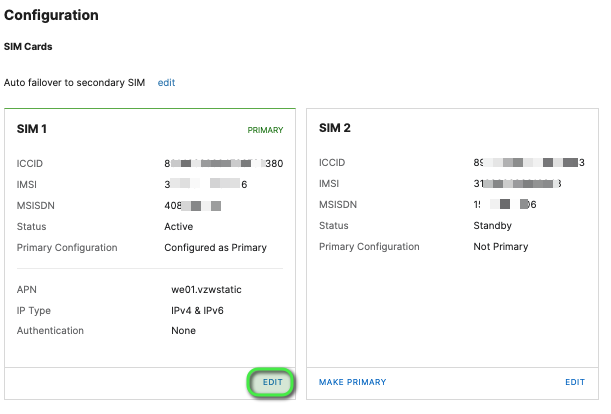
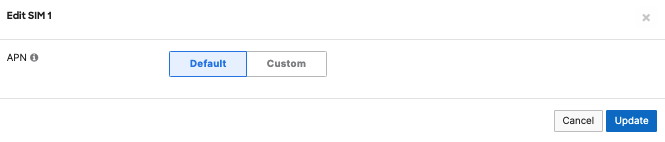
- Default
- IP type is set to IPv4 & IPv6 and will provide both IPv4 and IPv6 addresses to the MG
- IP type is set to IPv4 & IPv6 and will provide both IPv4 and IPv6 addresses to the MG
-
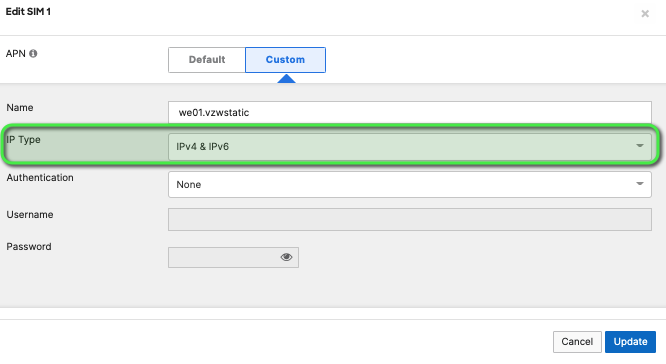
Custom Setting
-
Ensure proper APN and IP type (IPv4 & IPv6) is configured via dashboard or Local Status Page
-
Selecting IPv4 only as the IP type will make IPv6 unavailable
-
Selecting IPv6 only as the IP type as of this writing will cause the MG to lose connectivity to the Cisco Meraki dashboard. This is NOT recommended.
-
How to Confirm Your MG has an IPv6 address
Your MG’s IPv6 address is visible in the same places as its IPv4 address on the dashboard. There are several ways to gather this information from the dashboard. We are going to focus on two ways to do this for one MG.
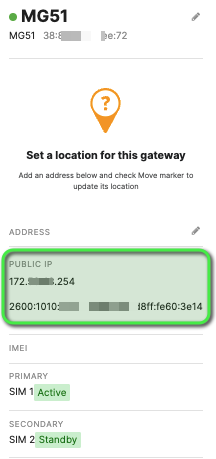
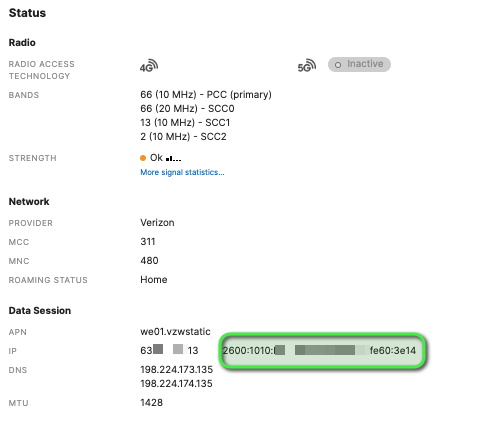
The first way is to navigate to the specific MG’s status page and on the left pane go to the “Public IP” section. This method is shown below:
- Browse: Cellular gateways > Select an MG to check the status page
- On the left side you will see the Public IP section.
This information can also be found on the Uplink tab. Under the Uplink tab, scroll down to the Data Session section to see this information
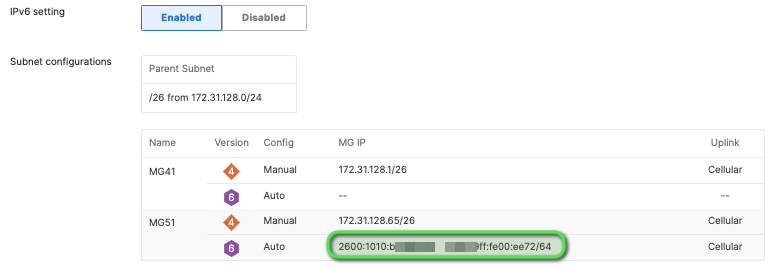
How to See Your MG Pool of IPv6 Addresses
Your MG’s LAN IPv4 and IPv6 address are configured under Cellular gateway > Settings
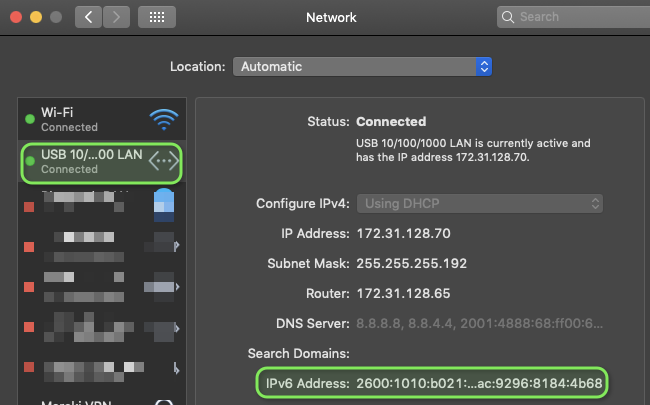
Verifying a Client Obtained an IPv6 Address
MacOS UI
Open: System Preferences > Select Network > Select your Wired LAN connection.
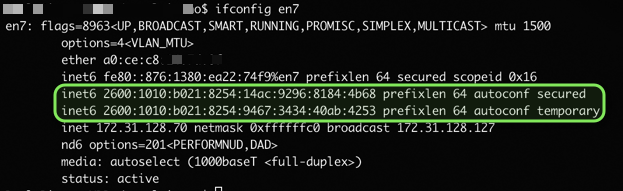
MacOS CLI
Open: Terminal, run “ifconfig”, and find the wired interface.
Windows UI
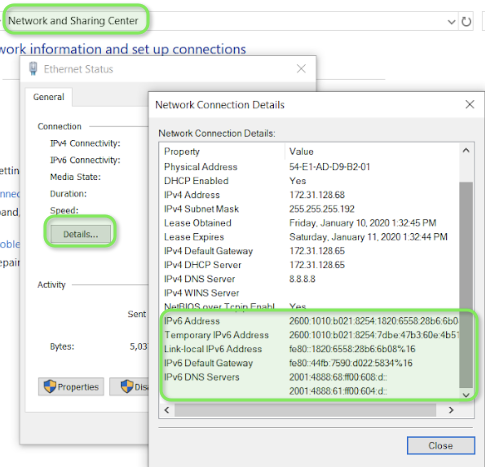
If the client successfully obtained an IPv6 address, it will show in the relevant section as can be seen below:
Windows CLI
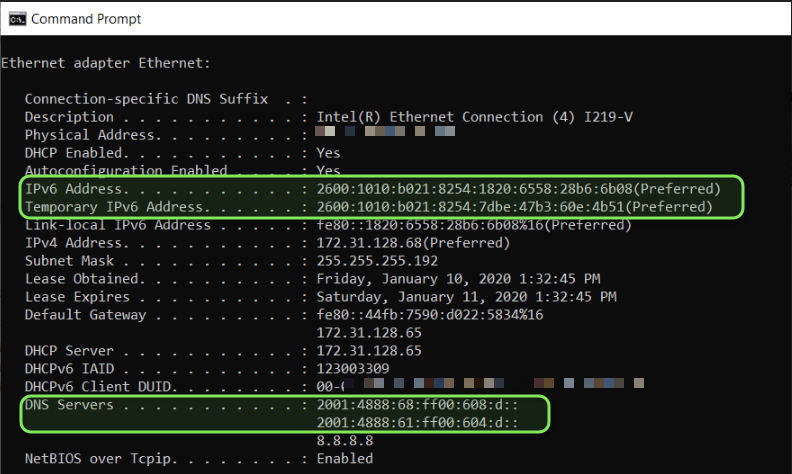
Open: CMD (Command Prompt), issue “ipconfig /all | more” command, and use the space bar to scroll.
Locate the wired interface.
Open Network and Sharing Center, click on "Ethernet" to bring up the Ethernet Status window. Click "Details..."