Microsoft Entra ID Integration with Splash Page
Overview
Microsoft Entra ID (formerly known as Microsoft Azure AD) is a cloud-based identity and access management service provided by Microsoft. It is designed to help organizations manage users and their access to applications, both on-premises and in the cloud. This feature implementation allows admins to configure SSIDs on Meraki to support the authentication of their Microsoft Entra ID users via Splash Page.
Prerequisites
- Firmware: MR28+
- Licensing: MR Enterprise
Configuration
Navigate to Wireless > Configure > Access Control on the dashboard.

-
Select the SSID in the top Left Corner.

-
Under the Splash Page section, select the Sign on With Microsoft Entra ID and add your Allowed Domains.

The built-in Microsoft domain works. Add it to the Allowed Domain field in the dashboard. Verify all custom domains that do not use onmicrosoft.com.
-
Navigate to Advanced Splash Settings below and then set the Captive Portal Strength to "Block all access until sign-on is complete".

Block a client's internet access by default when it enters the captive portal. Set the captive portal strength to "Block all access until Sign-on is complete" on the Access-control page of the SSID. This setting blocks internet access but keeps the client connected to the SSID.
-
Set Walled Garden to Enabled, and add the domains from Microsoft’s Azure portal authentication urls documentation to the Walled Garden Ranges. If a domain is not specified, all the valid Entra ID accounts will be permitted to access the SSID.
Add "device.login.microsoftonline.com" to the Walled Garden ranges for unmanaged Android devices.
-
Save the configuration.
The "Modern" splash theme is required for Microsoft Entra ID splash page integrations.
Granting Microsoft Admin Consent to Cisco Application
-
Network admins can sign-in using the below link to grant admin permission to the Cisco application.
-
Navigate to Microsoft Entra ID > Enterprise applications.
-
Search for the application Cisco Meraki Network Access.
-
Under Permission, click Grant admin consent for Cisco.
If the client has multiple tenants, the URL must include the exact tenant ID to install the Cisco application in the correct Entra ID directory.
https://login.microsoftonline.com/<tenant-id>/adminconsent?client_id=d1b29572-1b35-40cc-9152-a8056ab586c4

Alternatively, admins can connect to the configured Entra SSID to grant admin consent.
-
Connect to the configured SSID.
-
Click Sign in with Microsoft.

3. Accept the permission request to add the application to the admin Entra ID account.

4. Verify the new Cisco Meraki Network Access app is present in the Enterprise application portal.

Authentication Process
When an unauthorized user connects to the AP, the first HTTP GET request redirects to the splash page server hosted in the dashboard. The splash page gives the user the option to log in to the SSID using a Microsoft AD account.
1. Sign in to the user account to sign on to the application.
_image.png?revision=1&size=bestfit&width=767&height=489)
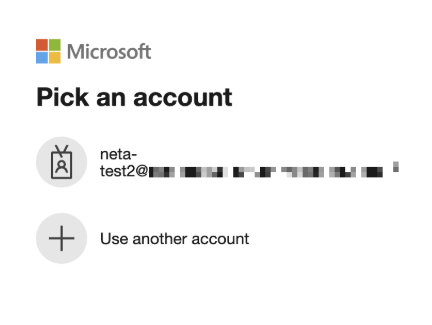
2. Users are then directed to the Microsoft login screen hosted on Microsoft active directory servers.

4. Once accurate credentials are provided users will be granted access to the network.
Client Roaming Behavior
Once a client is authenticated via Microsoft’s active directory server, the session information is stored in dashboard as an active client login session which is shared across APs in the network. This persistent session allows a client to roam without re-authentication as long as the session remains valid. Re-authentication with the Entra ID sign on portal is only required when the session interval expires.
Troubleshooting SSID Configuration
This section describes how to identify and mitigate common issues experienced with Splash page configuration in dashboard.
-
The built-in Microsoft domain onmicrosoft.com must be included in the Allowed domain field in the splash page of Dashboard.
Troubleshooting Entra ID Configuration
If you encounter errors during the connection to the Entra ID SSID please confirm all of the below Entra ID account configurations have been verified.
- The Entra ID user attempting to authenticate with the network must have an active email associated with their account.
- Within the Microsoft AD account the Cisco Meraki Application must be a verified application. Please refer to the section
“Granting Microsoft Admin Consent to the Meraki Enterprise Application ” - The Azure user attempting to authenticate with the network must have an active email associated with their account.
The associated user email must be the same as the user principal name. If they are not the same the Entra ID sign-in attempt will fail with the below error.

3.1. To verify, sign in to the Azure Portal: Go to https://portal.azure.com and sign in with your Azure account credentials.
3.2.Navigate to Azure Active Directory:
3.3. In the left-hand navigation pane, select Microsoft Entra ID. Select Users:
3.4. Under the Manage section, select Users. Search for the User.
3.5. Use the search bar and search for the relevant User.
3.6. Check the User Properties.
3.7. Click on the Properties tab of the selected User and ensure that there is a valid email.

Email Domain Verification
-
Sign in to the Azure ID Portal: Go to https://portal.azure.com and sign in with your Entra ID account credentials.
-
Navigate to Azure Active Directory: In the left-hand navigation pane, select Microsoft Entra ID.
-
Under the Manage section, select Custom domain names.
-
Confirm the domain is verified.

Monitoring
If a Sign-on Splash Page is used, login attempts are reported in dashboard under Wireless > Monitor > Splash logins and Wireless > Monitor > Login attempts.
Wireless > Monitor > Splash logins page:

API Reference 
For comprehensive API documentation, steps to configure the Entra ID with Splash Page and sample source code, refer to Developer Hub for more information.


