Using a Floor Plan or Custom Map in Dashboard
This article will discuss how to upload custom floor plans, align them on the map and place devices.
Overview
Map and Floor Plans in the Cisco Meraki Dashboard allow for a more visual approach to managing large numbers of devices and for keeping track of their locations.
Uploading and Aligning Custom Floor Plans
Custom floor plans can be used to visually organize devices based on their physical locations throughout a building. These floor plans can then be used on various other pages in dashboard that utilize maps as well.
In order to upload a custom floor plan, the file must be:
-
Less than 5 MB in size
-
No larger than 65,448,100 pixels
-
One of the following file types:
-
JPEG
-
GIF
-
PNG
-
Note: If issues are encountered when uploading an image, ensure the browser being used is up to date.
To upload a custom floor plan/map:
-
Navigate to Network-wide > Monitor > Maps & floor plans
-
Select Add a new floor plan

-
Enter a Name for the floor plan
-
Enter a Location (address or coordinates) for the floor plan
-
Upload your custom floorplan image for your deployment. Keep in mind that different floors of your building should be uploaded as separate images
-
Select Next
-
The floor plan will be placed with an approximated placement based on the address entered. You will then proceed to properly align the floor plan with Google Maps by clicking and dragging the floor plan. Aligning the floor plan with Google Maps will allow devices placed on the floor plans to automatically sync with the corresponding location in other maps' views
-
Click on Save floor plan and close or Save floor plan and place devices
Deleting/Renaming Custom Floor Plans
In order to remove a custom floor plan:
-
Select the Delete button next to the floor plan you would like to delete
-
Select Confirm on the next window
In order to rename a custom floor plan:
-
Select the Edit button next to the floor plan you’d like to rename
-
Name, location or image can be replaced here. Once the appropriate details are changed select Next.
-
Select Save floor plan and close or Save floor plan and place devices
Placing devices on the Map/Floor Plan
Devices can be placed on the Map, Satellite, or Floor plans views. If floor plans are being used and have been aligned, it is recommended that the devices be placed on the appropriate floor plan.
In order to place devices:
- Choose the appropriate map view in the upper right corner of the page. Map and Satellite will use Google Maps, while Floor plans will bring up any floor plans uploaded

2. Select Place devices on [map name]
3. Click and drag the devices wireless icon from the list on the right side of the page to the appropriate location on the map
At this point, device placement will be synced between the different views. So a device’s placement on the floor plan will be reflected in the Map view. However, if changes are made in the Map or Satellite views, they will remove the device from the floor plan view if moved outside of the bounds of the floor plan.
Removing devices from the Map/Floor Plan
In order to completely remove an device from a floor plan and the maps view:
-
Click Place devices on the map
-
Hover next to the device that needs to be removed from the floor plan and click on the x sign
-
Repeat this process as needed for any remaining devices
-
When finished, click Save device placements
Floor Plan Geoalignment
Why Geoalignment Matters
Geoaligning floor plans allows users to better track client location with Meraki APs using both location heatmaps and the Scanning API by giving the floor plan a geolocation. When viewing the location heatmap without geolocation data, APs, clients, and their positions will be overlaid on the Google Maps view based on the configured geolocation of the APs. When a floor plan has been geoaligned, the floor plan can be selected on the Wireless > Monitor > Location Heatmap page, which will overlay APs, clients, and location data on the floor plan and can provide more context to the client location data shown. Geoaligning floor plans can also allow for more accurate location data to be calculated.
How To Geoalign Floor Plans
All new floor plans uploaded to Dashboard will be prompted to input a geolocation by address or by latitude & longitude. Any existing floor plans that do not already have this information will have an Edit button as shown below.

Once you click on the Edit button you will be presented with an option to enter the location information of the deployment. This places the floor plan and the APs on the corresponding longitude and latitude in Dashboard.
Once you click Next, your floor plan will be placed at the location entered. You can now move, rotate and resize your floor plan according to the site's actual location and orientation. Once the floor plan is resized and oriented correctly, click Save floor plan and close in the top right corner of the screen. This will ensure that your currently placed APs will retain their location on the floor plan.

Map Options
When viewing the map and floor plans, several options are available regarding additional information that can be displayed. These options are also available in menu option in the top right corner as shown in the images below.
- Map Type: Whether or not to display floor plans on top of the Map and Satellite views

- Floor Plan: Select the floor plan to display from the list of defined floor plans and define the opacity of the floor plans on top of the map view.

Layers:
-
Neighbors
-
Mesh

Note: Neighbors lines are only displayed between mesh neighbor APs. APs in gateway mode with no repeaters associated, will not display any neighbor line.
- Markers: Manage map marker display options
- Markers to display: Displays devices that are checked

- Marker value: Controls what is displayed within the icon for each device
- Device type - Device model number will be displayed
- Device name - Device name will be displayed
- Current clients - The number of clients currently connected to the device
- Clients for the past day - The number of clients connected to the device over the last day
- Usage for the past day - The total data utilization through the last day

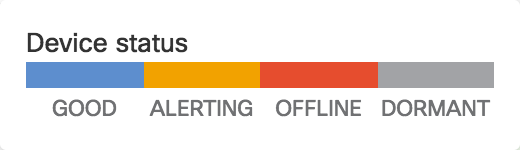
- Device Status: Shows different colors for each of the device status.