
Configuring ACLs
Information About ACLs
Learn more with this free online training course on the Meraki Learning Hub:
For more detailed information and examples of ACLs, see our MS Switch ACL Operation article.
ACL Location in Meraki Dashboard
To configure an ACL from the Meraki dashboard, navigate to Switch > Configure > ACL.

Dashboard Service Rules
In order to help maintain connectivity with the dashboard, dashboard service rules are added to the access control list. These rules consist of an explicit allow for all IPv4 traffic to and from the listed dashboard IP addresses. This list changes dynamically depending on the devices and services added to the Dashboard as well as the region the organization is located. Dashboard service rules are always processed before user-defined rules.

Initial Setup
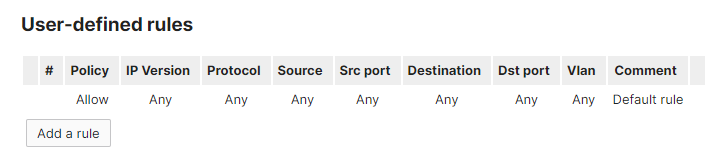
Upon initial setup, you will see that the explicit "Permit Any Any" rule is defined by default.
Note: The maximum number of ACL's that can be configured in a single network is 128.
Add a Rule
To add a new rule, select the Add a rule button below the list of ACL rules.

Edit a Rule
For each ACL rule, you can define the policy, IP version, source IP address or subnet, source port, destination IP address or subnet, destination port, and VLAN. You also have the option to describe the rule in a comment section.
Note: The VLAN field refers to the source VLAN for the traffic being evaluated and is processed on ingress.

The source and destination addresses must be an IP address or subnet in CIDR form (e.g. '192.168.1.0/24'), or 'any'.
The VLAN qualifier is not supported on the MS390 and the C9300-M. ACL rules with non-empty VLAN fields will be ignored by these devices.
Move a Rule
To change the position of a specific rule in the ACL, select the crossed arrows symbol to the right of the rule and drag the rule up or down the list.

Remove a Rule
To delete a rule from the ACL, select the x symbol to the far right of the rule.

Save Changes to an ACL
To save changes to the ACL rules, select the Save button below the ACL.

The Save button will be surrounded by an amber bar if there are unsaved changes on the page.
It may take 1-2 minutes for the changes to the ACL to propagate from the Meraki dashboard to the switches in your network.
Note: As ACLs are stateless, Management VLANs need to be allowed when creating ACLs to allow traffic between Stacks and other VLANs on the same switch
Monitoring ACLs
Beginning with MS 16, MS platforms (with the exception of MS390 and C9300-M) have an ACL Hit Counter live tool on the Tools tab of the switch details page. The tool can be run for 30s, 1min, or 2min, during which time the access-control entries (ACEs) defined in the network-wide Switching > ACL page will be displayed under the tool along with hit counts indicating how many frames have matched the ACEs while the live tool is running.

This tool can be useful for confirming that traffic is being denied or allowed as expected, or that hosts on the network are indeed sending the type of traffic admins expect.