
VLAN Profiles
Overview
VLAN Profiles is a new feature spanning MR and MS as a means to provide both dynamic, RADIUS based assignment of VLANs to devices/users/endpoints based on an alphanumeric name, but also as a means to abstract VLAN IDs from certain elements in Dashboard using relatable terminology instead of numbers.
VLAN profiles can work along with 802.1X/MAB authentication to assign authenticated users and devices to specific VLANs according to a VLAN name rather than an integer. This can reduce the configuration and management burden on the RADIUS server by allowing fewer authentication policies to be used for multiple sites which may use different VLAN IDs for the same functional group of users and devices. For example, sites A and B may both have a "guest" VLAN, which is VLAN ID 100 at site A but ID 99 at site B. Without VLAN profiles, a separate RADIUS policy or rule would normally be created on the RADIUS server for each of site A and site B. With VLAN profiles, a single policy can be created on the RADIUS server which sends the VLAN name "guest" to the switches at each site, which then can map the "guest" VLAN name to the appropriate VLAN ID.
Requirements, guidelines, and limitations
VLAN profiles is supported on the following platforms and firmware versions:
|
Platform Family |
Model | Minimum Firmware |
| MS100 Series | MS120 | MS15+ |
| MS125 | MS15+ | |
| MS130 | MS15.22+ | |
| MS200 Series | MS210 | MS15+ |
| MS225 | MS15+ | |
| MS250 | MS15+ | |
| MS300 Series | MS350 | MS15+ |
| MS355 | MS15+ | |
| MS390 | CS16+ | |
| MR | 20/30H/33/42/42E/52/53E/70/74/84 | MR30+ |
| CW WIFI6/7 | all models | MR30+ |
| Catalyst C9K-M | C9K-M | CS16+/Cloud Native IOS XE |
The VLAN Profiles feature is not available for Meraki Dashboard templates or networks bound to a template.
Key Profile Management Details (please do not skip this section)
- All devices are assigned to the default profile unless explicitly assigned to a non-default profile.
- To add or remove a VLAN name or group, you do so under the default profile, which will then propagate the added/removed profile to the non-default profiles.
- The default profile will always be the source list for every VLAN name and group used in any of the profiles in the network, and is the validation list for Dashboard use across switchports, access policies etc.
- When adding a name or group to the default, the name and ID mapping will automatically get added to every non-default profile.
- Non-Default profiles are intended to allow for VLAN mappings to be overridden from the default, but not intended to provide a completely separate list of names and groups. This ensures that all devices across the network have a common list of names that are selectable for configuration elements or RADIUS based assignment. When a new profile is created, the VLAN name to ID mappings are copied over from the default profile. If the new profile does not require a specific VLAN name to ID mapping to be overridden from the default, the initial values can be left matching the default profile.
VLAN Profiles in Dashboard
VLAN Profiles are a Network-wide configuration as the feature is supported across multiple products (MR and MS).
Configuration
Navigate to Network-wide > Configure > VLAN Profiles. This will bring up the profile assignment page listing each device/switch stack and its assigned profile

Here you can see which profiles are assigned to each switch or switch stack.
Managing VLAN profiles
Click on the VLAN profiles tab. Here you can add, delete, and edit VLAN profiles.
Default Profile
When VLAN profiles are enabled, a default profile is automatically applied to all switches and switch stacks in the network. If a VLAN profile is not explicitly assigned to a switch or stack by an administrator, it will use the default profile. The default profile is indicated by the Default name and Iname values, and on the VLAN profiles tab the (Default) label.
Creating a non-default profile
To create a new profile click "Add VLAN Profile".

Give the profile a unique name and Iname (Iname is used as the API unique ID).
The Iname is used as the unique ID for the profile in the API. It must be unique, and unlike the profile name, the Iname can't be modified after the profile is created.

To edit an existing profile click the edit buttons of the appropriate profile through the 3 dot widget.

Next, create mappings for VLAN names to VLAN IDs. The VLAN name entered is the value that must be sent by the RADIUS server to the switch in order to map to that VLAN ID. When finished. click "Save".
Each profile can include up to 1024 VLAN name to ID mappings, and each VLAN name can be up to 32 characters long. The VLAN profile name itself has a 255 character limit.
You can also map more than one VLAN ID to a VLAN Group using commas or hyphens to separate non-contiguous and contiguous ranges (e.g. 100,200,120-130)
VLAN groups used for RADIUS assignment are limited to 32 VLAN IDs per group. Otherwise there is no limit to the number of VLAN IDs in a VLAN group.
Assigning VLAN profiles
On the profile assignment tab, select the access points, switch(es), and/or stack(s) to assign a profile to.

Choose the profile to apply by clicking the drop down profile menu, then "Assign profile".

Note: VLAN profiles are applied to standalone switches or entire switch stacks. You cannot apply different VLAN profiles to switch members of the same stack (all switches in the stack use the same profile).
Removing non-default profile assignments
You can reassign a VLAN profile assignment from a device or stack back to the default profile. This is done by selecting the devices and assigning the default.

Verifying VLAN profiles
You can verify the VLAN profile applied to a device or stack from the Switching > Monitor > Switches page. If the "VLAN profile" column isn't visible, click the wrench icon in the top right corner of the switch list table and enable the column.


On the switch details page, the VLAN profile is listed in the left hand column below the config status.

VLAN Database
VLAN Database is an Early Access feature which requires enabling at Organization > Configure > Early Access
Overview
By default, Catalyst switches in Meraki mode have as many active VLANs as supported by the switch platform. For example, a Catalyst 9300 ships with VLANs 1-1000 active. Catalyst 9200 ships with VLANs 1-512 active. This helps the switch find a VLAN that it can use to reach Dashboard automatically through zero-touch provisioning. After initial setup however, in most cases the network uses far fewer than 1000 VLANs, some of which may use VLAN IDs between 1001-4094. The VLAN Database feature provides a simple way to remove, or prune any VLANs that are not needed from the switch's VLAN database and allows for a single place to configure the entire VLAN range needed in the topology and/or the switches attached to a VLAN Profile. This has historically required additional effort on a switch by switch basis to modify. The error that could be observed by this condition is:

The VLAN Database is a function of VLAN profiles, which can be applied to individual or groups of switches. An example would be if you use the same VLANs across many switches in a network, a single VLAN profile can often be used to limit the active VLANs.
This feature is limited to Cloud Managed Catalyst switches only. This feature does NOT effect how MS Classic series switches function.
Terminology
Required VLANs
Required VLANs are the list of VLANs necessary for a switch to run in order to forward traffic and connect to the Meraki Dashboard as intended. These are VLANs that are actually being used in the network. The purpose of the VLAN database function is to delete or prune any non-required VLANs.
Active VLANs
Active VLANs are those that are actually instantiated on the switch, in the case of Catalyst switches. The Active VLAN list should match the required VLANs in order for the switch to function properly. The VLAN database function will attempt to prevent required VLANs from being removed from the Active VLANs list but cannot prevent all misconfigurations. When a misconfiguration happens, such as a switch management VLAN (a required VLAN) being removed from an Active VLAN list, the VLAN database will generate an alert on the details page for the affected switch(es).
Allowed VLANs
Allowed VLANs refer to VLANs that have been configured to be allowed and carried across a trunk port, which can be referred to simply as “all” or a particular subset like 1-10, 20, and 30.
Reserved VLANs
Reserved VLANs are VLANs that a switch platform will not use for carrying traffic. Even though they belong to the valid range of 802.1Q VLAN numbers (1-4094), reserved VLANs can’t be used. For Catalyst switches the reserved VLANs are VLANs 1002-1005 and 4093-4094.
Understanding the VLAN Database
First, we must define all the VLANs that should be active on the switch. The list below is an example of what should be included.
REQUIRED VLANs:
- Trunk Native VLANs
- Trunk VLANs
- Regular Access VLANs
- Management VLAN
If certain features are being used then the following VLANs may also be required:
- AMI VLAN
- Any access policy VLANs (critical, guest, failed auth, critical voice, etc)
- Any VLANs that could be assigned by 802.1X/RADIUS dynamically
- Voice VLANs
- SmartPort VLANs
- VLANs mapped to an SVI on the switch
Note: When using VLAN DB, you now have the ability to use the all keyword on switchport trunks, which will include all VLANs in the Active VLAN range, where MS Classic still is all VLANs.

Note:
When rendering the active VLANs on a trunk port, only the active VLANs that are in the Allowed VLAN list of the trunk port are shown. If the allowed VLANs configured on a trunk port do not contain any active VLANs, this results in an empty set, in which case the following applies:
- On CS based Cloud Managed Catalyst switches an Alert is generated AND the Allowed VLANs list is set to VLAN 1.
- On IOS-XE based Cloud Managed Catalyst switches only an Alert is generated.
Trunk Ports will automatically add your management VLAN to the Active VLAN list if it is not currently included in the Active VLANs.
Note: If a user configures a VLAN on an access port that is NOT in the Active VLAN list, IOS XE will auto instantiate that VLAN. Dashboard will remove/prune that VLAN within and hour for IOS-XE devices but NOT for devices running CS Firmware.
Configuring the VLAN Database
1. Navigate to Network-wide -> VLAN profiles
2. Select VLAN profiles -> select your VLAN profile (in this example we are selecting the Default Profile)
3. In the Active VLANs text box enter all of the VLANs that are required on the switch(es) to be mapped to this profile

Note: The Active VLANs list must encompass ALL of the named VLANs listed in the profile below or you will not be able to save the configuration.
To Add a new named VLAN to the profile and VLAN DB
1. Navigate to Network-wide -> VLAN profiles
2. Select VLAN profiles
3. Select your VLAN profile
4. Select Add Named VLAN
5. Enter VLAN Name, Enter VLAN ID, and optionally select VLAN-to-SGT (Do not hit save yet)
6. Scroll up to Active VLANs and add your new VLAN to the list
7. Hit Save profile changes

To Remove a named VLAN from the profile and VLAN DB
1. Navigate to Network-wide -> VLAN profiles
2. Select VLAN profiles
3. Select your VLAN profile
4. Find the VLAN you would like to delete an press the trash can & Save profile change
5. Select your VLAN profile
6. In Active VLANs remove the VLAN you deleted above & Save profile changes

Verification
1. Select Network-wide -> VLAN profiles

2. If the switch is using a VLAN that is not part of the Active VLAN list you will get an Alert.

3. To Verify via CLI:
Issue the show vlan command to verify VLANs have been pruned from the list.

If a VLAN is assigned via RADIUS dynamically and does NOT exist in the VLAN DB, the log messages below will be displayed.
Oct 23 14:48:57.020: %DOT1X-5-SUCCESS: Switch 1 R0/0: sessmgrd: Authentication successful for client (000c.2910.93cb) on Interface Gi1/0/46 AuditSessionID 0A09A8C00000000CB519FC82 Username SHAUNSLAB\meraki
Oct 23 14:48:57.023: %EPM_PLUGIN-5-ERR_VLAN_NOT_FOUND: Switch 1 R0/0: sessmgrd: Attempt to assign non-existent or shutdown VLAN 11  to 802.1x port GigabitEthernet1/0/46 AuditSessionID 0A09A8C00000000CB519FC82
Oct 23 14:48:57.024: %SESSION_MGR-5-FAIL: Switch 1 R0/0: sessmgrd: Authorization failed or unapplied for client (000c.2910.93cb) on Interface GigabitEthernet1/0/46 AuditSessionID 0A09A8C00000000CB519FC82. Failure Reason: VLAN Failure. Failed attribute name 11.
Oct 23 14:48:57.024: %DOT1X-5-RESULT_OVERRIDE: Switch 1 R0/0: sessmgrd: Authentication result overridden for client (000c.2910.93cb) on Interface Gi1/0/46 AuditSessionID 0A09A8C00000000CB519FC82
4. To verify the Active VLANs on a trunk port, click on the switchport on the switch summary page, and look for the Active VLANs list on the configuration section. Both the allowed VLANs and the Active VLANs are shown. The allowed VLANs may include VLANs which are not active on the switch, so the Active VLAN list can be used to verify which VLANs are both allowed, and Active based on the current configuration. Only VLANs that are Active will pass traffic across the trunk.

Configuring the VLAN Database from the Local Status Page
Beginning with IOS XE 17.18.2, The VLANs that are active for a single switch can be modified from the local status page of that switch. This can be used to quickly reduce the number of VLANs below the limit so that a VLAN ID in the higher range (typically greater than 1000) can be quickly enabled on the switch. Use this if the management VLAN in your network is above 1000 for Catalyst 9300, or above 512 for Catalyst 9200.
The local status page is not intended to be used for configuring switches that are currently connected to the cloud dashboard. Any changes made to the device may be overwritten by cloud dashboard config so it's important to ensure that the cloud dashboard configuration is correct. Use the LSP to get a switch online for the first time, or to troubleshoot connection issues. Otherwise the normal configuration of the VLAN database should be done from the dashboard.
Log into the local status page
Connect to the LSP via the management port on the back of the switch, or remotely using the management uplink IP address of the switch. For more information, refer to this article
Review the active VLANs
On the Connection tab, there is a VLAN Utilisation table. The table provides some useful information about the VLANs that are configured on the switch. In this example, the switch has already been configured with the minimal required VLANs via the cloud dashboard.
- The list of VLANs assigned to access ports, or allowed VLANs on trunks
- The L3 Switched Virtual Interfaces (SVIs) enabled on the switch
- The management VLAN of the switch, used to reach the cloud dashboard
- The list of active VLANs on the switch. This is the number limited to 512, or 1000, depending on the switch model.

Modify the active VLANs from the Local Status Page
On the Switchport tab, there is an Active VLAN* text entry field. This field provides a quick way to configure the set of VLANs that should be active on the switch. Remember that the active VLANs should include:
REQUIRED VLANs:
- Trunk Native VLANs
- Trunk VLANs
- Regular Access VLANs
- Management VLAN
If certain features are being used then the following VLANs may also be required:
- AMI VLAN
- Any access policy VLANs (critical, guest, failed auth, critical voice, etc)
- Any VLANs that could be assigned by 802.1X/RADIUS dynamically
- Voice VLANs
- SmartPort VLANs
- VLANs mapped to an SVI on the switch
Using the Active VLAN* text field, modify the list of Active VLANs for the switch, using commas to separate individual IDs, and hyphens to indicate ranges of consecutive VLAN IDs. Click the Save button when finished to apply the configuration.
On this page, you can also modify the Native VLANs, as well as the list of allowed VLANs for trunk interfaces. Modifying these values will update the VLAN Utilisation table on the Connection tab.
- Active VLAN entry field
- Native VLAN configuration
- Allowed VLAN(s) configuration

VLAN Profiles and RADIUS
VLAN profiles were originally designed to be used only for RADIUS. A RADIUS server can respond back to the authenticator (network device like switch or AP performing 802.1X / MAB) with a name, that is then translated to a VLAN ID to place the device in. A VLAN Group can be used to perform load balancing of clients between the list of VLANs. The load balancing behavior is semi-intelligent, performing hashing to ensure a re-authentication of a client does not bounce them to another VLAN ID in the group, which could result in triggering connectivity issues. The following section walks through how to enable RADIUS support, reviews a use case, and then walks through troubleshooting.
Enabling RADIUS Support
VLAN profiles can be enabled or disabled for use with RADIUS globally for the network. When VLAN profiles are disabled you can still configure and assign profiles, but they won't be deployed to the switch configuration for use with RADIUS until you enable VLAN profiles for the network. This also allows the feature to be temporarily removed from the switches and switch stacks without losing the existing configurations in Dashboard.
Navigate to Network-wide > Configure > VLAN Profiles and choose the Settings tab choose to enable or disable VLANs for use with RADIUS. Then click "Save changes".

Note:
- This can be helpful when testing and/or troubleshooting VLAN profiles with RADIUS.
- The VLAN pool DHCP monitoring configuration is specific to MR and is not applicable to MS as of MS15 firmware.
- MS390s perform DHCP monitoring, and upon 3 clients failing to get and address in a VLAN within 5 minutes, the switch/stack will mark the VLAN dirty for 30 minutes before adding it back to the pool.
How VLAN Profiles work with RADIUS
Example Scenario:

In this scenario, the network is divided into multiple floors, and each floor has different VLAN assignments for the same functional groups (workstation, voice, and IoT devices). Rather than configuring an authentication policy for each floor on the RADIUS server, a single policy can be used that will return the VLAN names to the switches or access points that are acting as the 802.1X authenticator. The authenticators will then map the VLAN names to the appropriate VLAN ID for each floor according to the VLAN profile assigned to the authenticator in the Meraki Dashboard.
In order to use VLAN profiles with MS, an access policy must be first configured and assigned to switchports to authenticate users and devices connecting to those ports. For information on configuring and assigning access policies, see MS Switch Access Policies (802.1X).
The RADIUS server must be configured to send three attributes as part of the RADIUS Access-Accept message sent to the authenticator (switch/AP) as a result of a successful 802.1X/MAB authentication. These attributes tell the authenticator which VLAN name to assign to the session for that user or device. The required attributes are:
[64] Tunnel-type = VLAN
[65] Tunnel-Medium-Type = 802
[81] Tunnel-Private-Group-ID = <vlan name>
These are the same three attributes used when assigning a VLAN ID to a 802.1X/MAB session for a user or device. The difference when using VLAN profiles is that the RADIUS server is configured to send a VLAN name rather than the VLAN ID. Here's an example of this usage in Cisco Identity Services Engine:

In the above example, the RADIUS server will return the "WORKSTATION" value to the authenticator (switch/AP), which causes the authenticator to look for a VLAN ID mapping matching that name value. The authenticator will then assign the client to that VLAN based on the Profile assigned to that authenticator.
In the example below, the "WORKSTATION" value could map to VLAN ID 101, 201, 301, or 401 depending on which profile the authenticator has applied.

If the RADIUS server returns a name that is not defined in the VLAN profile, the switchport will fail-closed and the client device will not be able to access the network. If the RADIUS server returns a VLAN ID, the switchport will be authorized as an access port in that VLAN.
Also, when using multi-auth mode, multiple devices may be connected to each port, but each connected device is required to authenticate (all MS excluding the MS390**). After a VLAN is assigned to a host on the port, subsequent hosts must have matching VLAN information or the switch will deny access and those sessions will fail closed (the first session will remain active). Only one client is supported on the voice VLAN. Guest VLANs are not supported in this mode.
** Note: The MS390 allows for multiple devices behind a multi-auth port to have different VLANs assigned to each session. This means when multiple hosts authenticate to a single port on the MS390, each host may be assigned a unique VLAN to their session. For example, the first host to authenticate on a switch port might be assigned to VLAN 3, and a subsequently authenticated host may be assigned to VLAN 5.
Troubleshooting VLAN Profiles with RADIUS
As with most things RADIUS related, there are 4 places to look for troubleshooting information.
- The RADIUS server and the authentication/authorization logs. For Cisco ISE, this would be under Operations > RADIUS > Live Logs
- The authenticator (Switch or AP) event logs
- The endpoint/client device to validate the IP addressing it received
- A packet capture done between the authenticator and RADIUS server to peek at the info sent from the RADIUS server
Note: For guidance on RADIUS server troubleshooting and/or client device/endpoint troubleshooting, please refer to the appropriate documentation for those products.
Cisco Identity Services Engine Live Logs (example)
This section is just an example of using Cisco ISE, it is not the most comprehensive guide and thus for detailed troubleshooting please see the Cisco ISE troubleshooting guides created by the ISE team.
To view the AAA logs in Cisco ISE navigate to Operations > RADIUS > Live Logs, and search for the endpoint/device that is being used for troubleshooting. This can be filtered using the Endpoint ID and populating all or part of the client's MAC Address. Once filtered, find the log line with a green checkmark and click the magnifying glass as seen in the example below.

A new window / tab will open with a lot of information. Scrolling down to the bottom section labeled "Result" will show the response sent from the RADIUS server to the authenticator (switch in this case).

We can see here that the Tunnel-Private-Group-ID shows the VLAN name of WORKSTATION.
MR Named VLAN / VLAN Pooling / VLAN Blocking
- Navigate to Network-wide > Configure > VLAN Profiles and choose the Settings tab.
- Choose to enable or disable VLANs for use with RADIUS.
- Click "Save changes".
Leaving the Named VLAN box unchecked, still allows for VLAN Pooling on the WLAN.

The VLAN pool contains multiple VLAN IDs. If VLAN pool DHCP monitoring is enabled, a particular VLAN from the pool will be blocked when repeated DHCP failures occur.
In the dashboard, navigate to Wireless > Configure > Access control.
RADIUS Config
- Select the desired SSID from the drop-down menu.
- Under Security, select Enterprise with and choose any 802.1X authentication framework.

4. Under RADIUS, click Add server.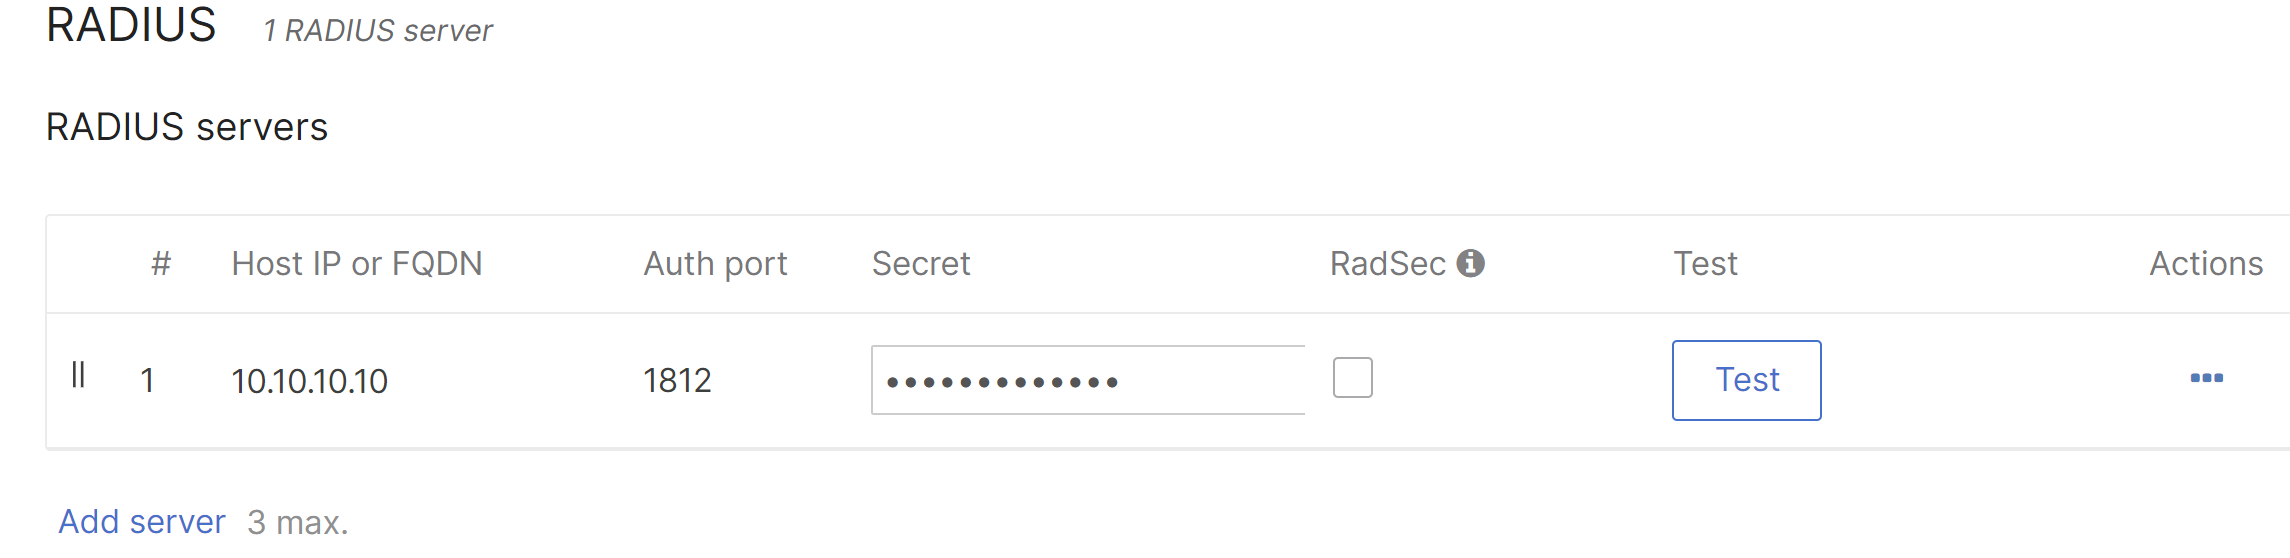
5. Enter the following information and click Done:
- Host IP or FQDN - Public IP address or Fully Qualified Domain Name of the RADIUS server.
- Auth Port - UDP port that the RADIUS server listens on for access requests, typically 1812.
- Secret - RADIUS client shared secret (if a RADIUS server has not been configured yet, select a shared secret here and make note for later).
6. Within Client IP and VLAN select External DHCP server assigned and SSID is set to Bridged mode.
7. Allow Radius override to override the VLAN tag with the RADIUS response

8. Within VLAN tagging, select your VLAN attribute type:
- Named VLAN - Wireless, Employee
- VLAN ID - VLAN ID i.e. 10
- None - Use mapping

This will determine what attribute we accept from RADIUS. VLAN ID will accept the IEEE standard attributes 64/65/81, Named VLAN will support the IEEE standard as well as the Airespace-Interface-Name VSA
The Default Access Point Tag is used when there is no RADIUS attribute sent, or we do not have a mapping for the sent attribute. This can be controlled per AP tag if you are using tags to differentiate where Access Points are located.
Note: The assignment of multiple VLAN values to a single Named attribute (VLAN Groups). VLAN ID would be assigned round-robin from the defined pool of VLANs.
Non-RADIUS VLAN Pooling
This section excludes the detailed SSID configuration.
- Select the SSID in Access Control
- Within VLAN tagging, select "Named VLAN"
- Under Named VLAN, select the VLAN group the SSID will use

Meraki Dashboard Troubleshooting for VLAN Profiles
Event Logs:
To look and see the applicable logs associated from the network device's perspective navigate to Network-wide > Monitor > Event log. For switching and wireless there is a filter for "All 802.1X" and "All client events" which will filter the logs to the necessary events. Example:

As seen there are logs showing 802.1X and RADIUS dynamic VLAN assignment. In this case, the switchport has multiple clients behind it, so we see a log stating there is a Multi-Auth VLAN Restriction to the WORKSTATION VLAN, showing the username and port as well as the Session ID.
Switch Port Details
Under the MS port 13 in this example we can see the client, its IP Address, and the VLAN ID assigned.

Note: At times there are 2 client entries for the same MAC Address. This is purely cosmetic and does not mean there are multiple clients using the same MAC address.
Switch Detail VLAN Profile Assignment
To validate the switch's VLAN Profile assignment, either navigate to VLAN Profiles > Profile assignment or in this example, under the switch details page there is a field for VLAN PROFILE under the switch's information.

VLAN Profile Mapping Review
To check the mappings, navigate to Network-wide > Configure > VLAN Profiles and click the arrow next to the applicable profile to drop down the details. Here we can see WORKSTATION is mapped to VLAN 401 as is the client above.

Packet Capture Walkthrough
When trying to troubleshoot issues with VLAN Profiles, it can also be advantageous to perform a packet capture on the authenticator's uplink port, bouncing the switchport where the client is connected, and waiting for the 802.1X / MAB process to complete before stopping the capture. In this example the switch's uplink port is port is port 24 as indicated by the arrow in the interface.

To obtain a packet capture, either navigate to Network-wide > Monitor > Packet capture, or under the switch port's details page scrolling down to Troubleshooting:

This will automatically take you to the Network-wide > Monitor > Packet capture along with a filter on the switch and port (24 in this case).

To filter the capture to only capturing RADIUS traffic (essential for busy networks to ensure the packet capture grabs the right information) you can populate filters for traffic. In this example we are filtering the standard RADIUS ports for authentication (1812/1645), accounting (1813/1646), and Change of Authorization (1700/3799).
port 1812 or port 1813 or port 1645 or port 1646 or port 1700 or port 3799
Start the packet capture (it may be necessary to increase the capture timeframe to a few minutes - 300 seconds is a safe value as long as there is a good filter in place).
Next open a separate tab, navigate to the client port, and under the Troubleshooting section, cycle the port:

Using Wireshark
Once the packet capture is complete, open the .pcap file in Wireshark. If you do not have it installed please see https://www.wireshark.org/download.html.

Under the Access-Accept packet (packet 5 in this capture above) if you drop the Attribute Value Pairs section down, there is the field for Tunnel-Private-Group-Id where the VLAN name or ID will be populated, and in this case is set to WORKSTATION.
Using Dashboard's tcpdump display
If installing Wireshark is not possible, Dashboard has a tcpdump functionality that can also be used to spot check the response from the RADIUS server. Instead of download .pcap file, select View output below and set the verbosity to medium:

Once the capture is started, cycle the port the client is connected to, and watch the output under the packet capture page for things to complete. Then parse the output for the Access-Accept packet and the Tunnel-Private-Group-ID attribute:
