

Vision Portal: Introduction
Overview
Cisco Meraki Vision is a camera-viewing portal for core physical security use cases. You can navigate between cameras to view video, run Motion Search, and share footage.
Learn more with these free online training courses on the Networking Learning Hub:
Navigate to vision.meraki.com and sign in using your Meraki dashboard credentials.
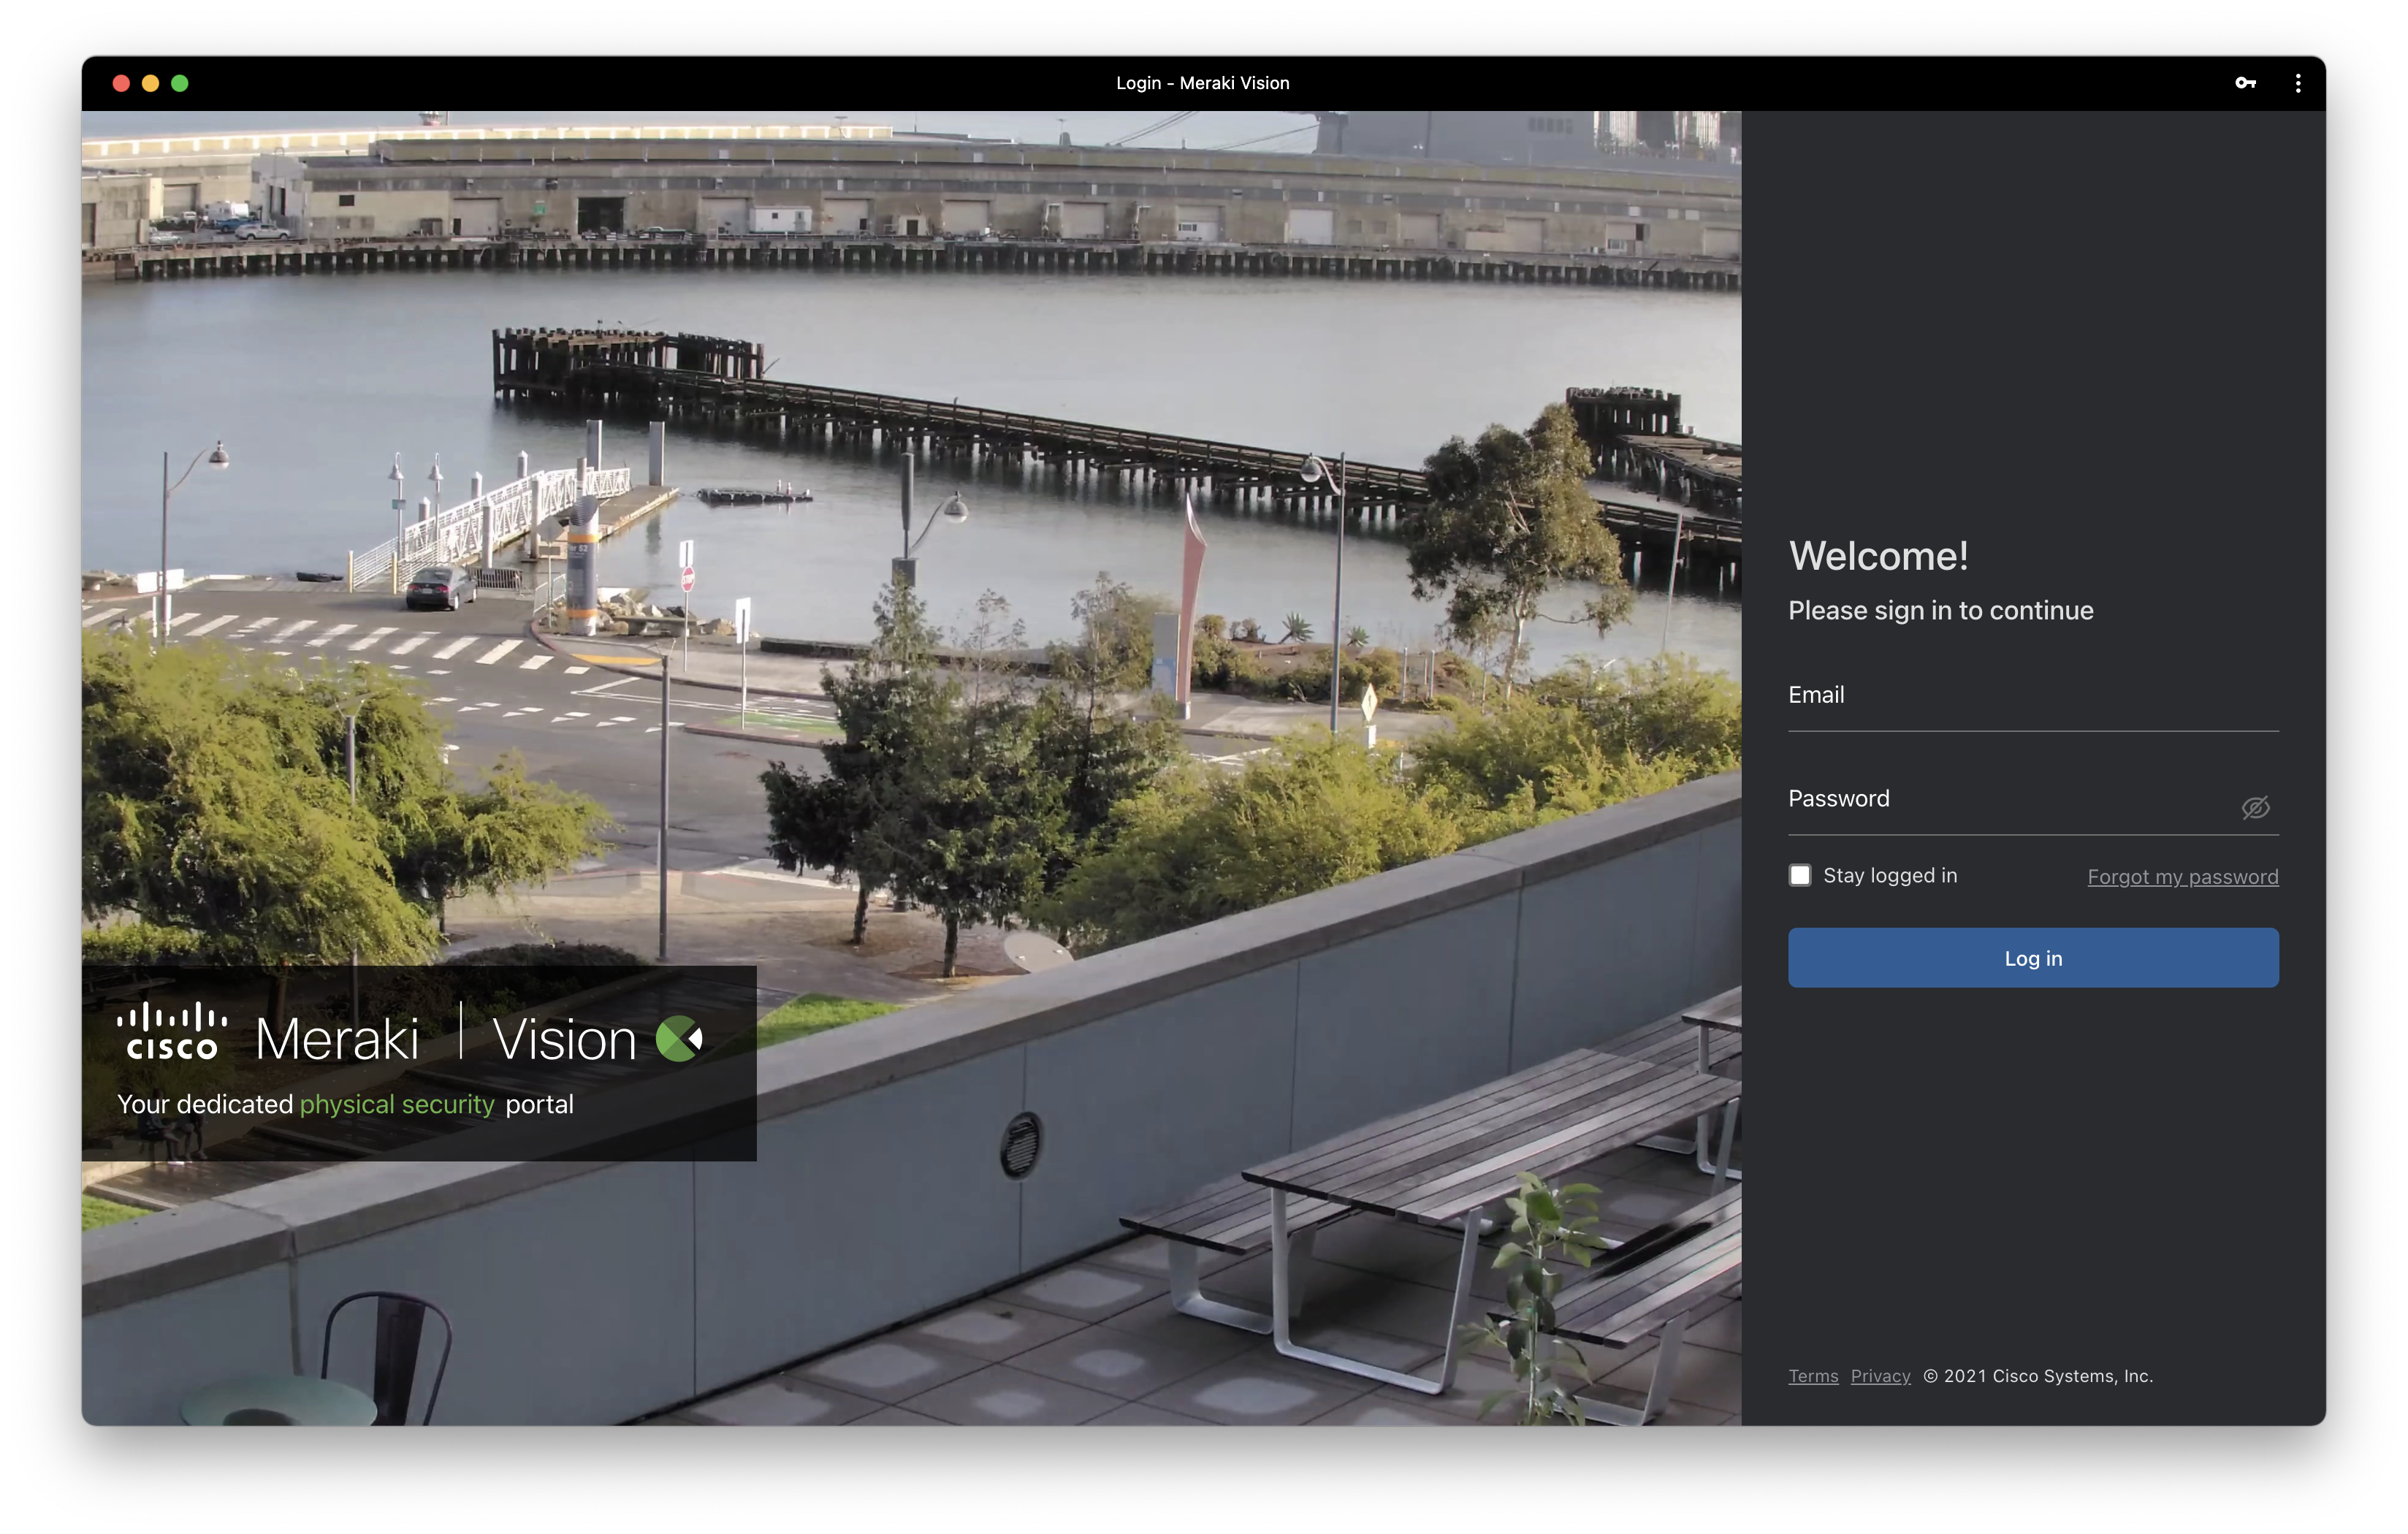
You can also open the portal through links on the dashboard.
Camera settings, configuration, troubleshooting, and analytics remain on the dashboard. Existing features such as the video player, video wall, and exports page also remain on the dashboard.
Key improvements
The following is a list of key improvements on the Vision portal compared to the Meraki dashboard.
- Everything at your fingertips
- Powerful search options
- Collapsible navigation pane
- Integrated map view for camera navigation
- Faster, cleaner, and more intuitive viewing experience
- New time-picker with 24-hour option and time zone view
- Related tags and video walls list
- Two motion search experiences: quick and advanced
- Easier and more powerful export experience
- Custom export filename
- Video wall exports (export from multiple cameras simultaneously)
- Export previews
- A more complete video wall experience
- Create MULTI NETWORK VIDEO WALLS (NEW)
- Video Wall creation flow (NEW)
- Full bitrate stream
- No idle timeout in full-screen view
- Digital zoom and dewarp on an individual camera
- Event Search (NEW)
- Search for Motion events (Vehicle or Person)
Tour of the interface


Step-by-step instructions
Find something across networks

-
Use the org-wide search to type in any string
-
It will search for matches across your cameras, video walls, and exports across all networks in the organization
-
The search uses fuzzy search, which can accommodate misspellings, such as "entrnce" instead of "entrance."
-
Find a camera in a network
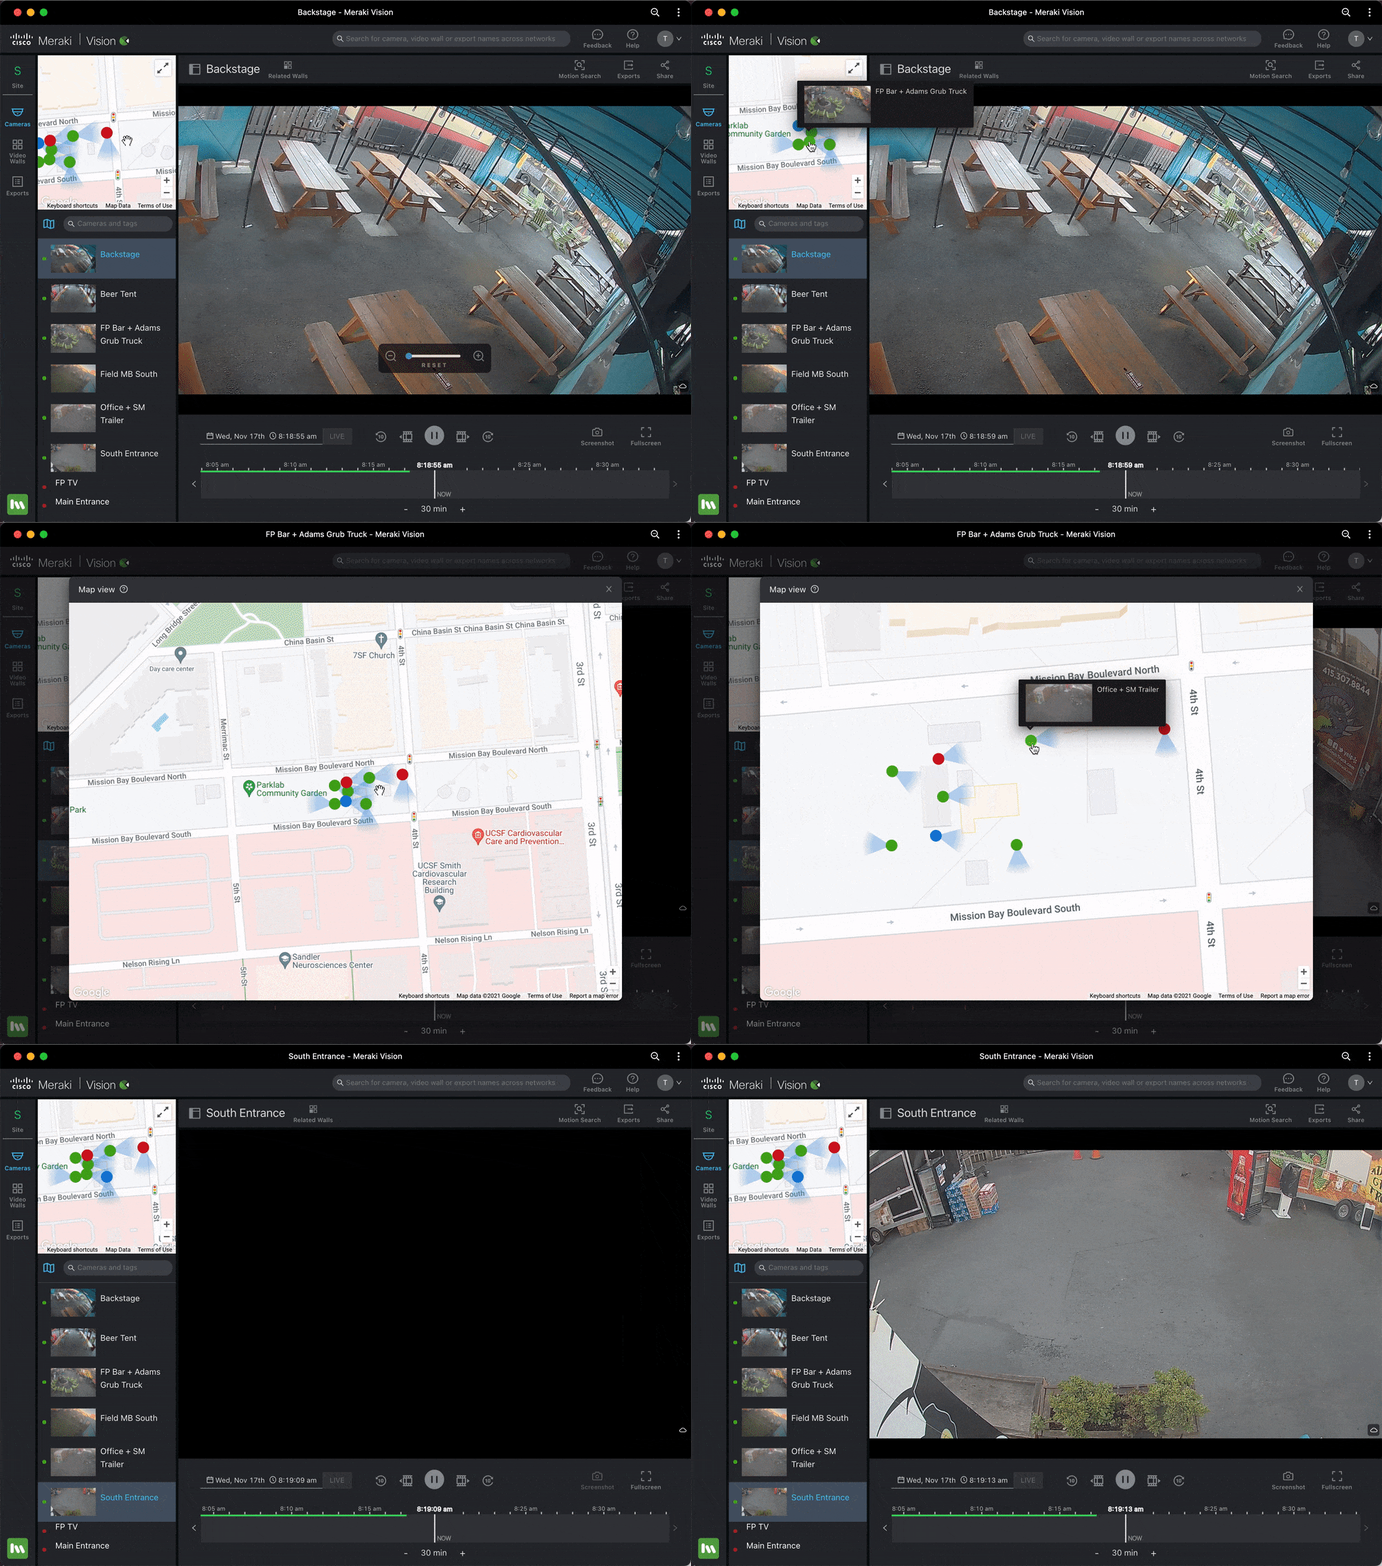
Cameras page > Navigation pane (map)
You can use the global search to find the right camera. If you are already on a single network, you can use the Cameras page navigation pane instead.
-
From here you can use the mini-map to find the right camera based on its location
-
The blue dot refers to the selected camera, and red dots are cameras that are offline
-
-
Expand this for a larger view, and to switch between floor plans
-
Collapse this if you don’t have any placements or don’t need this; your setting will be remembered on your device
You can configure placement and FoV on the Meraki dashboard. Read more here.
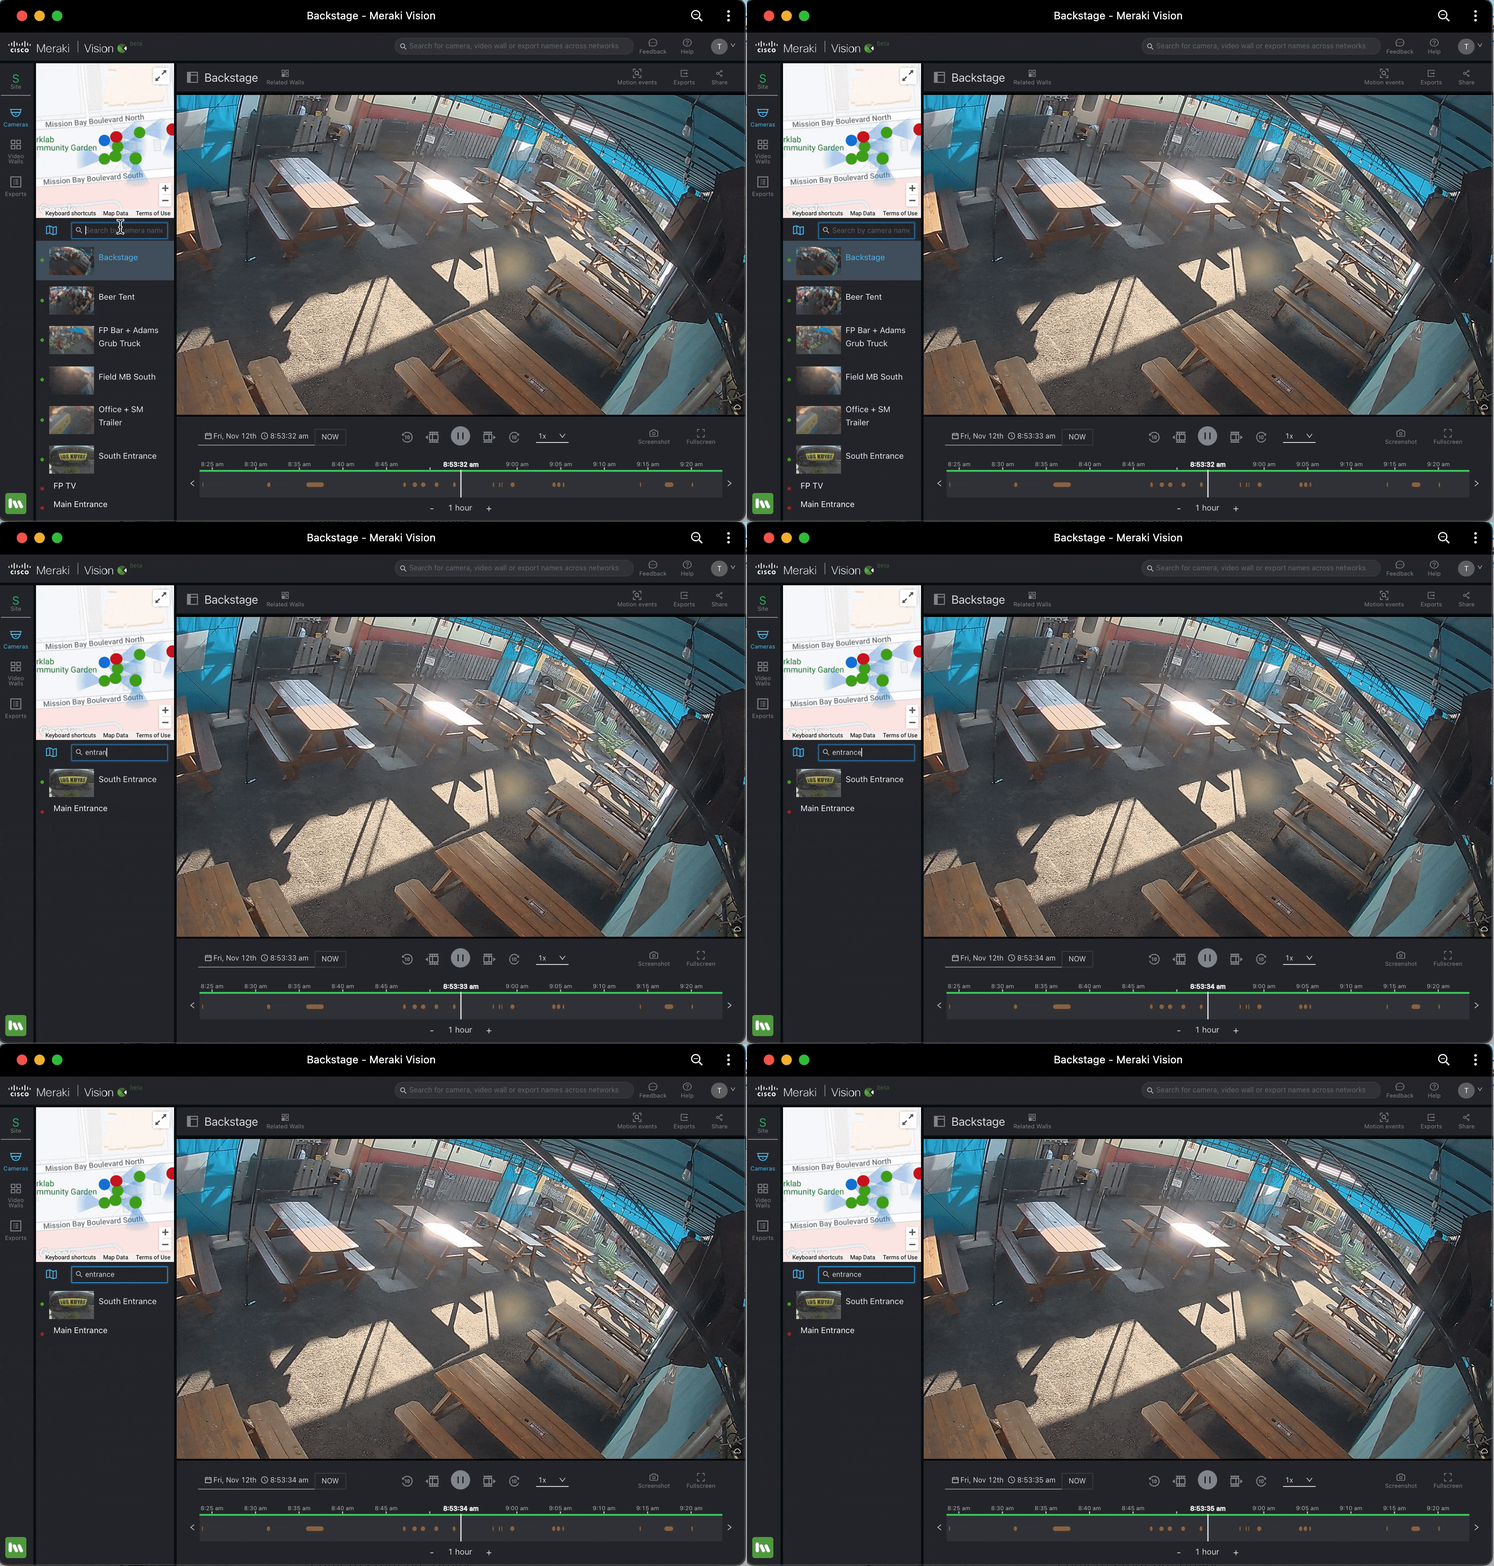
Cameras page > Navigation pane (search and list)
Go to Cameras > Navigation pane (search and list). In addition to the global search or the mini-map, you can use the search input or the list view below the mini-map.
-
Type a string that corresponds to a camera name or tag
-
Check which tags are associated with a camera by looking at the tag icon next to the camera name
-
-
Or, use the thumbnails to select the correct camera
-
Green dots correspond to cameras online, red dots are cameras that are offline
-
Find a video wall in a network
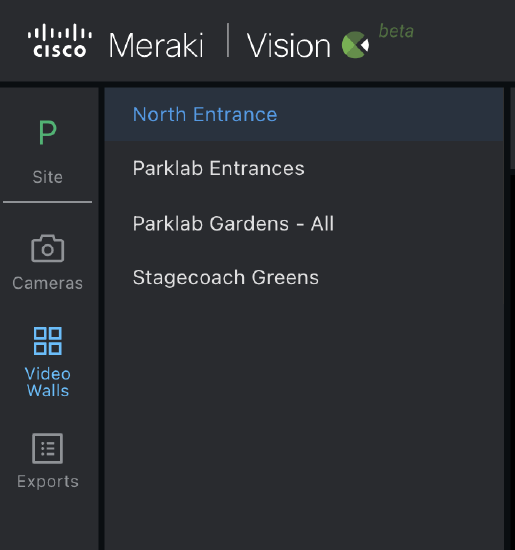
Scroll through the list of video walls in the navigation pane. Video wall order and configuration are still managed through the dashboard.
Watch live video
You can watch live video through either the cameras or video wall video player page.
-
On each page, select NOW on the video timeline to go to live video.
-
On the video wall page, you can also edit and start a video wall rotation to flip through live video on many video walls one after another.
-
You can generate a link that will start a video wall rotation and enter theater mode without user intervention by appending the following at the end of the URL: "?&autostart=true&fullPage=true"
-
-
Use the audio on/off button on the video timeline to listen to audio, if audio is enabled
-
Select Theater or Fullscreen on the video timeline if needed.
-
The organization idle timeout is ignored on the video wall.
-
-
Select and zoom into any of the cameras on the video wall
For best experience with video performance, we suggest using the recommended browsers cited in our Dashboard Browser Compatibility article. Video wall order and configuration are still managed through the dashboard.
Find and play historical video

Cameras and video wall page → Video timeline
Go to the video timeline on the cameras or video wall page. The video timeline on both pages helps you navigate to historical video.
- Use the time-picker to type in a date and time using natural language processing, or select the date and time using the calendar and clock
- Browse through the timeline by selecting the arrows and changing the zoom level
- The timeline also provides options to go backwards and forward by one frame or ten seconds
- The timeline also provides a way to play back by 0.25x, 0.5x, 1x, 2x, and 4x
- Use the audio on/off button on the video timeline to listen to audio, if audio is enabled
Earliest available video
Overview
The earliest available video feature is available only in the Vision portal. The feature lets you identify and jump to the earliest available video footage recorded by a specific camera. In the time-picker interface, the feature displays a timestamp, such as "March 28, 2025 at 12:30:00 am Earliest Available Video." The timestamp shows the earliest point in time for which video data exists on the camera. You can also see the earliest point directly on the timeline by the marker.
Purpose and benefits
The earliest available video feature shows the earliest available footage date. The feature removes guesswork and lets you determine if critical footage for your investigation is accessible. The earliest available video feature helps you:
- Rapidly Access Critical Footage: Know the starting point of available video, which is important for time-sensitive investigations.
- Remove Guesswork: Avoid manually searching for the beginning of available footage.
- Streamline Investigations: Allows investigators to quickly determine the starting point of their footage review, ensuring they begin their analysis from a valid and relevant time. This helps users decide if their investigation is worth starting from that point.
Important Note on Accuracy: Due to the continuous nature of camera recording and storage management (where older footage is constantly being recorded over or deleted as new footage is captured), the displayed "Earliest Available Video" timestamp might be slightly off by up to 2 minutes. This minor discrepancy occurs because the camera is simultaneously recording new footage and managing the deletion of the earliest footage, leading to a dynamic earliest available point.


Cameras and video wall page → Motion search
Motion search on the video actions page can help you find historical video.
-
By default, the drawer version searches the entire camera's field of view for a default time period. The time period is based on your currently selected time period on the timeline:
-
For live, this is backwards 50% of the timeline zoom until current time
-
For historical, this is backwards and forwards by 50% of the timeline zoom
-
-
You can narrow down the search criteria by selecting a smaller region on the video player
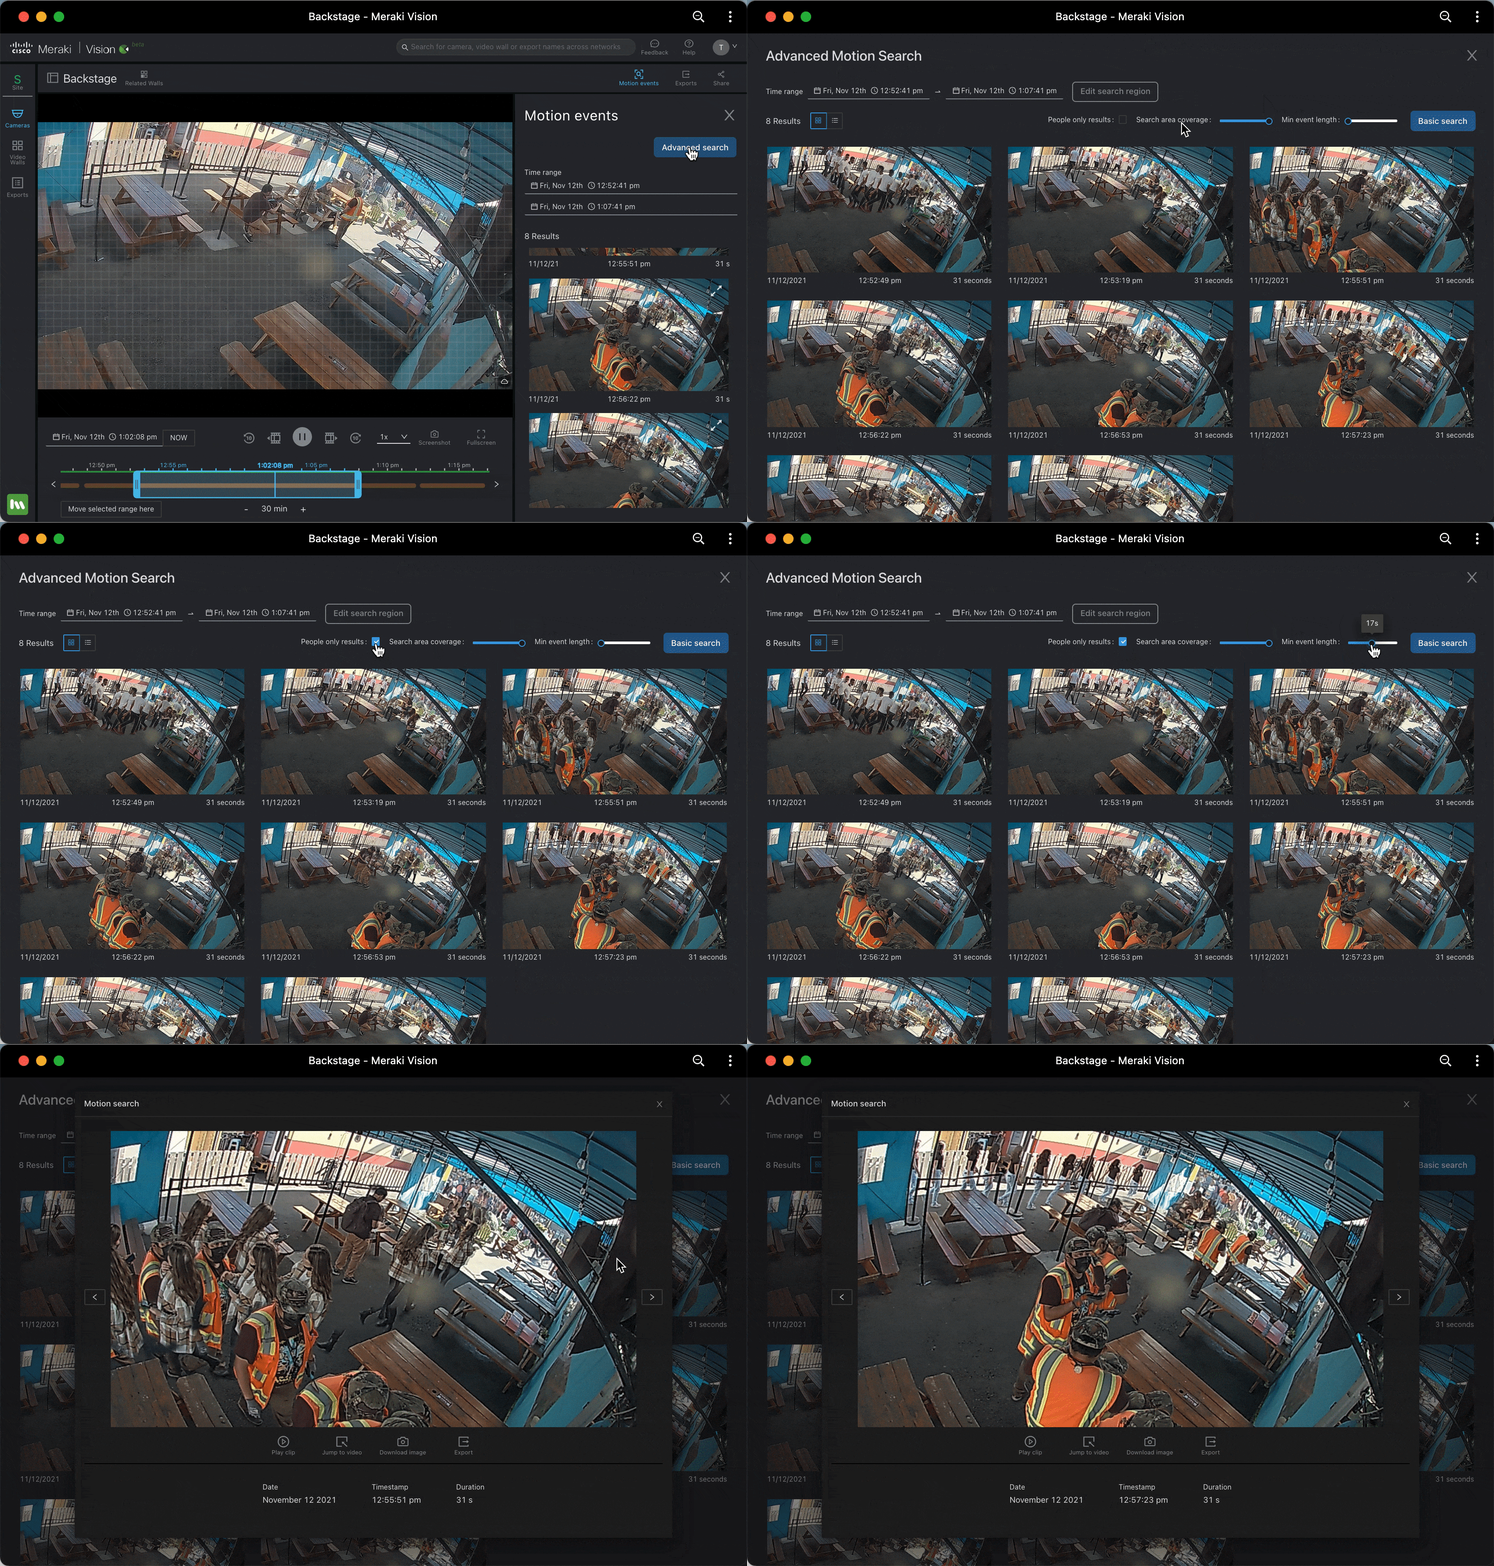
Select Advanced Search for a larger, more focused motion search experience with a larger grid view and more filters.
The motion search results are provided in the form of motion recap images. These represent an entire motion event in a single frame.
- After you select a result, you can play it back
- From here, you can download the motion recap image
- You can directly export the entire event
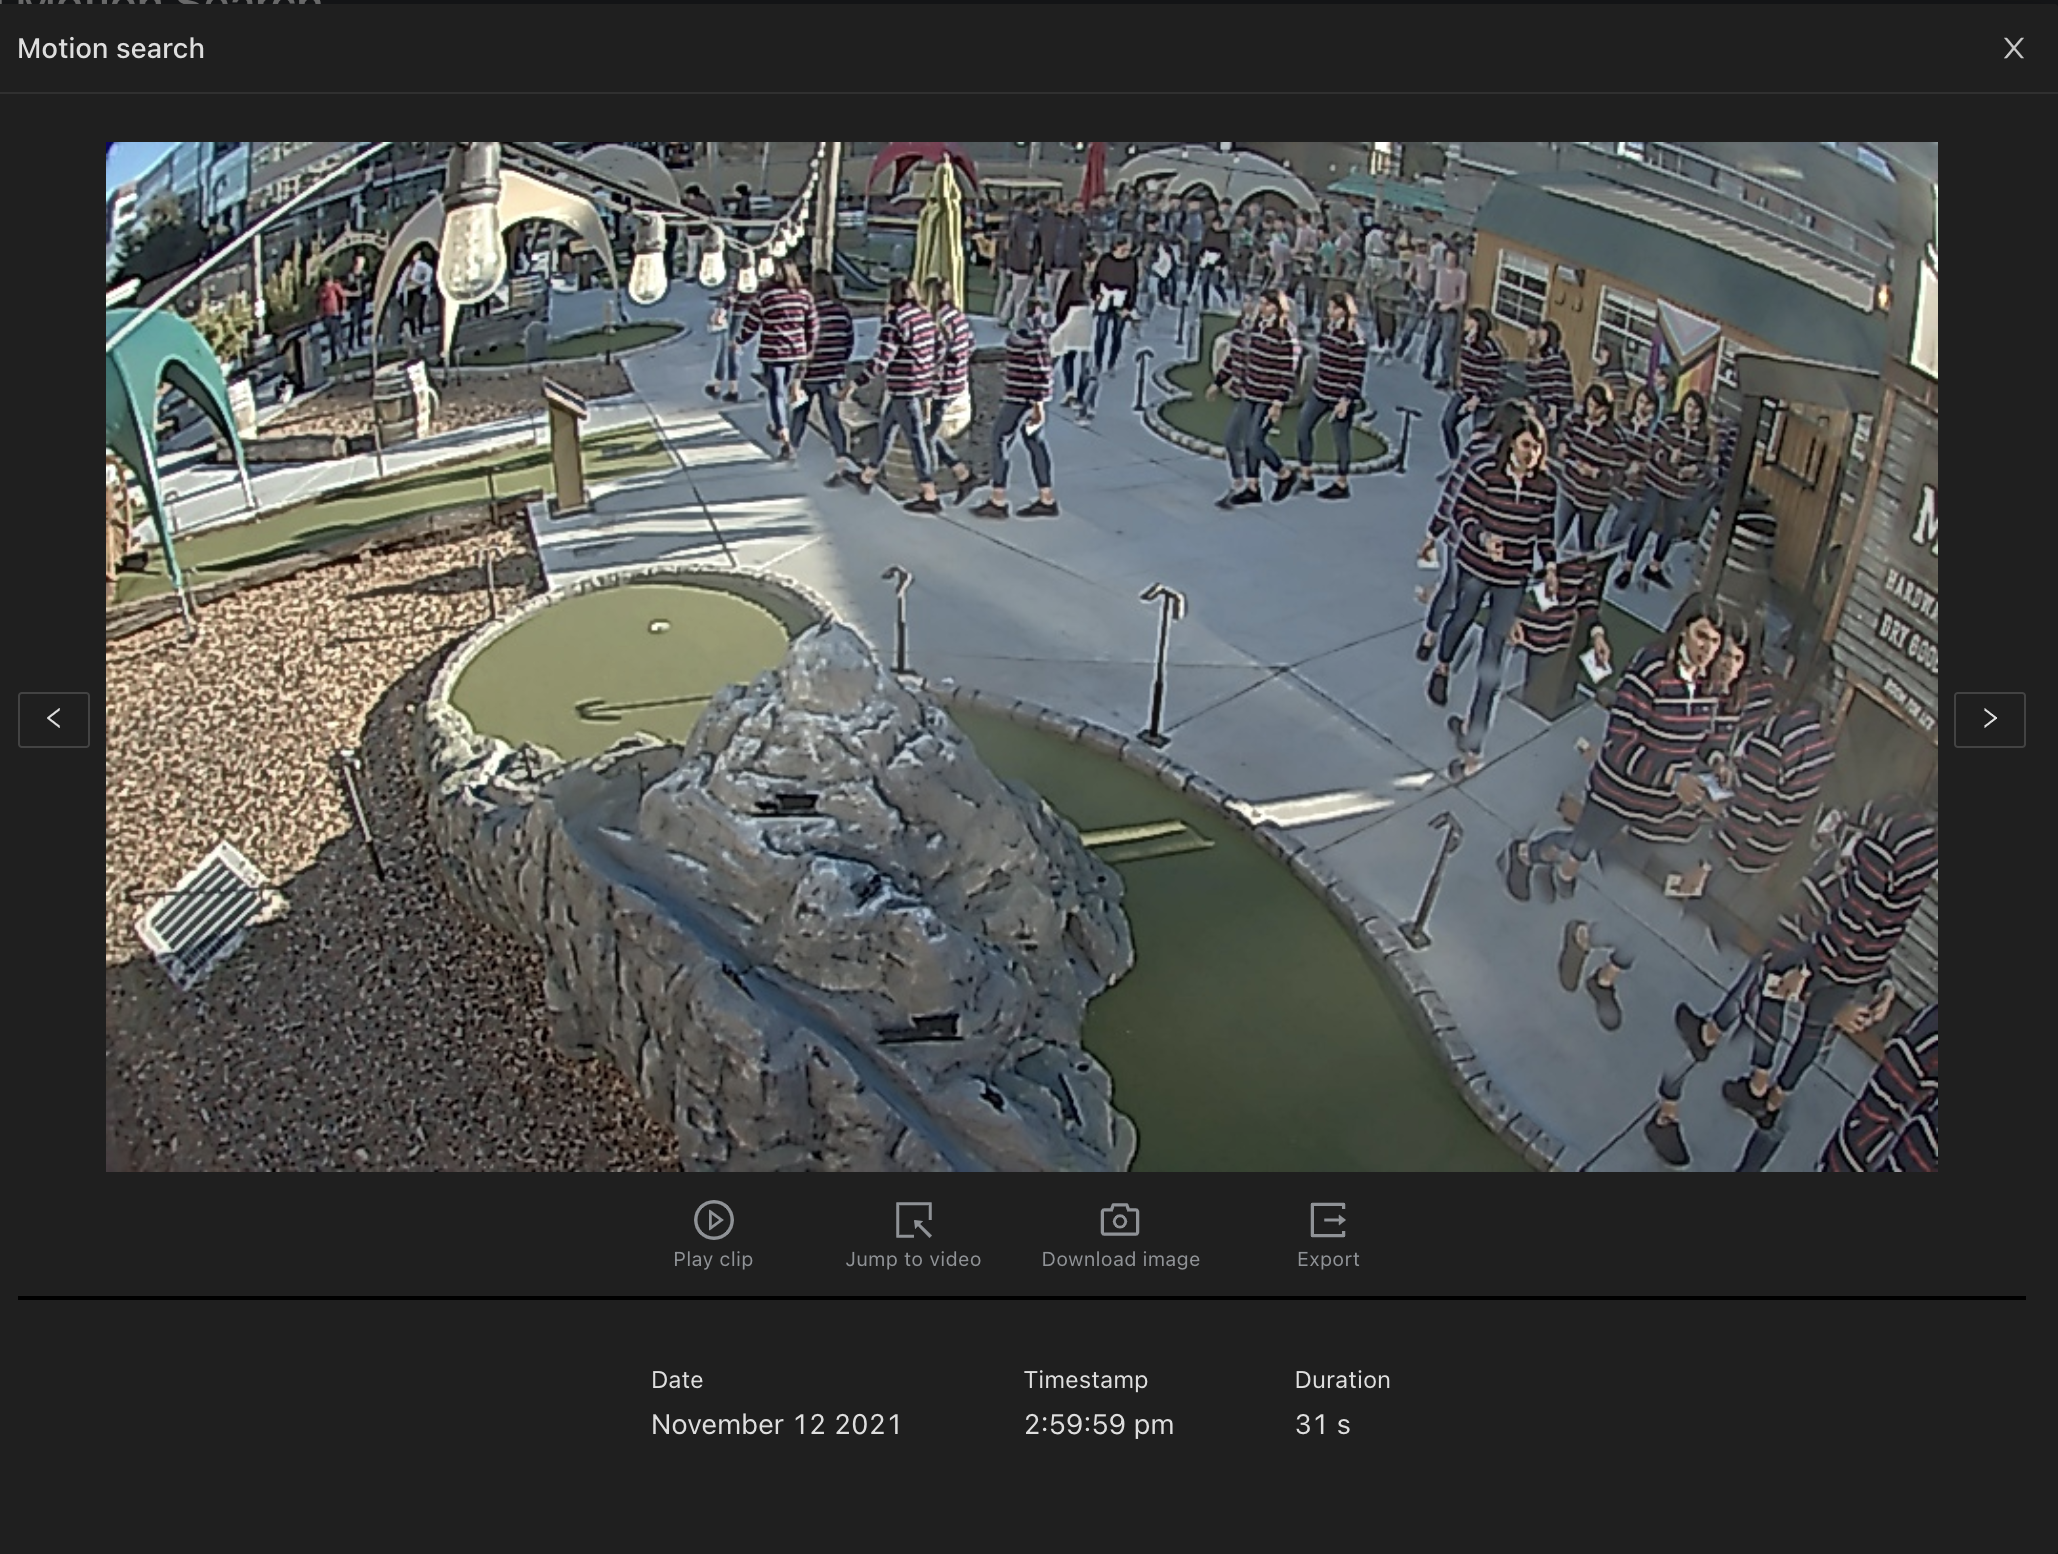
If you have Event Search enabled through the Meraki Early Access page, the portal directs you to a different tab.
Retrieve and share footage
You have many options to retrieve footage:
- The screenshot button on the video timeline captures a single frame from what you are viewing.
-
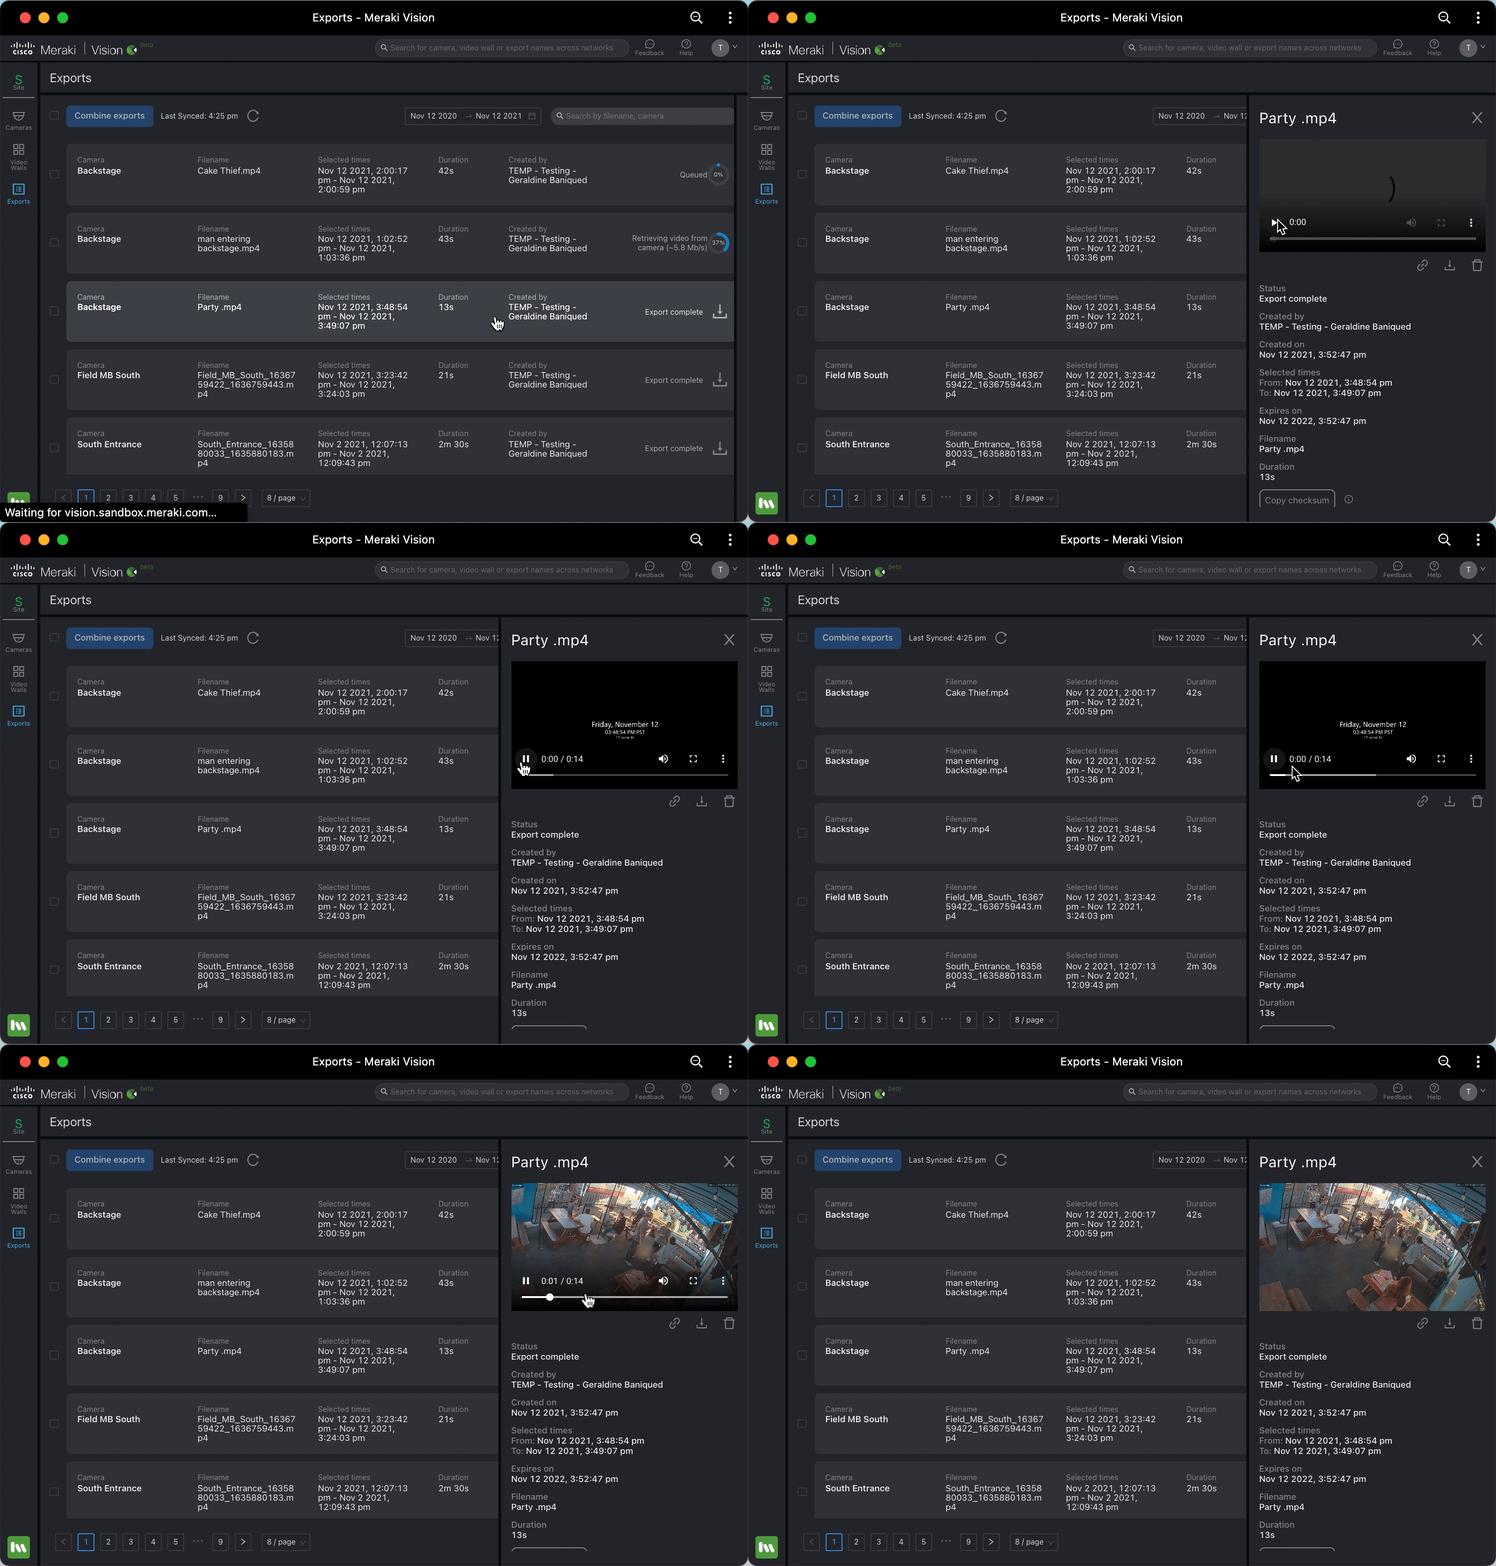
Export allows you to rename the export, select a duration, and save a video file to share later
- View and share these exports from that same drawer, or on the network-wide exports page
- From the network-wide exports page, you can also combine exports into a single file
- You can also delete exports, or get the checksum to verify integrity
-
Share allows you to share a link to the video you are watching with another Meraki Vision portal user
Create video walls
You can create video walls for single and multi-network video walls
Miscellaneous
The following features are on the top-right of the interface:
- Get help (link to documentation) and information about keyboard shortcuts.
- Give feedback.
- Log out.
Managing permissions to the interface
Permissions are managed on the dashboard. All users are given access to both the dashboard.meraki.com and the vision.meraki.com experience. There is no way to prevent users from using the dashboard experience and using only Meraki Vision. Read the full article on camera permissions.
SSO login from the IdP provider is possible. Read this article for more info.
Steps to use the interface on a browser
You can use the Meraki Vision portal like any other website. You can also open the interface through links on the dashboard.
To use the portal in a browser:
-
Go to vision.meraki.com.
-
Log in with your Meraki dashboard credentials.
Permissions are managed on the dashboard.

Steps to use the interface as an app
There are links to the interface from the dashboard. You can also download the Meraki Vision portal as a Progressive Web App (PWA).
To download and open the app:
- Select the button to the right of the address bar to download the app.
- Add the app to your dock or desktop.
- Open the app from your dock or desktop the next time you use it.


Provide feedback
Use the Feedback button on the top-right corner to send Meraki your thoughts on the interface.
Changelog
Refer to the full list of Meraki Vision Changelog for more information.
Additional resources
Refer to the FAQ here for more information.