Cisco Secure Client Azure AD SAML Configuration
Cisco Secure Client Microsoft Entra ID (Azure AD) SAML Configuration
This document highlights how to setup authentication with Microsoft Entra ID (Azure Active Directory) using SAML for Cisco Secure Client VPN on the MX Appliance. SAML is an XML-based framework for exchanging authentication and authorization data between security domains. It creates a circle of trust between the user, a Service Provider (SP), and an Identity Provider (IdP) which allows the user to sign in a single time for multiple services.
SAML authentication requires MX firmware version 16.16+ or 17.5+.
When configuring Cisco Secure Client SAML authentication with Azure AD for multiple networks, each network requires a separate Azure AD enterprise application.
For additional information, refer to the AnyConnect configuration guide.
Add Cisco Secure Client from the Microsoft App Gallery
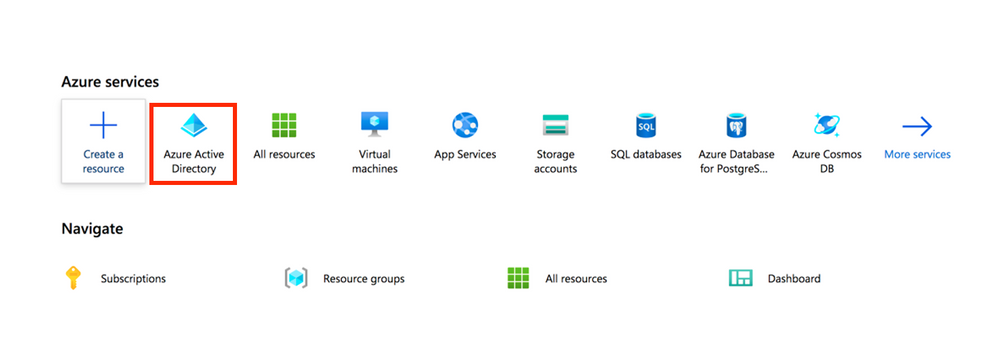
Step 1. Log in to Azure Portal and select Microsoft Entra ID (Azure Active Directory).
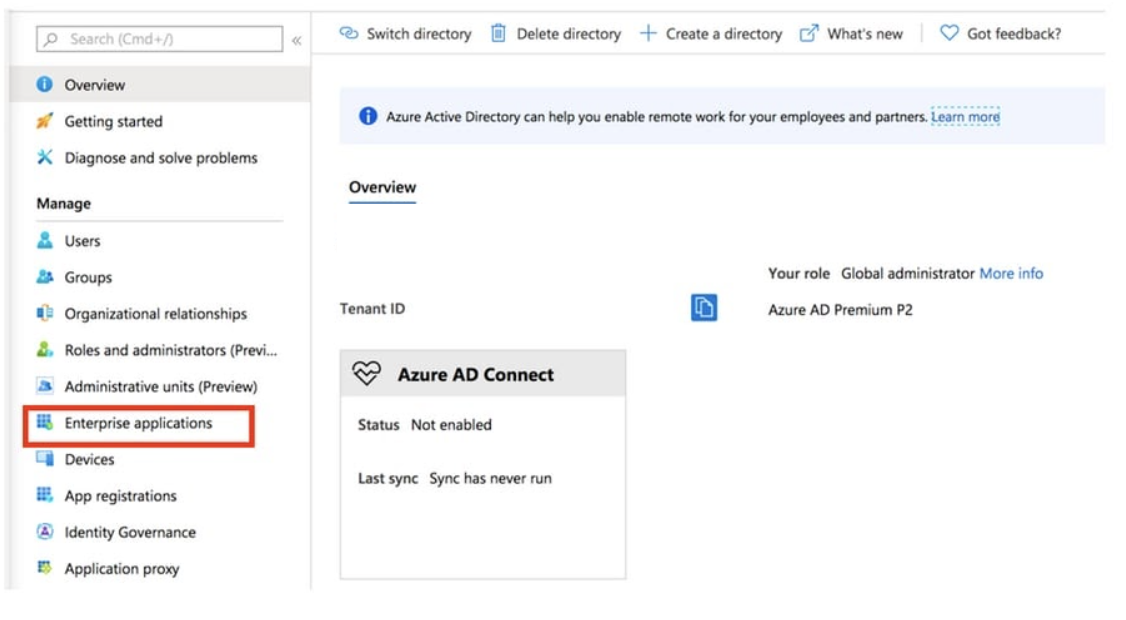
Step 2. As shown in this image, select Enterprise Applications.
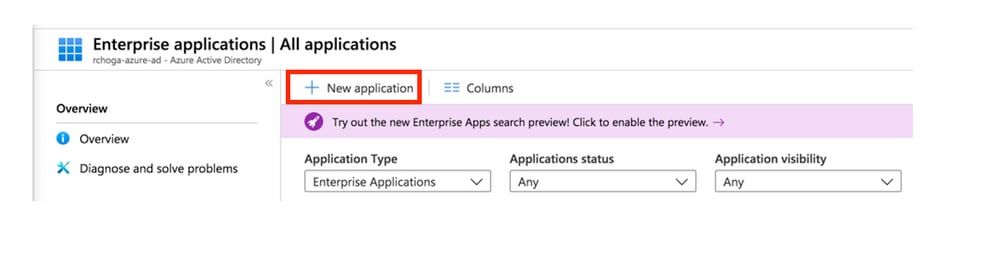
Step 3. Now select New Application, as shown in this image.
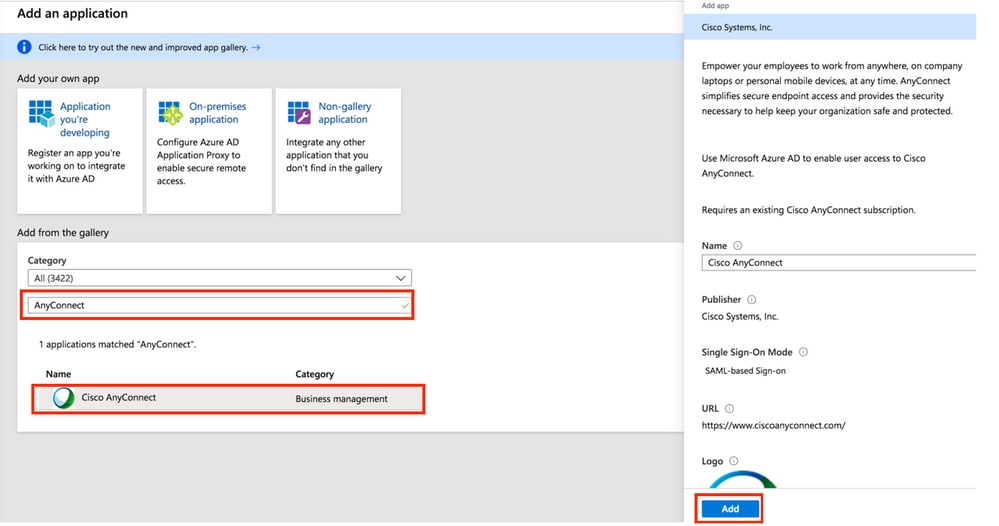
Step 4. In the Add from the gallery section, type Cisco Secure Client in the search box, select Cisco Secure Client from the results panel, and then add the app.
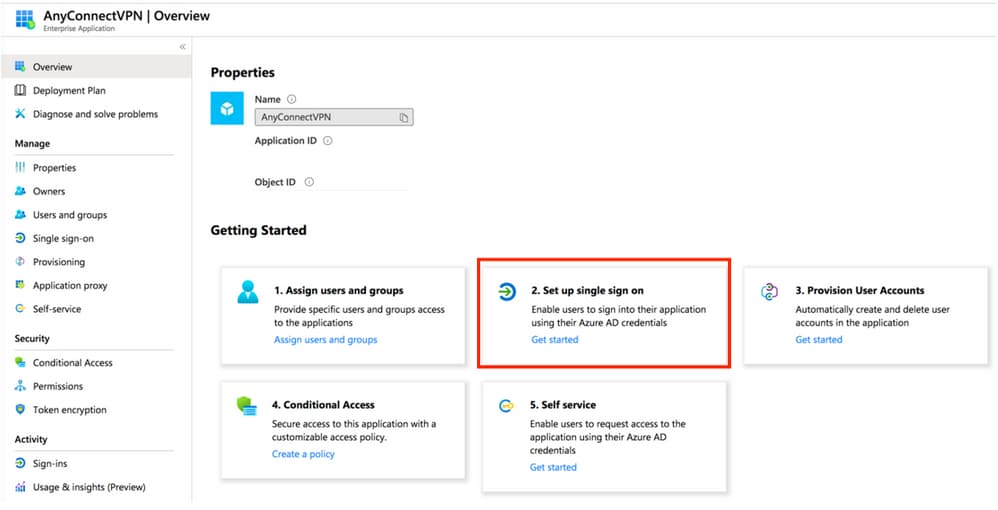
Step 5. Select the Single Sign-on menu item, as shown in this image.
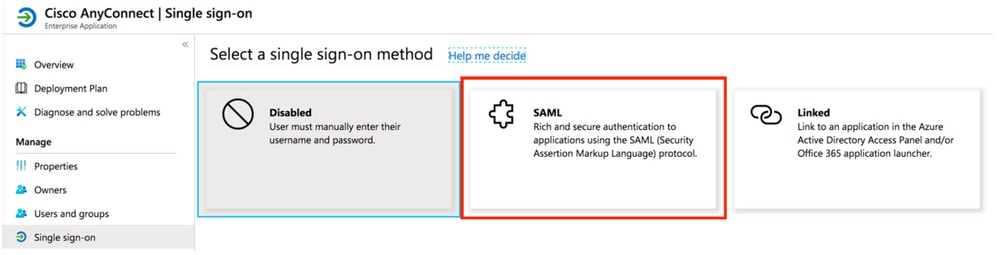
Step 6. Select SAML, as shown in the image.
Step 7. Edit Section 1 with these details.
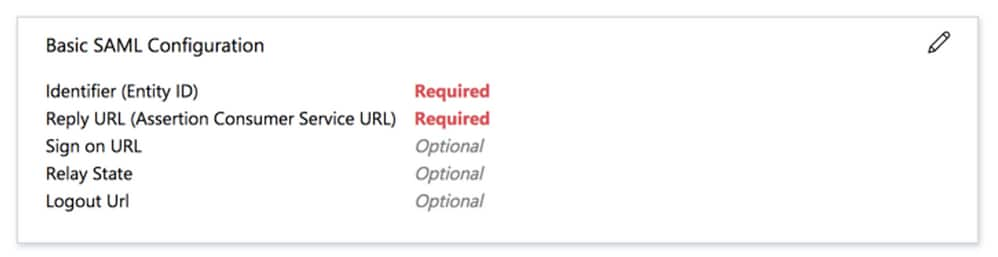
If my Cisco secure Connect Server URL is "vtk-qpjgjhmpdh.dynamic-m.com" (this URL is different for every network), the Entity ID and Reply URL will be configured as follows:
a. Identifier (Entity ID) - https://vtk-qpjgjhmpdh.dynamic-m.com/saml/sp/metadata/SAML
b. Reply URL (Assertion Consumer Service URL) - https://vtk-qpjgjhmpdh.dynamic-m.com/saml/sp/acs
If a port other than the default 443 is used the URLs should include the custom port. For example, if port 4433 is used the above URLs would look like https://vtk-qpjgjhmpdh.dynamic-m.com:4433/saml/sp/metadata/SAML and https://vtk-qpjgjhmpdh.dynamic-m.com:4433/saml/sp/acs
If a custom hostname is utilized the Identifier and Reply URLs should contain this custom hostname and not the Meraki DDNS name.
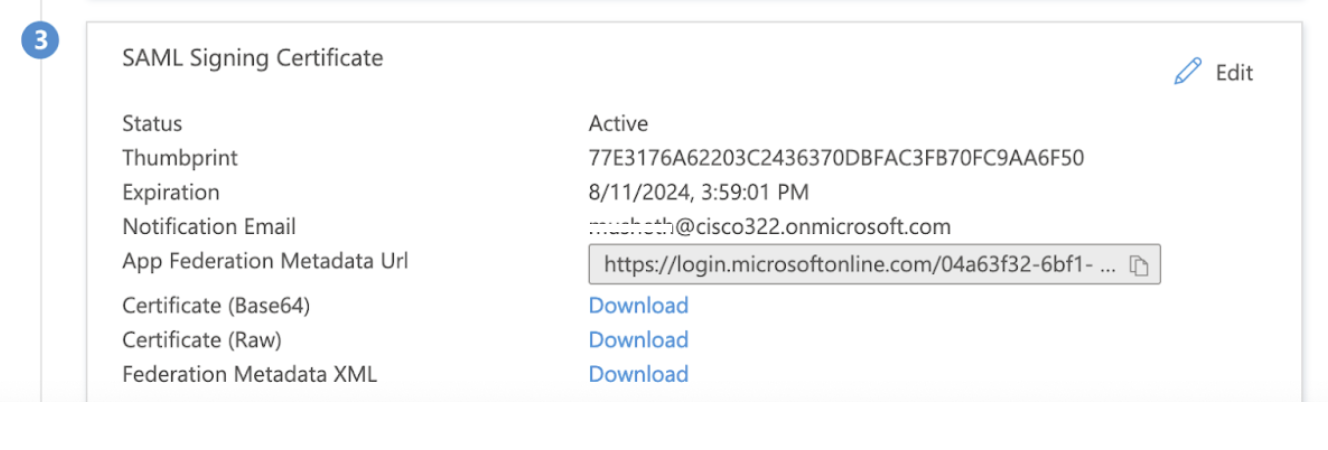
Step 8. In the SAML Signing Certificate section, Download the Federation Metadata XML file and save it on your computer.
Step 9. Configure your Cisco Secure Connect Server on the Meraki Dashboard
-
Set Authentication Type to SAML

-
Configure your Cisco Secure Connect URL - for example https://vtk-qpjgjhmpdh.dynamic-m.com (this URL is different for every network)
(add “:port” to the end of the URL if using a port other than the default port 443)
Please ensure your Cisco Secure Connect URL starts with "https://"

NOTE: If a custom hostname is utilized it would be entered here. -
Upload the Federation Metadata XML file downloaded in step 8 above

-
Save your configuration.


Assign Microsoft Entra ID (Azure AD) User to the App
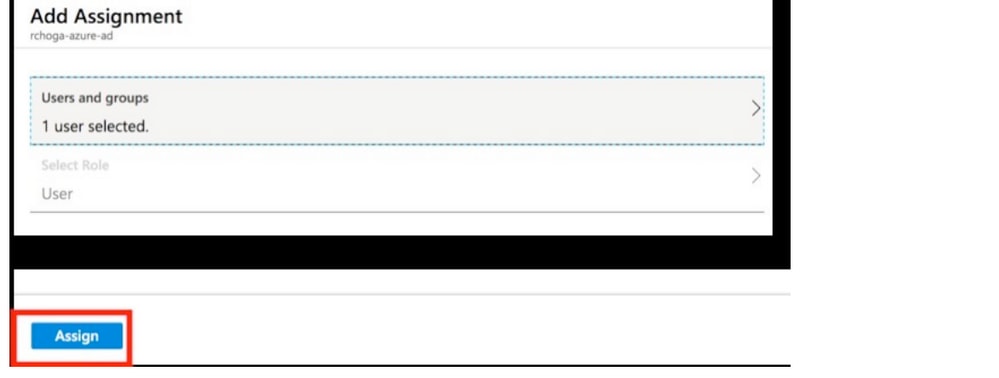
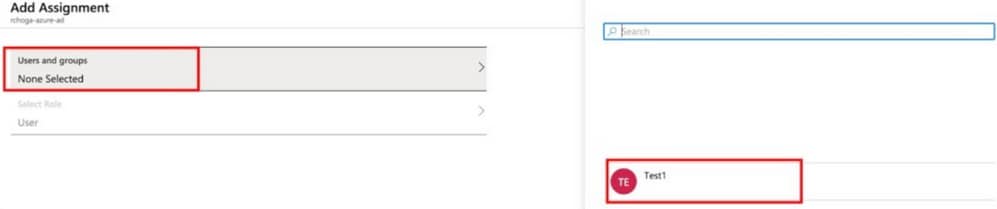
In this section, Test1 is enabled to use Azure single sign-on, as you grant access to the Cisco Secure Connect app.
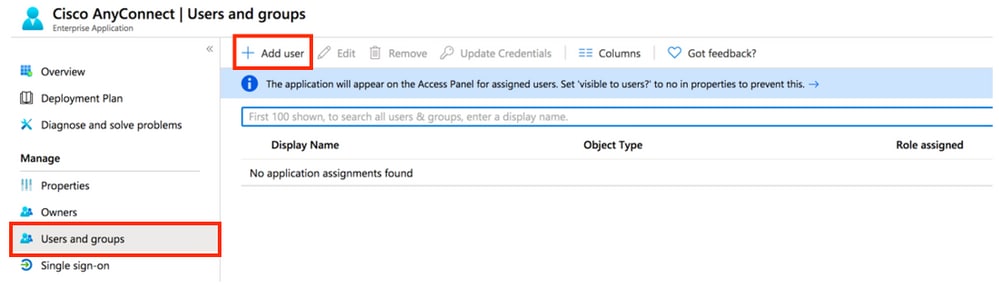
Step 1. In the app's overview page, select Users and groups and then Add user.
Step 2. Select Users and groups in the Add Assignment dialog.
Step 3. In the Add Assignment dialog, click the Assign button.