

Managing and Troubleshooting AnyConnect Certificates
Overview
This guide covers MX WAN appliance support, configuration, and certificate troubleshooting for AnyConnect. For more information about other AnyConnect configuration items, refer to the AnyConnect Configuration Guide.
AnyConnect uses Transport Layer Security (TLS), formerly known as Secure Sockets Layer (SSL), for tunnel negotiation, so certificates are required. AnyConnect servers use certificates in two ways:
Managing AnyConnect certificates
AnyConnect certificates identify the AnyConnect server and authenticate clients. You can provision the AnyConnect server certificate automatically or manually, and you can optionally configure client certificate authentication for additional security.
AnyConnect server certificate
The AnyConnect server certificate identifies the AnyConnect server and is mandatory for the server to function. You can provision the server certificate in two ways: auto-generated (auto-enrolled) or custom (manually generated).
Auto-generated server certificate
Auto-generated server certificates are the default configuration when you enable AnyConnect on the dashboard. The MX automatically enrolls in a publicly trusted server certificate using the Dynamic DNS (DDNS) hostname of the Cisco Meraki network (for example, boston-njndubu.dynamic-m.com). The publicly trusted certificate renews automatically, so dashboard administrators do not need to manage DNS records or interact with public certificate authorities (CAs) to get a signed certificate.
Because the DDNS hostname can be difficult to remember, we recommend using an AnyConnect profile to create a DDNS alias and simplify the user experience. For more information about creating profiles, see How to Create a Profile.

You can configure the DDNS hostname on MX appliances in Passthrough/VPN Concentrator mode when AnyConnect is enabled. As noted in the Environment section, the dashboard does not support automatic certificate generation for networks hosted on dashboard.meraki.cn, dashboard.meraki.ca, or dashboard.meraki.in.
If your MX is in HA mode with a virtual IP and sits behind a NAT device, use the custom certificates feature to manage certificates and DNS records, because automatic DDNS hostname certificates might not suffice.
Auto-generated certificates have the following properties:
- The server certificate is valid for 90 days.
- A factory reset does not remove the certificate from the MX.
- If you replace a device through the Return Merchandise Authorization (RMA) process, the new device automatically requests a new certificate.
Custom server certificate
Custom server certificates let you use a DNS name of your choice. When you use a custom certificate, you are responsible for renewing the certificate, managing DNS records, and signing the certificate with a CA.
Custom certificates require MX firmware 16.16 or later. Custom hostname certificates do not renew automatically, so you must renew certificates manually and manage the DNS record that resolves your hostname to the MX IP address on the internet.
The MX supports custom certificates in HA mode. You must download a certificate signing request (CSR) and upload a certificate for both the primary and spare MX appliances. The dashboard only displays the custom certificate upload tab for the primary and spare appliances when the MX is in HA mode.
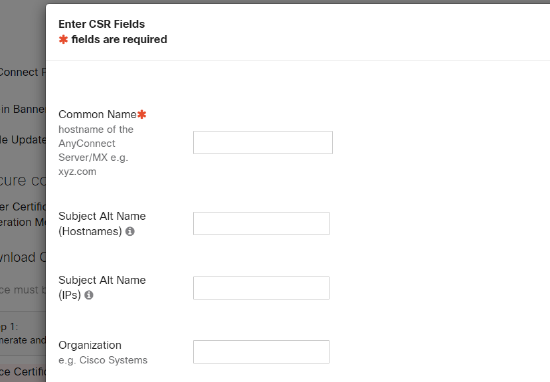
To use a custom certificate, you must generate a CSR on the MX device and then have a CA sign it. You cannot upload a certificate without first generating the CSR on the MX device.
For a high-availability AnyConnect VPN setup that uses a virtual IP, give each firewall a unique Common Name (CN) and include the shared DNS name in the Subject Alternative Name (SAN) field. For example:
- Primary firewall certificate: CN=primaryvpn.company.com, with SANs including primaryvpn.company.com and vpn.company.com.
- Secondary firewall certificate: CN=secondaryvpn.company.com, with SANs including secondaryvpn.company.com and vpn.company.com.
This configuration lets users connect to vpn.company.com and maintain a trusted connection whether they reach the primary or secondary firewall.
The MX does not support wildcard certificates. For example, use vpn.company.com instead of *.company.com.
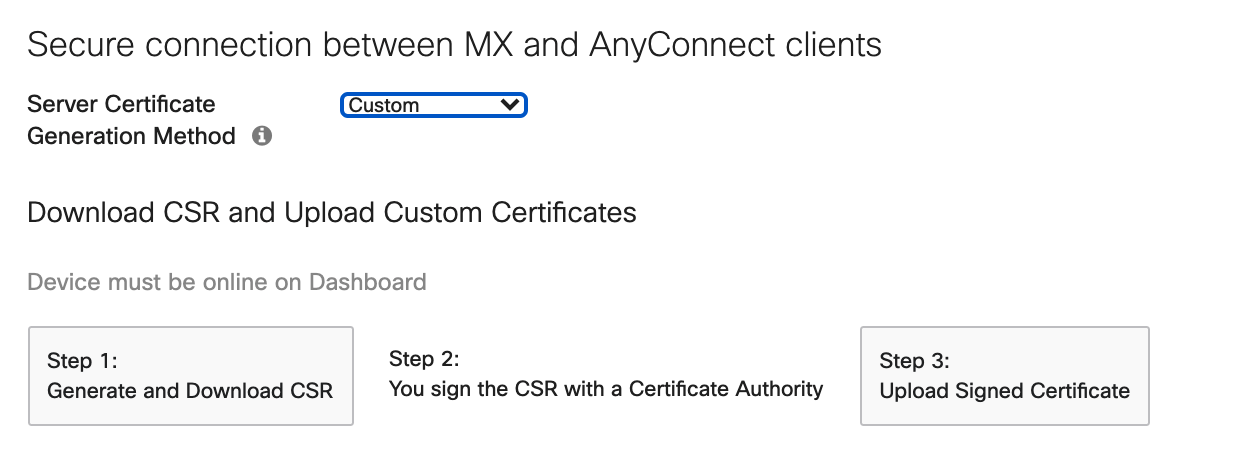
Downloading the CSR
Administrators can generate a CSR and have a public CA sign it.
Uploading the signed certificate
The dashboard requires a PEM-encoded certificate (.pem or .crt) for upload. A PEM-encoded certificate looks like this in a text editor:

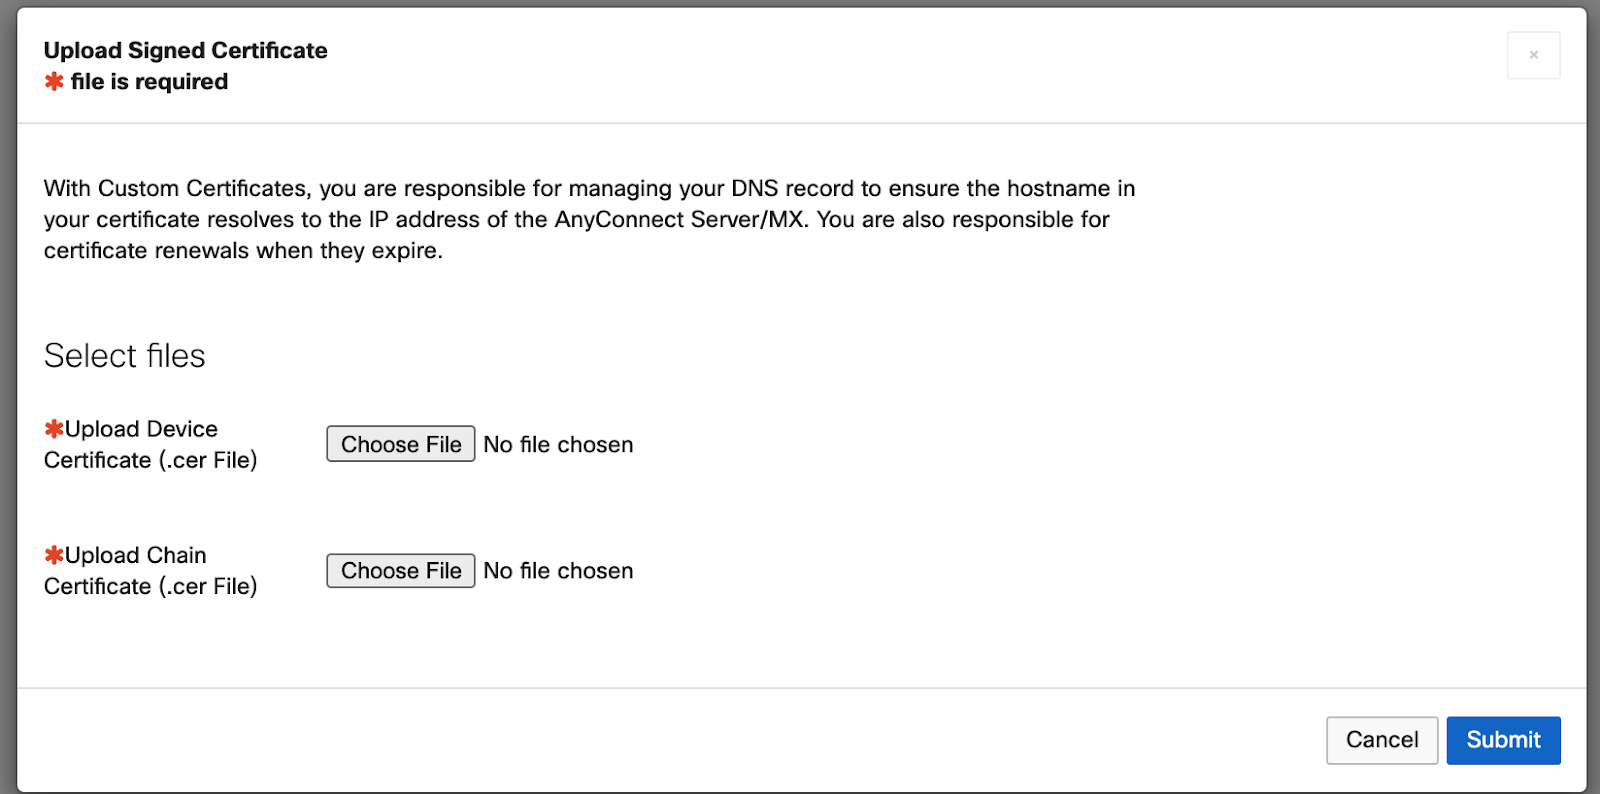
Use the Upload device certificate option to upload the certificate that identifies your appliance to AnyConnect clients. The Common Name and Alternate Name values in the Subject field of this certificate must match the names you configure your AnyConnect clients to accept. The Issuer field on this certificate must match the Subject field of the certificate you upload in the next step.\
Use the Upload CA certificate or chained certificate option to establish a full chain of trust to the CA. Some CAs require only a CA certificate, while others require an intermediate certificate or a certificate chain, depending on the sub-CA that signed the certificate. The dashboard only accepts PEM-encoded certificates like .pem or .crt.
A chain certificate must establish a full chain of trust back to a root CA. CAs self-sign such certificates, as the following example demonstrates:
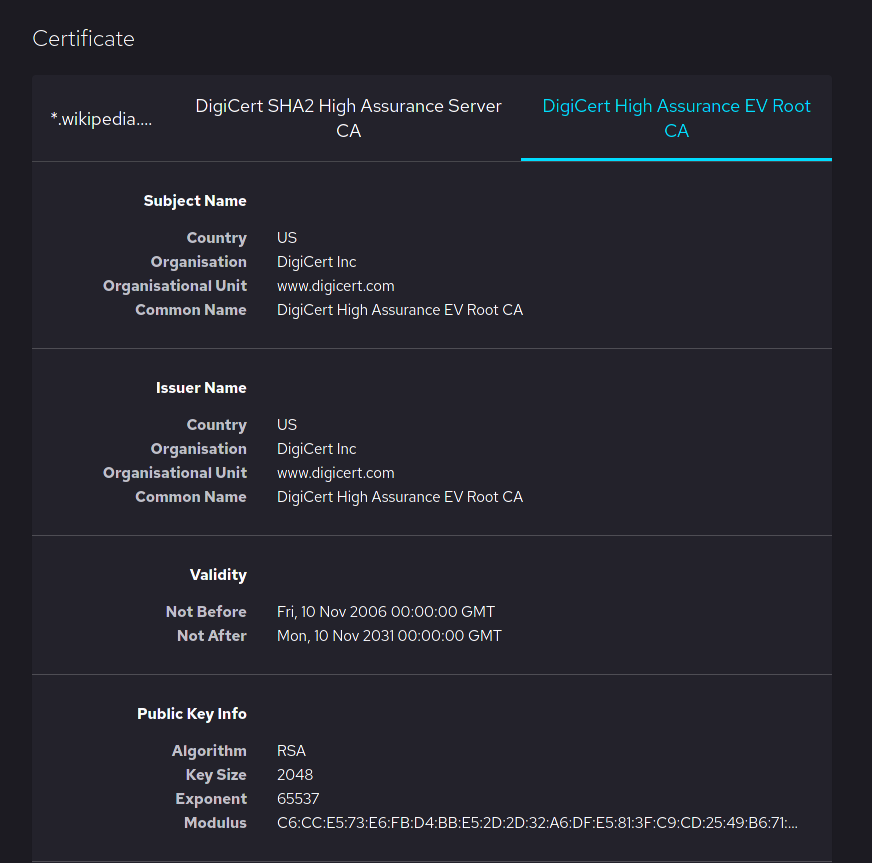
In a self-signed certificate, the Subject Common Name and Issuer Common Name are equal. If you upload an incomplete or invalid chain of trust, the dashboard displays the error "Failed verifying Device Cert with Cert Chain" during upload. Contact your certificate provider with questions about obtaining this type of certificate.
Client certificate authentication
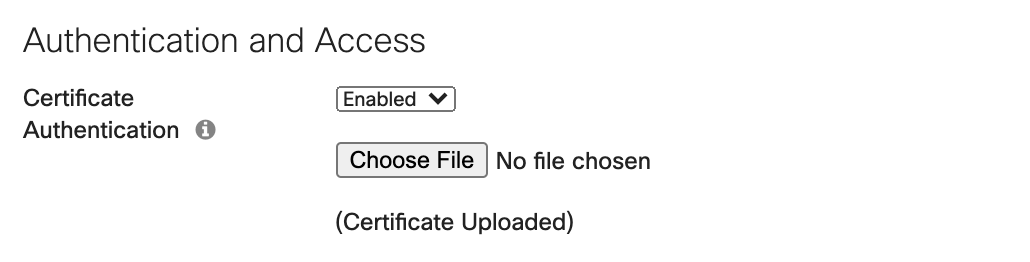
The AnyConnect server on the MX supports client certificate authentication as an optional authentication factor. When you enable certificate authentication, the AnyConnect server uses the uploaded trusted CA certificate to validate authenticating clients before requesting user credentials.
To configure certificate authentication, upload a .pem or .crt file of the root CA certificate to the MX, and install a certificate signed by the same root CA on the end user's device.
Certificate authentication configuration
The dashboard requires a PEM-encoded certificate (.pem or .crt) for upload. A PEM-encoded certificate looks like this in a text editor:
Upload CA certificate required to authenticate users.
Client device configuration
After you configure the AnyConnect server, provision the user's device with a certificate signed by the CA certificate you uploaded to the AnyConnect server. For example, on a Windows machine, run MMC, add the Certificates snap-in, navigate to Personal > Certificates, and import or request a new certificate.
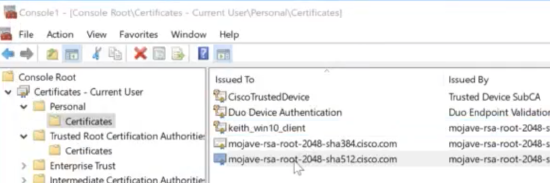
After you provision the certificate, only devices with a certificate signed by the root CA on the AnyConnect server can authenticate to the VPN. Administrators commonly use client certificate authentication to filter non-corporate devices from authenticating to the VPN.
AnyConnect on the MX does not support certificate-only authentication. Users must enter credentials after certificate authentication succeeds. If certificate authentication fails, the AnyConnect client reports a certificate validation failure and does not request user credentials.
Certificate store override
Certificate store override lets an administrator direct AnyConnect to use certificates in the Windows machine (local system) certificate store for client certificate authentication. Certificate store override applies only to SSL connections, which the UI process initiates by default. This feature in the AnyConnect profile does not apply when you use IP Security (IPsec) with Internet Key Exchange version 2 (IKEv2).
You must have a predeployed profile with this option enabled to connect with Windows using a machine certificate. If this profile does not exist on a Windows device before connection, the device cannot access the certificate in the machine store, and the connection fails.
Troubleshooting AnyConnect Certificates
Troubleshooting auto-generated certificate issues
When you configure AnyConnect on your MX, the MX generates a temporary self-signed certificate to start receiving connections. The MX then initiates enrollment for a publicly trusted certificate, which takes about 10 minutes to complete after you enable AnyConnect. If you try to connect before a publicly trusted certificate is available, you see an "Untrusted Server Certificate" message. After enrollment completes, the AnyConnect server replaces the self-signed certificate with the publicly trusted certificate.
Issue: The user continues to see an "Untrusted Server Certificate" message more than 10 minutes after enabling AnyConnect.
Troubleshooting steps
Ensure the device is online on the dashboard
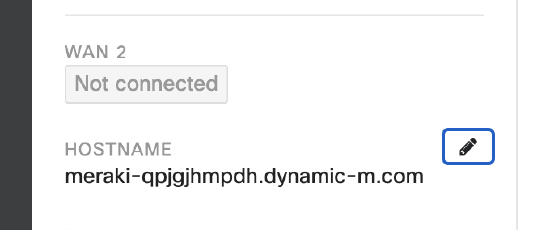
- Ensure DDNS is enabled and resolves to the MX IP, and connect using the DDNS hostname instead of the MX IP address. Connecting with the IP address causes a certificate error even when the MX has a publicly trusted certificate.
- Connect to the MX from different devices to check whether they all report the MX as an "Untrusted Server." Devices should have HydrantID Server CA O1 certificates by default. If only some devices show this error, check the Trusted CA folder on your client device; if you do not see the HydrantID certificates, update your browser to the latest version.
- In rare cases, download the root CA certificate and push it to the end device so the device trusts the AnyConnect server certificate. To identify which root CA to download, connect to the DDNS hostname or IP address of the MX, click Details on the Untrusted Server message, and check the Issuer field to identify the required root CA. Download the root CA certificate and push it to the client.
Troubleshooting custom certificate issues
Troubleshooting steps
- Open the certificate in a text editor to verify it uses the PEM format (.pem or .crt).

- Ensure your MX is running firmware 16.16 or later (or 17.6 or later for custom certificate troubleshooting), and ensure AnyConnect clients connect using the custom DNS name instead of the MX DDNS hostname.
- If the CSR signed by the CA does not match the CSR on the MX, the dashboard reports an error; regenerate and sign a new CSR.
- If you upload an invalid chain or certificate, the dashboard reports an error; re-upload the root CA certificate.
Escalation
Before filing a bug report, verify that the customer has the correct chain and certificate and is not running into an existing bug or known issue. If the customer has the correct chain and certificate and the issue persists, file a bug report.
Troubleshooting client-side certificate authentication issues
Troubleshooting steps
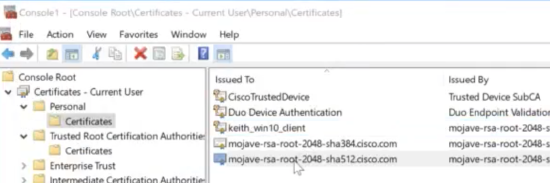
Verify that the device attempting to connect has a certificate signed by the trusted CA uploaded to the MX in the Personal > Certificates folder
-
Upload a PEM-encoded certificate (.pem or .crt) to the Client certificate authentication option on the AnyConnect Settings page