
Configuring Sentry Policies
Sentry Policies create mappings between group policies for Meraki networking equipment and tags in Systems Manager. This allows for a form of dynamic policy configuration, akin to Cisco Identity Services Engine, without needing a dedicated box in your network. Group policy settings like traffic shaping, scheduling, security and VLAN rules can apply to devices based on any of their tags in Systems Manager. By adding dynamic tags, such as security policies, devices can automatically move between group policies based on the device's posture.
To set up a Sentry Policy, navigate to Network-wide > Configure > Group Policies. Select the target Systems Manager network followed by a scope, the tags for the devices enrolled in SM, and finally the group policy to apply to devices in that scope. See the group policy documentation for more information on the network-side setup.
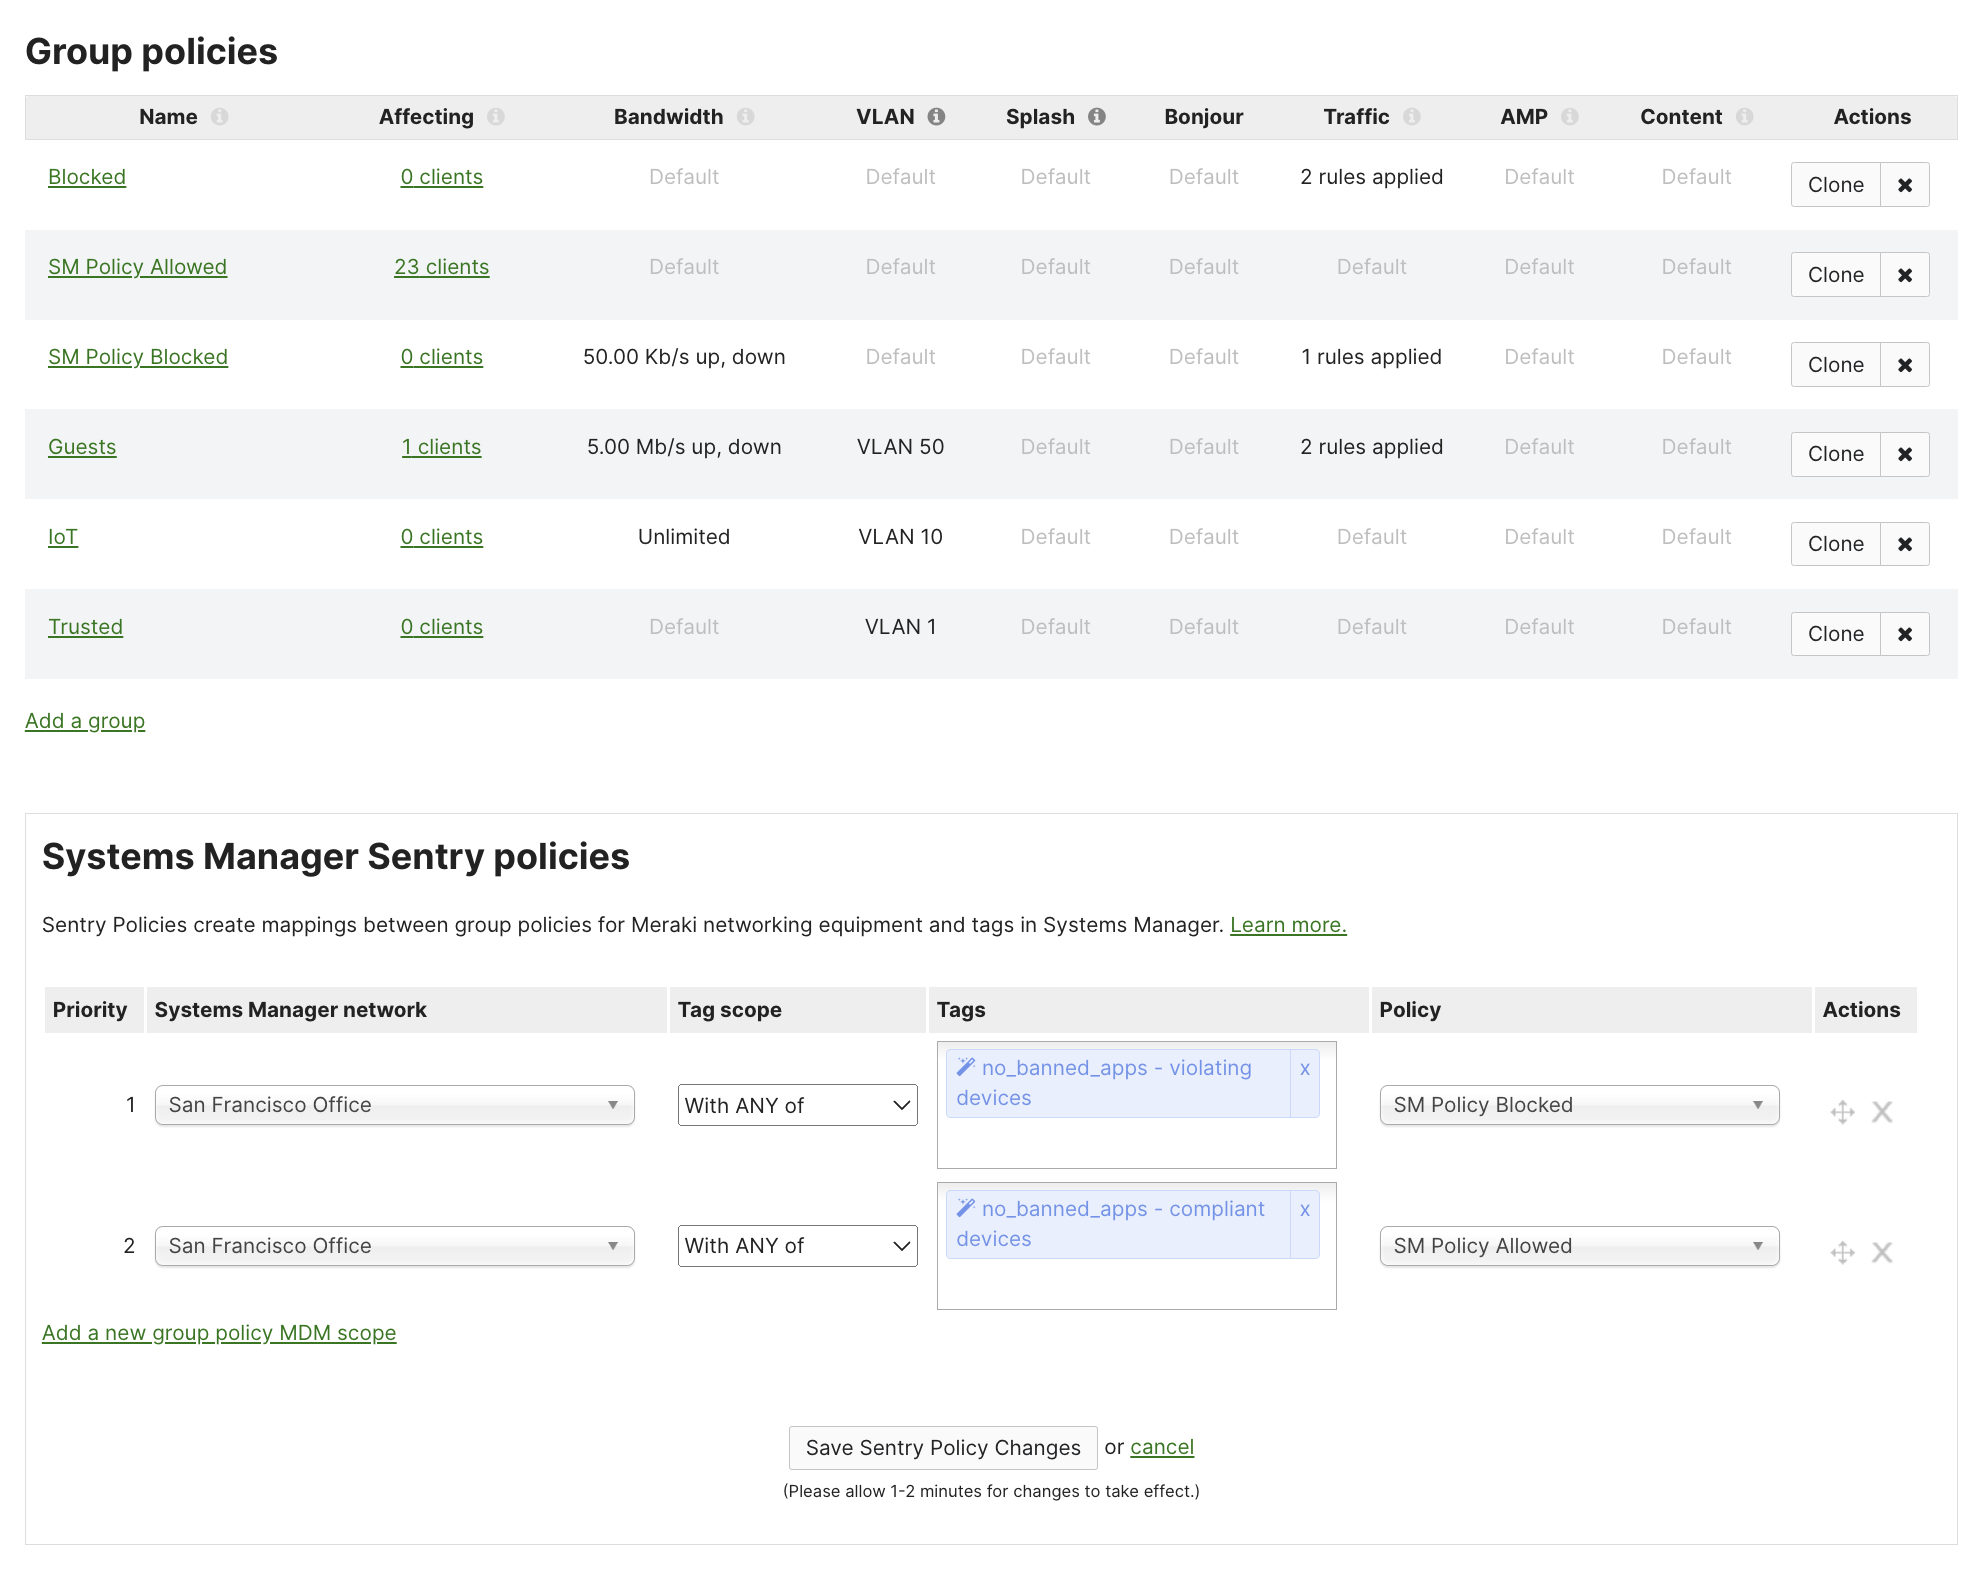
In the above example: devices which are enrolled in Meraki Systems Manager network "San Francisco Office" and have the Security Policy compliance no_banned_apps as compliant will be give then network group policy of SM Policy Allowed. Conversely, devices which are enrolled in Meraki Systems Manager network "San Francisco Office" and have the Security Policy compliance no_banned_apps as violating will be give then network group policy of SM Policy Blocked.
In this example, the tag no_banned_apps is a Meraki SM Security Policy. So no_banned_apps compliant/violating will automatically toggle on/off based on the device's posture via Meraki SM. Manual tags, Owner tags, or simply all devices enrolled in Meraki SM could also be used for a simpler approach.