

How to Assign a Static IP Address to a Switch
Overview
By default, when you set up a switch, it tries to attain connectivity via DHCP. You can also configure a static IP address through the Cisco Meraki dashboard or through the local configuration page.
If a static assignment fails, the switch automatically falls back on DHCP for its IP assignment.
Learn more with this free online training course on the Networking Learning Hub:
Step-by-step instructions
Configure a static IP address via dashboard
-
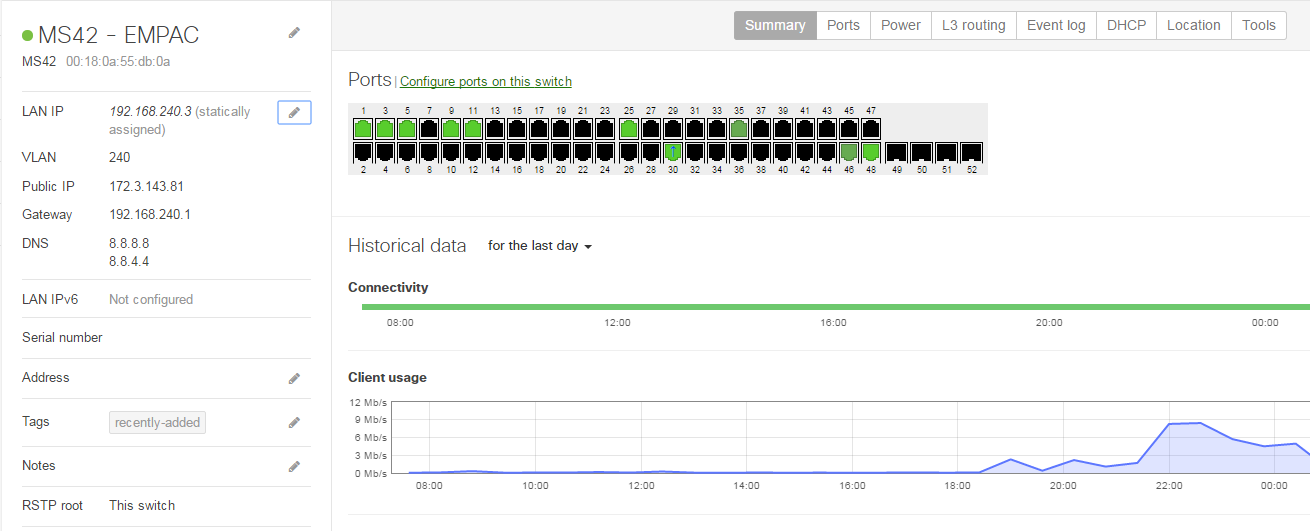
Navigate to Switch > Monitor > Switches.
-
Select the appropriate switch.
-
Select the pencil icon next to LAN IP.

Configure a static IP address via local IP assignment
-
Connect a client to the MS. Access the local status page via any ethernet port on the device.
-
Once you obtain an IP address, browse to the URL switch.meraki.com.
-
Select Uplink Configuration.
-
Enter your login credentials when prompted. If local login credentials were configured via dashboard, use these credentials. Otherwise, the default login is the device's serial number as the username and a blank password. Each device is labeled with its serial number on the bottom label.
-
On the Uplink Configuration page, set the needed connection information.
