

Troubleshooting RADIUS Authentication Issues
Overview
Use the RADIUS Issue Resolution Guide instead of this document. This document lists troubleshooting steps in random order and doesn't work as a standalone guide.
Troubleshoot RADIUS server configuration and connectivity
Troubleshooting steps
Follow these steps to troubleshoot RADIUS server configuration and connectivity issues:
- Confirm the SSID uses your RADIUS servers.
- Navigate to Wireless > Configure > Access control > [SSID name] and check the configuration:
- Legacy Access control page: Check the Association requirements section.

- New Access control page: Check the Security section.
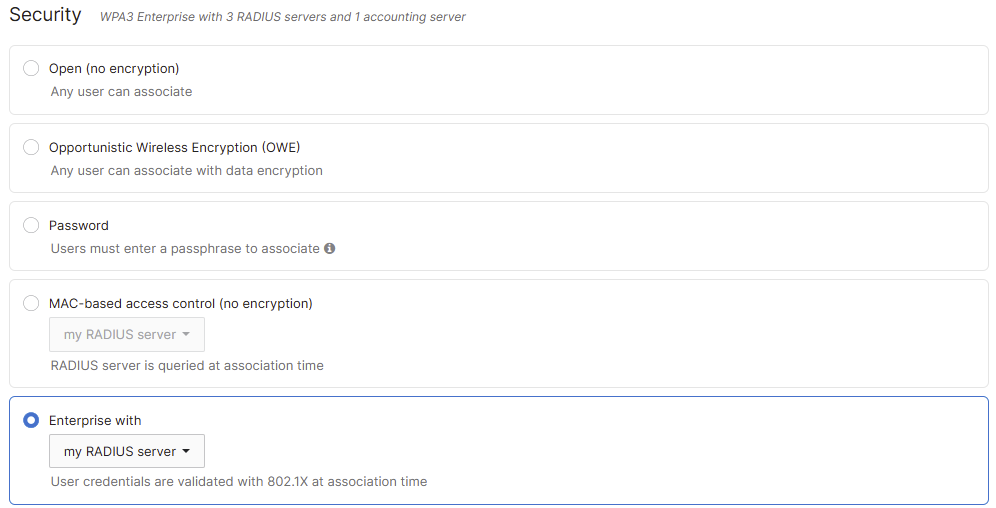
Record the configuration and continue to the next step.
- Verify the Cisco Meraki dashboard configuration.
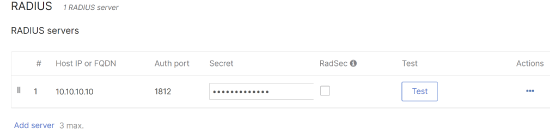
- Navigate to Wireless > Configure > Access control > [SSID name] > RADIUS and confirm the following:
- The RADIUS server IP address is correct.
- The port matches on both the dashboard and the RADIUS server.
- Navigate to Wireless > Configure > Access control > [SSID name] > RADIUS and confirm the following:
The secret matches on both the dashboard and the RADIUS server
| Legacy Access Control page | New Access Control page |
 |
 |
If the configuration is correct, continue to the next step.
- Ping the RADIUS server from the MR access point.
- Navigate to Wireless > Monitor > Access points > [access point name] > Tools > Ping, enter the RADIUS server's IP address, and click Ping. Record the results and continue to the next step.
The following image shows a successful ping from the new Access control page

The following image shows a failed ping.

Take note of the results and proceed to the next step in the RADIUS troubleshooting flow.
- Capture wired traffic on the access point port while you reproduce the issue:
- Disable the wireless adapter on your testing device.
- Navigate to Network-wide > Monitor > Packet capture
- Select the access point, set the interface to Wired, and
Select Start capture.

- Re-enable the wireless adapter on your device and reproduce the issue.
- Stop the capture.

- Open the capture in Wireshark. Use this filter:
ip.addr==192.168.128.254 && radius
(replace 192.168.128.254 with your RADIUS server IP)

Continue to the next step.
- Check whether the capture shows an access-accept, access-reject, or no response:
- Access-accept: If you see an access-accept message and still can't connect to the SSID, go to Troubleshoot access-accept received but client cannot connect.
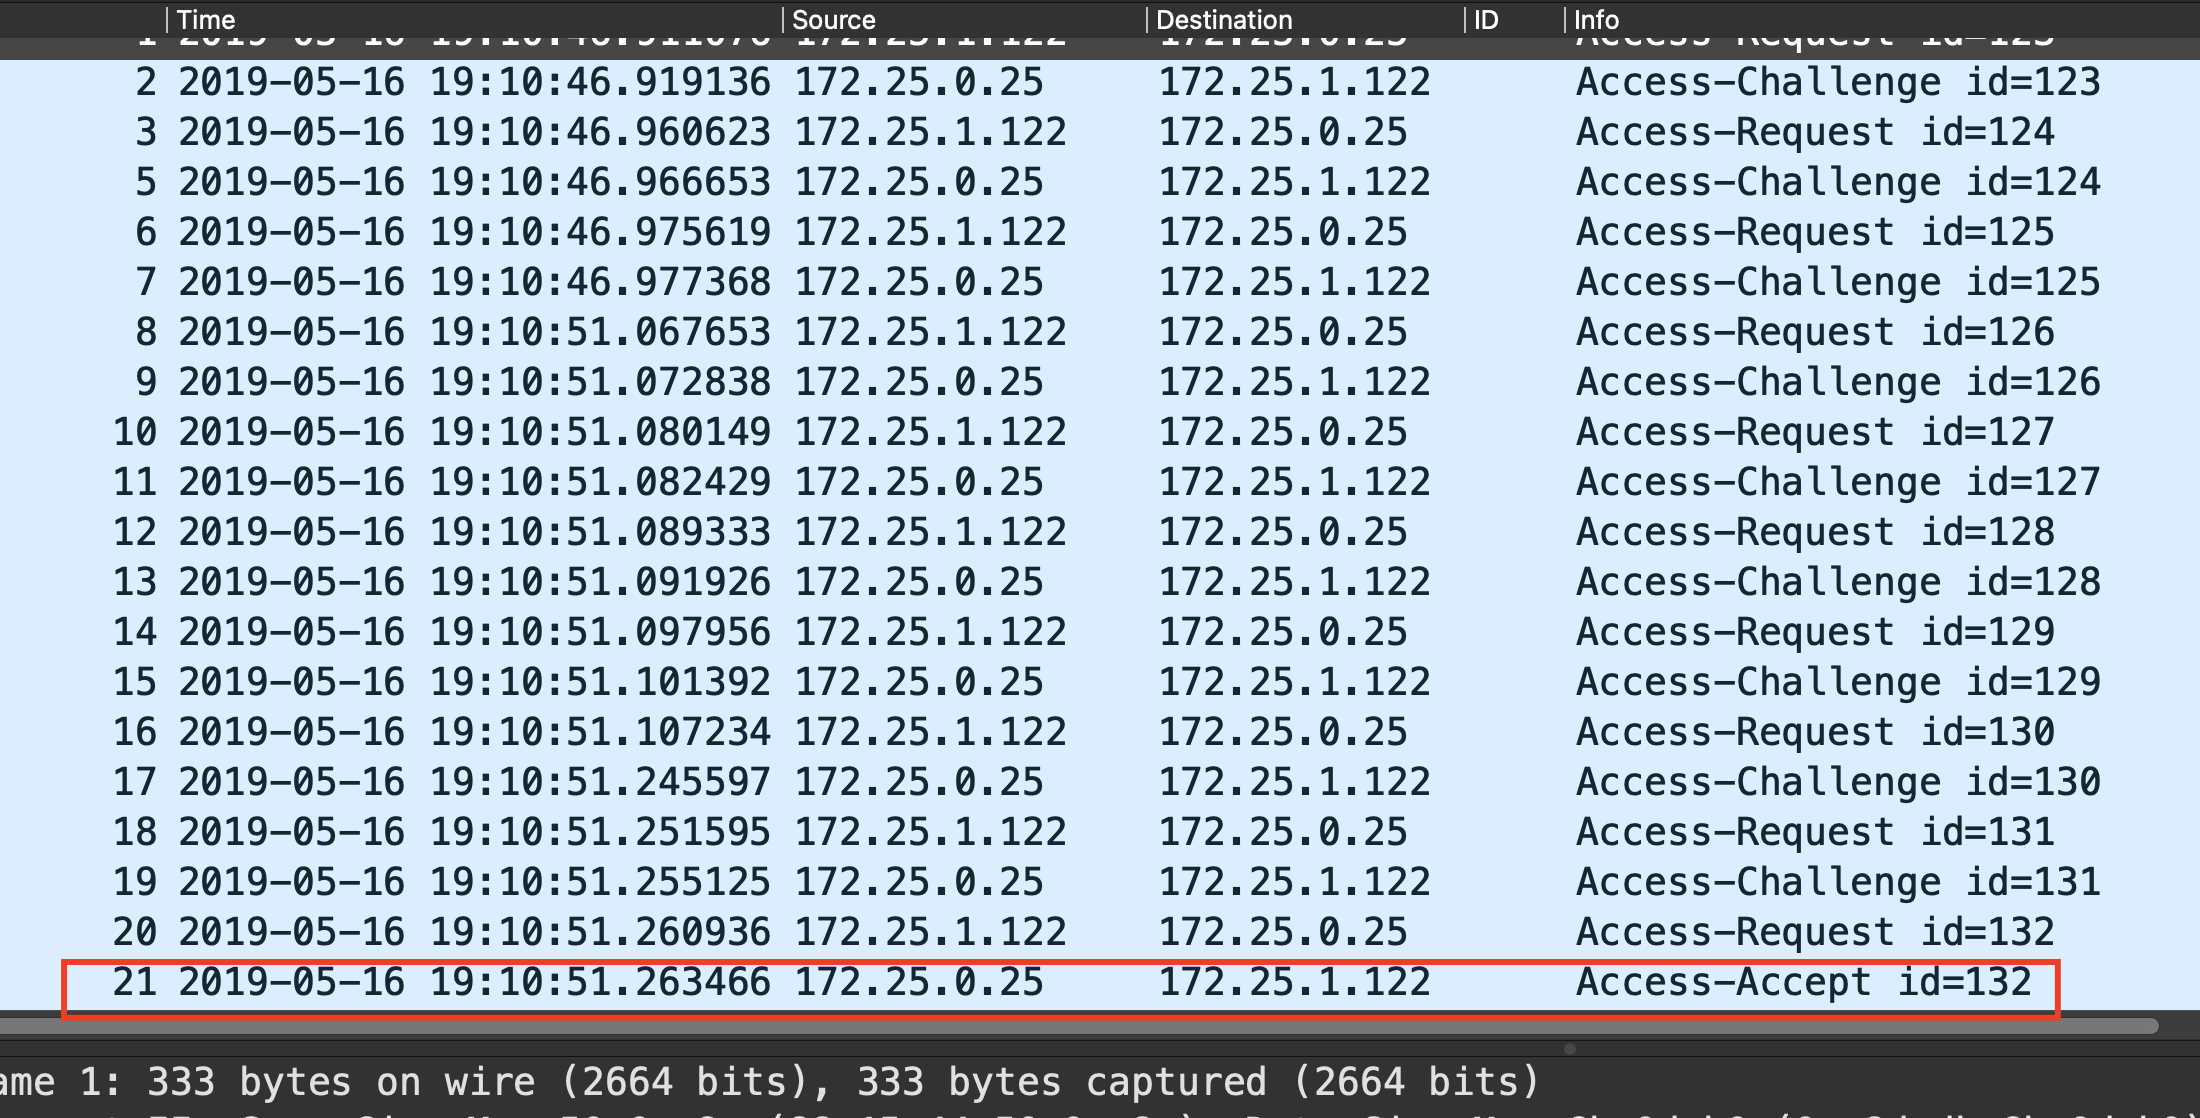
Access-reject: If you see an access-reject message, go to Troubleshoot access-reject received.

No response: If you see you don't get either access-reject or access-accept, you may either see only Access-request packet

Or the process stops after an access-challenge or access-request.

Record the behavior and continue to the next troubleshooting step.
Troubleshoot access-accept received but client cannot connect
Troubleshooting steps
Complete the following checks in order to troubleshoot a client that can't connect despite receiving an access-accept message.
Check for access-request retries
Check your capture for a high number of duplicate access-request packets (retries). Even when you see access-accept packets, a high number of retries can prevent clients from connecting to the SSID

Record the behavior and continue to the next step.
Check for a group policy override
Check whether the access-accept packet contains a group policy override using one of these attributes:
Filter-ID: The RADIUS server uses the Filter-ID attribute-value pair (AVP) to assign the group policy Ntw Admins.

Reply-Message: The RADIUS server assigns the group policy Policy-X through the reply-message attribute

Airespace-ACL-Name: The RADIUS server assigns the group policy Policy-Y through the Airespace-ACL-Name attribute

Aruba-User-Role: The RADIUS server uses the Aruba-User-Role attribute to assign the group policy Policy-Z.

If the access-accept packet contains one of these attributes, record it and continue to the next step.
Confirm the SSID expects the correct group policy attribute
Navigate to Wireless > Configure > Access control > [SSID name]
Confirm the correct attribute is selected under RADIUS attribute specifying group policy name

After you confirm the attribute, continue to the next step.
Confirm the group policy exists and isn't blocking the client
Navigate to Network-wide > Configure > Group policies and confirm the desired policy exists. The policy name must exactly match the name the RADIUS server sends.

Navigate to Network-wide > Configure > Group policies > [policy name] and confirm the policy doesn't include firewall rules or Umbrella policies that block the client. Record the configuration and continue to the next step.

Check for a VLAN override
A correct VLAN override must contain all three of these attributes:
- Tunnel-Type = VLAN
- Tunnel-Medium-Type = IEEE-802
- Tunnel-Private-Group-ID = [VLAN to assign]
If the access-accept packet is missing any of these attributes, the VLAN override doesn't work. The following example shows the RADIUS server assigning VLAN 200 to the user.

If the access-accept packet contains a VLAN override, record it and continue to the next step.
Confirm the SSID accepts a VLAN override
Navigate to Wireless > Configure > Access control > [SSID name] and confirm the RADIUS override setting:
|
New access control page > Client IP and VLAN > RADIUS override = Override VLAN tag |
Legacy Access control page > Addressing and traffic > RADIUS override = RADIUS response can override VLAN tag |
 |
 |
Record the configuration and continue to the next step.
Collect a wireless capture
Collect a wireless capture while you reproduce the issue. Use one of these tools, listed in order of ease of use:
- A Macbook
- Other Meraki Acess points installed closed to the access point selected to reproduce the problem
- Cisco access points
- A linux device with a wireless card (Can be a laptop live boot linux)
Meraki Support most likely will need a wireless capture, so try to gather one before reaching out.
If you only have MR access points available, follow these steps:
- If you have a spare MR access point that you can install in the room where the problem occurs, skip to step 5
- If you plan to use a neighboring access point instead, for example an access point installed in the next room, start with step 3.
- Choose the access point where you'll reproduce the problem.
- Navigate to Wireless > Monitor > RF spectrum > [access point name]
- Select the affected band (2.4 GHz or 5 GHz). Record the channel the access point uses.
- Click Interfering APs, sort by dBm in descending order, and record the basic service set identifier (BSSID) with the strongest signal that corresponds to one of your local SSIDs.

- Identify the access point broadcasting the strong BSSID you recorded.
- Filter the access point list using the last characters of the BSSID

- Click the access point name, and click BSSID Details to confirm the strong neighbor access point.

- Configure the strong neighbor access point, or the spare access point, to use the same channel as the access point you'll use to reproduce the issue.
- Navigate to Wireless > Configure > Radio settings > [access point name] > Channel > Change channel setting

- Select Manual, choose the channel, and click Save.

If you're unsure which radio band the access point uses, match both the 2.4 GHz and 5 GHz bands to the channel used by the access point reproducing the issue.
- After both access points use the same channel,
- Navigate to Network-wide > Monitor > Packet capture, select both access points under Access point
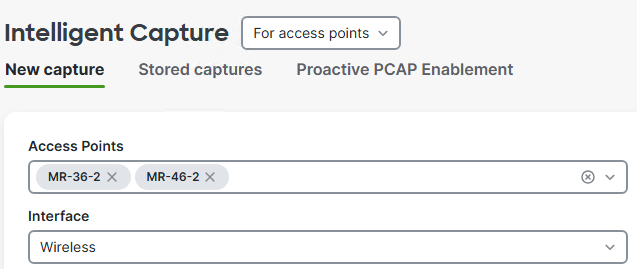
- Click Start capture, and reproduce the problem.
Confirm VLAN assignment and traffic forwarding
Check whether the group policy overrides the VLAN. Navigate to Network-wide > Configure > Group policies > [policy name] > VLAN and check the setting. If the setting is Do not tag VLAN or Tag VLAN, the group policy modifies the client's default VLAN.

Take note of the configuration and continue to the next step in the troubleshooting flow.
Record the configuration and continue to the next step.
Confirm the neighboring device has the correct VLAN configuration. Depending on where your access points connect, use these documents to verify the VLAN configuration:
Check for the complete four-way handshake process. In the wireless capture, apply this filter: wlan.addr == <client-mac-address> and eapol. Confirm you see messages 1 through 4

If you used multiple MR access points and see duplicate messages, this result is expected. Record the behavior and continue to the next step.
Check for data traffic from the wireless client. In the wireless capture, apply this filter: wlan.addr == <client-mac-address> and wlan.fc.type_subtype == 0x028. Confirm you see Quality of Service (QoS) data frames to and from the client MAC address.

Record the behavior and continue to the next step.
Check whether the access point forwards client traffic to the LAN. In the wired capture you collected earlier, apply this filter: eth.addr == <client-mac-addr> and (dhcp or arp or dns). If you see traffic sourced by the client MAC address, the access point forwards the client traffic from the wireless medium to the LAN

Record the result and return to the troubleshooting flow.
Troubleshoot access-reject received
Troubleshooting steps
- Identify which device sends the last packet over the air. In the wireless capture, apply this filter: wlan.addr == <client-mac-address> and eap.
- Check the source MAC address of the last packet to determine whether the wireless client or the access point sent it.
For example, if the last packet's source MAC address is 96:18:88:bc:c8:9c and the destination is 8a:43:15:a1:05:6f, the access point sent the last packet.

Record the behavior and continue to the next step.
Potential reasons the client stops 802.1x authentication include:
The client doesn't trust the RADIUS server certificate. If the capture ends after the Server Hello certificate packet, the wireless client likely doesn't trust the RADIUS server certificate. Install the RADIUS server certificate on the client, or configure the client to trust the certificate.
The certificate is expired. Expand the Server Hello packet and confirm the certificate is still valid

The RADIUS server and client don't support the same EAP method. Adjust your RADIUS server configuration or your client configuration so they support at least one common Extensible Authentication Protocol (EAP) method

The RADIUS server sends an access-reject. See Troubleshoot access-reject received to investigate further