
Azure AD (MSFT Entra ID) SAML Integration
Overview
This guide will provide you the steps to configure Security Assertion Markup Language (SAML) authentication with Azure AD (now rebrand to Microsoft Entra ID), providing individual user and group-based identities for policy enforcement.
Prerequisites
- id.swg.umbrella.com must be sent to the Umbrella secure web gateway (SWG) and not sent directly to the internet.
- SAML metadata must have a signing key.
- Ensure that your IDP URL is bypassed from SAML authentication, which can be achieved in 2 ways: bypassing from Umbrella using external domains or bypassing decryption by adding to the Selective Decryption list. This will avoid an otherwise authentication loop.
- Configure SAML with your identity provider (IdP) that supports SAML 2.0 POST profiles.
- Download your IdP's metadata file in XML format.
- Enable cookies for your browser.
- Enable SAML and HTTPS inspection on a Ruleset that includes the Network and Tunnel identities from which the user traffic arrives.
Bypass Domains from HTTPS Decryption
We recommend that you bypass the following domains from HTTPS decryption:
- msauth.net
- msftauth.net
- login.live.com Note: Users will be able to access their personal cloud applications if you already have Tenant Controls configured, and choose to bypass this domain from HTTPS decryption.
- login.microsoftonline.com Note: Users will be able to access their personal cloud applications if you already have Tenant Controls configured, and choose to bypass this domain from HTTPS decryption.
Deployment
Configure Azure AD (Entra ID) for SAML with Azure's Metadata Upload
Go to Secure Connect -> Identities & Connections -> Users. If you have not already setup your IdP, you will see the screen below.
- Select your identity provider, click Connect under "Bring your own ID Provider".
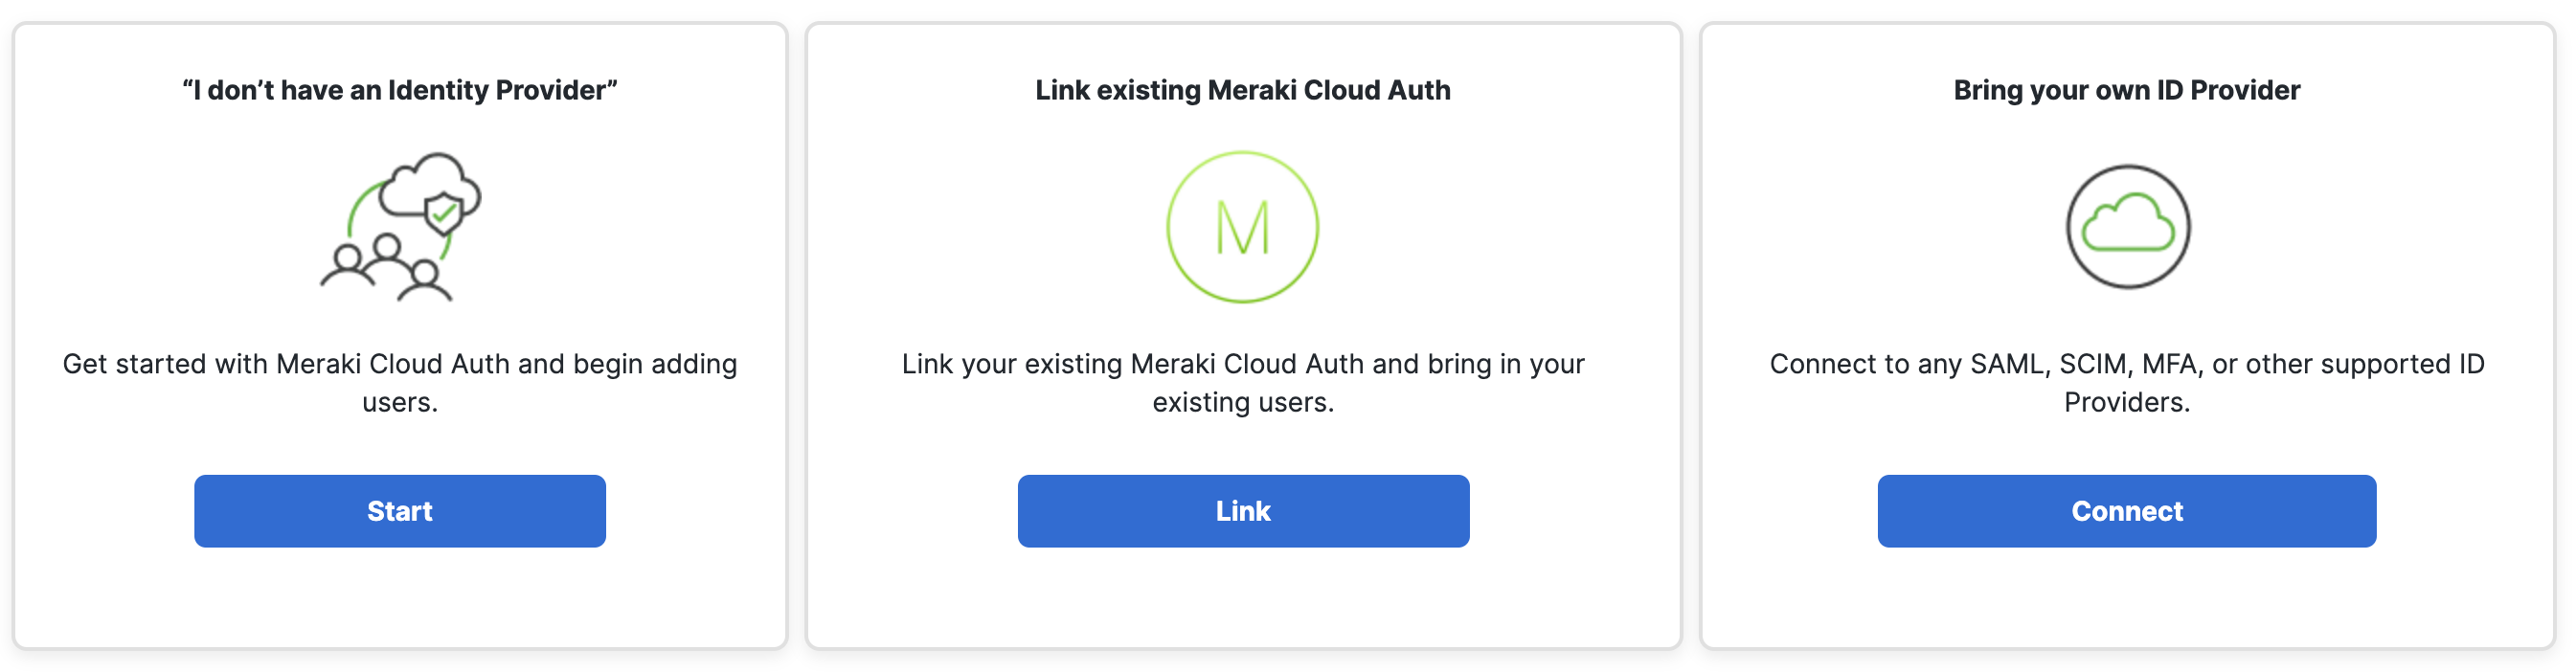
- Click Configure SAML to get to the Umbrella Dashboard.


If you have already configure SCIM, when clicking on Secure Connect -> Identities & Connections -> Users you see the page below. Click on User Groups to get to the Umbrella Dashboard, and go to Deployments -> Configuration -> SAML Configuration to navigate to the SAML page.

3. On the Umbrella Deployments > Configuration > SAML Configuration page, click Add on the top right corner.

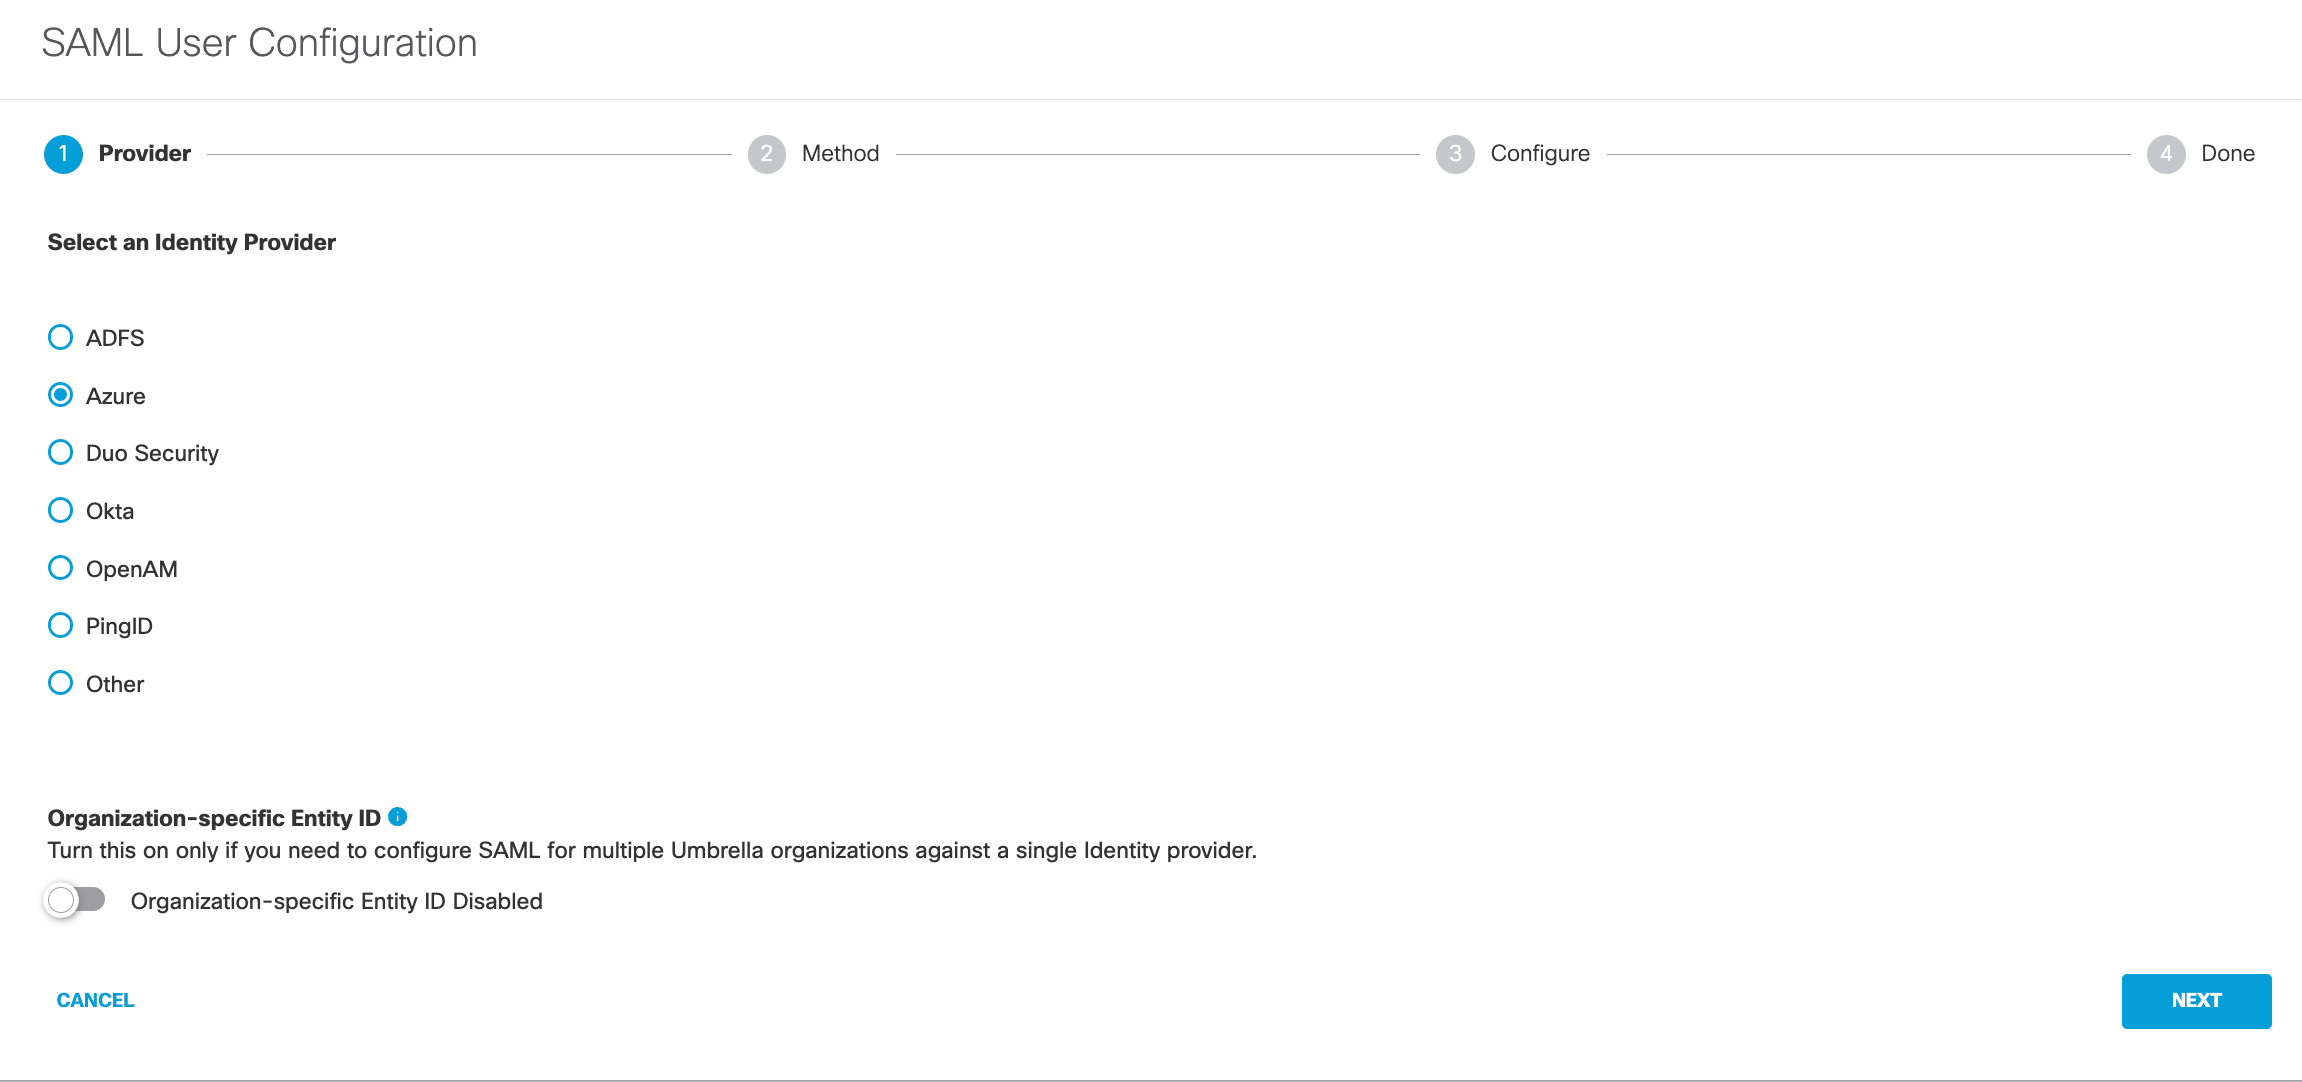
4. Select Azure and click Next. (Configurations stay the same for Microsoft Entra ID)
Notice: Turn on Organization-specific Entity ID Enabled to enable the entity if you have multiple Secure Connect Orgs and need to configure SAML authentication for these Orgs against the same IdP. Otherwise, leave it uncheck by default.

5. Select XML File Upload.

6. Download the Umbrella metadata file (SP metadata file) and click Next.
The Umbrella SP metadata includes the Service Provider Issuer ID, the assertion consumer endpoint URL information, and the SAML request signing certificate from Cisco Umbrella. This metadata is required when configuring your IdP for Umbrella.
Note: Your IdP must send the Cisco Umbrella User Principal Name in the NameID attribute in the SAML assertion. For more information on configuring your IdP, exporting your IdP metadata, obtaining your IdP details, or downloading your IdP signing certificate, refer to your vendor's documentation.
Tip: Do not chose the Cisco Umbrella User Management application within Azure. You must configure this step by using the general SAML 2.0 application option within Azure. For detailed steps, please scroll down this page and check section Configurations on Azure AD (Microsoft Entra ID).
7. Upload Azure's metadata file in XML format and click Next.
For details on how to download Okta IdP metadata, please scroll down this page and check the section Configurations on Azure AD (Microsoft Entra ID).

8. From the Re-Authenticate Users drop-down list, choose how often Umbrella re-authenticates users: Never, Daily, Weekly, or Monthly.

9. Click Save. Your new configuration appears as SAML Web Proxy Configuration.

Configure Azure AD (Entra ID) for SAML Manually
1. Navigate to Deployments > Configuration > SAML Configuration and click Add.
2. Select Azure and click Next.
3. Select Manual Configuration

4. Download the Umbrella metadata file (SP metadata file) and click Next.
The Umbrella SP metadata includes the Service Provider Issuer ID, the assertion consumer endpoint URL information, and the SAML request signing certificate from Cisco Umbrella. This metadata is required when configuring your IdP for Umbrella.
5. Enter the appropriate information to configure Azure's provider metadata and click Next.
For details on how to access Okta IdP metadata, please scroll down this page and check the section Configurations on Azure AD (Microsoft Entra ID).
- Entity ID—A globally unique name for an identity provider.
- Endpoint—The URL used to communicate with your identity provider.
- Signing Keys—Your identity provider’s x.509 certificate used to sign the authentication request.
- Signed Authentication Request (optional)—You can sign the authentication request for this IdP.

6. From the Re-Authenticate Users drop-down list, choose how often Umbrella re-authenticates users: Never, Daily, Weekly, or Monthly.

7. Click Save. Your new configuration appears as SAML Web Proxy Configuration.

Configurations on Azure AD (Microsoft Entra ID)
1. Log into Azure AD and navigate to Azure Services > Enterprise Applications.

2. Select New Application and then Create Your Own Application.


3. Give the new application a meaningful name and select Integrate any other application you don't find in the gallery (Non-gallery).

4. Once the application has been created, you will be redirected to a new page. In this page, you can select which users and groups can have access to this application. Select Single sign-on, then select SAML.


5. Click Edit. Enter saml.gateway.id.swg.umbrella.com for the Identifier (Entity ID) and https://gateway.id.swg.umbrella.com/gw/auth/acs/response for the Reply URL (Assertion Consumer Service URL).


6. Download the Azure AD Federation Metadata XML.

Next Step
Please read this link for more details on provision Identities from Azure AD (MSFT Entra ID).