
Manage Tags
Overview
The Meraki Dashboard allows Administrators to configure a combination of Network and Device specific tags to create Summary Reports filtered for specific devices across multiple networks. This allows for the easy creation of much more specific Summary Reports than creating reports based on entire Networks.
Note: For information on using Systems Manager tags, refer to the document Using Tags in Systems Manager.
Additional Information can also be found in the following:
Learn more with these free online training courses on the Meraki Learning Hub:
Creating Network tags
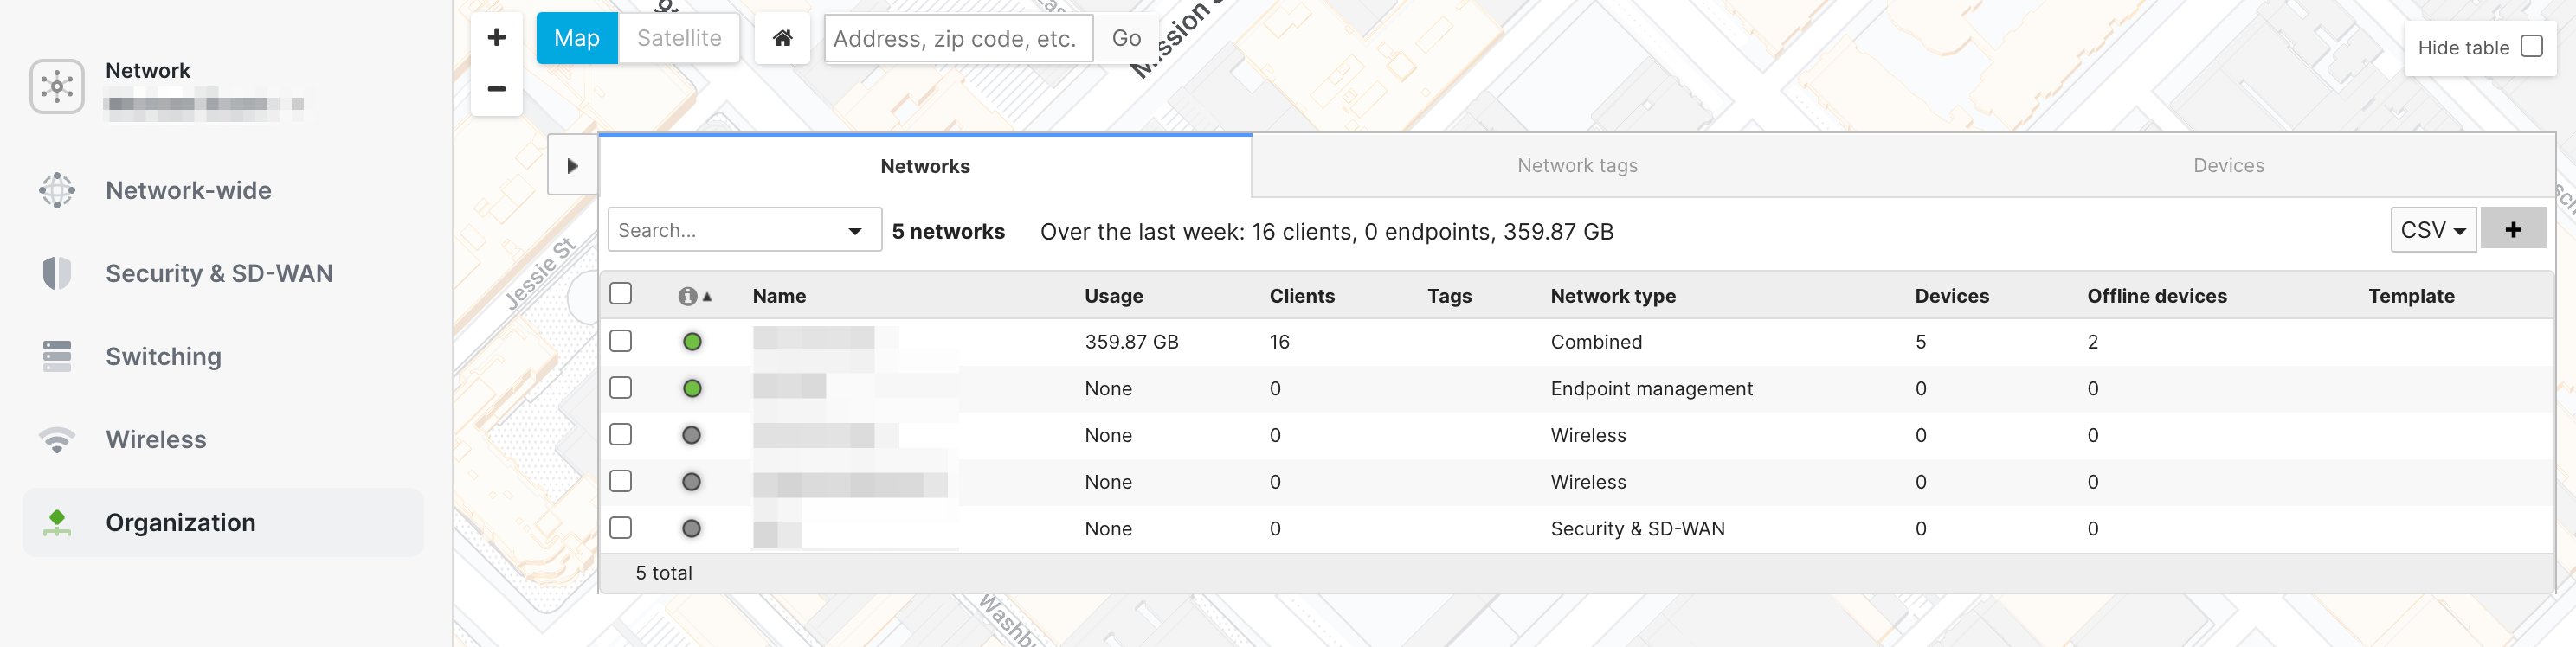
To create a Network tag, simply go to the Organization > Monitor > Overview page and expand out the Network list by clicking the left facing arrow at the top of the network list if it is not expanded by default. The picture below shows the Organization > Monitor > Overview page with the Network list already expanded.
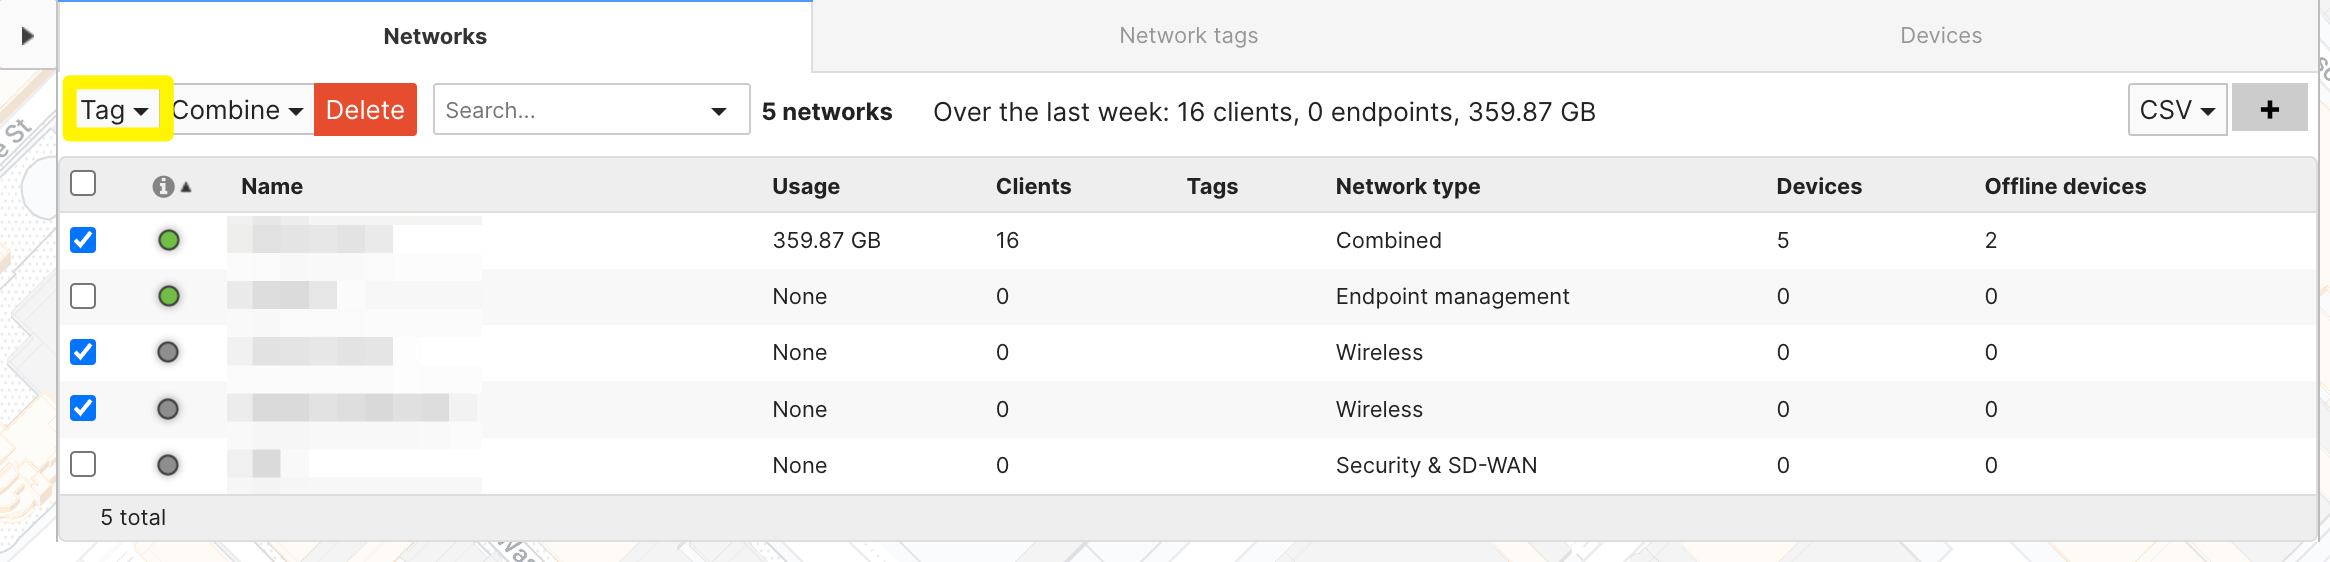
Next, use the checkboxes to select the Networks you would like to apply the tag to. Then select the Tag dropdown menu from the top left. The picture below shows several networks selected with the Tag dropdown menu highlighted.
After selecting the Tag dropdown menu, begin typing in the tag you want applied to the selected Networks. If it already exists as a Network tag you can select it from the list, otherwise select 'Add option,' then click 'Add.'
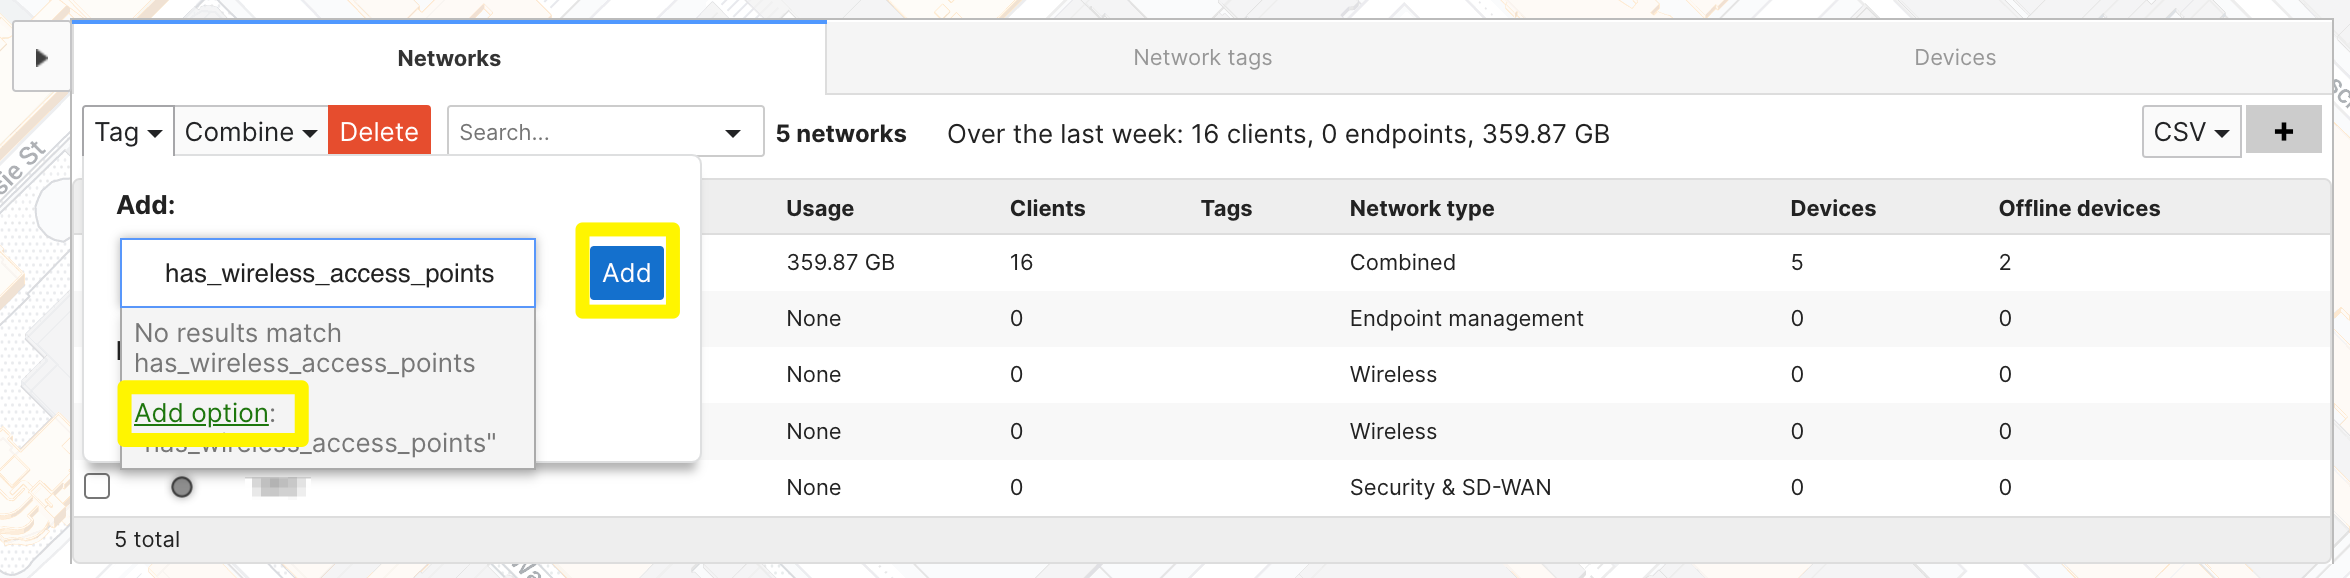
Note: Although tags are case sensitive, it is advised to avoid using multiple capitalization variants and use completely unique tags per use-case. If similar tags are required, a hyphen or number addition should be used such as has_wireless_access_points1 or has_wireless_access-points .
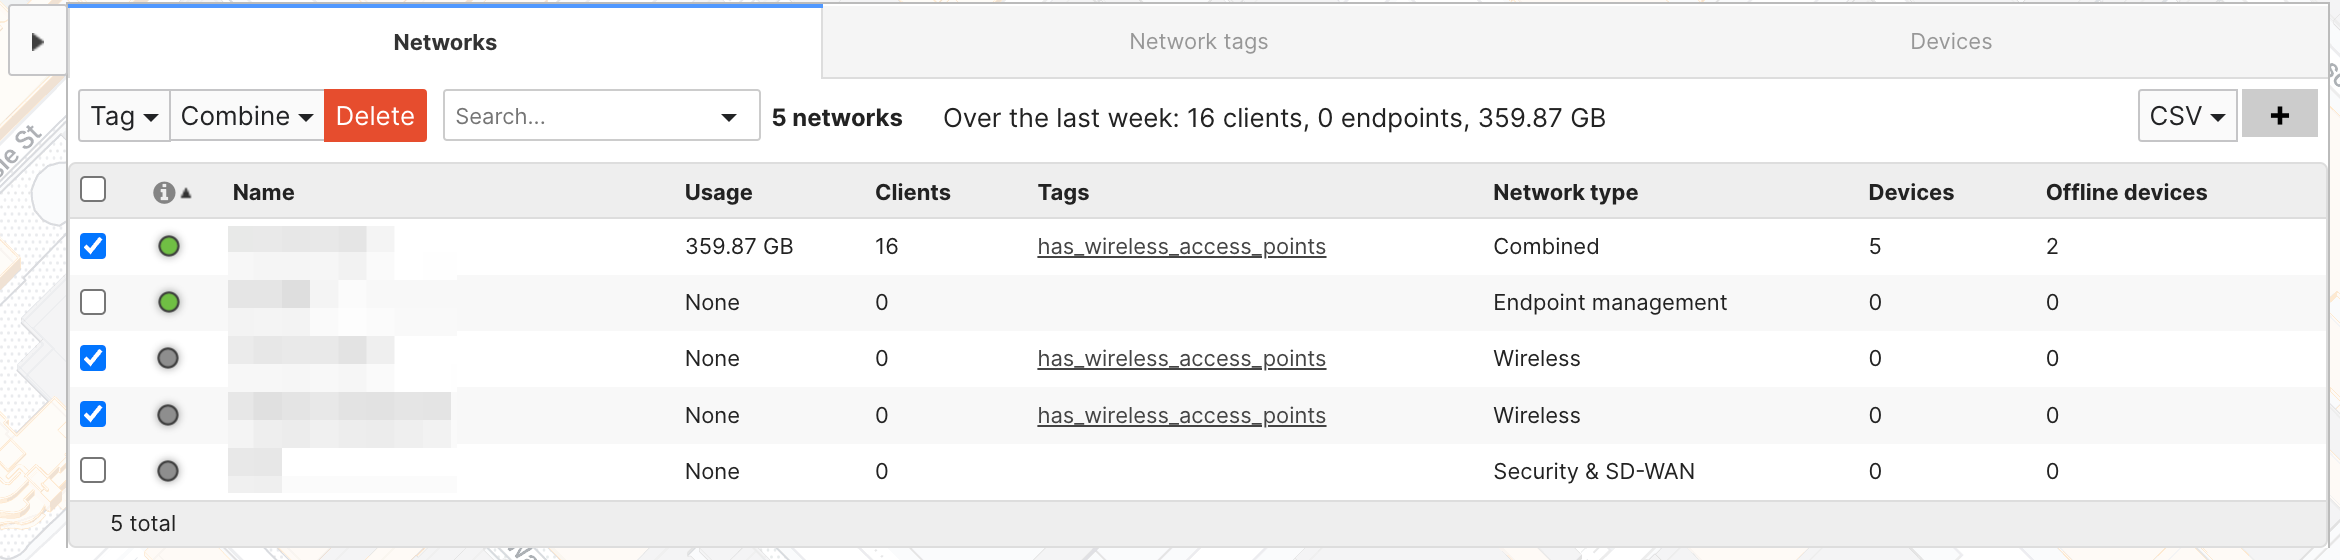
After clicking 'Add' you should now see the tag you applied listed under the Tag column, and under the Network Tags tab, as shown in the pictures below.

Note: Deleting a tag from all networks in an Organization will effectively delete the tag itself, and it must be recreated for use again.
Creating Device tags
To apply tags to specific devices we will need to go into each Network and tag devices individually. Tags can be applied for the following device families in the listed locations:
- Security Appliance: Security & SD-WAN > Monitor > Appliance status > Tags
- Switch: Switch > Monitor > Switches
- Access points: Wireless > Monitor > Access Points
- Camera: Cameras > Monitor > Cameras
- Cellular Gateways: Cellular Gateway > Monitor > Cellular Gateways
- Sensors: Sensors > Monitor > Sensors
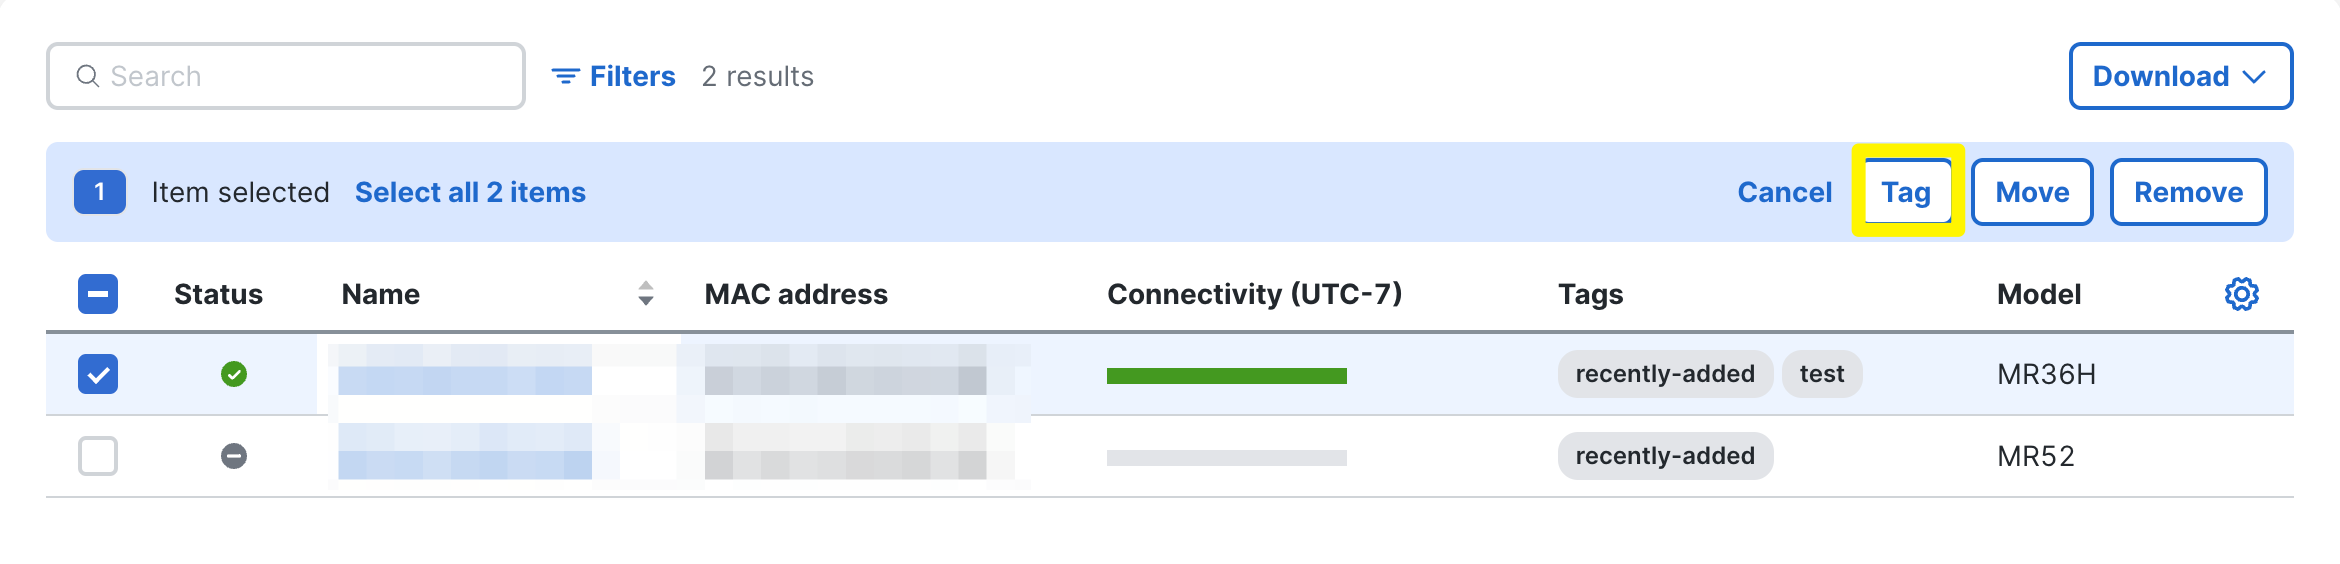
The picture below shows the Wireless > Monitor > Access Points page for one of the networks we selected and tagged in the previous section of this article. To apply a tag to a device, select the checkbox for the device(s) you would like to tag, then select the 'Tag' dropdown as highlighted below.
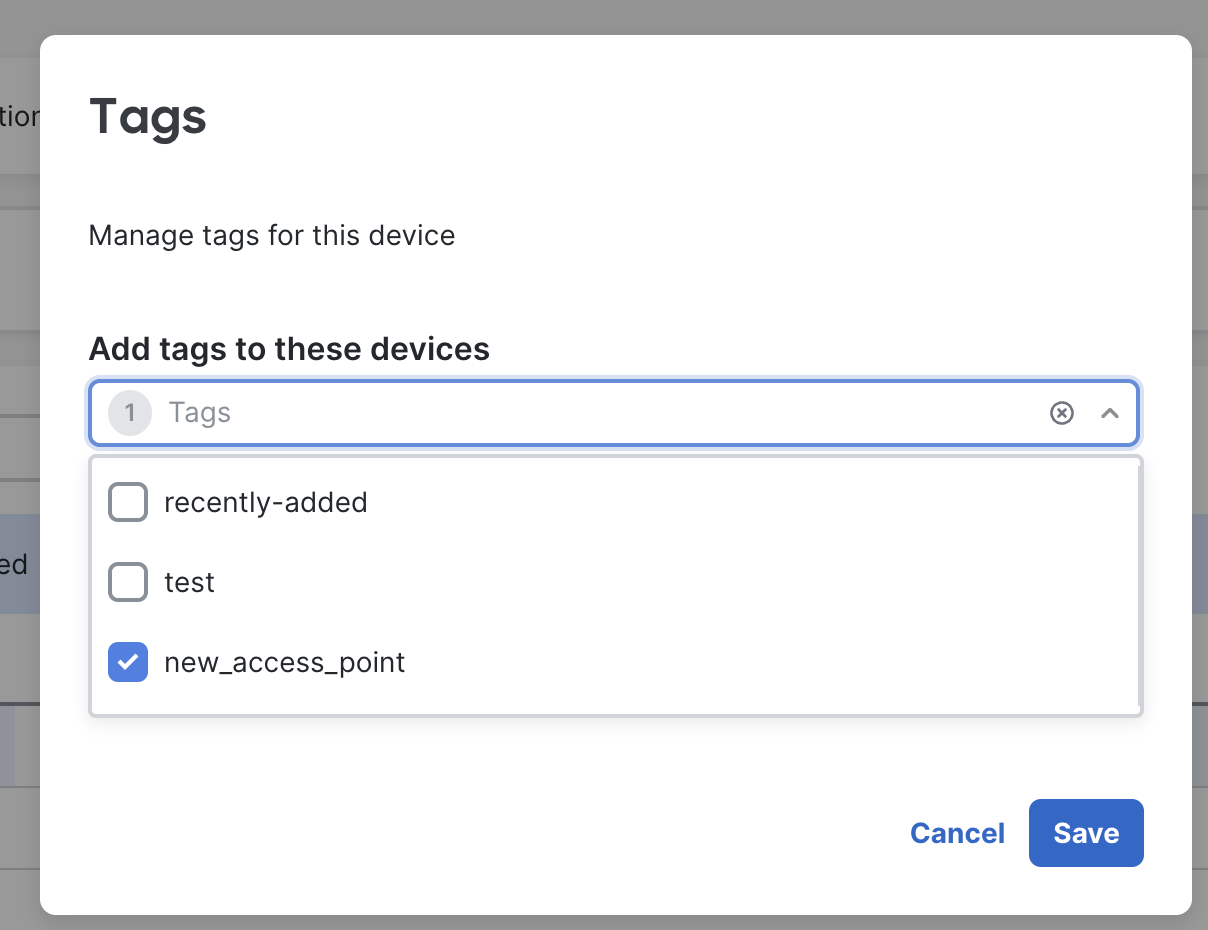
After selecting 'Tag' type in the tag you wish to apply and click in the '+Add' text box.
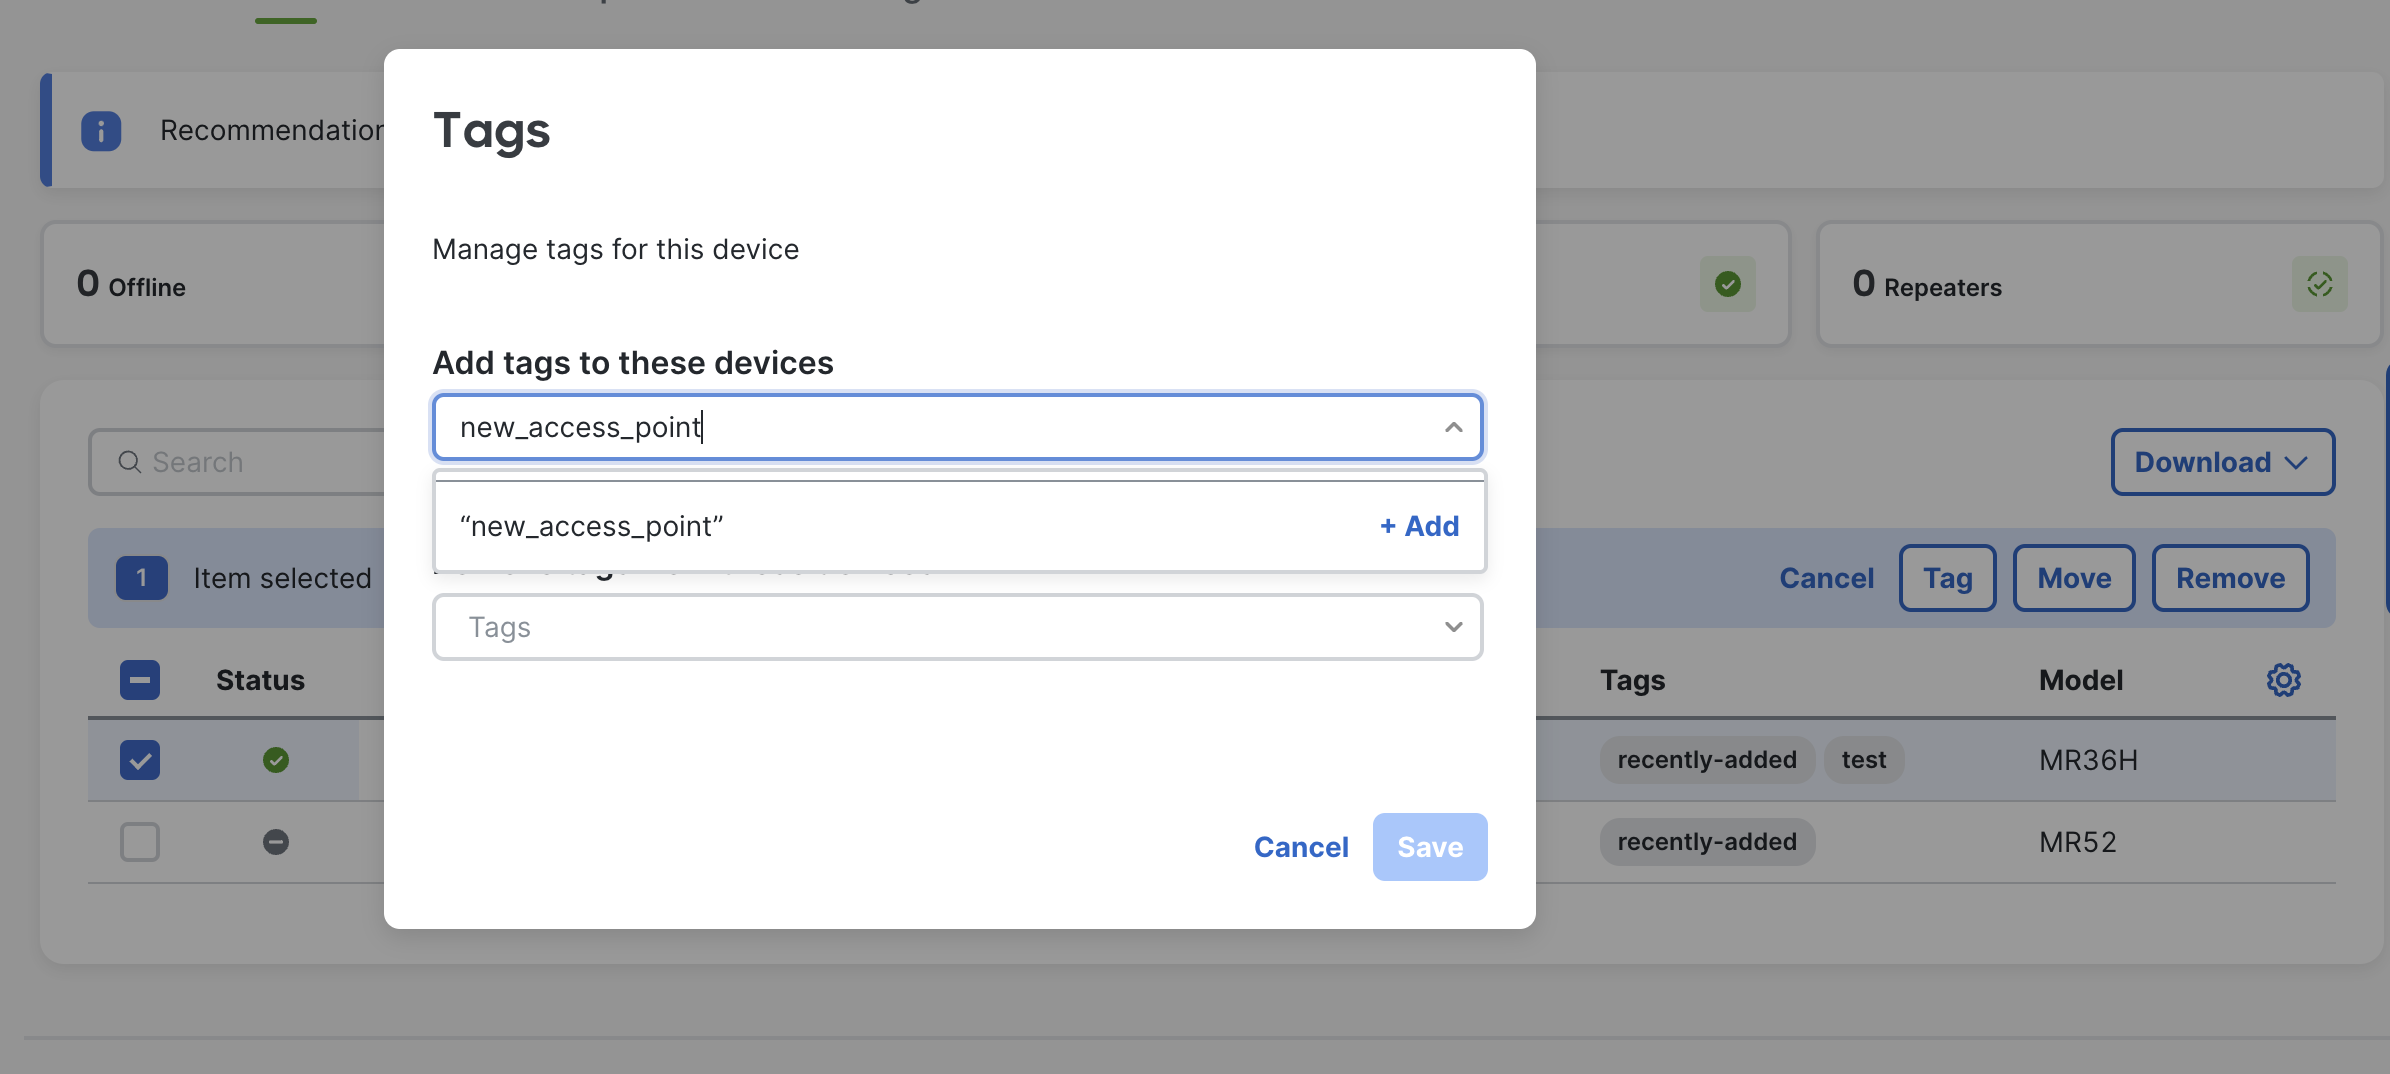
Click "Save" to confirm.
Note: Device tags cannot contain spaces or commas inside a tag.
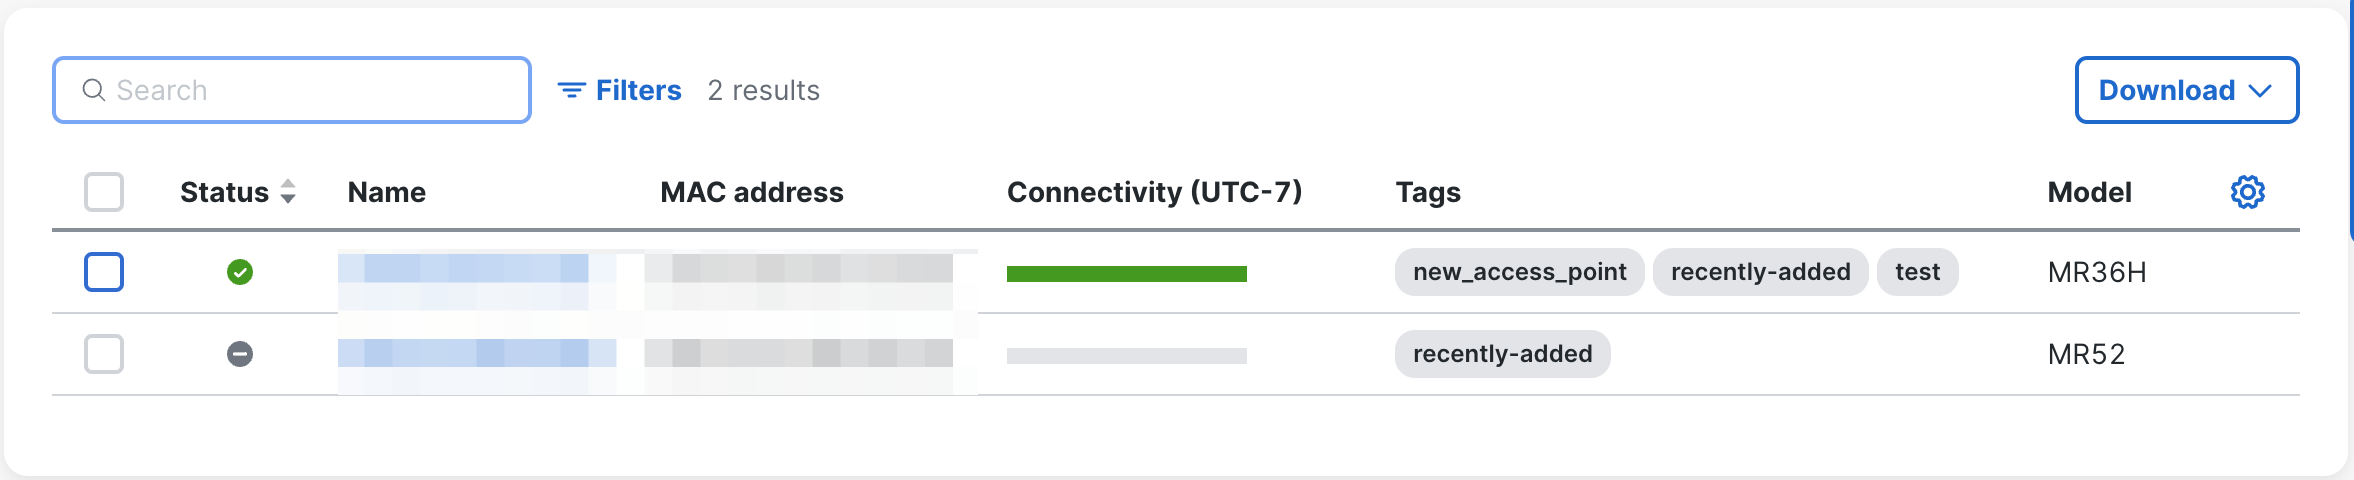
After clicking 'Save' you should now see the new tag applied to any access points that were previously selected, as shown below.
To add the tags to the Security appliance you can navigate to Security & SD-WAN > Monitor > Appliance status > Tags the option is right below the serial number as shown below. We can add the tag to Spare MX using the same method.
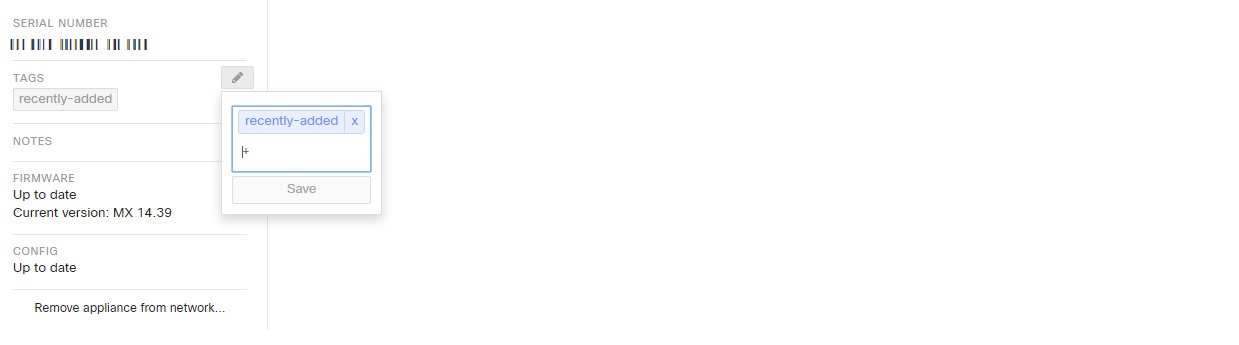
We can add tags individually to all other devices if we navigate to the device page. The tags option is available below the serial number of all the devices.
Note: Deleting a tag from all devices in an Organization will effectively delete the tag itself, and it must be recreated for use again.
Creating and Managing a Tag Combination
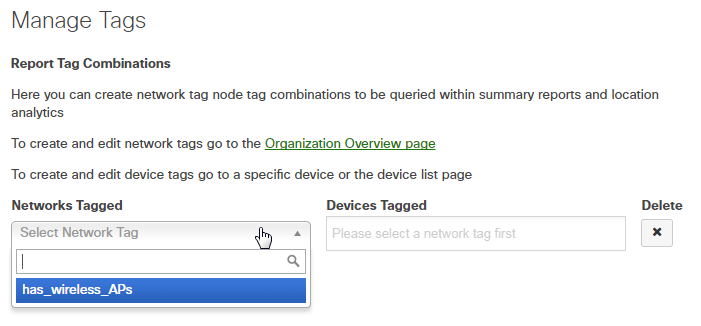
To create a tag combination to use for customizing Summary Reports, go to the Organization > Configure > Manage Tags page. Once there click 'Add tag combination,' then select the Network tag that defines the networks you want to pull data from, as shown below.
Organization > Configure > Manage Tags page is now deprecated. Dashboard organizations are not auto-enrolled into this feature.
If you wish for this to be enabled, please contact support.
 I'
I'
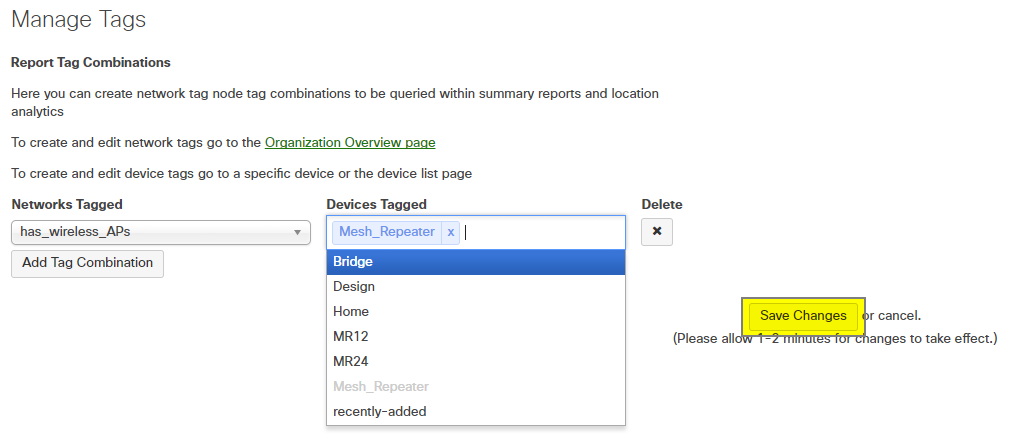
After selecting the Network tag, select a Device tag from the tags available in the Networks matching the Network tag. Then, select 'Save Changes.'
Delete Tags
Note: By deleting the tag from all the devices listed within your Organization will cause the tag to be permanently deleted from your Organization dashboard. You will need to manually re-create the tag in order to use it again.
To delete a tag from the Meraki dashboard, select the device by clicking the check box next to the device under 'Overview' and click on the 'Tag' button.
Then, click on the dropdown under 'Remove tags from this device' and select the tag you wish to remove. Click on the 'Save' button to confirm the removal of the tag.


The tag is now removed from that the device.
Using combined tags to create a custom Summary Report
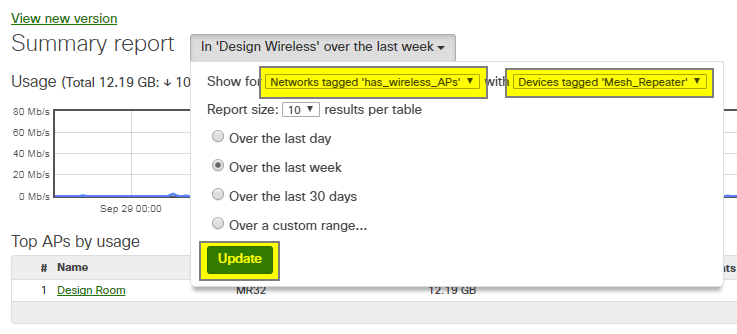
To create a custom Summary Report using the tag combinations outlined above go to Organization > Monitor > Summary Report. On the Summary Report page, select the dropdown menu at the top right of the page, highlighted in the picture below.
Note: Data for the Summary report will only be available from the time the tag is applied moving forward. Data prior to the tag's application will not be included.
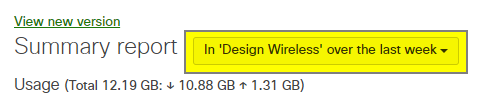
Then, select the Network tag and Device tag combination that was defined in the previous section of this article from the available dropdown menus. Finally, choose the number of results per table you would like displayed and the length of time the Summary Report should cover and click 'Update.' This will generate the Summary Report based on the parameters that were selected. The picture below shows the Summary Report ready to be generated for all devices tagged with 'Mesh_Repeater' that are in Networks with the tag 'has_wireless_APs'.

For more information about creating Summary Reports please refer to our Summary Report Overview article.