
Integrating Meraki with Cisco CX Cloud
Overview
The Meraki Basic Asset & Lifecycle View integrates the Meraki dashboard with Cisco CX Cloud providing a single location for Cisco customers to view assets, licenses, and contracts when they own both Cisco and Meraki products.
CX Cloud users are able to cross-launch to the Meraki dashboard for case management. Once they log in using their Meraki dashboard credentials, they are able to open a new case or modify an existing case.
Linking the Meraki Dashboard to the CX Cloud portal
Integrating CX Cloud with a Meraki network is a simple process that requires only a few steps. For CX Cloud to be successfully connected, the Meraki dashboard and CX Cloud portal must first be linked using the Meraki dashboard API key for the user's organization. Once CX Cloud and the Meraki dashboard have been linked, the Meraki dashboard data will be imported into CX Cloud.
Generate the Meraki Dashboard API Key
Cisco Meraki Dashboard API is enabled by default on all organizations, you can generate the API key from your profile or from the API & webhooks page. The API key will be associated with the dashboard administrator account which generates it, and will inherit the same permissions as that account. You can generate, revoke, and re-generate your API key on your profile or from the API & Webhooks page.
Note: Keep your API key safe as it provides authentication to all organizations with the API enabled that your account has access to. If your API key is shared, you can re-generate your API key at any time. This will revoke the existing API key.
To generate the API key from your profile page. Navigate to My profile page (selecting your username in the upper right corner) and scroll down to the API access section to generate an API key.

To generate the API key from the API & Webhooks page. Navigate to Organization > Configure > API & webhooks > API keys and access.
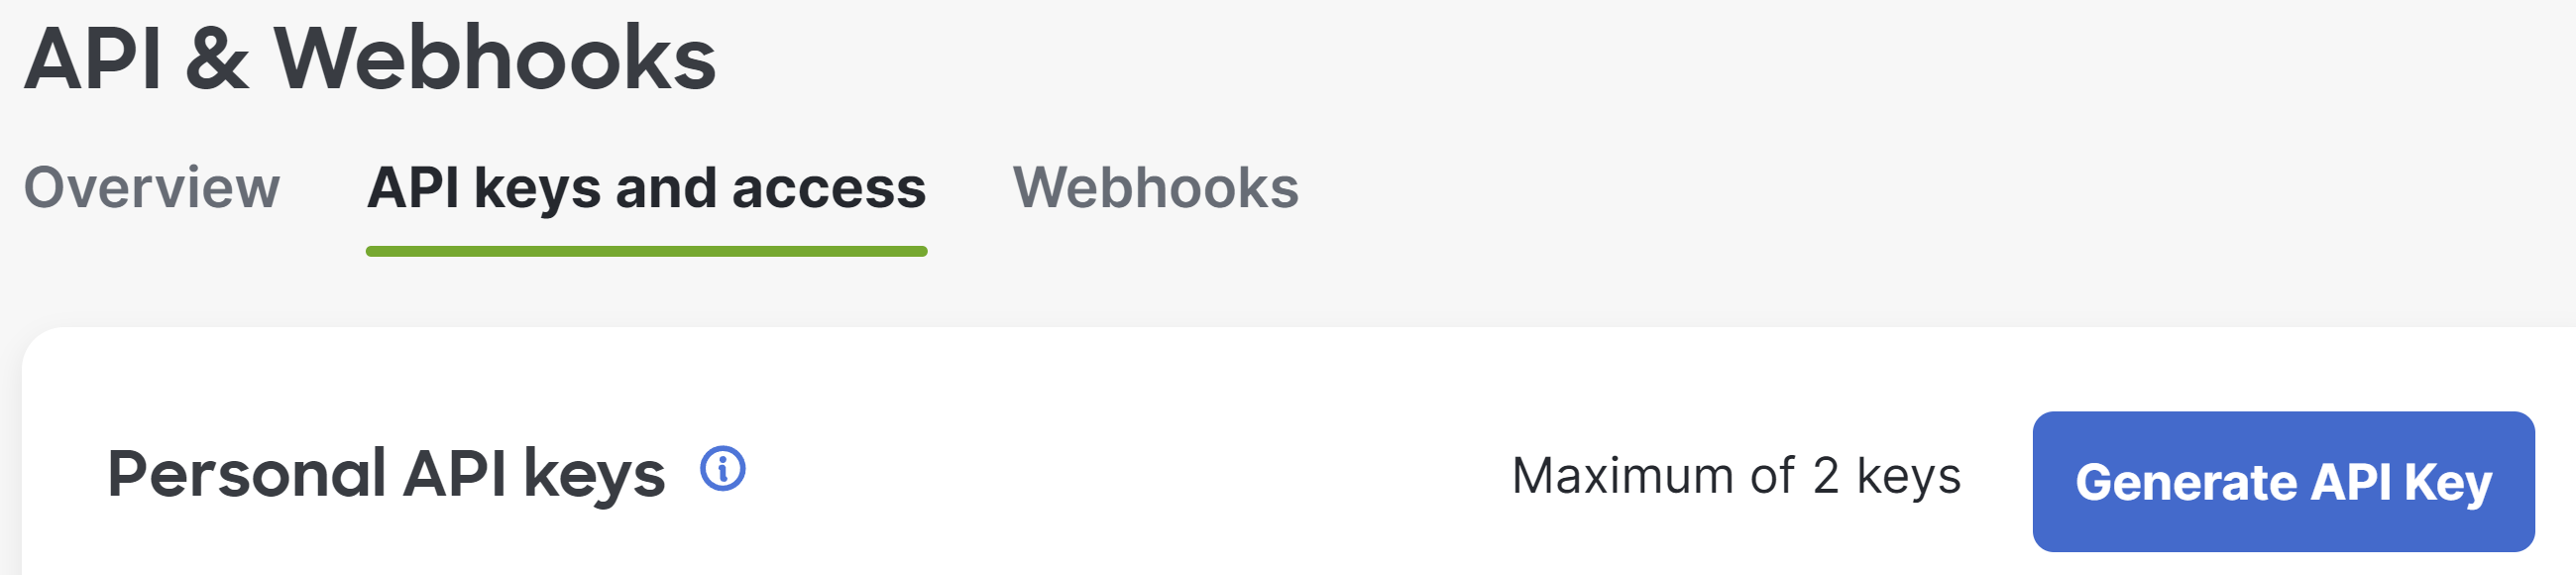
Note: There is a limit of only 2 API keys per profile. After generating two keys, the Generate API key option disappears from the dashboard view. You need to revoke one of the generated keys before you can generate a new one.
Apply the Meraki Dashboard API Key to the CX Cloud Portal
Once the Meraki dashboard API key has been generated, the CX Cloud Super Administrator needs to configure it properly in CX Cloud.
- In the CX Cloud Portal, select the Connect Meraki Dashboard button.

- Paste the Meraki dashboard API key in the appropriate field and click Continue.

Once this information has been saved, the Meraki dashboard and CX Cloud portal should now be properly linked, allowing Meraki dashboard data to be passed to CX Cloud.
Unlinking the Meraki Dashboard and CX Cloud Portal
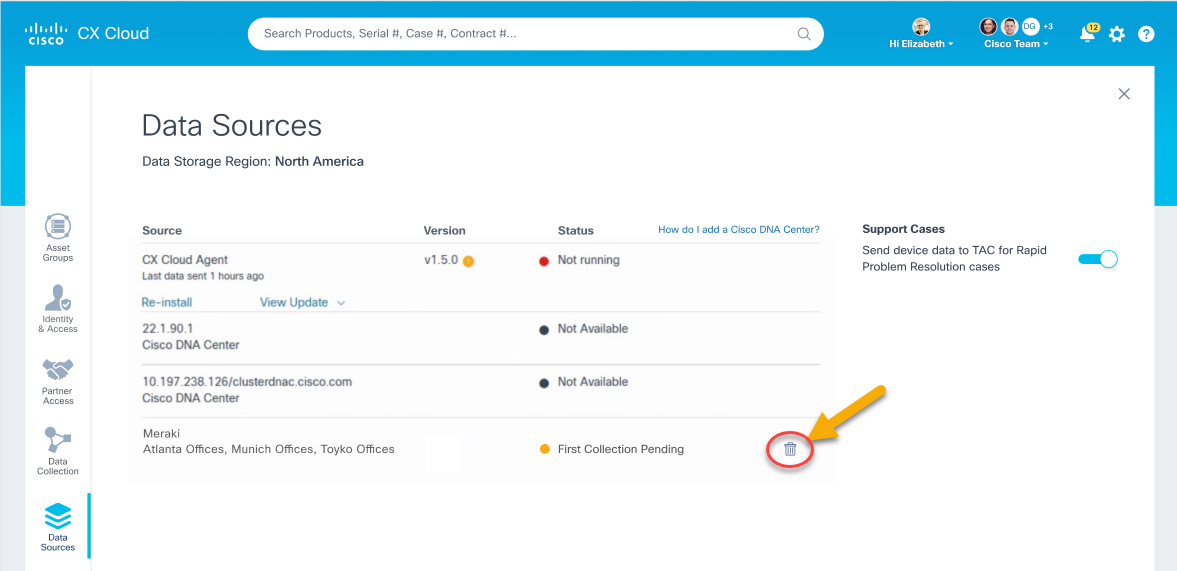
To unlink a Meraki network from CX Cloud, from the CX Cloud Data Sources screen, select the Trash icon. Confirm that you want to disconnect Meraki from CX Cloud by selecting Disconnect.
Deleting this link will delete all relevant data from CX Cloud within 24-48 hours. If needed, you can set up the connection again.
Troubleshooting
- Ensure that the Meraki dashboard and CX Cloud portal are properly linked via API from Network-wide > Configure > General
- When there is any error with the Meraki dashboard API key during the Data Lake Meraki API collection process, that error will be made available to CX Cloud and will be reported under Data Collection admin settings.