
Using Google OAuth Splash with a Walled Garden
Overview
The Meraki sign-on Splash Page can be integrated with Google OAuth, requiring users to log in with credentials from a custom Google domain for network access. This Splash Page can be configured to block Internet access until sign-on is complete, but certain domains need to be added to the Walled garden ranges in order for OAuth to complete.
This article explains how to configure the Meraki sign-on Splash Page with Google OAuth while restricting pre-authentication Internet access.
Prerequisites
- Firmware: MR28+
- Licensing: MR-ENT
Google OAuth Walled Garden with the WAN Appliance
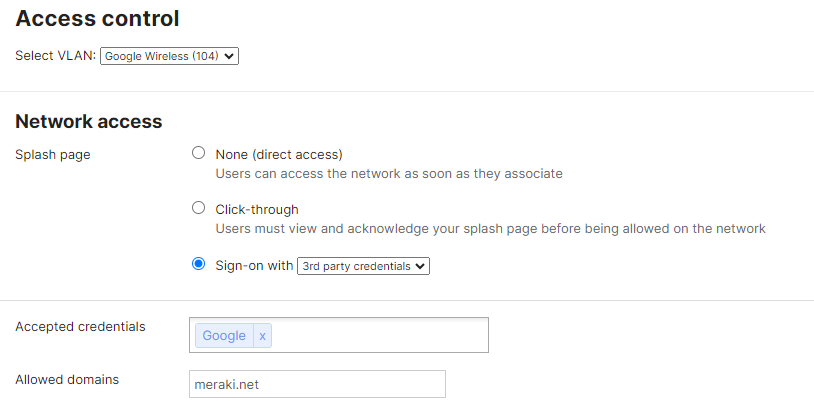
- On the Dashboard, navigate to Security Appliance > Configure > Access Control.
- Select the appropriate VLAN from the drop-down menu.
- Set the Splash page method as Sign-on with 3rd Party Credentials and select Google as the Accepted Credentials as well as your domain.
- Set Captive portal strength to "Block all access until sign-on is complete." and Walled garden to enabled.
- Add the domains provided in Google's Gmail Firewall Settings documentation to the Walled garden ranges.

- Save Changes at the bottom of the dashboard.
Google OAuth Walled Garden with Meraki Access Points
- In Dashboard, navigate to Wireless > Configure > Access Control.
- Select your Desired SSID in the top Left Corner
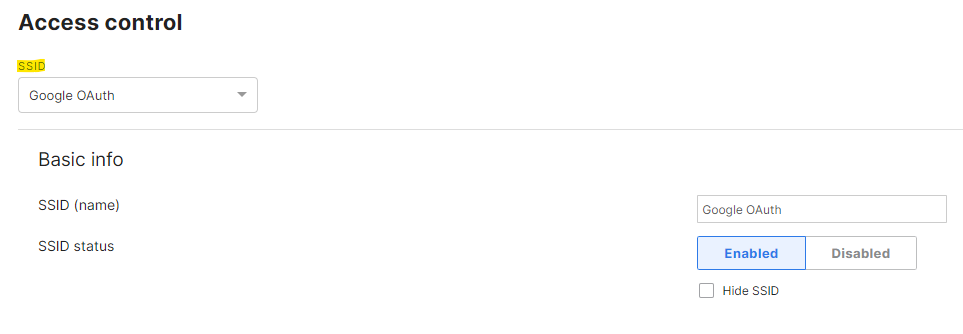
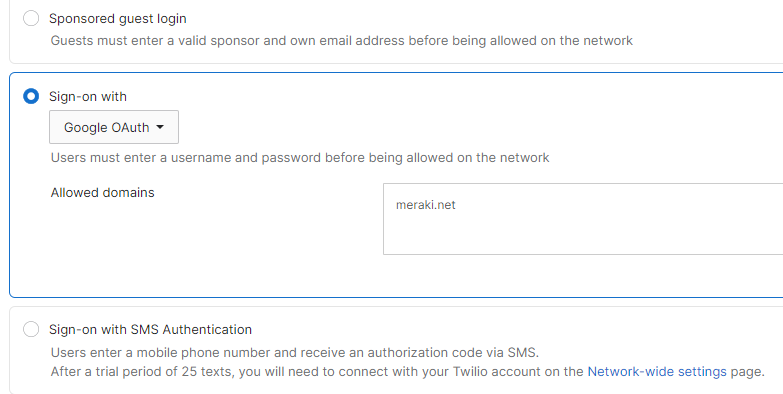
- Under Splash Page, Select Sign on With Google OAuth and add your Allowed Domains.
- Navigate to Advanced Splash Settings below and then set the Captive Portal Strength to "Block all access until sign-on is complete".
- Set Walled Garden to Enabled, and then add the domains from Google's Gmail Firewall Settings documentation to the Walled Garden Ranges.

- Save Changes at the bottom of the dashboard.
Refer to Google OAuth in Google Sign-In for more information.