Subscription - Licensing Claim Cloud
Overview
This article provides a comprehensive guide on how to claim your subscription licensing to your Meraki Dashboard for your organization. This action allows any license entitlements associated with the subscription to be consumed by any Network that is nested under the organization. Once claimed, the Meraki Dashboard serves as the sole License Manager Controller, streamlining management and changes.
Organizations using active legacy licensing models, such as Co-term or PDL, are unable to claim subscription license keys. Mixed licensing modes are not permitted.
Subscription License keys can only be claimed by an expired organization, an organization in a grace period, or a newly created organization (this includes ones created via Organization split).
All trials must either be expired or removed from the organization before claiming the Subscription License key.
Subscription Claim for the First Time
Customers can have one or multiple subscriptions linked to their organizations based on their unique needs.
1. Upon completing the purchase of a Subscription, customers will receive an email containing their Claim Key information.
Note: Customers will receive the confirmation email with the License Key on their Requested Start Date (RSD).

Only Cisco Networking Subscription can be used in Meraki Dashboard or Cisco Smart Software Manager.
Note: If you have SSO enabled, the logging-in experience will be different. The customers will see a different prompt
2. Log into the Meraki dashboard by going to dashboard.meraki.com and input your Email and Password. Click Log in once you are ready.
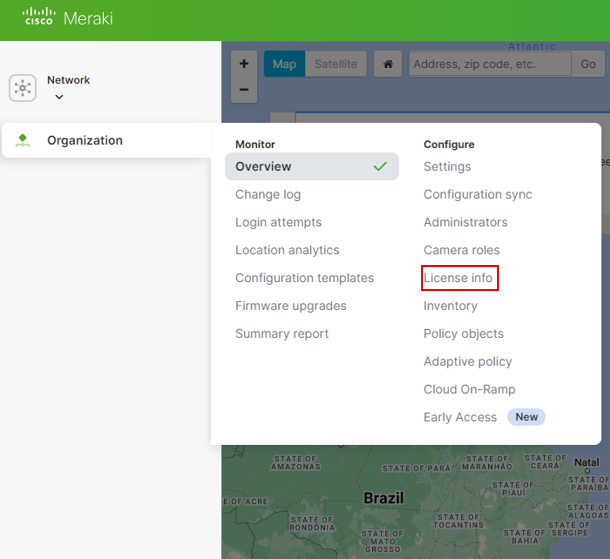
3. Once you log in, Click on Organization > License info section. Click on the Add Licenses button.


4. Proceed to input the required claim key information from the original email in the prompt, click Submit button.
5. You will then be prompted to confirm the details of your subscription. You are able to change the Subscription name to something that makes sense for your business and add notes. After carefully reviewing and verifying the details, click on Claim this subscription.
Note: Scenarios where you can expect an error notification.
1. If your subscription is being used in CSSM and you are trying to claim it in Dashboard.
you will receive an error notification saying.
"You are not allowed to claim this subscription" You will need to make sure the Subscription is not been used in your CSSM in order to complete the claiming Process.
2. If you are trying to claim your Subscription on a Organization that has active licenses for Co-term.
Your will received an error notification saying.
"Your organization currently has active coterm licenses until XX XX, You may claim your subscription after your licenses expire or you may claim in a new organization" Please contact your sells rep / Partner assist you with this.
6. Once done with the process, you will be taken the to Organization > Subscriptions & license info section. There, you will see the subscription already claimed and ready to be used.
Note: Meraki Subscription offers the ability to add, upgrade, and extend your existing Subscription. Any changes to your existing Subscription will be automatically reflected in Meraki Dashboard, without the need for any additional claiming actions. For more detailed information on Change Subscription, please review the following information - Subscription Changes
Note: Cisco Networking Subscription does not have subscription changes available at this time.
Claiming An Additional Subscription
1. To claim an additional subscription, navigate to Organization > Subscriptions & license info section.
2. Click on the Claim a Subscription button located on the upper right-hand side of the page.
3. After inputting the required claim key in the prompt, proceed to click Submit button.
4. You will be prompted to confirm the details of the subscription. You are able to change the subscription name to something that makes sense for your business and add notes. After carefully reviewing and verifying the details, click on Claim this subscription.
5. Once done with the process you will be taken to the Organization > Subscriptions & license info section where you will see the new subscription already claimed and ready to be used.
6. Once the claim process has been completed, bind the networks to the newly added subscription. When one or more networks are bound to a subscription, all devices in those networks will consume seats from the subscription. If you do not bind your networks, they will remain unbound and this can result in non-compliance.
For more information on binding your networks to the subscription, please refer to: Subscription - Network Binding

