
Configure DNS Settings in Meraki Go
Overview
By default, Meraki Go will use the DNS address server settings for the internet provider that you are connected to. You have the ability to utilize other DNS providers with a simple change to your network configuration.
This requires having a wired network configured. See Configuring VLANs in Meraki Go for more information on adding a wired network.
Select the Wired Network
Begin by selecting the wired network from the Networks tab. A wired network will look something like the image below. 
When the network is selected, you will see a page that contains your IP address information.

Change the DNS Settings
Use the Edit menu in the upper right and choose the "Change DNS server" option from the pop up.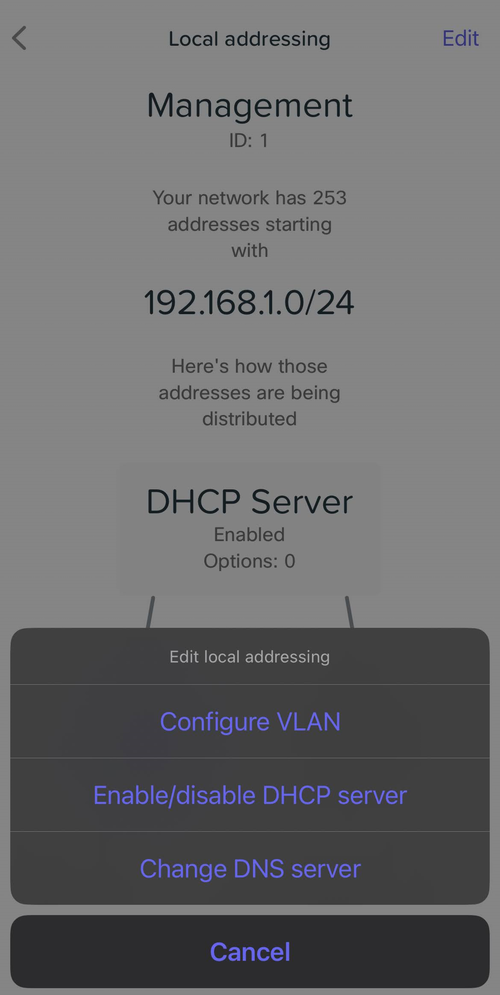
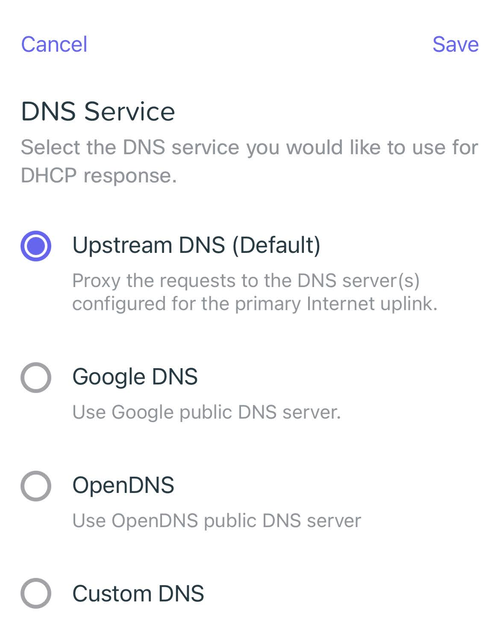
The next screen contains several options for configuring the DNS service for your network. The default option is to use the Upstream DNS, which is provided by your internet service provider. Alternatively, Google DNS and Open DNS are built-in selections.
Enabling a Custom DNS Provider
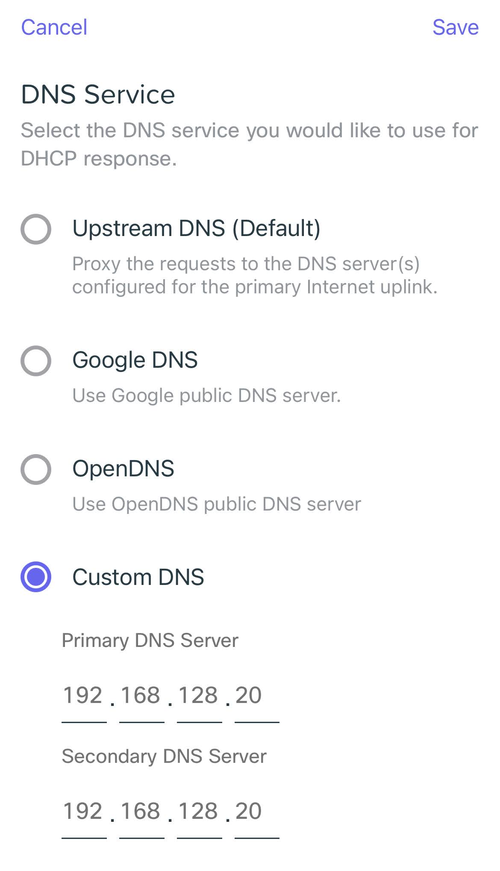
If you want to use a DNS provider that is not listed, you can select the "Custom DNS" option. Enter the addresses for your primary and (optionally) secondary DNS servers and click the Save button
Next Steps
Having problems? See Meraki Go - DNS Misconfigured for more information on DNS settings.