Enabling Multi-Factor Authentication in Meraki Go
Goal and Prerequisites
Multi-factor authentication (MFA) / (also known as two-factor authentication, TFA) is our recommended method for securing your Meraki Go account. This article will help you enable multi-factor authentication for your account.
Enabling multi-factor authentication for a Company in Meraki Go will require all administrator accounts to use multi-factor authentication for accessing that company.
Before beginning this process, we recommend selecting an authenticator app to use for multi-factor authentication.
Steps to Enable Multi-Factor Authentication
Open Multi-Factor Authentication Settings
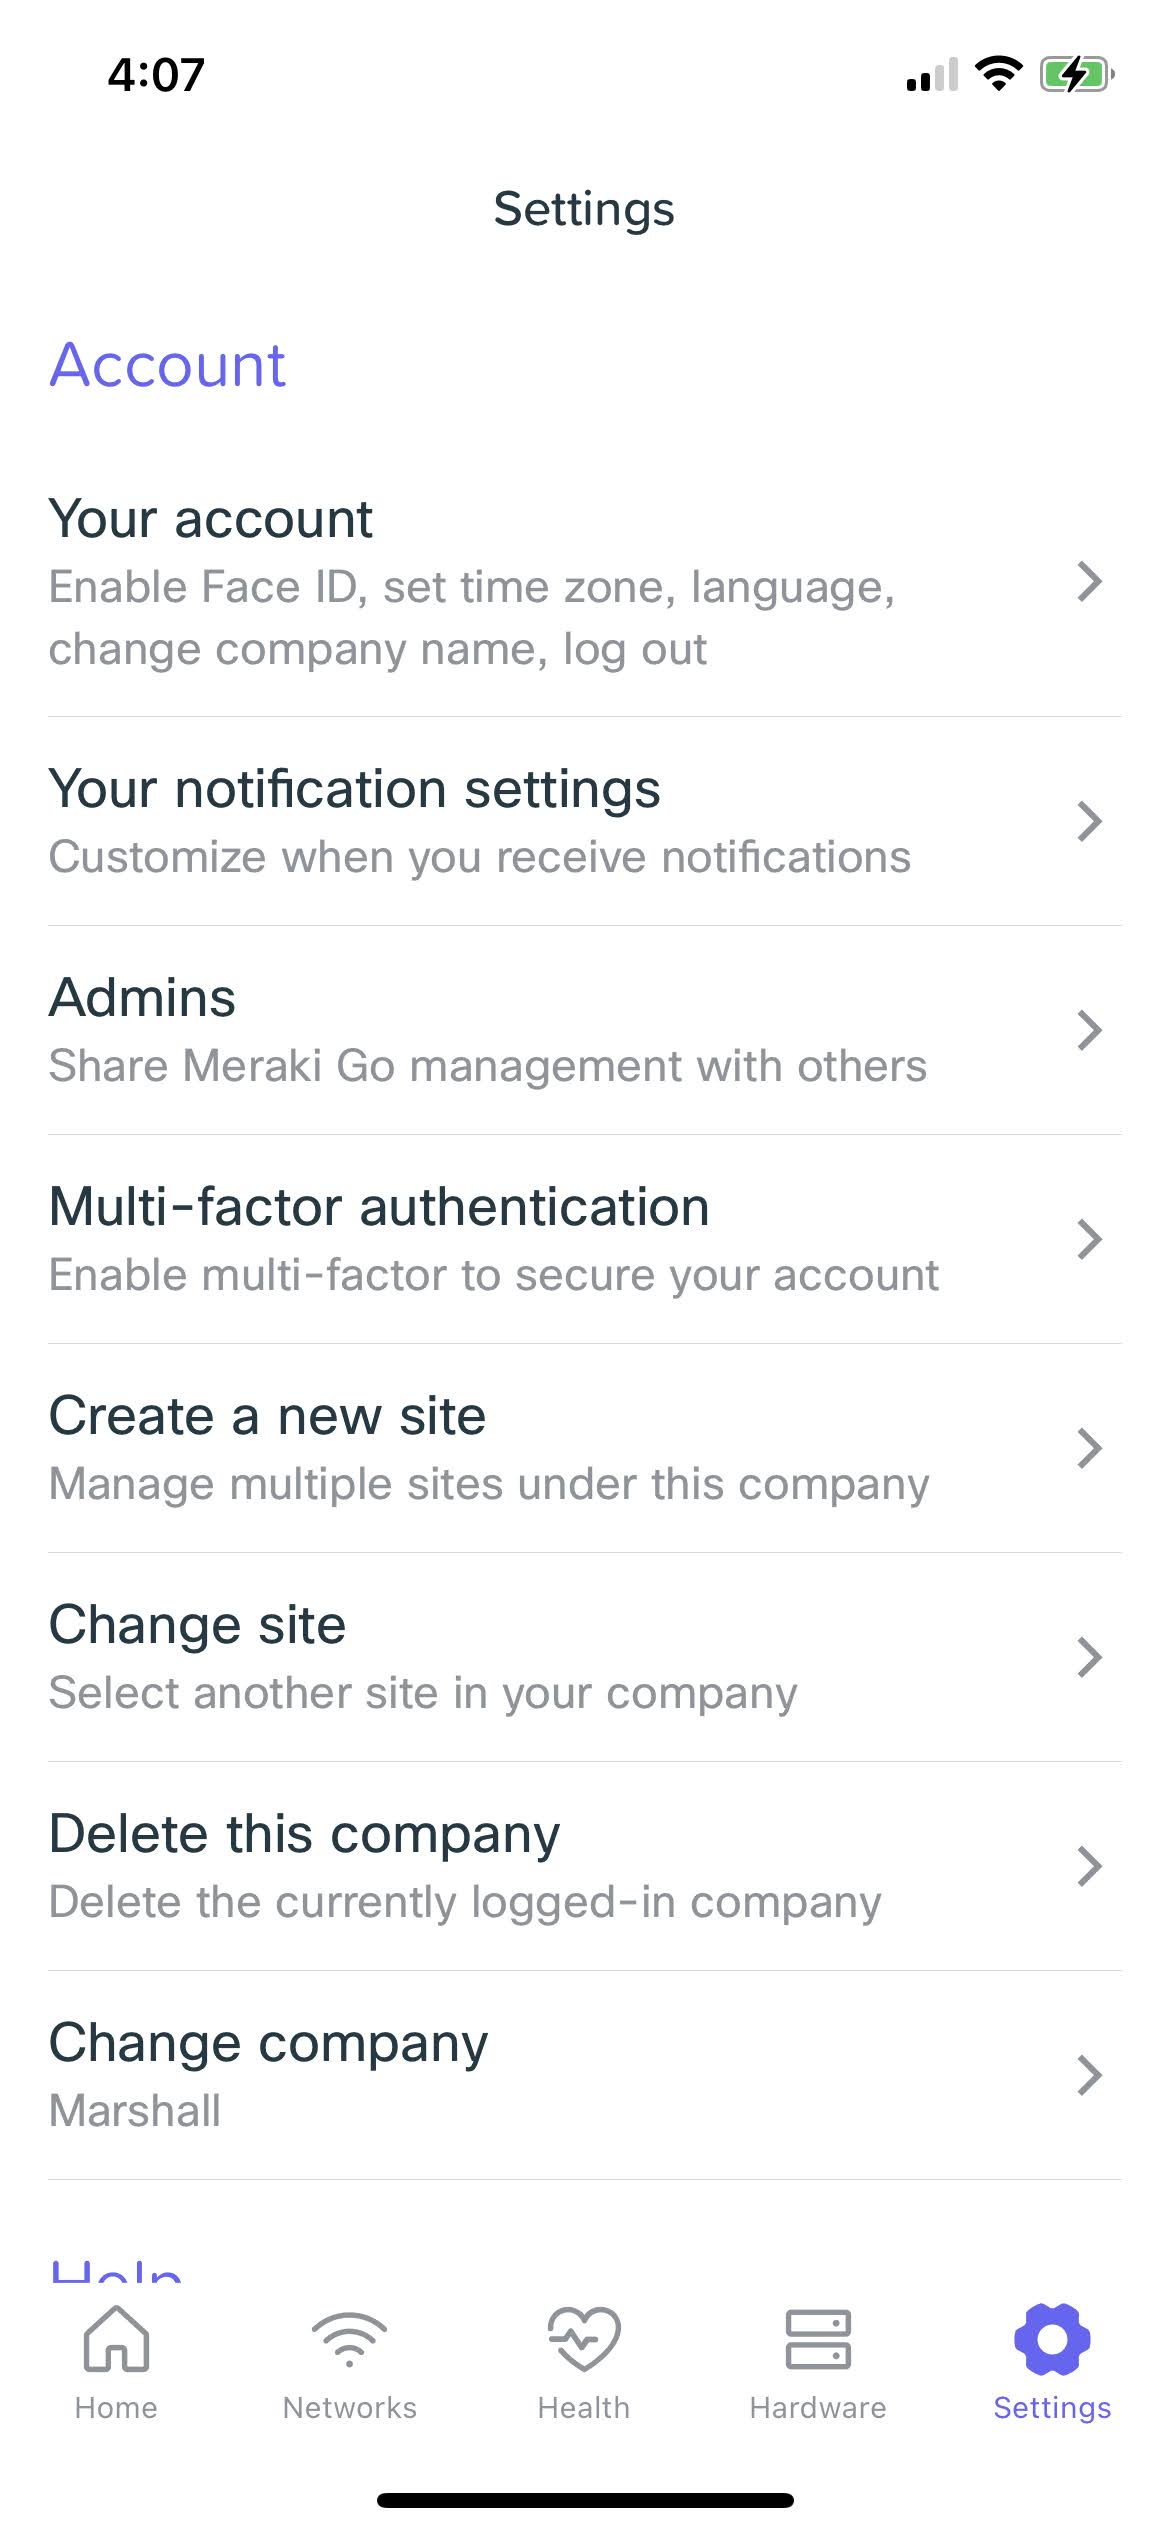
In the Meraki Go app, select the Settings icon in the bottom right. Scroll down to the Account section and select "Multi-factor authentication".
Set Up an Authenticator App
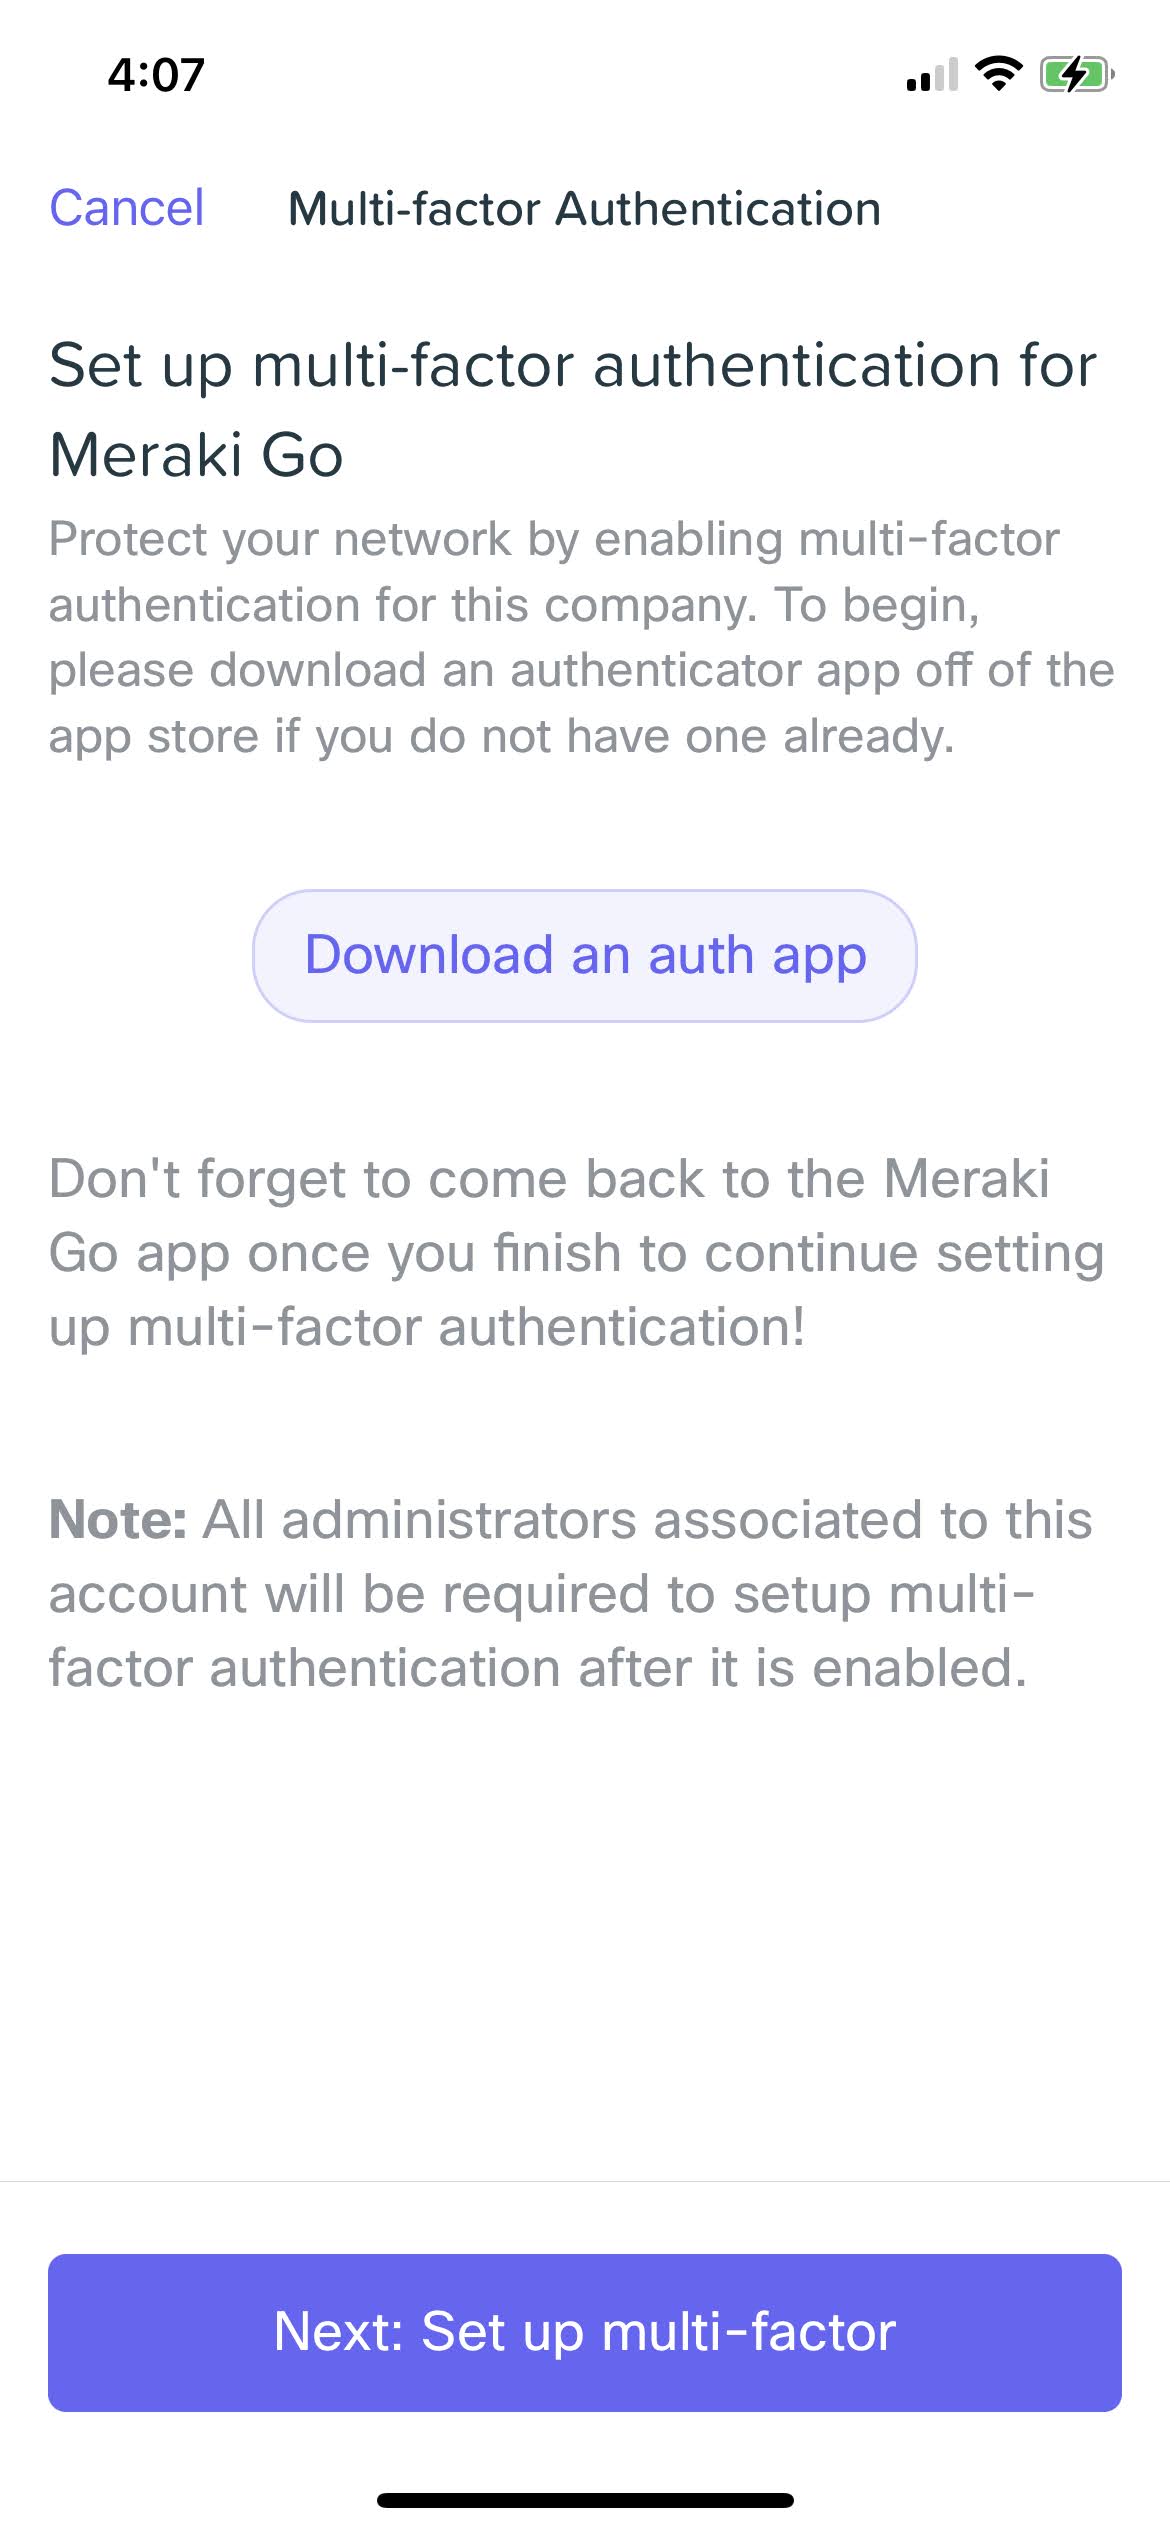
In order to enable multi-factor authentication, you will need an authenticator app. The "Download an auth app" button will provide one alternative but most authenticator apps will work.
Once you have an authenticator app, you can move to the next step by pressing the "Next: Set up multi-factor" button.
Adding Meraki Go to the Authenticator App
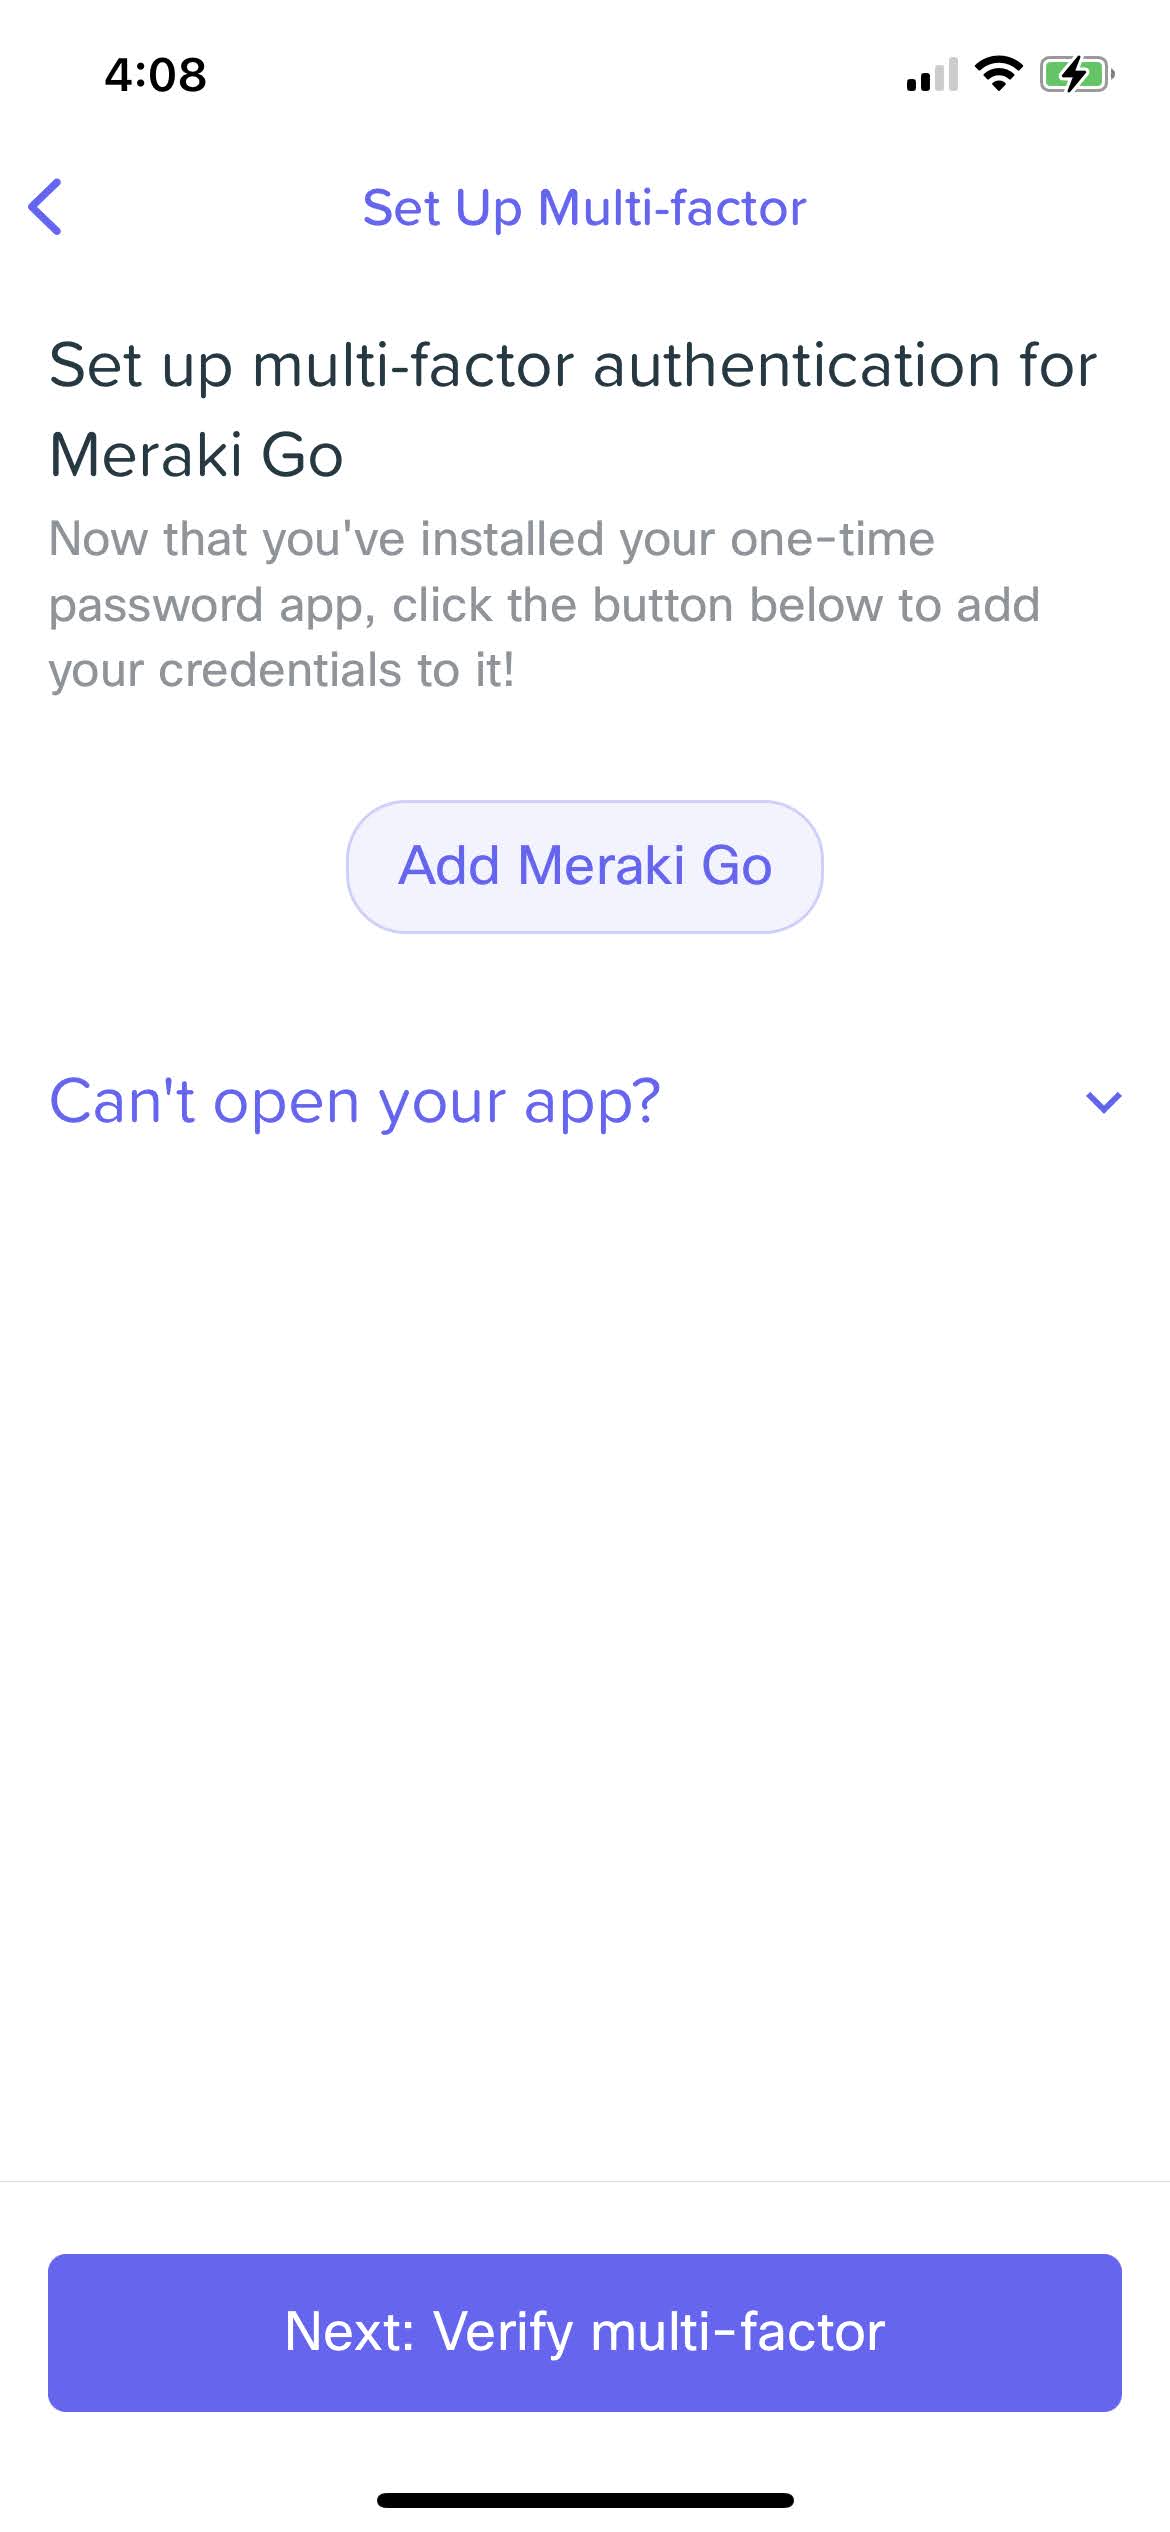
Click the "Add Meraki Go" button to generate a QR code for your authenticator app.
You can also use the "Can't open your app?" button to show your Account Name and Secret code to enter manually into the authenticator app.
When you are done, select the "Next: Verify multi-factor" button.
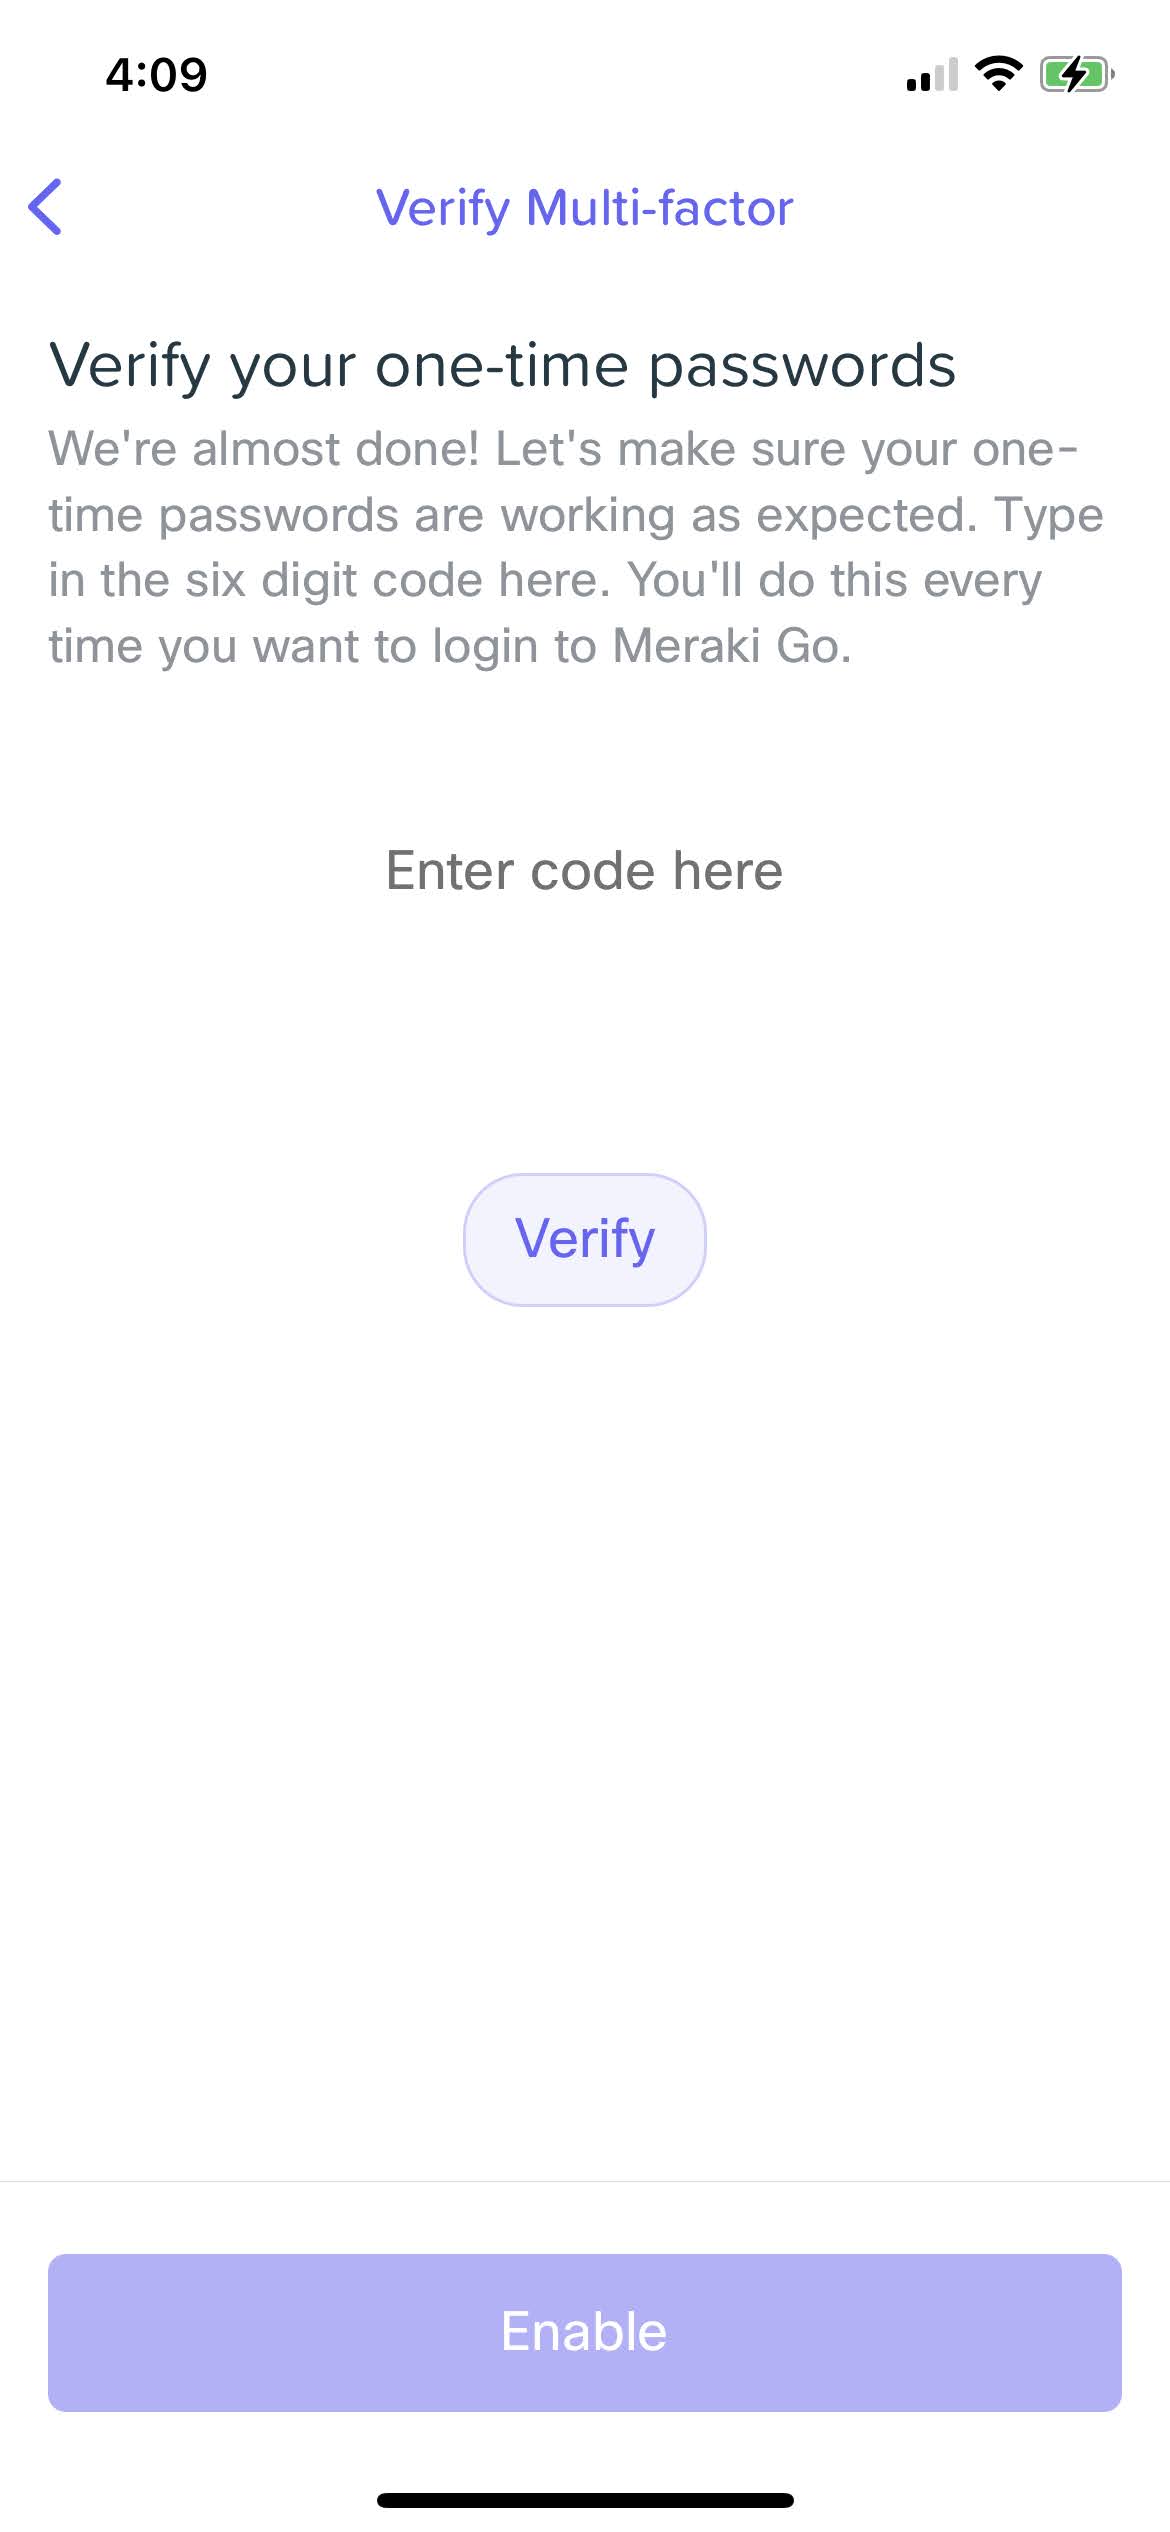
Verify the Multi-Factor Settings
Before finalizing the additional security on your account, you will have to verify the settings using the authenticator app.
Enter the code from the authenticator app and press the "Verify" button. If the code is correct, the "Enable" button will become active. Click "Enable" and your settings will be applied.