Meraki Go - Scheduled Network Availability
Overview
By default a network will be available at all times. In the event a network should not be available at a certain time (like a guest network outside of business hours), a schedule can be created for that network. A few built-in schedules exist for quick selection, but any time frame can be selected on a per-day basis. This helps accommodate various use cases, as well as increasing control over how the network operates.
Goal
After completing this guide it will be possible to control exactly what times a network is made available. It will be made clear how to:
- Create a schedule for any given network.
- Modify an existing schedule for a network.
- Delete an existing schedule to make a network available at all times.
Note: Scheduling network availability is only available in the Meraki Go app and cannot be configured via the Meraki Go web portal.
First Step - Opening the Schedule Configuration
- Navigate to the network tab in the app.
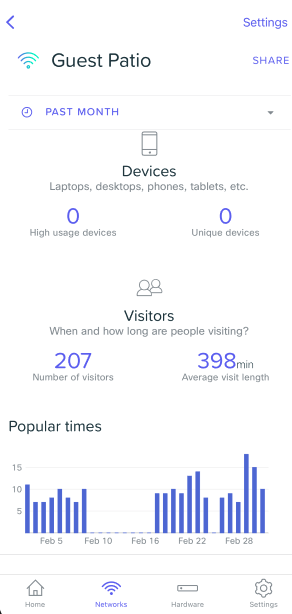
- Select the desired network (in the example, Guest Patio is selected).
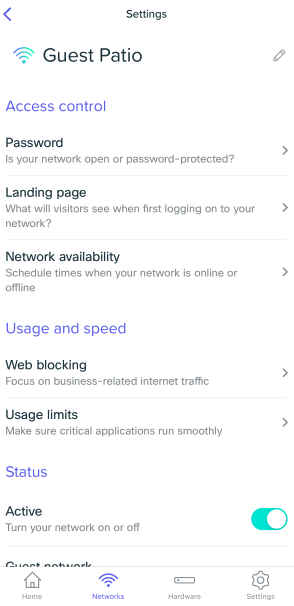
- Tap on Settings, and select Network availability under the Access Control header.


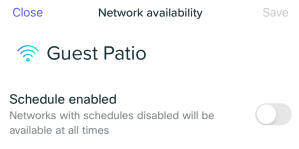
After selecting the Network Availability menu item the screen for viewing, editing, and creating schedules is presented.

- Tap the Schedule enabled row to allow this particular network to only be on during a selected timeframe.

Second Step - Modify the Schedule
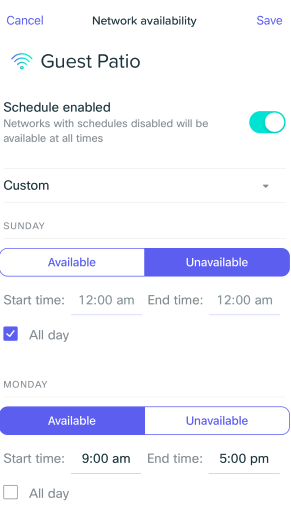
After Network Availability is enabled, it is easy to modify the existing schedule with a template or to create your own availability time frames. Some easy templates that are included:
- Always Available - This template is included as a means to quickly and easily clear a schedule that has been set.
- Available 9-5 daily - Saturday through Sunday the network will be online from 9am to 5pm with this template.
- Available 9-5 weekdays - Similar to above, but excluding the weekends for the more business oriented networks.
- Custom - The type of schedule that is selected when any manual modifications are made to the existing templates.
After making all desired changes, pressing Save will create the schedule.
Pressing Save makes this schedule active right away. It may take a few minutes to be reflected in the hardware.
What's Next
Have any feedback? Please use the make a wish feature in the settings pane of the app to let us know your thoughts!

