
WiFi Access Point Features in Meraki Go
Devices (Clients) List
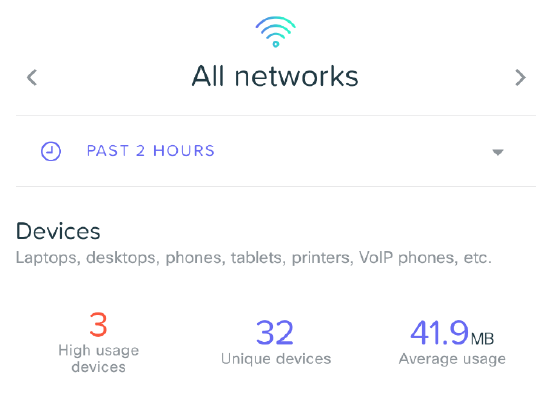
You can find the devices connected to your network in the app under Home > Devices. In the Meraki Go app, your devices are the clients connected to your network. This could include laptops, desktops, phones, tables, printers, VoIP phones, etc. Meraki Go keeps track of which devices have connected to your network, their current connection status, the applications they use, and how much bandwidth they use.
Keep in mind that, when viewing Devices on the Home tab, the information displayed is based on which network you have selected at the top of the page, and which time period you have selected beneath that. Note that the time period you've selected on the home tab also affects the devices displayed on the hardware details page. If you have All networks selected, the devices included in your list will be devices from all networks on your account. If you select a specific network, the devices listed will only be from that network.
Under Devices, the app displays three categories for device use information:
- High usage devices
- High usage devices are devices that are using a disproportionately large percentage of your network's bandwidth, compared to other devices on the network. Devices are considered to be "high usage" if their total bandwidth use over the selected time period is more than two standard deviations from the mean for devices on that network
- Unique devices
- The number of unique devices that have connected to the network in the selected time period
- Average usage
- The total bandwidth use over the selected time period, divided by the number of unique devices
Devices (Client) Use Information
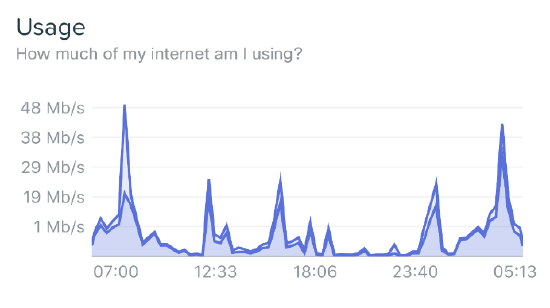
Under Home > Usage, you will find a graph that visualizes, historically, how much bandwidth was being used on the selected network, over the selected time period. The vertical axis represents bandwidth, and ranges from 0 to your max bandwidth use during that time. The horizontal axis represents time, and ranges from the current time to the end of the selected time period in the past.
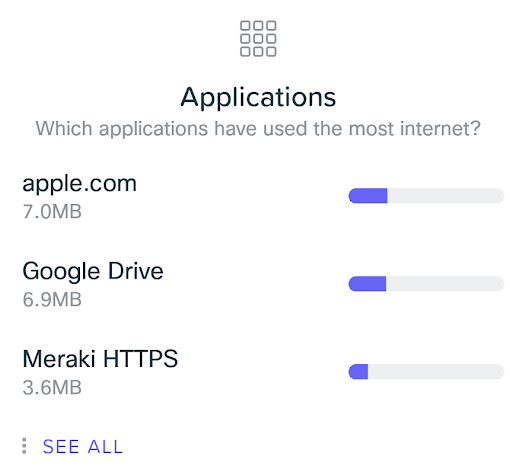
Applications Use Information
Under Home > Applications, you will find a pie chart which displays a ratio of relative bandwidth use for the applications being used by devices on the network. The applications in the list include applications that have been used in the selected time period for the Home tab.
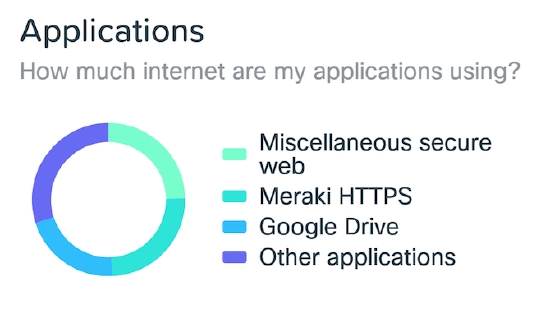
The applications included are the top 4 applications by use. Because of this, the chart will display up to 4 applications at a time.
WiFi Networks
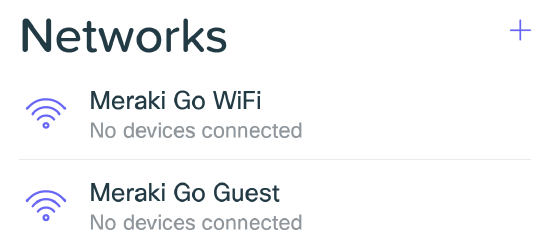
Your WiFi networks can be managed in the Meraki Go app from the Networks tab.
Create a WiFi Network
If you do not yet have a network, or if you would like to create another network, you can Create a WiFi Network by selecting the plus ( + ) symbol in the top-right corner of the main Networks page in the Networks tab. You will need to specify a couple settings here.
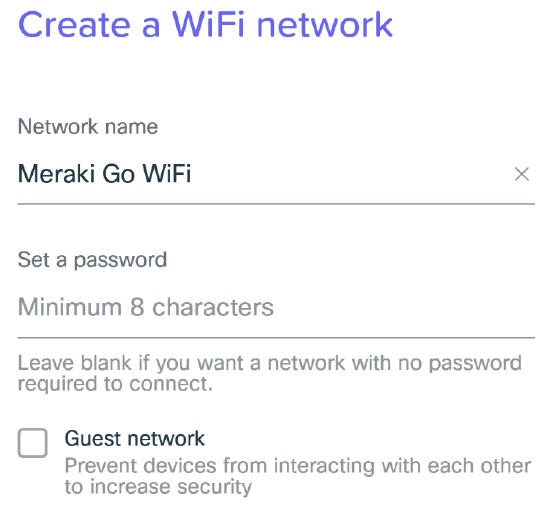
- Network name
- This is how your network will appear to users who connect to it.
- Set a Password
- If you would like your network to require a password, you can enter it here. If you would like your network to not have a password, make sure to leave this field blank. If the field is blank, it will say "Minimum 8 characters."
- Guest Network
- When you would like to have a network be a Guest network, you can select the checkbox here.
- A Guest network has Client isolation enabled, which means that devices on this network cannot communicate with any other devices on the guest network, or with any other devices (like printers, servers, etc.) on your local network (LAN). This is a more secure setting when you want to ensure that network's users can only browse the internet and cannot interact with each other or with network resources.
Network Details
You can view more details about any of your existing networks by navigating to your Networks tab. On the Networks main page, you should see a list of all your account's networks, along with the number of devices currently connected to each network. Select any of these to view details about that network. If you would like to edit or make changes to the network, you can select SETTINGS from this page.
- Network Name
- You can view and edit the name of your network.
- Network Password
- You can temporarily view the password for your network. This will not reveal the password to network users, only temporarily to you when this option is selected. If you would like to edit your password, you can select SETTINGS at the top of the screen.
- Data Timeframe
- Your network's details can be viewed in three timeframes: Past day, Past week and Past month. This selection will affect the information listed in the Devices section below it.

- Devices on Network
- Your network details page has information about the devices (clients) on your network. On your main network details page, you will see how many high usage devices you have, and how many unique devices you have.
- Devices are considered to be "high usage" if their total bandwidth use over the selected time period is more than two standard deviations from the mean for devices on that network.
- The full list of devices connected to your network during the selected time period can be viewed by selecting SEE ALL. After selecting SEE ALL, you can also search devices on your network by device name, MAC address, IP address or Operating System (iOS, Windows, Android, etc.) For additional details about each device, you can select the device so see a more complete network device details page.

- Applications
- Your network details page displays information about which web applications are using most of the bandwidth on your network. The most used applications will be listed first, and your top 3 will be displayed by default. You can view the full list of applications by selecting SEE ALL.
Network Settings
You can edit the settings for any of your existing networks by navigating to your Networks tab, selecting a network, then selecting SETTINGS from the Network Details page. From here, you can change several settings for your WiFi networks and can access some of the more advanced options for configuring your networks.
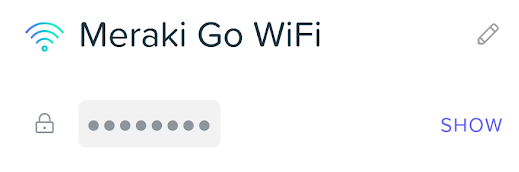
Network Name
The network you are editing will be displayed at the top of the page. By selecting the pencil icon here, you can change the name of the network.

Access Control
- Sharing
- You are able to share your network quickly and easily with a QR code.
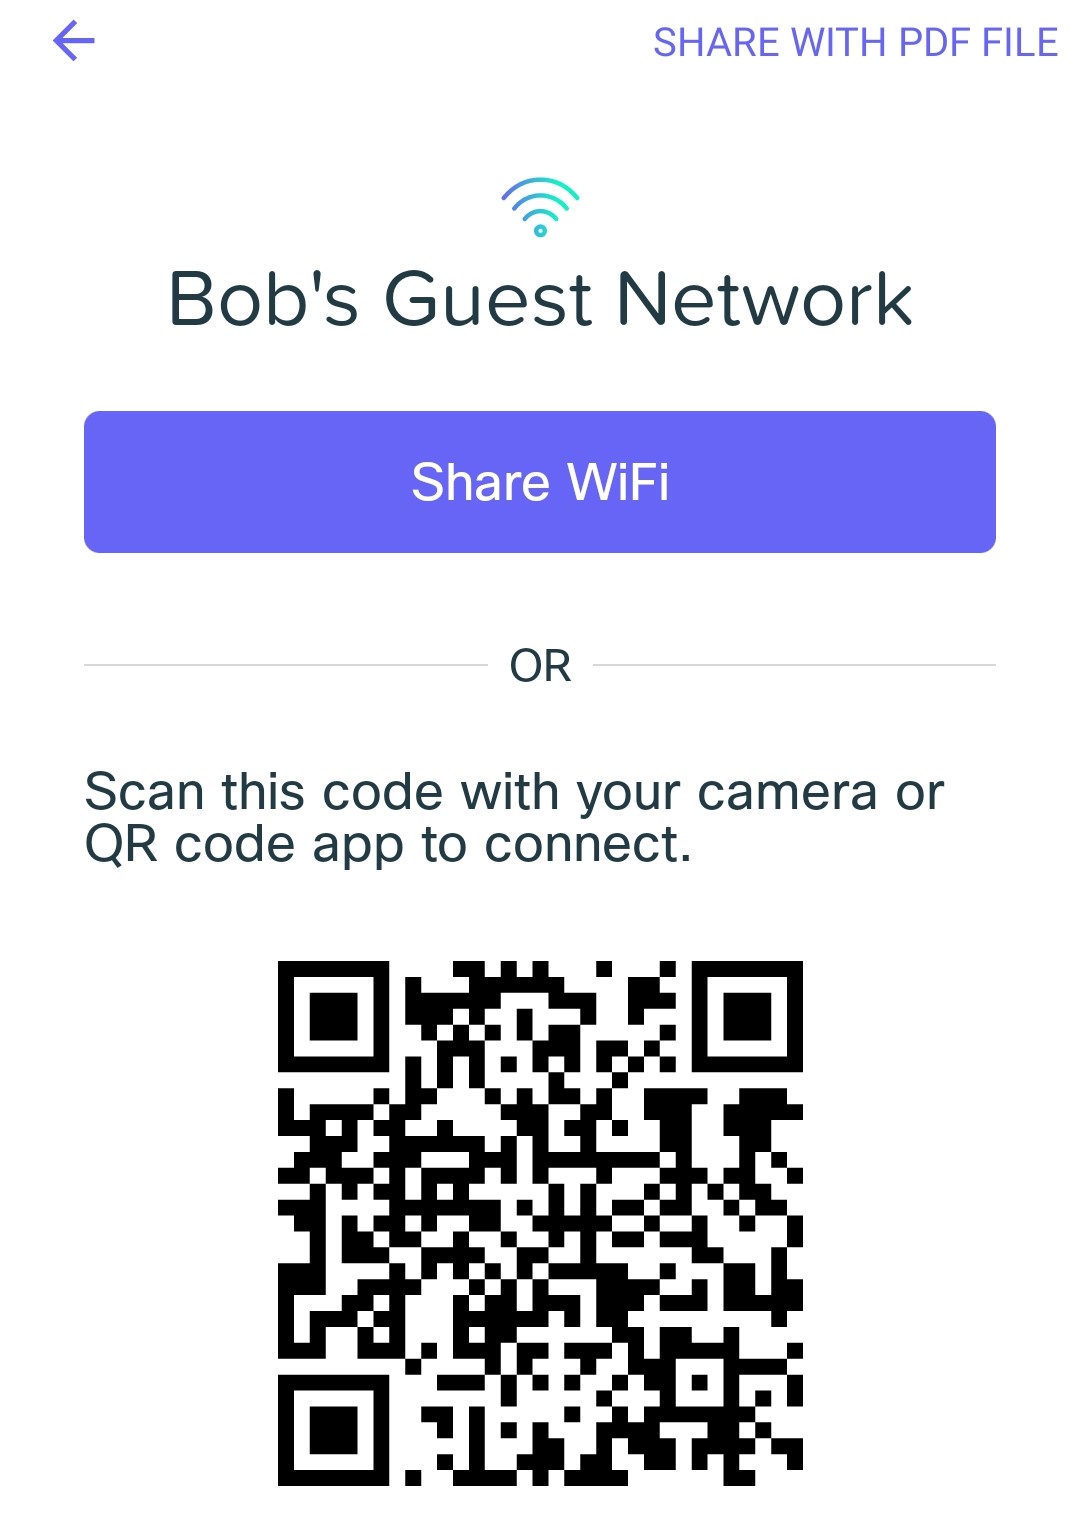
- This can be converted to a PDF file for easy printing.
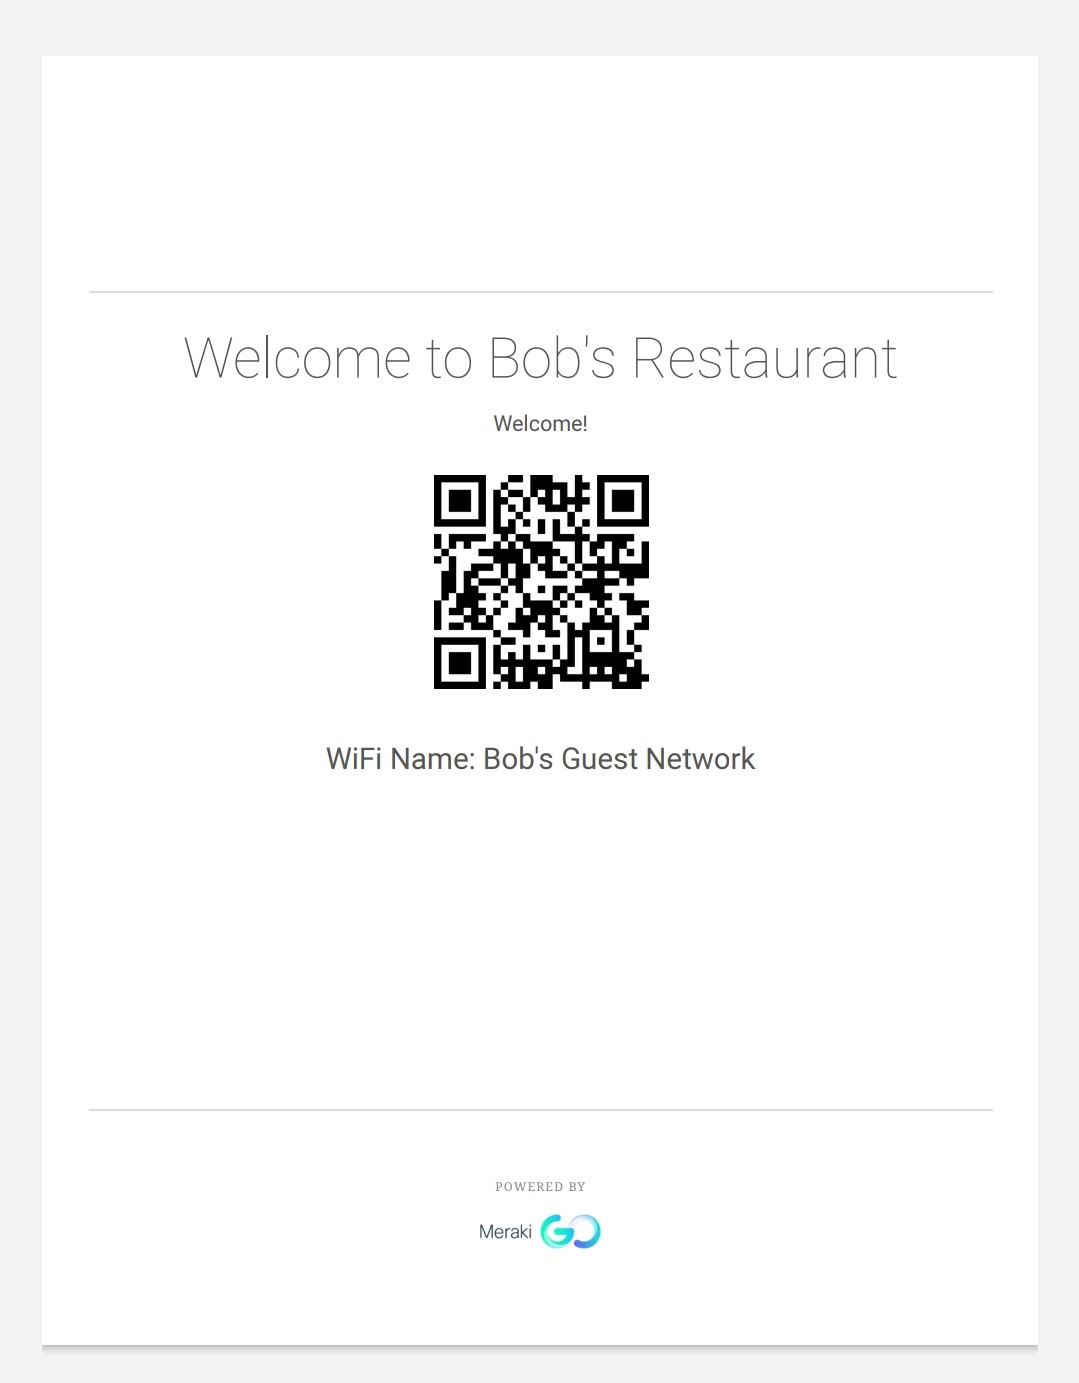
- You are able to share your network quickly and easily with a QR code.
- Password
- You select whether your WiFi network requires a password to connect to it. The password security protocol is WPA2 Personal.
- Alternatively, you can select Open if you'd like your network to not have a password. This option is generally recommended for Guest networks.
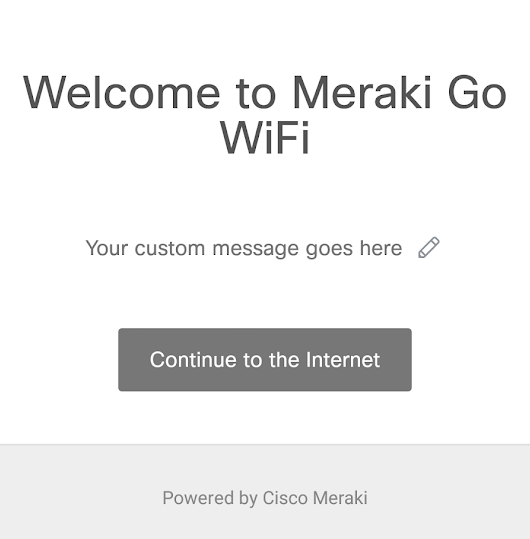
- Landing Page
- By setting a Click-through splash page, you can require first-time connections to your WiFi network to be sent to a custom landing/splash page before being allowed to reach the internet. This can be used to set a greeting, a warning message, terms of service, etc.
Limited Broadcast
Limited broadcast (also referred to as per-ap broadcasting) permits or denies a wifi network from being used with a particular set of access points.
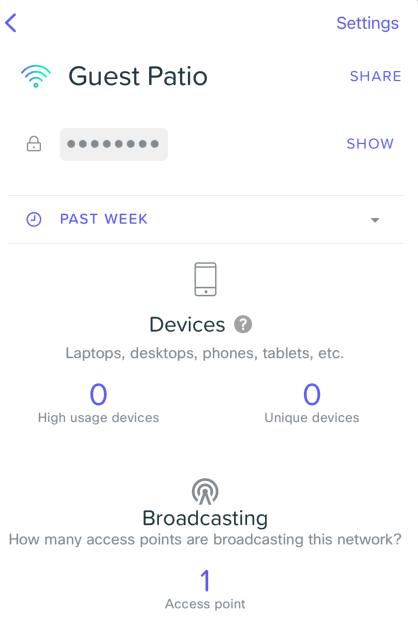
Tapping the "1", the number of access points, will present a list of all access points. Here, you can choose which access points will broadcast the wireless network.
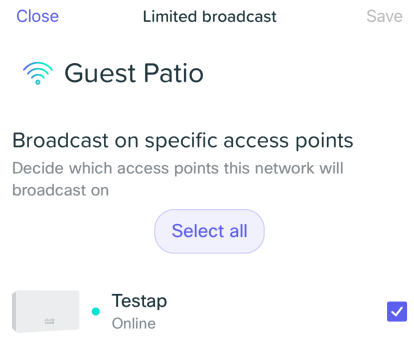
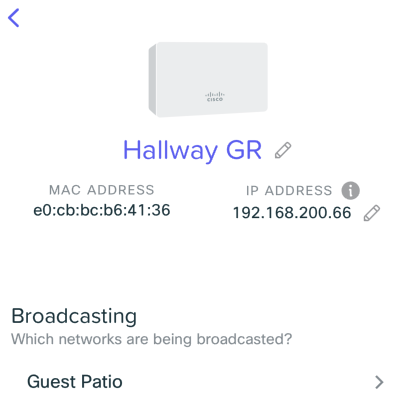
Similarly, choosing an access point from the Hardware tab will now list which networks are being broadcast from that particular access point.
Status
- Active (On/Off)
- This option simply turns your network on or off. This disables your network completely, and any currently connected devices will be disconnected. Note that you cannot delete networks (you can only edit existing networks), so if you would like a network to no longer be used, you must turn your network off.
- Guest network
- Enabling Guest network turns on the client isolation feature. Client isolation sets up a local firewall that prevents users on the network from communicating with anything on else on the local network, including other guests, local network resources, printers, security devices, and any other networked resources. Users on a network with Guest network enabled will essentially only be able to reach the internet (unless there is explicit routing enabled).
- Note that Guest network can only be used in NAT mode, and when this option is enabled, your network will automatically be set to NAT mode if it is not already. This is because client isolation uses the unique generated 10.0.0.0/8 network created in NAT mode to generate the local firewall.
- Note that you do not need to enable this feature for a guest network, it is simply recommended for best-practice user security.
- Discoverable
- If a network is set to Undiscoverable, then it will not actively broadcast its name to client/user devices and will not appear on WiFi lists. If a network is set to Undiscoverable, it can still be accessed, but users will need to manually enter the name of the network they want to connect to on their device.

Advanced Settings
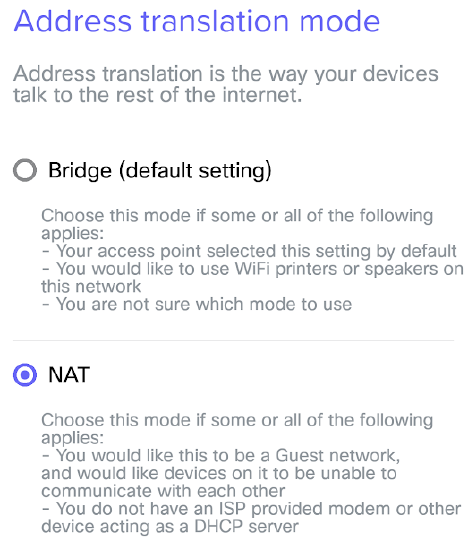
Address translation mode
- Address translation mode is an advanced setting which allows you to adjust how devices (clients) on your network communicate.
- Note that this option should only be changed if you are comfortable with the networking terms listed. Otherwise, the WiFi access point will automatically configure itself to use the correct setting for your network.
- Bridge mode (default setting)
- In Bridge mode, your network's IP addressing is determined based on the IP addressing of the rest of your network. This mode must be selected if you would like wireless devices to be able to use local printers or other networked devices on the local network (unless explicit routing is configured).
- When a WiFi access point is first turned on, it attempts to negotiate in Bridge mode if it can. If the WiFi access point's IP address matches its public IP address, then it will be set to NAT mode automatically.
- NAT mode
- NAT mode should be used if you would like to set up an isolated Guest network, if you do not have a local DHCP server, or if devices on that network only require internet access.
- In NAT mode, the WiFi access point sets up network address translation and runs a DHCP server to assign IP addresses to wireless devices out of a private 10.X.X.X IP address pool. All traffic inbound and outbound to/from that network is translated to whatever addressing is used on the local network (LAN).
- Bridge mode (default setting)
- If you would like to learn more about Bridge mode and Nat mode, you can read more in our enterprise documentation article, SSID Modes for Client IP Assignment.
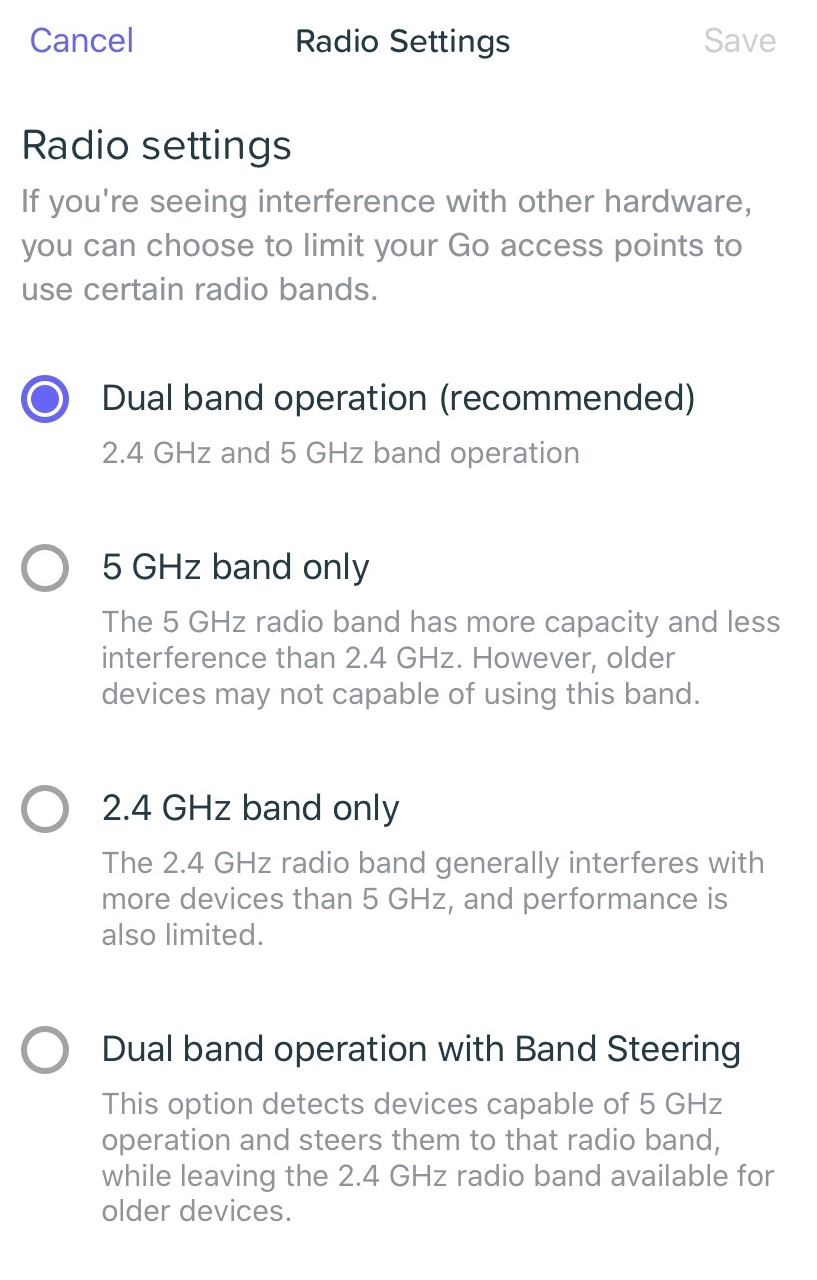
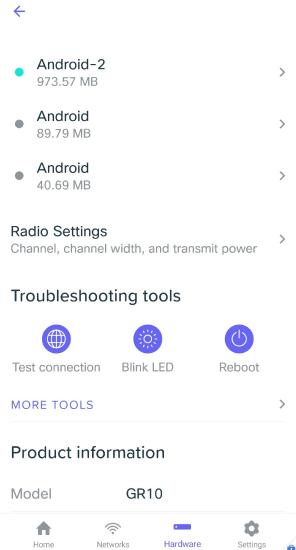
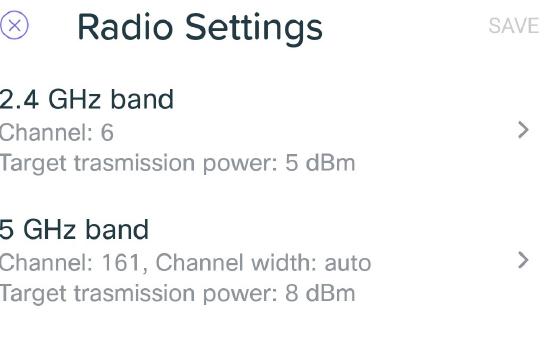
Radio Settings
The radio settings can be found in the same view under Advanced Settings (Networks > Settings > Advanced Settings > Radio Settings). This mode allows for configuration of:
- Dual band operation: Supports both 2.4 and 5 Ghz band operation. This setting supports the widest amount of client devices.
- 5 Ghz band only: Allows configuration of the GR access point to only broadcast a particular network on 5 Ghz band only. This supports fewer old devices, but does help improve wireless quality in most cases.
- 2.4 Ghz band only: Allows configuration of the GR access point to only broadcast a particular network on 2.4 Ghz band only. This is not recommended, but can help some older clients connect to networks if other options fail to provide access.
- Dual band operation with Band Steering: This option is the same as dual band, with the added benefit of trying to get most clients on the 5 Ghz band for better quality. This option leaves the 2.4 Ghz band available, but less preferable, to end devices.
Radio Settings Override
The AutoRF feature allows all Meraki Go access points to automatically select what should be the best channels to use. However, choosing the right channels is extremely difficult. The Meraki Go access points do not always have an ideal opportunity to check which channel is the best. In some cases, manually assigning a channel, transmit power target, or both is the best path to a healthy wireless network.
To change or override the existing channel and transmit power being used on your access point, open the app and follow these steps:
- Select the access point from the Hardware tab to change the radio settings for.
- Tap the Radio Settings option to open the configuration panel.
- Choose which band you want to update settings for.
- Now you may choose both the channel and transmit power for this particular access point.
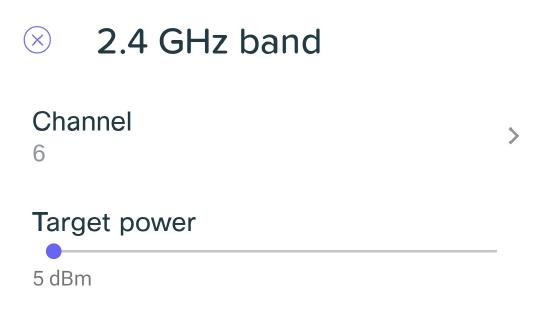
- Press the X once you have set these values appropriately.
- Tap Save to commit the channel and transmit power changes.
Network Device Details
Details about individual devices connected to your networks can be viewed on the Network devices details page. From the Networks tab's main Network details page, you can see a short list of the top-use devices on your selected network. You can also select SEE ALL to see all devices that have connected to your network in the selected timeframe. By selecting any individual listed device, you can reach that device's Network device details page.
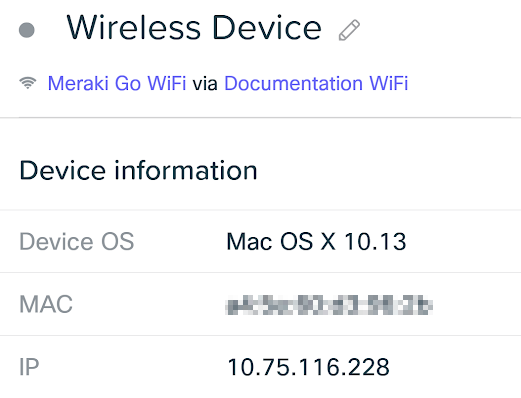
Device Name
Each device's name can be changed to help you more easily identify devices on your network. Devices will be automatically given a name based on their detected OS.
Connection Status
If the device is currently connected, there will be a green dot next to its name. If it is not connected, then there will be a grey dot.
Network and WiFi Access point name
The network the device connected to and the hardware it was connected to are listed below the device's name.
If a custom name has not been given to the hardware, then the hardware's MAC address will be displayed instead.
Device information
- Device OS
- The device's detected operating system and version
- The access point will use the User-Agent string field of an HTTP GET request packet to determine the operating system of the client when it first associates
- MAC
- The device's unique hardware address. This can be useful for configuring network settings on other devices.
- IP
- The device's IP address, which is used for directing network traffic to and from the device.
- If the access point is in Bridge mode, the device's IP information is obtained via whatever IP addressing method is in place for the rest of the network.
- If the access point is in NAT mode, devices connected to WiFi access points are given IP addressing information by the access point. There is a local DHCP server run by the access point, which provides addresses in a 10.X.X.X/8 subnet. The IP address is created by running the client’s MAC address through a hashing algorithm. The device is given a gateway address of 10.128.128.128 and a DNS address of 10.128.128.128. This DNS address points back to the AP, which then uses its own addressing information to route DNS traffic.
- Wireless connection
- Signal strength
- If the device is currently connected to one of your networks, then its most recent signal strength will be displayed. This can be used to gauge the quality of the connection the device is receiving. If the signal strength is consistently low, then the device may need to be moved closer to the access point, or another access point may be required, closer to the device. If the
- Access point
- The name of the WiFi access point the device connected to most recently. If the hardware has not been named, then the hardware's MAC address will be displayed instead.
- WiFi network
- The WiFi network the device connected to most recently.
- Last Seen
- The time the device was last connected to the listed access point and WiFi network.
- Signal strength
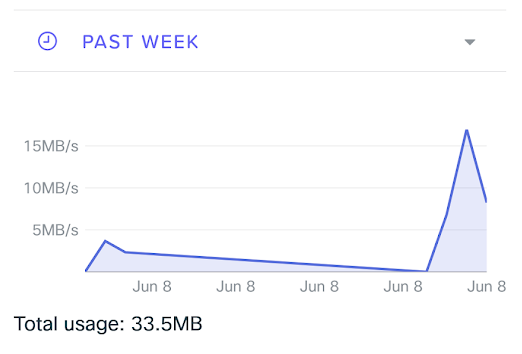
- Usage Graph
- If the device has been online in the selected timeframe, then a graph will be displayed showing a graph of its bandwidth use during the time it was online. Note that the graph only spans the period of time that the device was online, so if a device was online for only one day, the graph would span one day, rather than a week, or month, if that timeframe were selected.
- Application usage
- Under the usage graph is the Application usage section. Any web applications used by the device in the selected timeframe will be listed here by name. The amount of bandwidth/data used during that time will also be displayed, in order, so you can easily identify what the main activities were for the device during that time.
Blocking Content
Meraki Go WiFi access points have content filtering features that allow you to block certain types of web traffic for users on your networks. In the Settings tab, under Usage and speed, you can configure Web blocking.
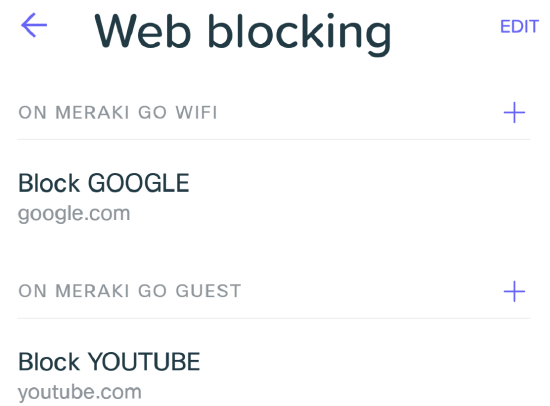
To block a website, select the plus (+) icon next to the name of the network you would like to block the site on. Blocked websites are added by domain. This means that if you want to block traffic to docs.google.com, you would only need to enter google.com, because google.com is the domain for docs.google.com, and docs.google.com is a subdomain of google.com.
Note that subdomains cannot be blocked, so if you were to enter docs.google.com, all of google.com would be blocked, including drive.google.com and mail.google.com, so make sure to select blocked websites carefully. Also note that any blocked sites you have configured will only be blocked on the network you added it to, so you will have to add a site to each network if you would like it blocked on every network.
You can select EDIT in the top-right corner to delete any blocked sites you already have listed.
Usage Limits
Meraki Go WiFi access points have traffic shaping features that allow you to set usage limits on either entire networks, or on certain types of web traffic. In the Settings tab, under Usage and speed, you can configure Usage limits.
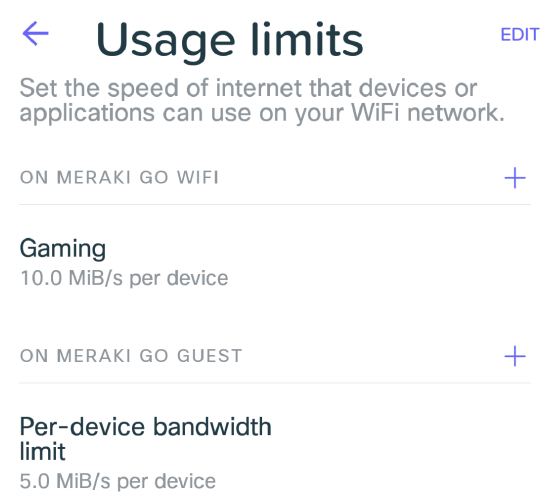
To set usage limits, select the plus (+) icon next to the name of the network you would like to set usage limits on. There are two options for setting usage limits. For all devices on the network and by application category.
- All Devices on Network
- For this option, the selected Usage limit is per device, for all devices on that network.
- By Application Category
- For this option, the selected Usage limit is per device, per category, for all devices on that network.
You can select EDIT in the top-right corner to delete any blocked sites you already have listed.
Hardware Status
The status of all the hardware connected to your Meraki Go account can be viewed on the Hardware tab. Each piece of hardware listed will have a picture representing the hardware model, a colored dot indicating the hardware's connectivity status, and a name. If a custom name has not been given to the hardware, then the hardware's MAC address will be displayed instead.
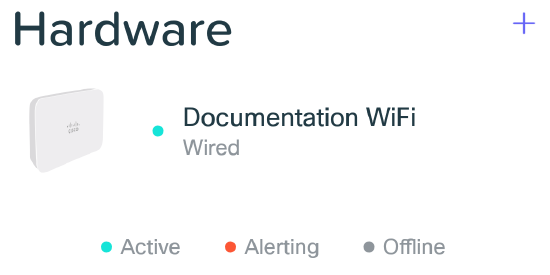
You can select any hardware in the list to be brought to the Hardware details page.
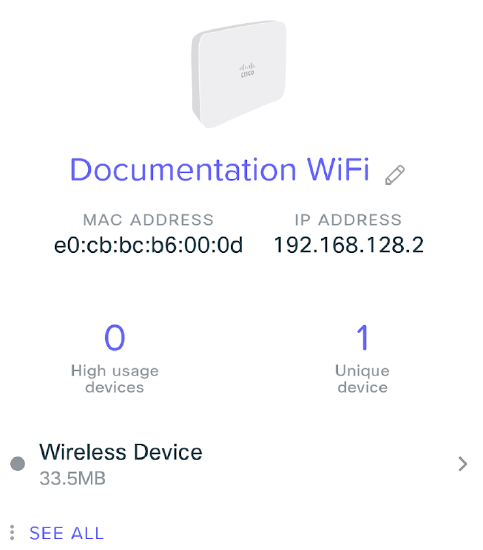
Hardware Details
- MAC
- The hardware's unique hardware address. This can be useful for configuring network settings on other devices
- IP Address
- The local IP address of the hardware
- Connected Devices
- Unique Devices
- The number of unique devices that have connected to your hardware in the timeframe selected on your Home tab.
- High Usage
- High usage devices are devices that are using a disproportionately large percentage of your network's bandwidth, compared to other devices on the network. Devices are considered to be "high usage" if their total bandwidth use over the selected time period is more than two standard deviations from the mean for devices on that network
- Unique Devices
- Product Information
- Model
- The model of your hardware
- Serial
- The serial number of your hardware
- MAC Address
- The hardware's unique hardware address. This can be useful for configuring network settings on other devices
- LAN IP
- The local IP address of the hardware
- Public IP
- The public IP address of your hardware. If you have a modem/router, then this will be the public IP address of your entire network.
- Channels (2.4 and 5ghz)
- Two values will be listed here. The first number is the 2.4Ghz channel the hardware is broadcasting on, and the second is the 5Ghz channel. Meraki Go WiFi access points broadcast on both channels to better reach different types of client/user devices.
- Model
- Delete
- You can use the delete option to remove the hardware from your network.
Adding Hardware
To add additional Meraki Go hardware to your account, navigate to the Hardware tab and select the plus (+) icon in the top-right corner. From here, you'll be walked through the standard unboxing process for new hardware.
The process for adding new hardware is:
- Unbox
- Remove the hardware from the box, and remove the mounting plate by sliding it forward.
- Add hardware
- From this screen, you will have 2 options:
- Scan QR code
- Use your phone/tablet's camera to scan the QR code on the back of the hardware. The QR code is the black and white patterned square that appears on the sticker on the bottom of the hardware. If your camera is not responsive or not enabled, you can enable it in your phone's settings, or Enter serial number instead.
- You may need to give the Meraki Go app permissions to use your camera. If you are not directed automatically, you can navigate on your phone/tablet to your Settings App > Applications > Meraki Go > Permissions, and then enable camera.
- Enter serial number instead
- If you cannot use the QR code for any reason, you can also enter the serial number of your device. This is a 12-character sequence (eg. Q2VD-ABCD-1234) which is on the back of your hardware, and it also listed on the side of the box your hardware came in.
- Be sure to include dashes when entering your serial number.
- Scan QR code
- From this screen, you will have 2 options:
If you have any issues adding hardware to your account, feel free to contact Support under Settings tab > Account > Contact support.