
Configuring WPA2-Enterprise with Meraki Authentication
Overview
WPA2-Enterprise with Meraki Authentication is used to authenticate wireless users using a defined username and password configured on the Meraki dashboard. Meraki Authentication uses PEAP (Protected Extensible Authentication Protocol) with MSCHAPv2 to provide a secure authentication process for 802.1X. For more information on how PEAP works, refer to our documentation on Configuring RADIUS Authentication with WPA2-Enterprise. When using Meraki Cloud Authentication, the Meraki cloud serves as the Authentication Server, the access point is the Authenticator, and the STA (Client), is the Supplicant.
Note: It is expected that certain client devices will get a prompt to trust or ignore validation for the Cisco Meraki certificate they get when connecting to an SSID that is set to use WPA2-Enterprise with Meraki Authentication.
WPA2-Enterprise with Meraki authentication is not supported for wireless MX or Z-series models when in a combined network. In order to use this feature you will need to split the wireless MX or Z-series device into a standalone network.
Creating Meraki Authentication Users
User accounts must be created in the dashboard in order to use the Meraki Cloud Authentication option. The created user will show an account type of “Meraki 802.1X” and can be authorized on a per-SSID basis.
To create an 802.1X user on the Meraki dashboard:
- Navigate to Network-wide > Configure > Users.
- Select the SSID to configure from the SSID drop-down menu.
NOTE: Meraki Authentication must be enabled on Client VPN or at least one SSID to be able to create, edit or delete users.
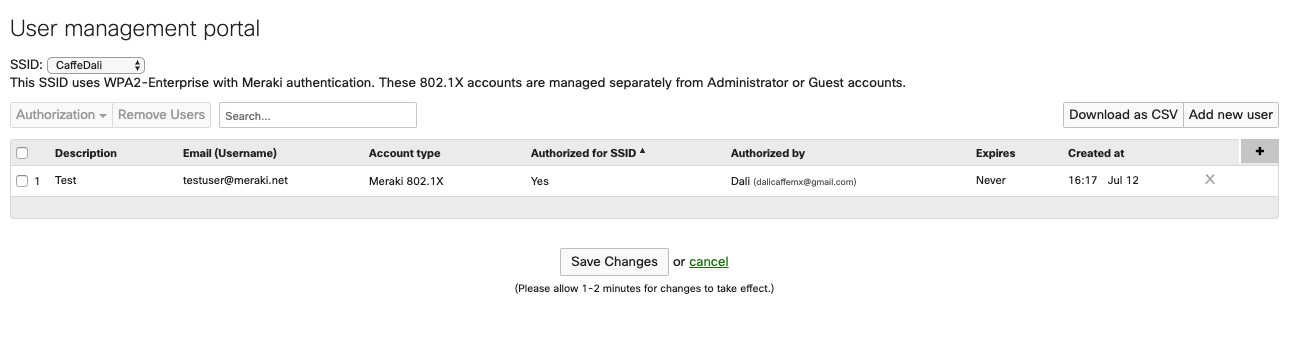
- After selecting the desired SSID, select Add new user. A dialog box will appear to set the following attributes:
-
Description: A descriptive name i.e. John Doe.
-
Email (Username): The email address of the user account which is also the username. Passwords will be sent to this email address.
-
Password: Enter a password or click the Generate button to generate a random password. The password can be emailed to the new user if desired.
-
Authorized: Yes allows network access for the selected SSID, No denies network access.
-
Expires: Choose the default option of Never, or click Change and set the expiration value using the drop-down. This option will only show up if Authorized is set to Yes.
-

- Select the Save Changes button.
For more information about users, refer to our documentation on Managing User Accounts using Meraki Authentication.
SSID Configuration
The following steps explain how to configure an SSID to support WPA2-Enterprise and authenticate against Meraki Cloud Authentication:
-
From the dashboard, navigate to Wireless > Configure > Access control.
-
Select your desired SSID from the SSID drop-down, or navigate to Wireless > Configure > SSIDs to create a new SSID by enabling an unconfigured SSID.
-
For Security choose Enterprise with and select Meraki authentication from the dropdown.
-
For WPA encryption mode, it is recommended to use WPA2 only.

-
Select the Save Changes button.