
Integrating Active Directory with Sign-On Splash Page For MR Access Points
Cisco Meraki devices (MR access points and MX security appliances) support the use of a sign-on Splash Page, requiring network users to authenticate in a web browser before being allowed access to the network. This splash page can be integrated with an Active Directory server, allowing users to provide their domain credentials to gain access.
This article outlines how to configure a sign-on Splash Page with Active Directory.
Overview
When using Active Directory authentication, your Access Points need to perform a secure LDAP bind using SSL\TLS via the starttls command. The LDAP bind authenticates the user logging into the splash page as illustrated below:
- A secure connection is established using TLS. After the handshake, a secure channel is established. LDAP calls are encrypted preventing outsiders from snooping the portion of the exchange highlighted in beige.
- The AP binds to the Domain Controller using the Active Directory admin credentials specified in Dashboard.
- If the bind is successful, the AP searches the directory for the user logging in by their sAMAccountName attribute. If a match is found, the DN of the user is returned to the AP.
- The AP then attempts to bind with the DN of the user and password entered in Dashboard. If the credentials are OK then the user is authenticated.

Configuration and Requirements
In order to configure a splash page with Active Directory authentication, configuration steps must be completed on both Dashboard and Active Directory, outlined below:
Active Directory Configuration
The following requirements must be configured on each AD server being used for authentication:
- Every AD server specified in Dashboard must hold the Global Catalog role. Please refer to Microsoft documentation for specific configuration steps.
- Since communication between the MR and AD server will be encrypted using TLS, a valid certificate with the appropriate parameters must be configured on the server.
- If no certificate is present, it will be necessary to install a Self-Signed certificate.
- If a certificate already exists, please ensure that it has been configured with the necessary parameters for TLS.
- The MR will communicate from its LAN IP with each AD server over TCP port 3268, to ensure that no firewalls or ACLs on the network or server will block that communication.
When Active Directory authentication is configured, the MR queries the Global Catalog over TCP port 3268. Therefore the Active Directory server (Domain Controller) specified in Dashboard must also hold the Global Catalog role.
Dashboard Configuration
Once all AD servers have been primed with the configuration requirements outlined above, the following steps outline how to set up AD authentication with a sign-on splash page:
- Log into Dashboard
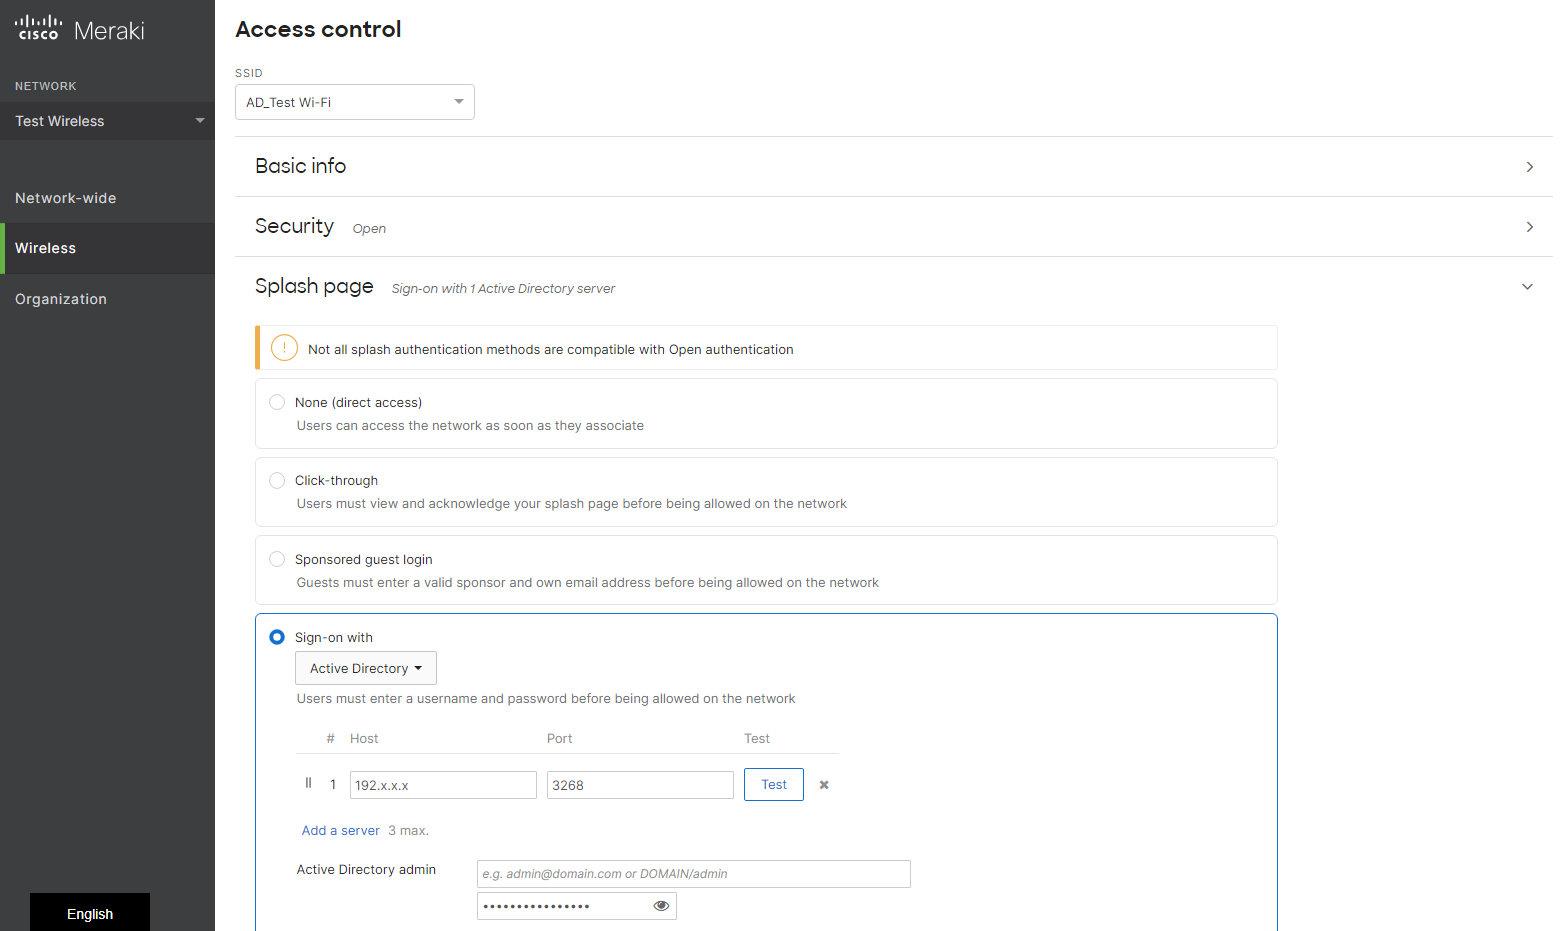
- Navigate to Wireless > Configure > Access control.
- Select the desired SSID from the SSID drop-down menu.
- Navigate to the Splash page section.
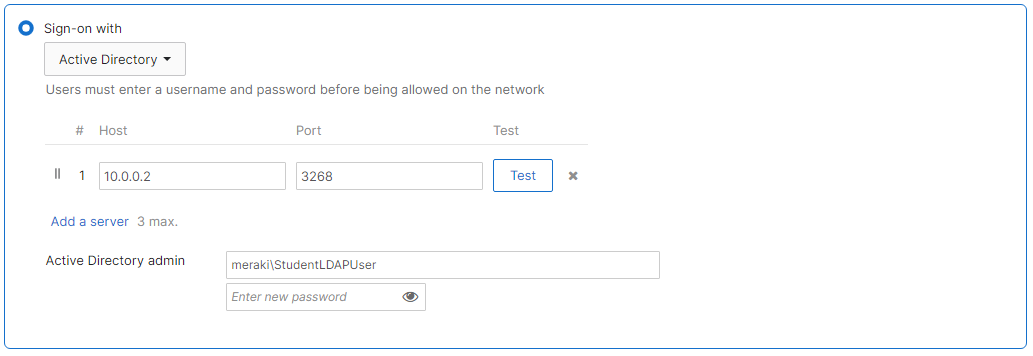
- Using the Sign-on with drop-down menu, select Active Directory.
- Click on Add a server and input the IP address of the domain controller.
- Note: Multiple servers may be added. The AP will test against these servers in sequential order, i.e. from top to bottom.
- Input a domain admin's credentials in the Active Directory admin section. The account can use the Windows 2000 (admin@domain.local) or Pre-Windows 2000 (Domain\admin) format.
Note: It is advised these user credentials have minimal read-access permissions to the domain database. This account will only be used for the BIND to Active Directory - Click the Save Changes button to save changes.
Microsoft LDAP Test
Once the configuration above has been completed, the Meraki device should be able to communicate with the Active Directory server using TLS. If this fails, Microsoft offers the Ldp.exe tool to ensure that the LDAP service is running and compatible with the current certificate.
Please reference Microsoft documentation for error code details and troubleshooting assistance.
Scoping Active Directory per SSID
By default, when using Active Directory for Splash Page authentication, all users in AD can be granted access. However, by using OUs and a custom AD admin account, it is possible to limit which users can get through authentication. This document will show you how to limit the scope of users that can be authenticated to an SSID using a Splash Page with Active Directory Integration.
Note: The following images and settings are intended to be used as general guidelines as these may not be updated to fit changes on the AD side. Please refer to Microsoft documentation and support for assistance.
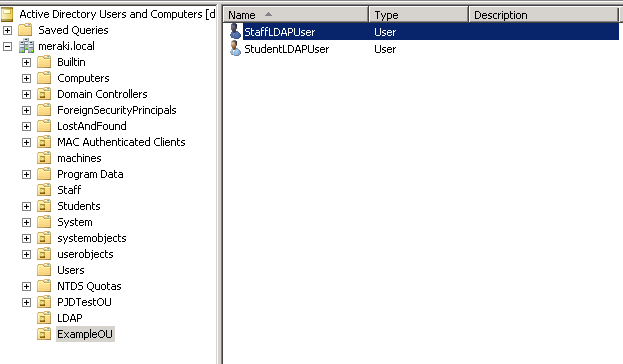
First, you will need to create users for each group of users. In this case, we have Students and Staff. We will use this example to limit Staff Users from accessing the Student SSID.
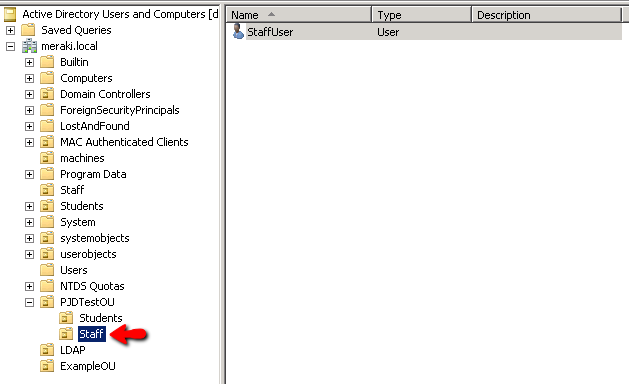
Right click and select Properties of the Staff OU
Deny the StudentLDAPUser's READ rights for the Staff OU
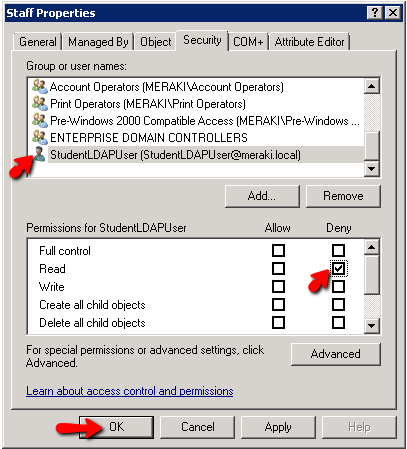
Now, you will use this StudentLDAPUser to Bind to AD under 'Configure >> Access Control' for your Student SSID:
Since this user does not have the ability to read the Staff OU, Staff Users will not be able to use this SSID. You will need to apply this Deny to all User OU's that should not be allowed to access this SSID.
You will repeat the same steps to Deny Students from accessing the Staff SSID. You'll need to Deny Read permissions for StaffLDAPUser for all OU's that should not have access to the Staff SSID.
Additional Resources
For additional information regarding sign-on splash pages and Active Directory integration, please refer to the following documentation:
- Active Directory Integration with Group Policies
- Active Directory Integration with Client VPN
- Integrating LDAP with a Sign-on Splash Page
- Splash Page Traffic Flow and Troubleshooting