
Bulk Configuring Quality and Retention Settings Through Profiles
There are different ways to configure the quality and retention settings on MV cameras. Different cameras need different settings based on the desired detail and retention. Quality and retention profiles let you group cameras and assign the same settings to all of them at once, avoiding the need to adjust each camera individually.
You can use APIs to set individual camera settings or to create and assign profiles. More documentation is available in the Meraki Developer Hub.
Creating Profiles
-
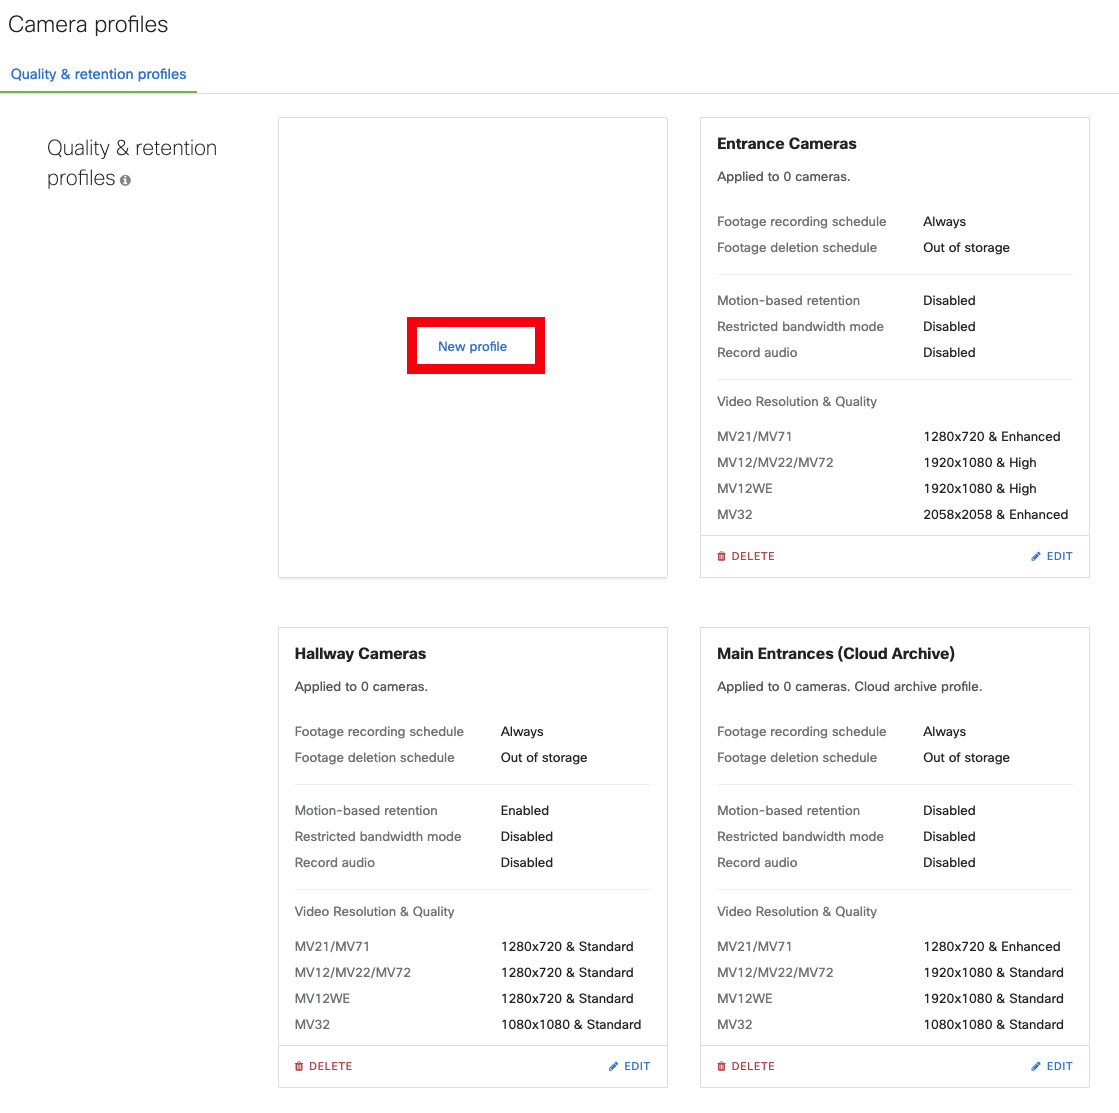
Navigate to Cameras > Configure > Camera profiles.
-
Under Quality & retention profiles, select New profile.
-
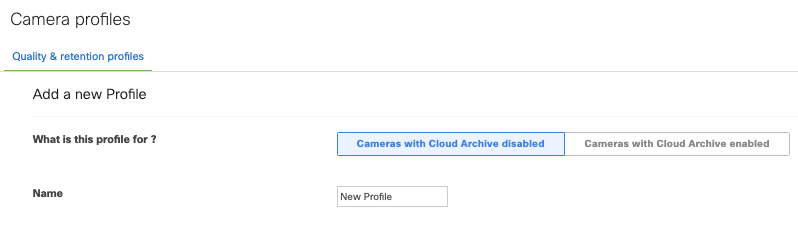
Fill out each field accordingly, starting with the type of profile and its name.
-
Create separate profiles for cameras with Cloud Archive enabled and disabled. Some quality and retention settings are unavailable when Cloud Archive is enabled due to bandwidth limits. Choose which profile type you are creating.
-
Name the profile.
-
-
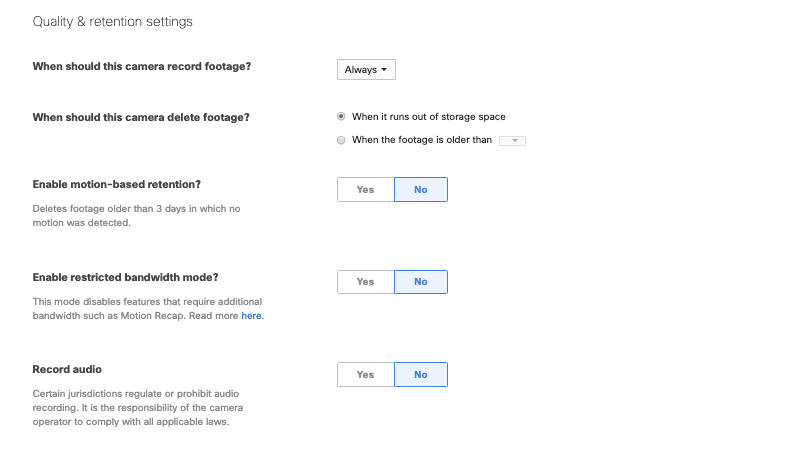
Configure the quality & retention settings just like on the individual camera settings page.
You cannot create a new schedule on this page. Go to the individual camera’s settings page in manual configuration to create schedules.
-
At the bottom, there is a table for per-model configuration. Different camera models have different options for video resolution and quality. You must customize the quality, resolution, and camera type for each model when assigning this profile to them.
-
The last column shows the average number of retention days based on the selected options.
-
If motion-based retention is enabled, the average is computed assuming ~7 hours of motion a day. Navigate to the individual camera settings page to see a more accurate estimated retention.
-
-

-
Select Save.
Deleting or Editing Profiles
-
Ensure that the profile you wish to delete is not assigned to any camera. See Unassigning Profiles.
-
Navigate to Cameras > Configure > Camera profiles.
-
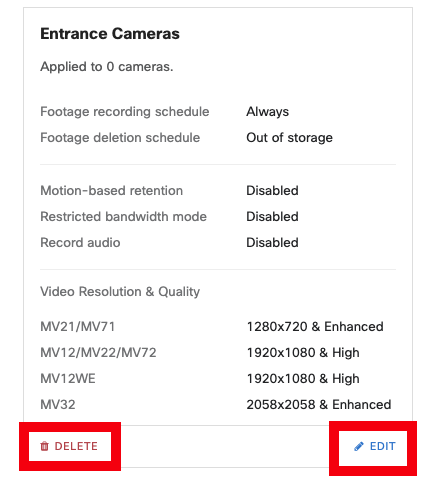
On the profile you wish to delete, click Delete or Edit.
-
When deleting, select Yes to confirm.
-
When editing, fill out the form as in the instructions above.
-
Assigning Profiles
Ensure you apply any Cloud Archive licenses to the cameras before assigning a profile. Assigning a profile does not assign the license.
Through the List Page
-
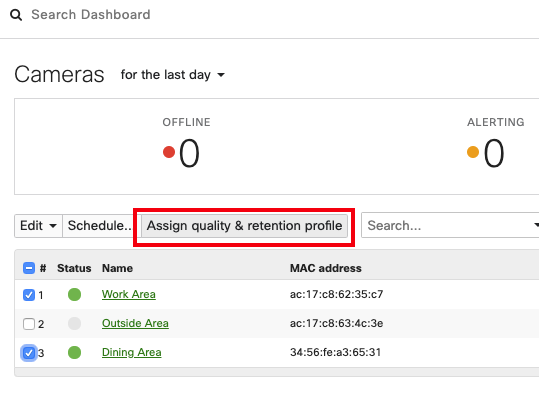
Use the checkboxes to select the cameras that you want to bulk assign.
You cannot select cameras with Cloud Archive both enabled and disabled because they require different profiles. These profiles differ due to the quality and retention settings available for Cloud Archive.
-
Select Assign quality & retention profile.
-
Select the profile you wish to assign.
-
Select Review Changes.
-
Review the updated average retention days before confirming.
-
Select Save.
-
Review assigned profile by visiting an individual camera’s settings page or adding the Quality & retention profile column on the nodes list page.

Through a Camera's Settings Page
-
Navigate to a camera’s Settings > Quality and retention tab.
-
Select on Profile assignment under Configuration method.
-
Select Change profile.
-
Select the profile you wish to assign.
-
Select Review Changes.
-
Take a look at the modified average retention days before confirming.
-
Select Save.
-
Review assigned profile by visiting an individual camera’s settings page or adding the Quality & retention profile column on the nodes list page.
Unassigning Profiles
-
Navigate to a camera’s Settings > Quality and retention tab.
-
Select on Profile assignment under Configuration method.
-
Select Manual configuration.
-
By default, the camera will retain its previous settings. Change the settings as desired.
-
Select Save.
Using Cloud Archive with Profiles
Some quality and retention settings, like the Maximum retention limit, cannot be changed when Cloud Archive is enabled due to bandwidth limits. Therefore, you must create separate profiles for cameras with Cloud Archive enabled and those with it disabled.
Note the following behavior when using Cloud Archive with profiles:
-
When you assign a camera a Cloud Archive license, its non-Cloud Archive profile will be unassigned and it will go back into manual configuration. By default, the camera will retain its previous settings. Change the settings as desired, or assign it a new Cloud Archive profile.
-
When you remove a Cloud Archive license from a camera, its Cloud Archive profile will be unassigned and it will go back into manual configuration. By default, the camera will retain its previous settings. Change the settings as desired, or assign it a new non-Cloud Archive profile.