Sensor Crop
Overview
Sensor Crop is a feature available on second and third-generation MV cameras (MV2, MV12 series, MV22/23 series, MV52, MV63 series, MV72/73 series). It allows you to set a fixed zoom and pan while maintaining image quality.
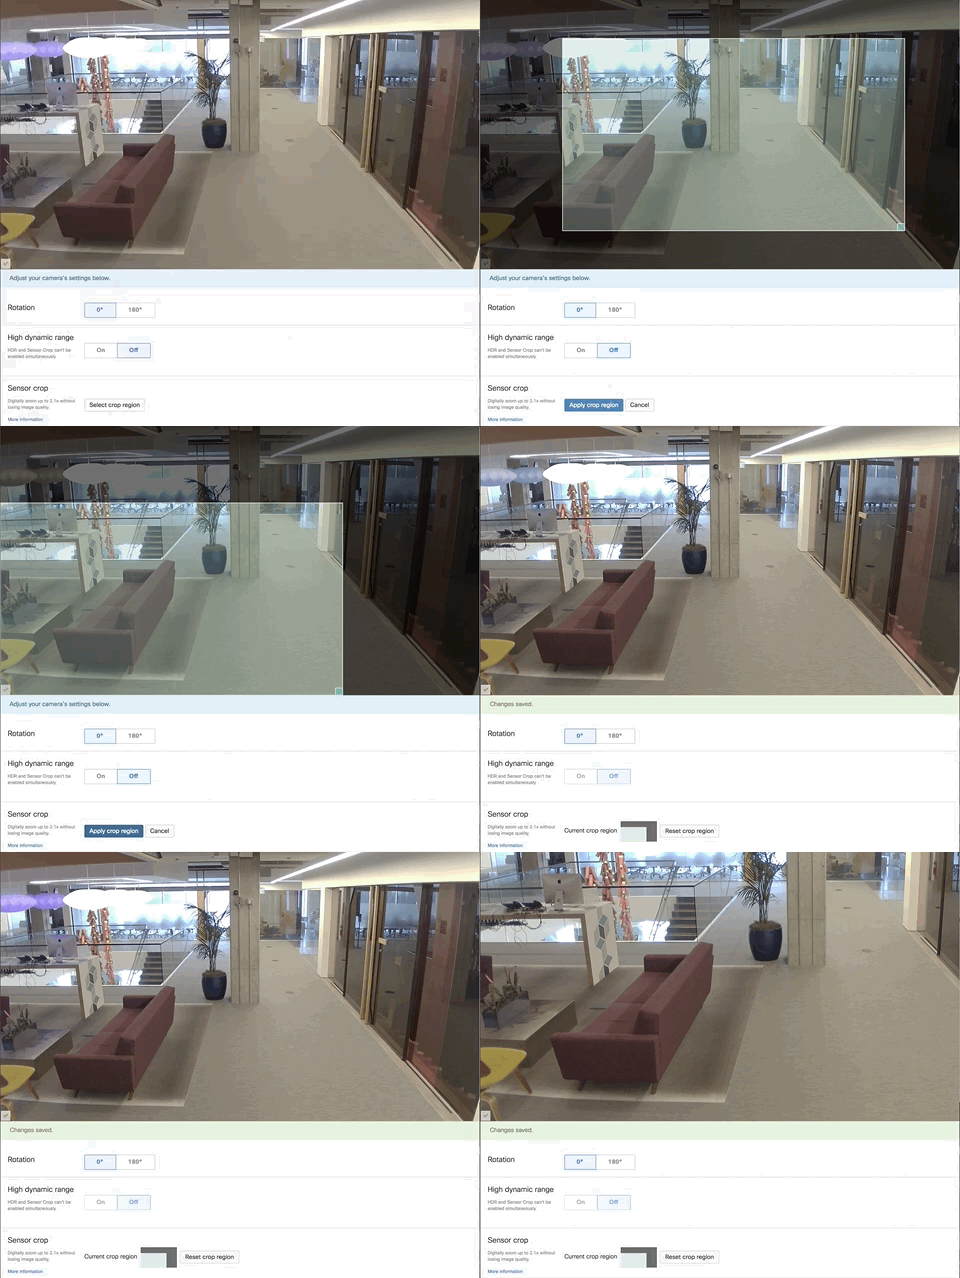
In the above gif, the camera streams at 1080p full-frame (4MP sensor downsampled to 1080p). After selecting and applying a crop region, the sensor crops the output to the selected area at full 1080p. This creates a higher-quality, zoomed image of the chosen region.
Use Case
-
Sensor crop is best utilized on cameras where physical/logistical limitations of the camera installation location relative to the area of interest prevent:
-
viewing a selection of the frame in greater detail
-
removing portions of the perimeter of the frame that are undesirable
-
-
Some examples might include:
- Identification: viewing persons entering a building entryway in greater detail for better identification
-
Privacy: removing a portion of the frame that observes a private work desk/area
-
Analytics: removing a portion of the frame that observes passersby outside a glass window
Configuration
To configure Sensor crop:
- Navigate to your camera's "Video Settings" page
- Click the "Select crop region" button
- Move and/or resize the selection pane to the desired crop region
- Click "Apply crop region" to apply this setting
Before applying sensor crop:
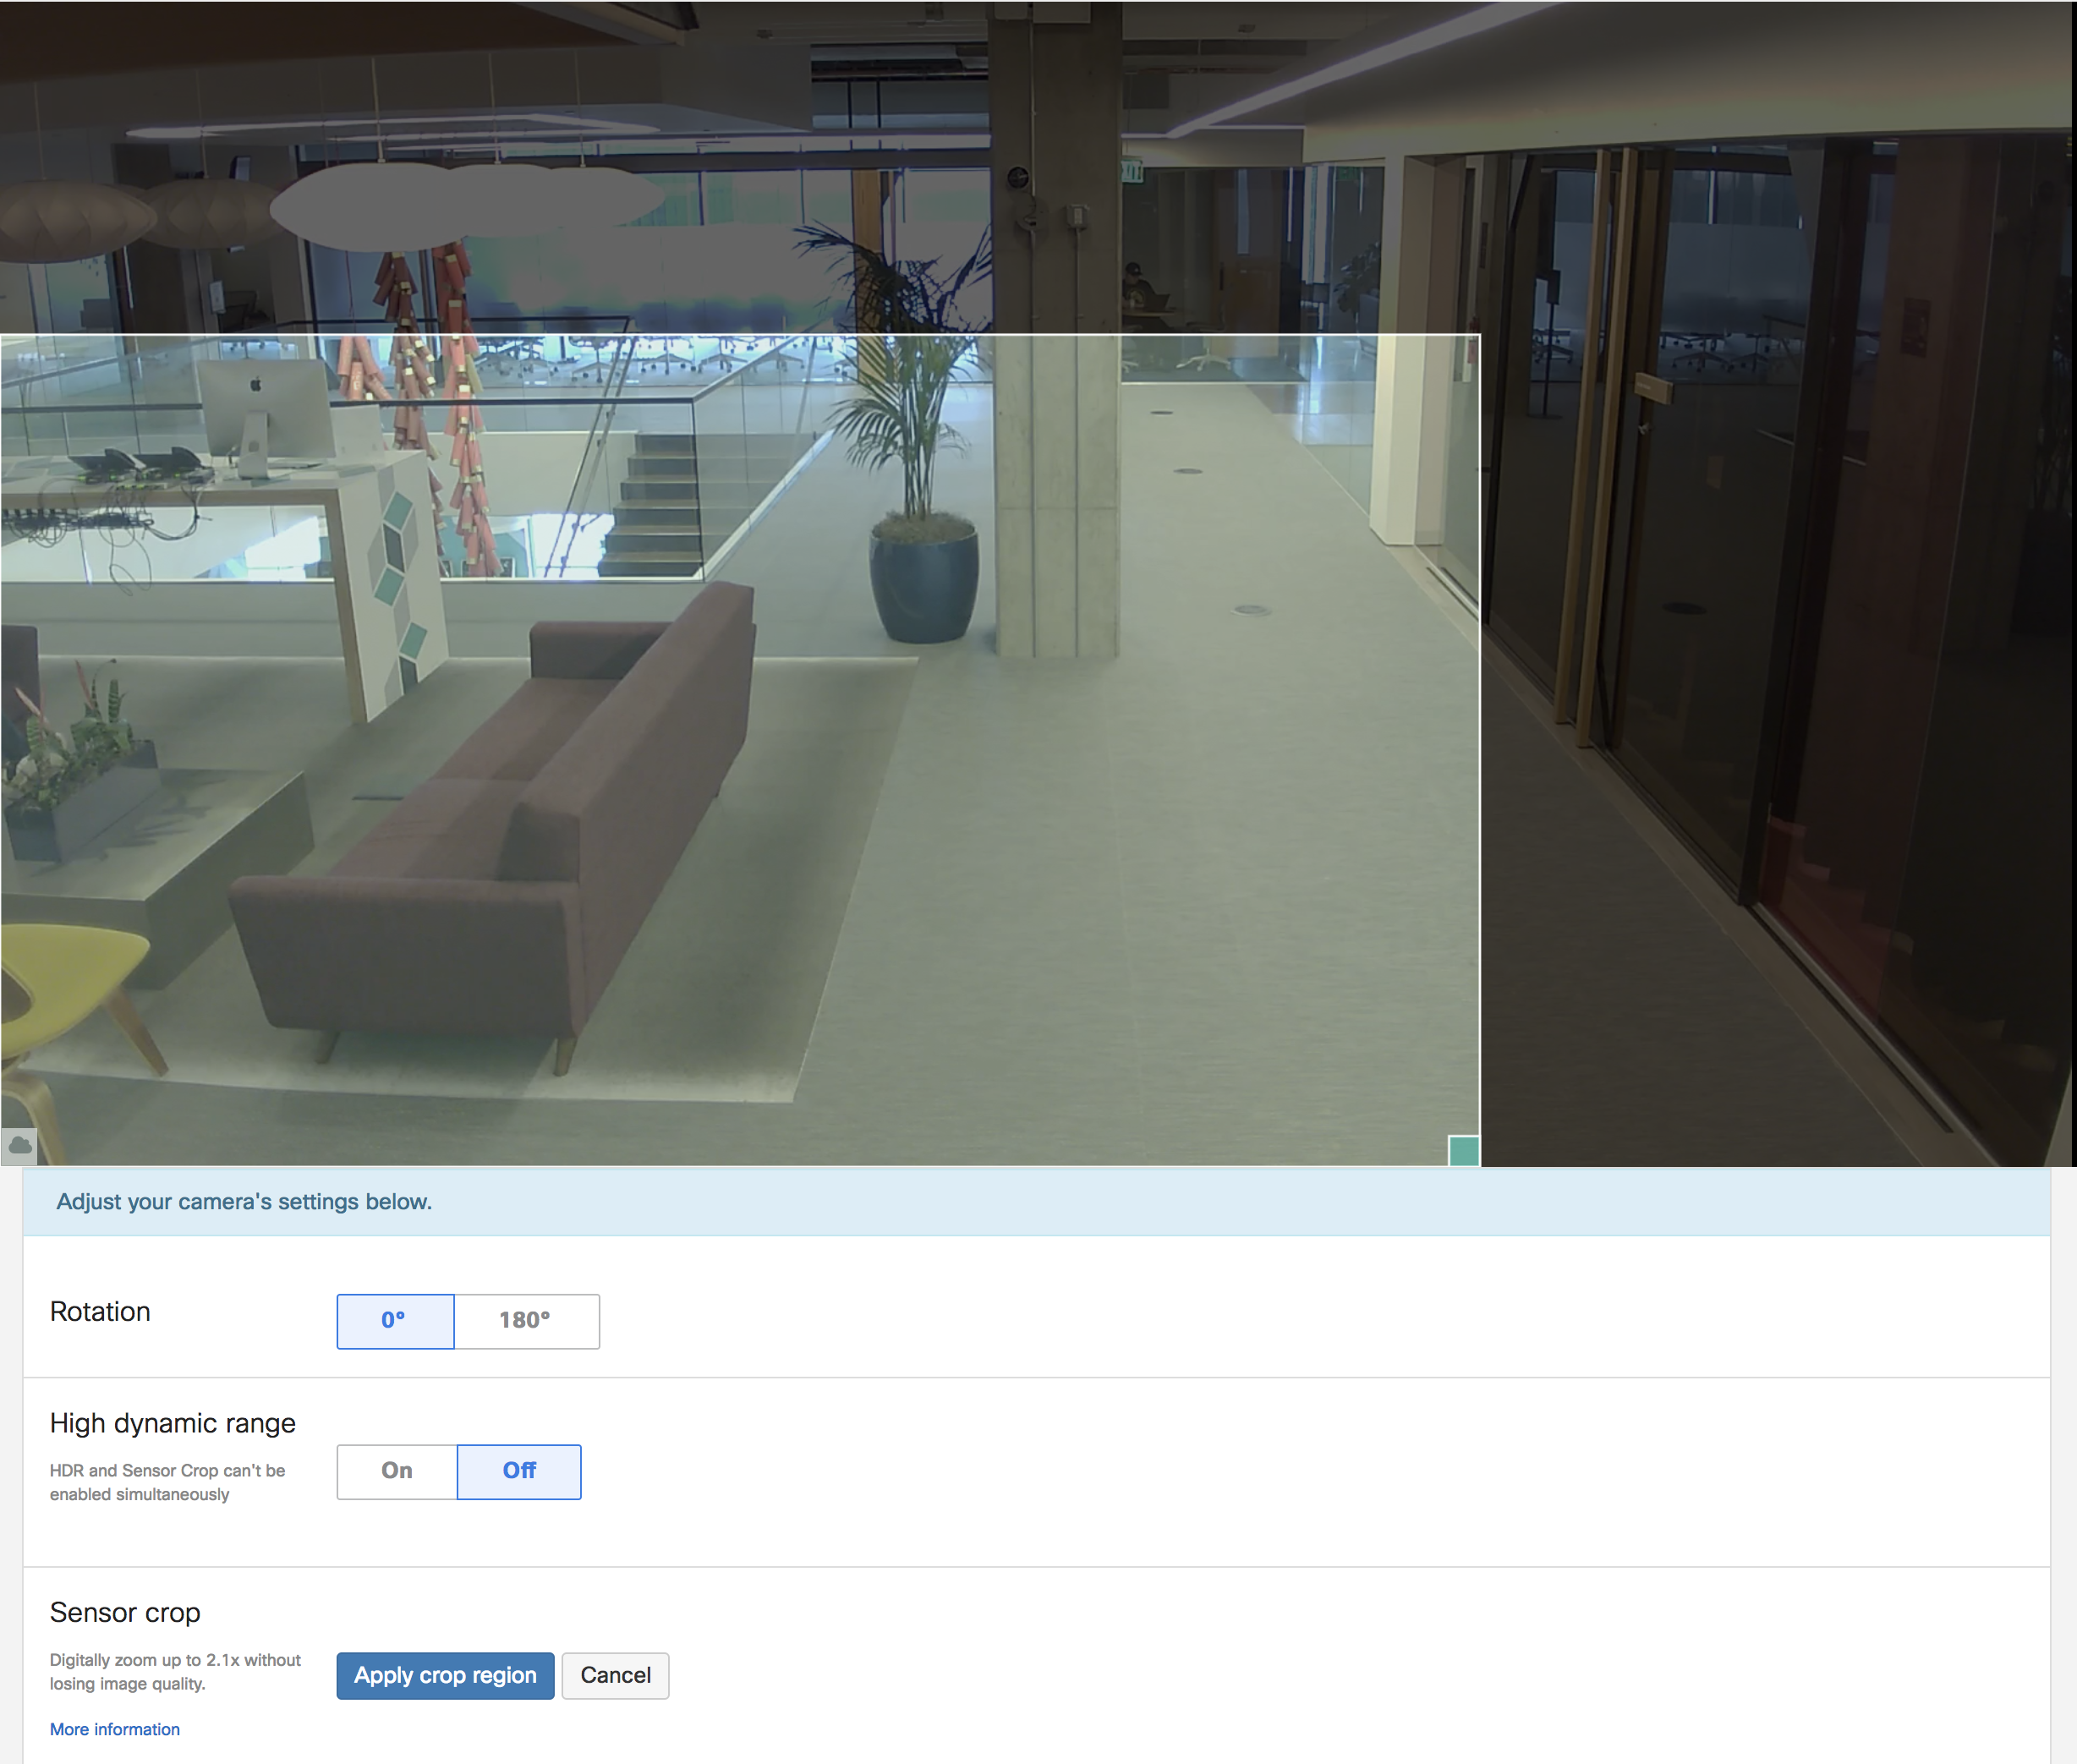
The crop region can also be moved anywhere in the frame, and can also be scaled; it doesn't need to be exactly 720p or 1080p.
If a crop region is selected that is larger than the video quality setting (720p or 1080p), the camera first crops the frame and then downscales to the desired resolution.
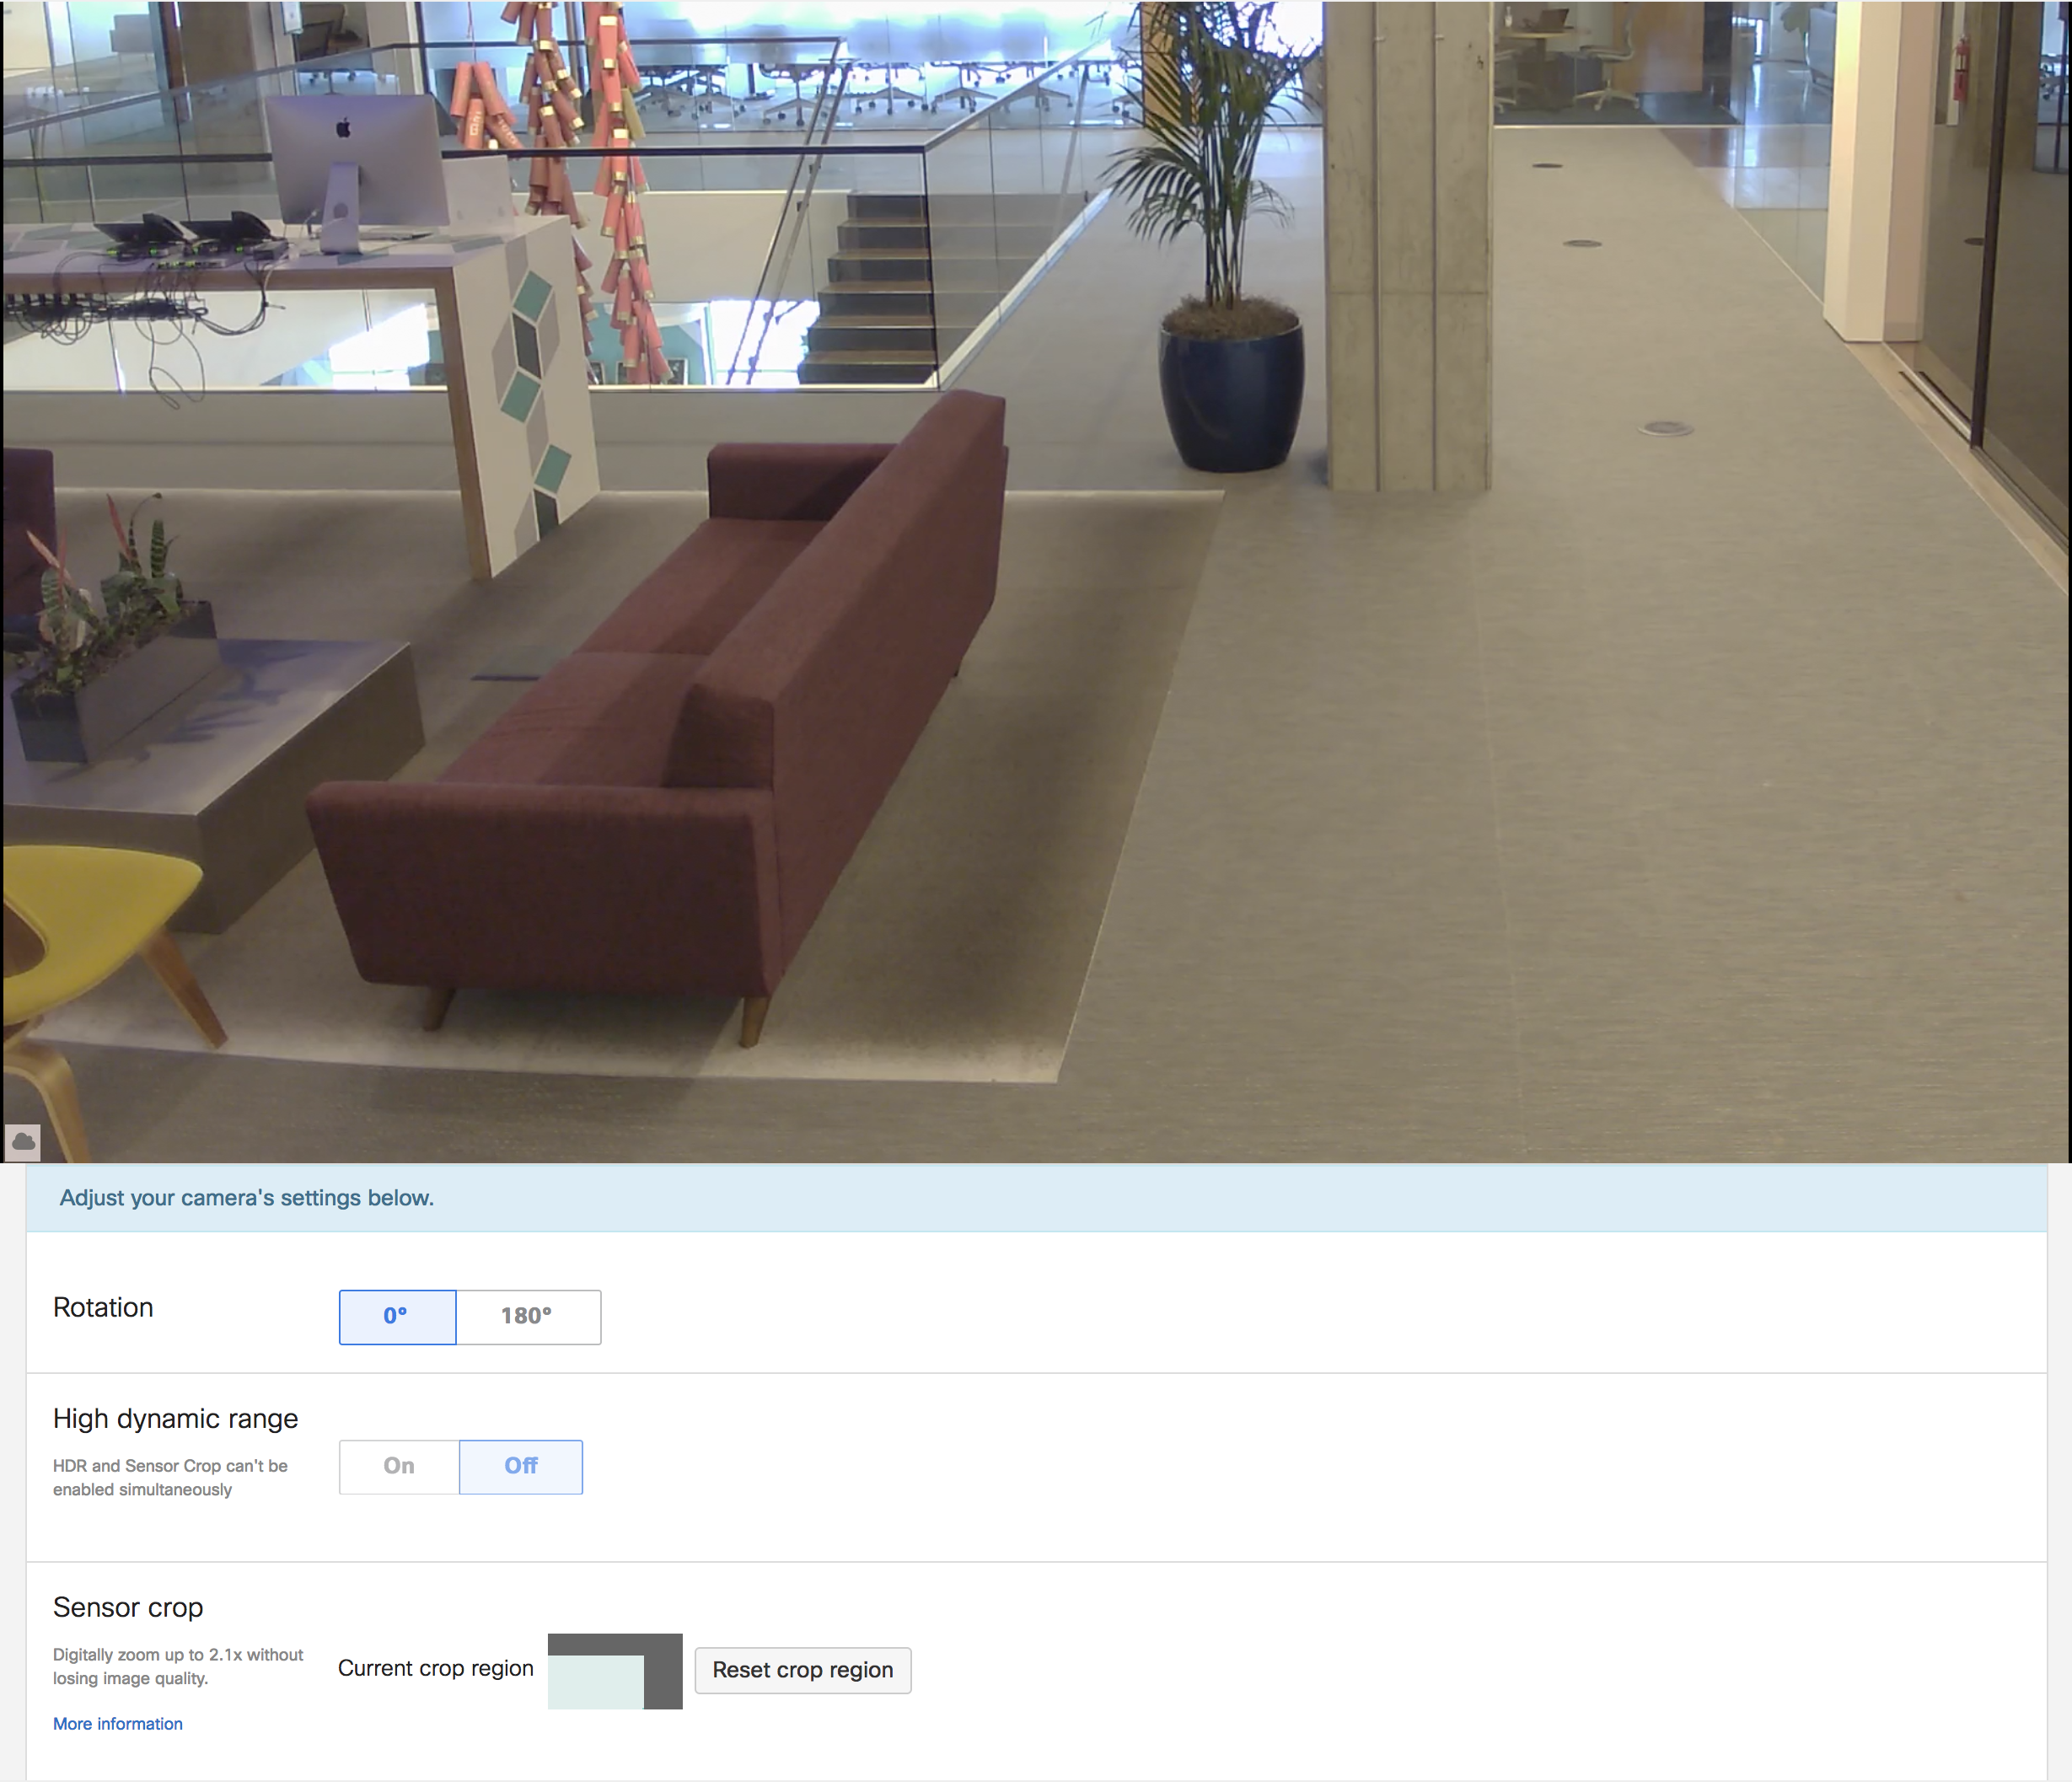
After applying sensor crop:
Sensor Crop vs. Optical Zoom vs. Digital Zoom
Sensor crop is different from optical and digital zooming. To briefly compare:
-
Sensor crop
-
Changes applied after optics but before sampling/storing of footage to enlarge a desired region
-
Crops the sensor to a selected region before capturing a frame and downsampling (if required)
-
Requires no moving parts
-
-
Optical Zoom
-
Changes applied to optics to enlarge a desired region
-
Alters the focal length/aperture/etc when capturing footage
-
Requires moving parts
-
- Digital Zoom
- Applied after optics and sampling/storing of footage to enlarge a desired region
- Upsamples the footage in software and may require additional processing for pixel inferences
- Requires no moving parts
Technical Breakdown
How It Works
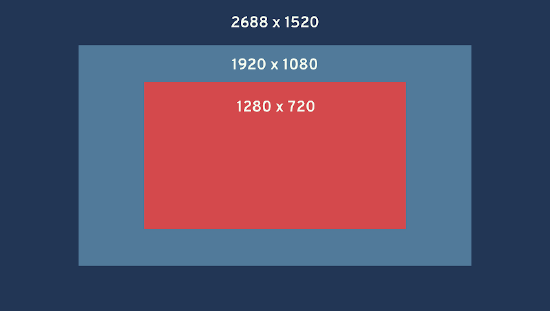
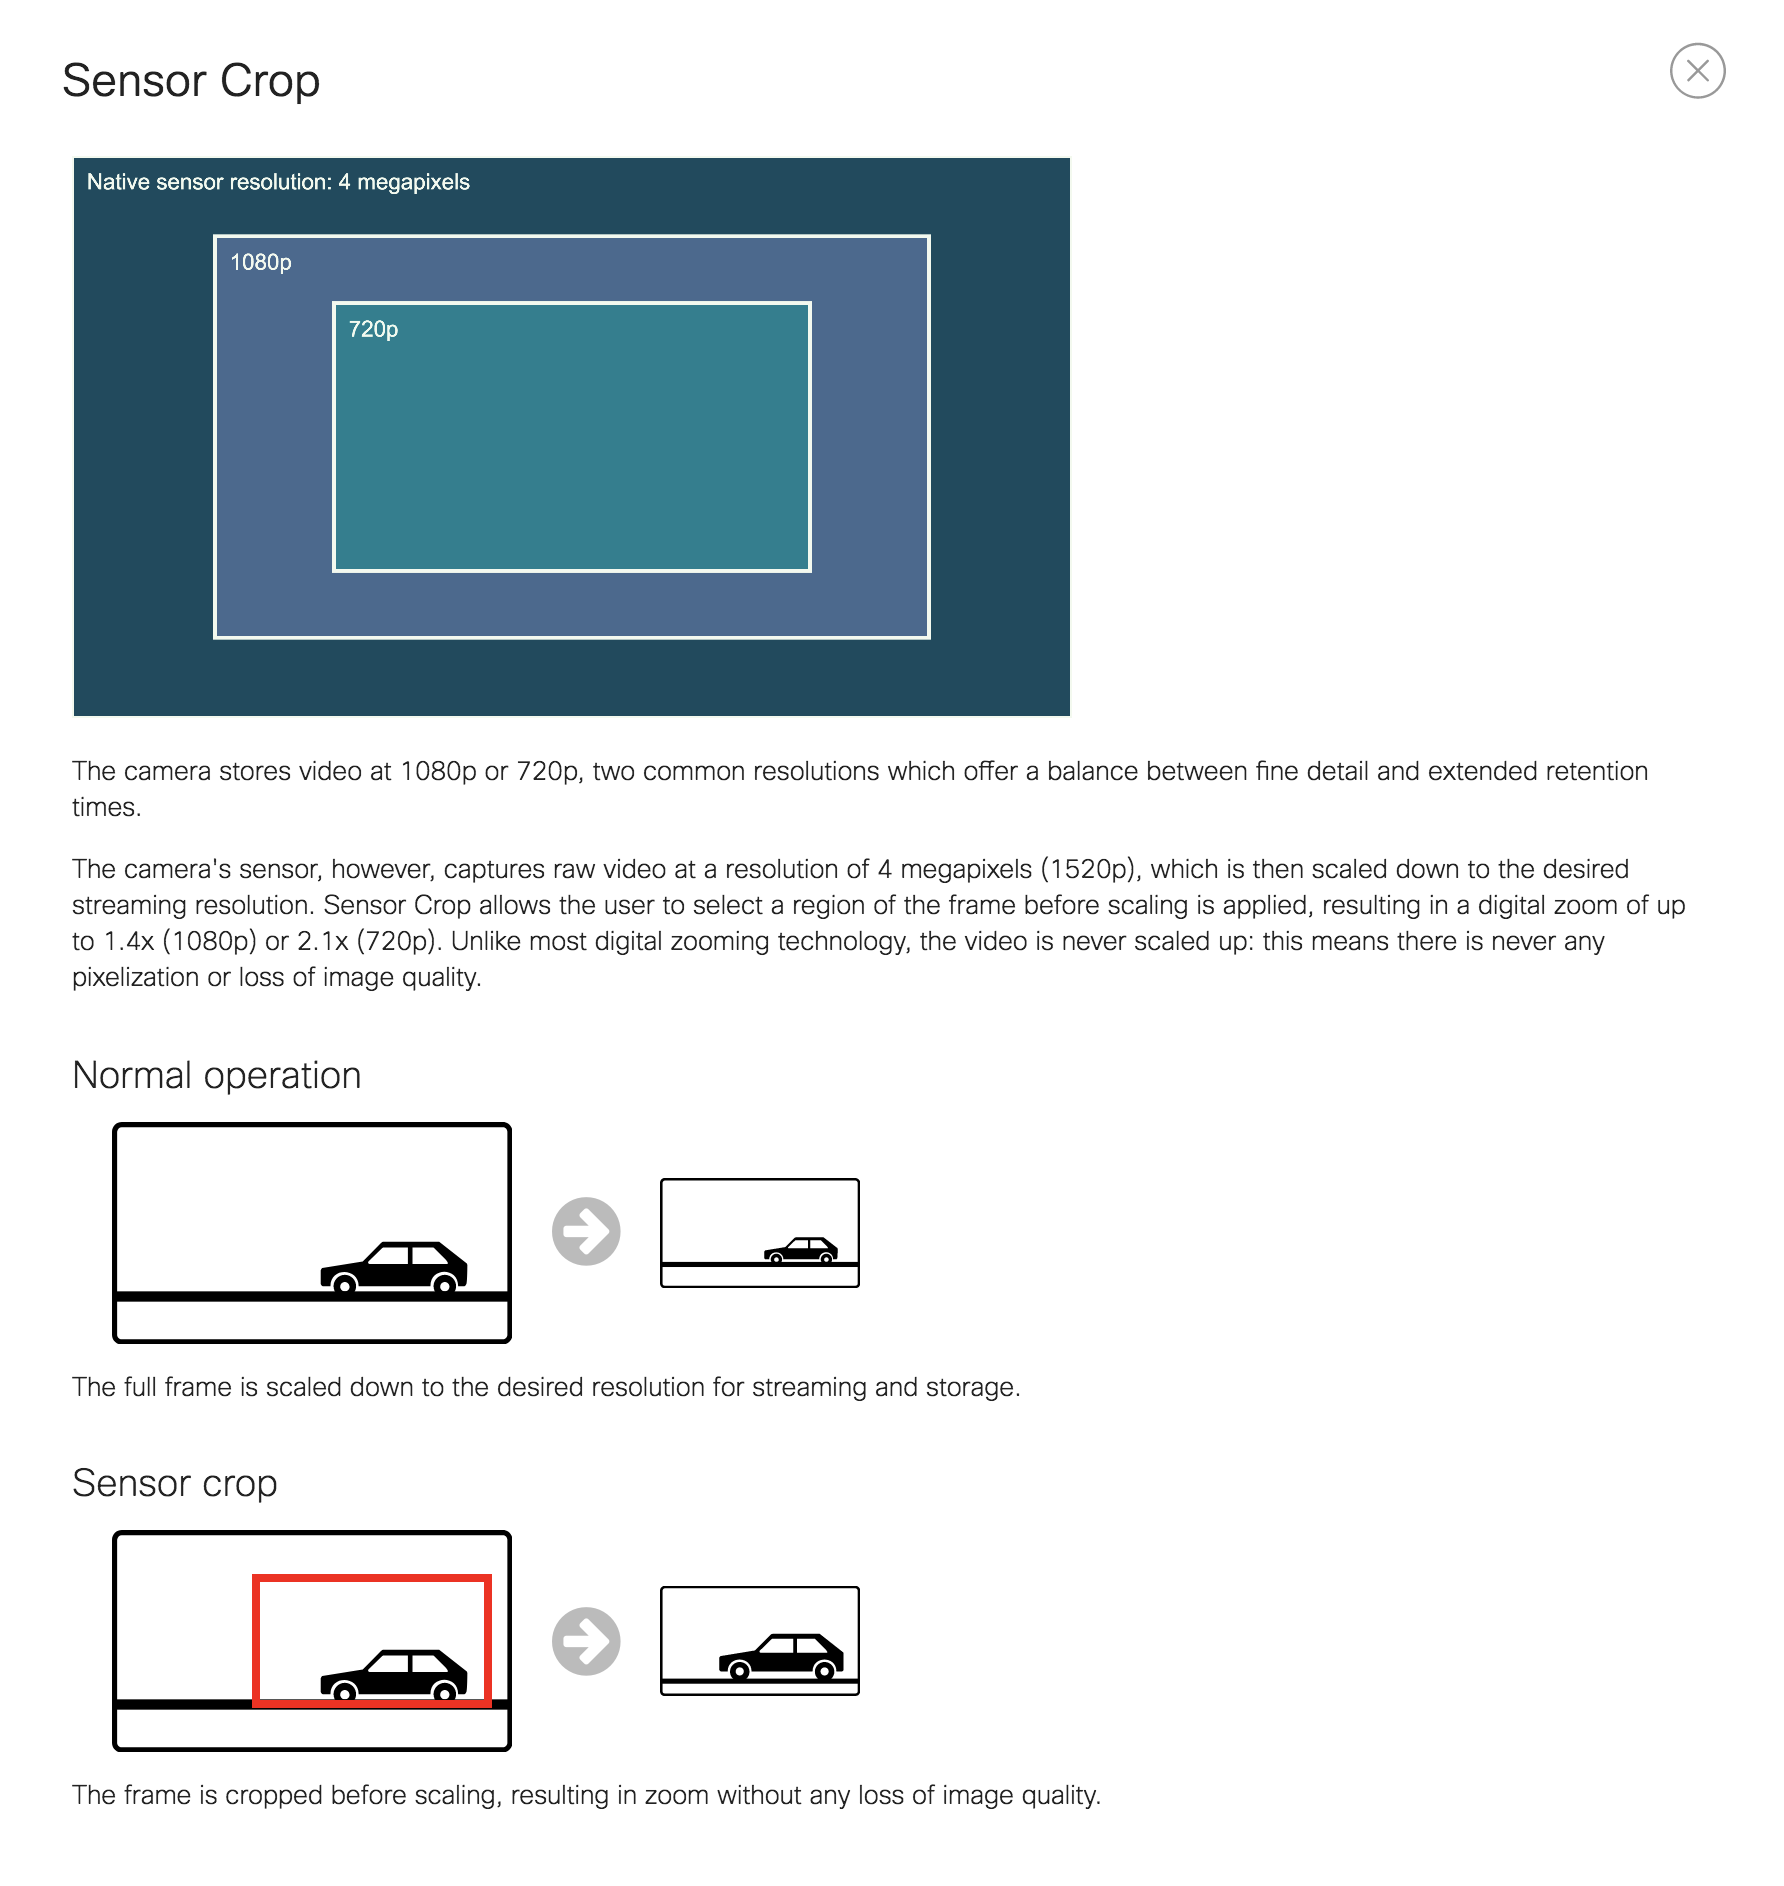
Instead of scaling down the entire frame, we crop the image first. This produces a zoomed image of up to 2.1x at 720p or 1.4x at 1080p.

Event Log
Sensor crop changes are logged as shown.
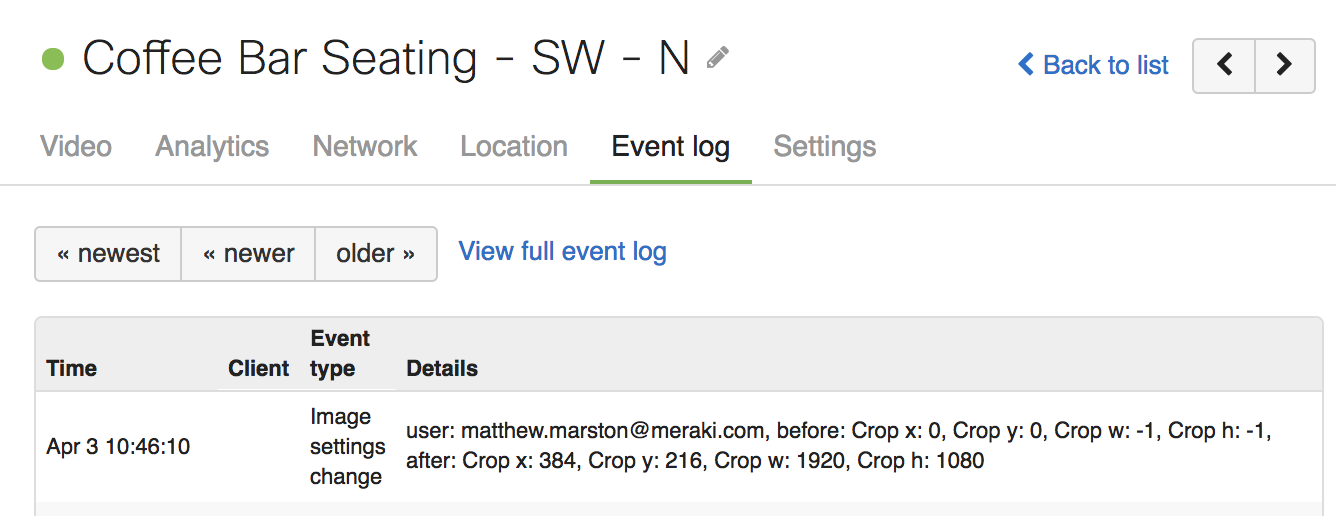
Image settings change
Details include:
- user: user who executed the change
- before: sensor crop settings prior to application of change
- after: sensor crop settings after change
- if value remains unchanged between before/after, this value is not represented
Expected values:
- user: user's admin email address
- x: horizontal pixel start [off-set calculated from top-left corner of sensor]
- min. 0, max. 1408 for 720p video quality setting
- min. 0, max. 768 for 1080p video quality setting
- y: vertical pixel start [off-set calculated from top-left corner of sensor]
- min. 0, max. 792 for 720p video quality setting
- min. 0, max. 432 for 1080p video quality setting
- w: width in pixels
- -1 for full sensor width
- 1280 default minimum for 720p video quality setting
- 1920 default minimum for 1080p video quality setting
- h: height in pixels
- -1 for full sensor height
- 720 default minimum for 720p video quality
- 1080 default minimum for 1080p video quality setting

