
Quick Start Guides
Overview
Follow these steps to get started and refer to the detailed information about the MV for more guidance.
-
Log in to the Meraki Dashboard. If this is your first Meraki device, create a new account.
-
Find the network you wish to add your camera(s) to, or create a new camera network. If a camera option does not appear on the Create Network page, please contact Meraki Support for assistance.
-
Add your camera(s) to the network. You will need the serial number of each camera, which can be found at the bottom of the camera or on the box that the camera arrived in.
-
Unpack your MV.
-
Connect your MV to a PoE wired connection with internet access.
-
After powering on, your MV downloads the latest firmware from the Meraki cloud and updates itself. This process can take up to an hour, depending on your internet speed.
-
Set up the camera(s) as desired using the "Configure" section of the dashboard.
-
Setup is complete. The live video feed from your camera(s) should now appear on the dashboard.
MV cameras can become warm or hot to the touch during operation. Their temperature may vary based on the surrounding environment, installation conditions, and workload. After setup, ensure proper mounting to allow adequate heat dissipation.
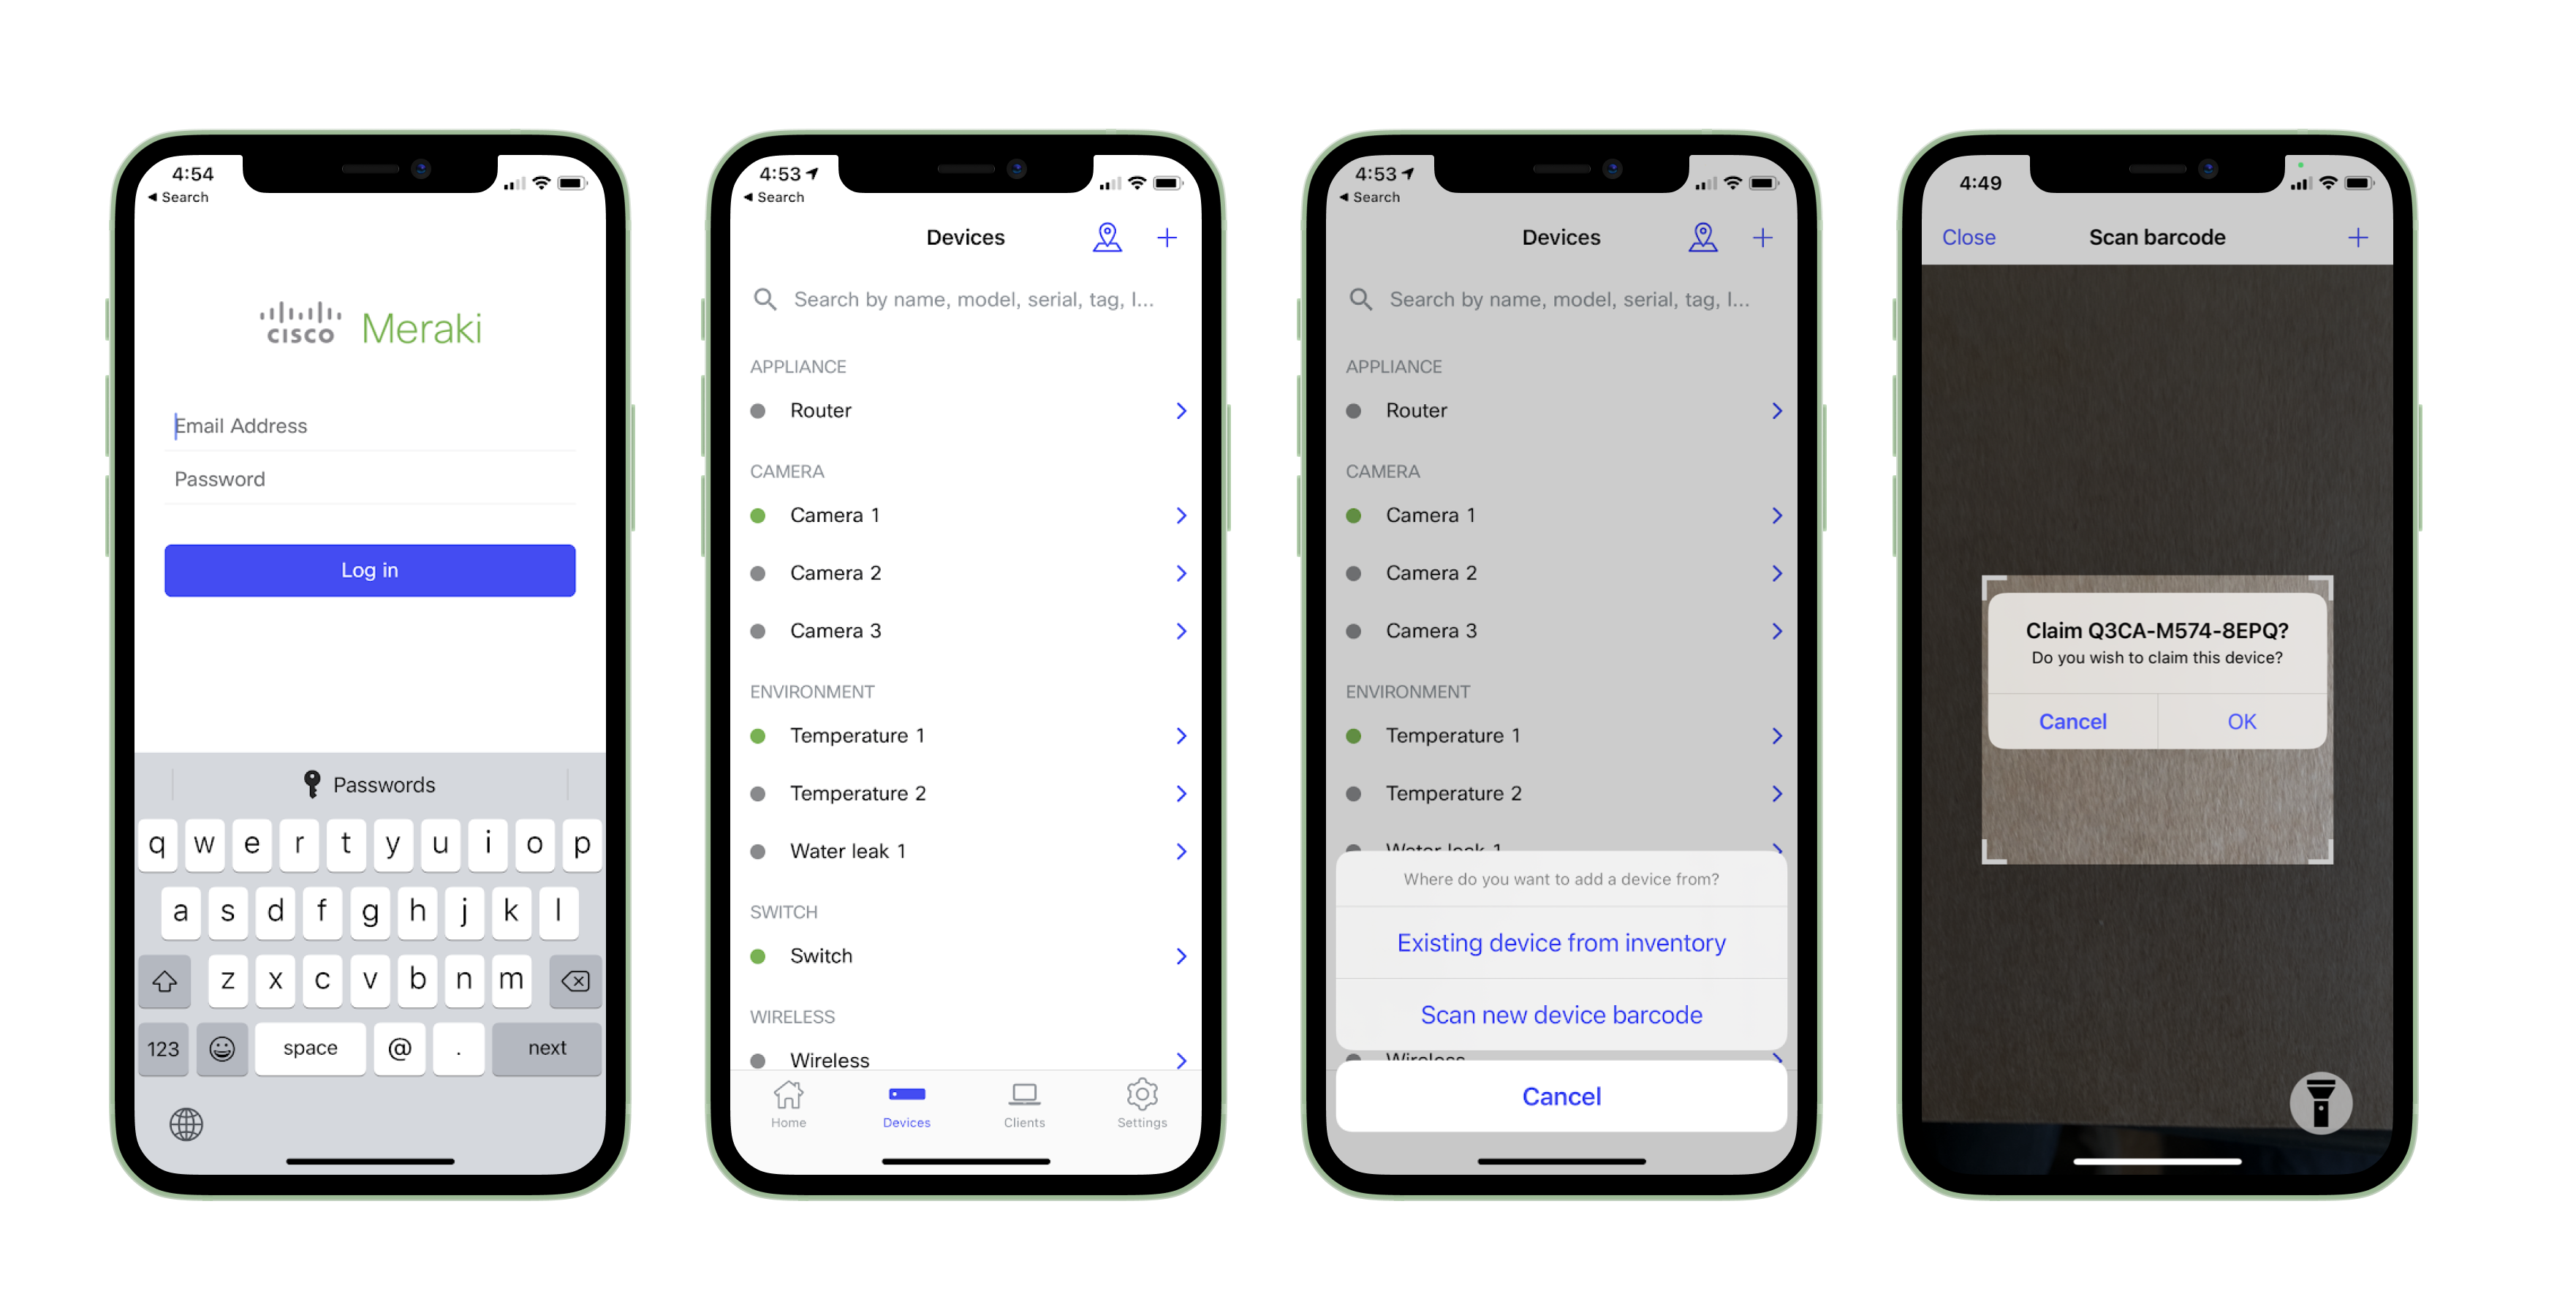
Quickly Scan and Claim Multiple Devices through the Meraki Mobile App
To claim multiple devices, scan their barcodes using the Meraki app for faster processing.
- Log in to your Meraki iOS or Android app with your Meraki dashboard account. Create a new account if you do not have one.
- Navigate to the correct network through the left-side bar.
- Go to the Devices tab from the bottom navigation bar.
- Select the + icon on the top right of the screen and pick Scan new device barcode.
- Point your phone camera toward the hardware barcode to claim the device.
- Enter device information and then select Done. Press Add another to claim a new device.
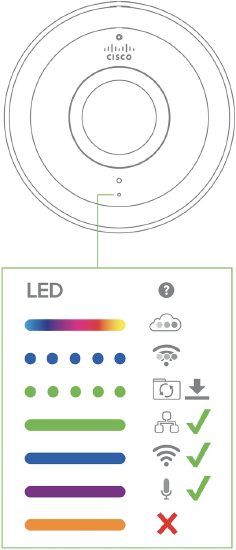
LED Indicators
- Rainbow (solid, rotating through colors) - MV is booting up.
- Flashing Blue - MV is searching for Wi-Fi network(s).
- Flashing Green - MV is upgrading or initializing for the first time.
- Solid Green - MV is connected via Ethernet.
- Solid Blue - MV is connected via Wi-Fi.
- Solid Violet - MV has audio recording enabled.
- Solid Amber - MV has an issue and may need replacement.
For model-specific information and more detailed instructions, refer to installation guides or the instruction pamphlet within your MV box.
It is extremely beneficial to utilize the Meraki mobile app when doing first-time deployments.
During first-time setup, the camera automatically updates to the latest stable firmware. Some features may remain unavailable until the update is complete. The firmware download may take up to an hour, depending on internet speed, followed by up to 10 minutes to enable whole disk encryption.