
MV32 Planning Tool
Desk Occupancy is no longer supported, and the planning tool is not currently available. For an alternative solution to understand area occupancy, please visit MV Presence Sensing.
Overview
To get an idea about how many cameras that might be needed for a new project, there is an external planning tool that can place cameras on a floor plan and show the coverage for each camera to assure that all areas are covered as needed. It is also possible to show only positions, which can be used for the actual installation if the project becomes reality.
The planning tool is web based, hence it is important to download an ongoing project to be able to share it with others or simply save for later. If there are any changes made to the browsing history the planned positions will not remain when re-visiting the tool, unless there is a file to import.
Planning tool site https://mvplanning.meraki.com/
Use Case
-
This tool is needed to give an understanding of the project scope
-
It is needed for the seller to be able to tell a partner/customer the expected price for a project
-
It is needed for the partner/customer to be able to plan for the installation work, the wiring, etc.
-
-
It is most likely that a sales engineer will work with this tool in cooperation with a sales person
-
The coverage outcome can be used by the sales person to make sure that the planning aligns with the customers intentions of area covered for the wanted data analytics
-
The position outcome can later be used by any handyman that will do the actual installation work
-
Prepare for the planning
These things are needed to be able to plan for camera positions:
-
Floor plan
-
Measurements for the floor plan (i.e. the length of a wall in meters or feet)
-
Ceiling height
-
Logic naming for the project and the floor plan(s)
Get started
Before placing the cameras on the floor plan, each project needs to be named correctly, a floor plan must be uploaded, the scale and the mounting height(s) needs to be given. This first chapter will describe those first steps.
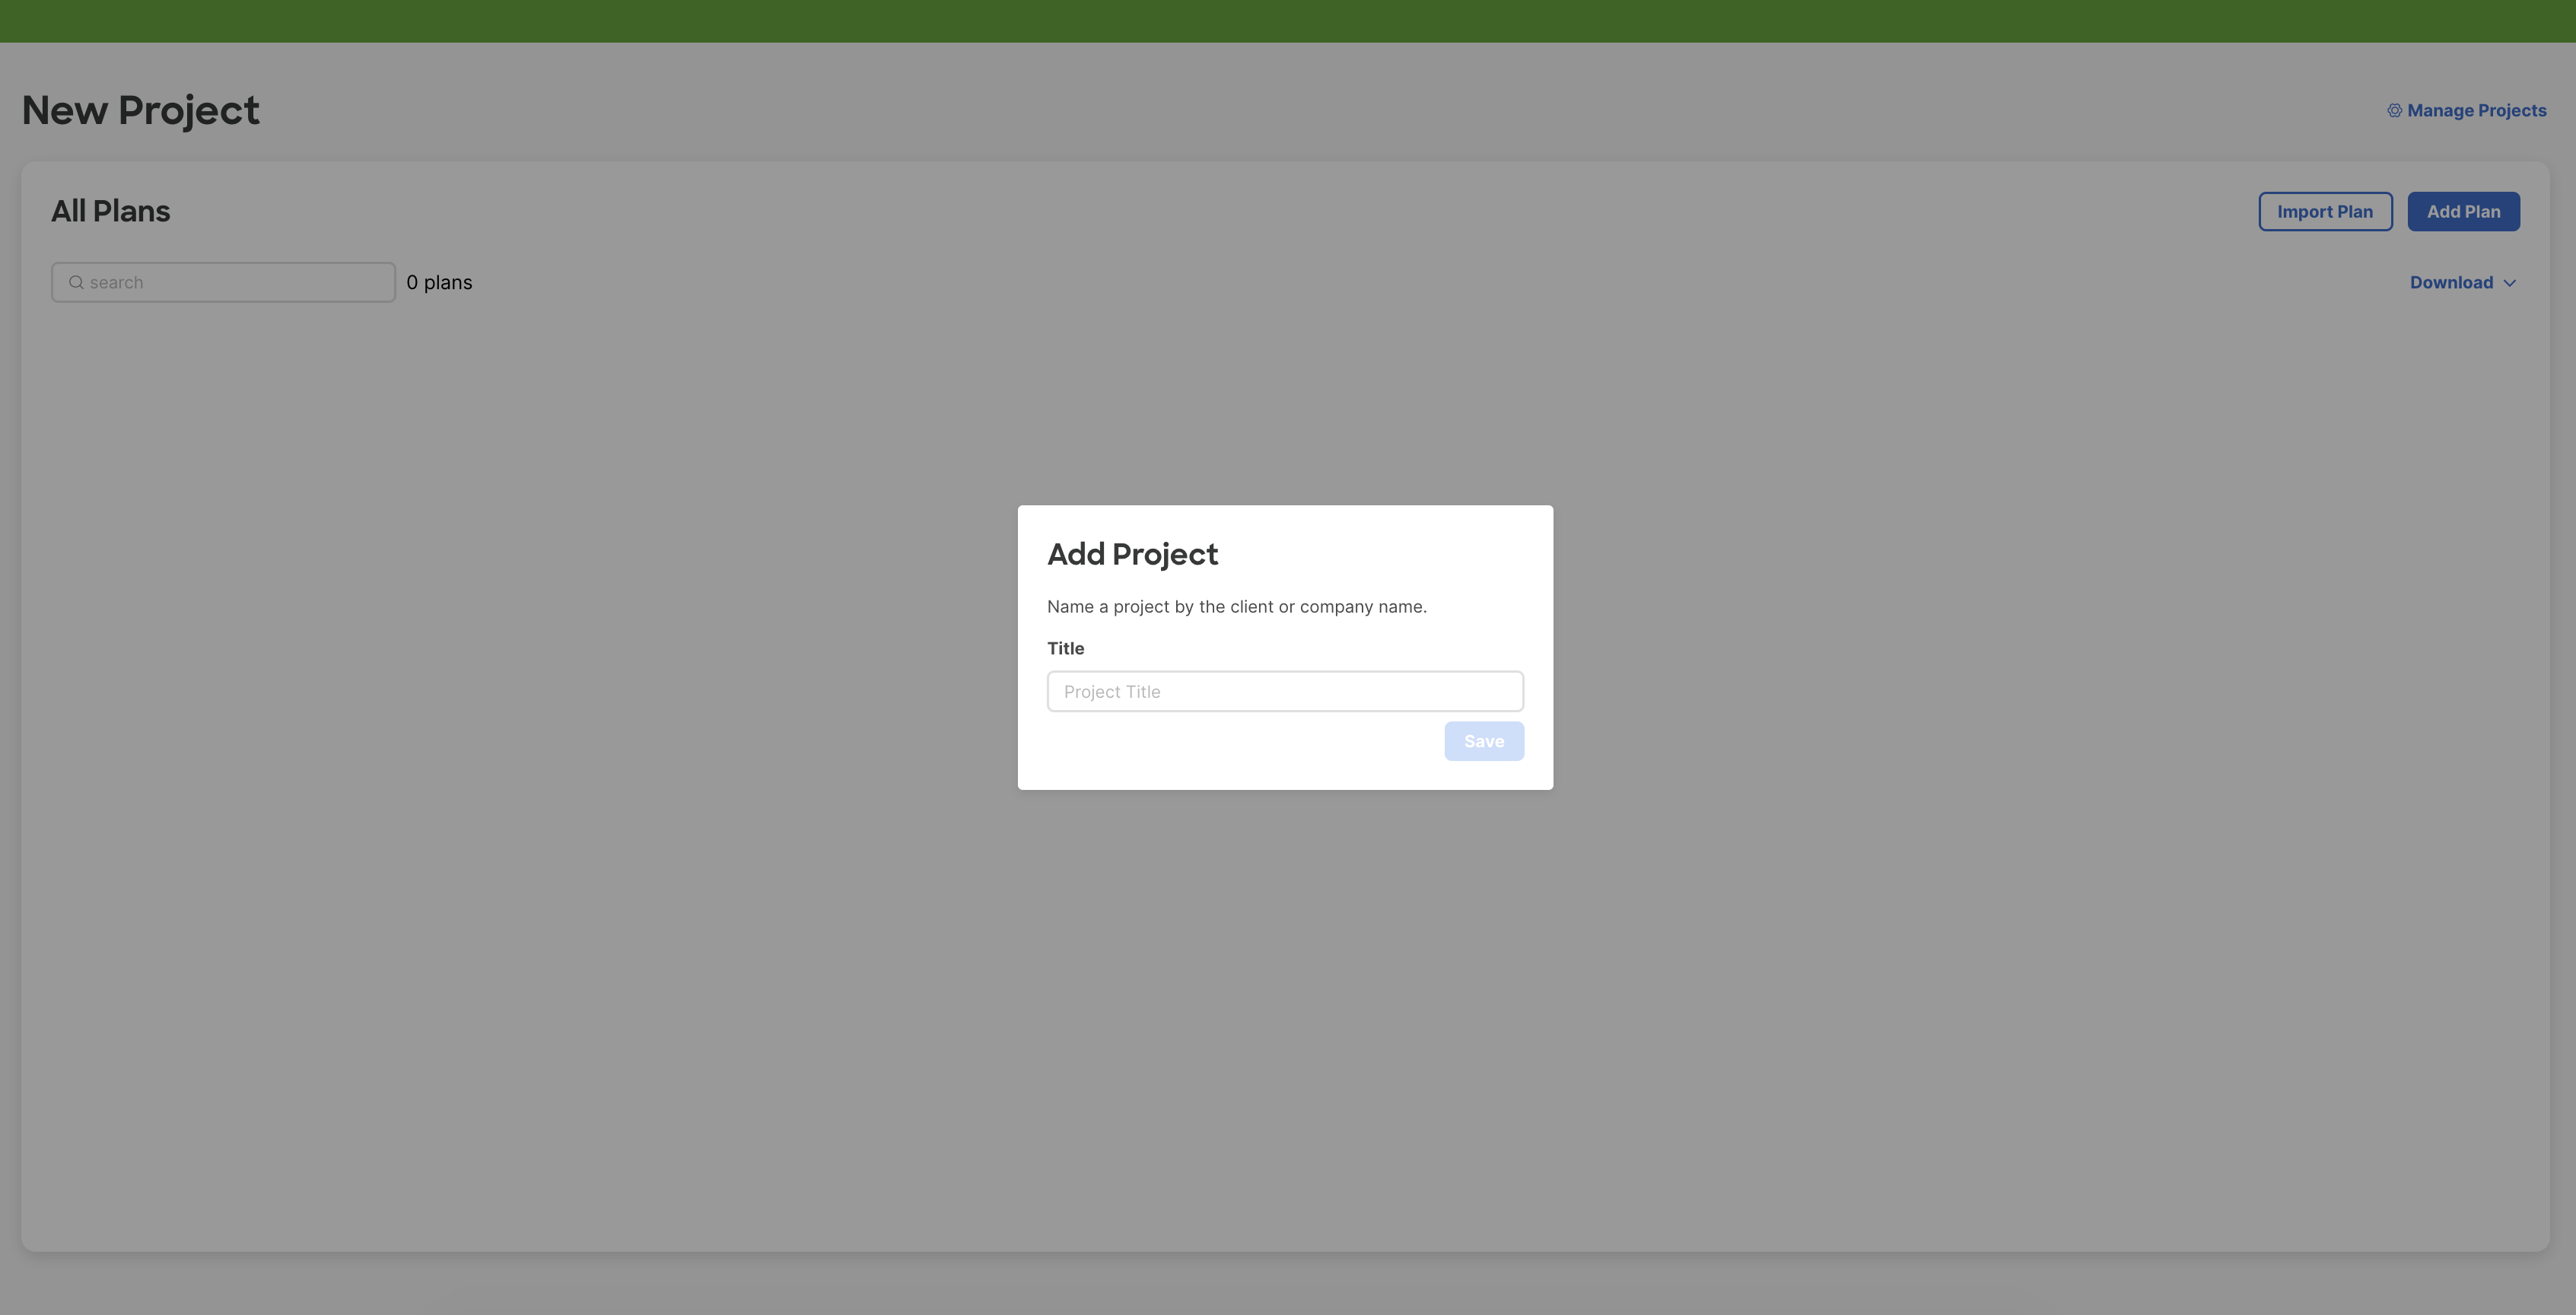
Name the Project
The first thing to do when entering the tool is to name the current project. Please consider a logic name for the planned area, so that the documentation can be shared and understood by others on site (for the mounting).
Add and Name the Floor Plan
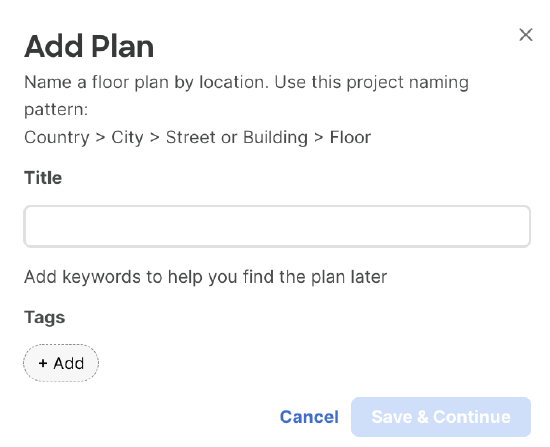
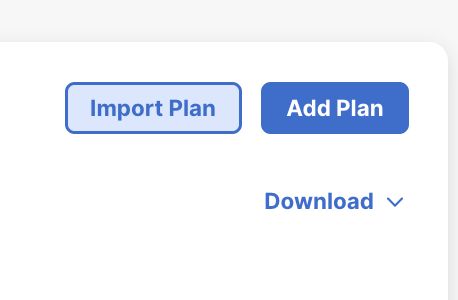
Add Plan
Click "Add Plan" to upload a floor plan with a known measurement to use for the scaling (i.e. the length of a wall in meters or feet). It is recommended to use a floor plan with walls, windows, doors, rooms and desks clearly marked, but without much more information in the image.

Name Plan
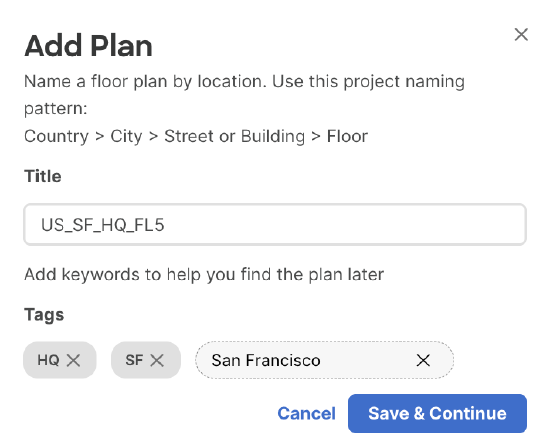
When uploading a floor plan it needs to be named in a logical way that can be understood by any other user who is involved in the project, either for planning or for mounting the cameras. A project can have several floor plans, as one project can contain a building with several floors. If the same company is planning installations in several buildings, in different cities and/or different countries, please consider that in the naming of each floor plan, to make it easy for anyone else in the project to find the correct floor plan.
Tag Plan
It is also possible to tag a floor plan to be able to find all floor plans in a specific country, a specific city, etc.
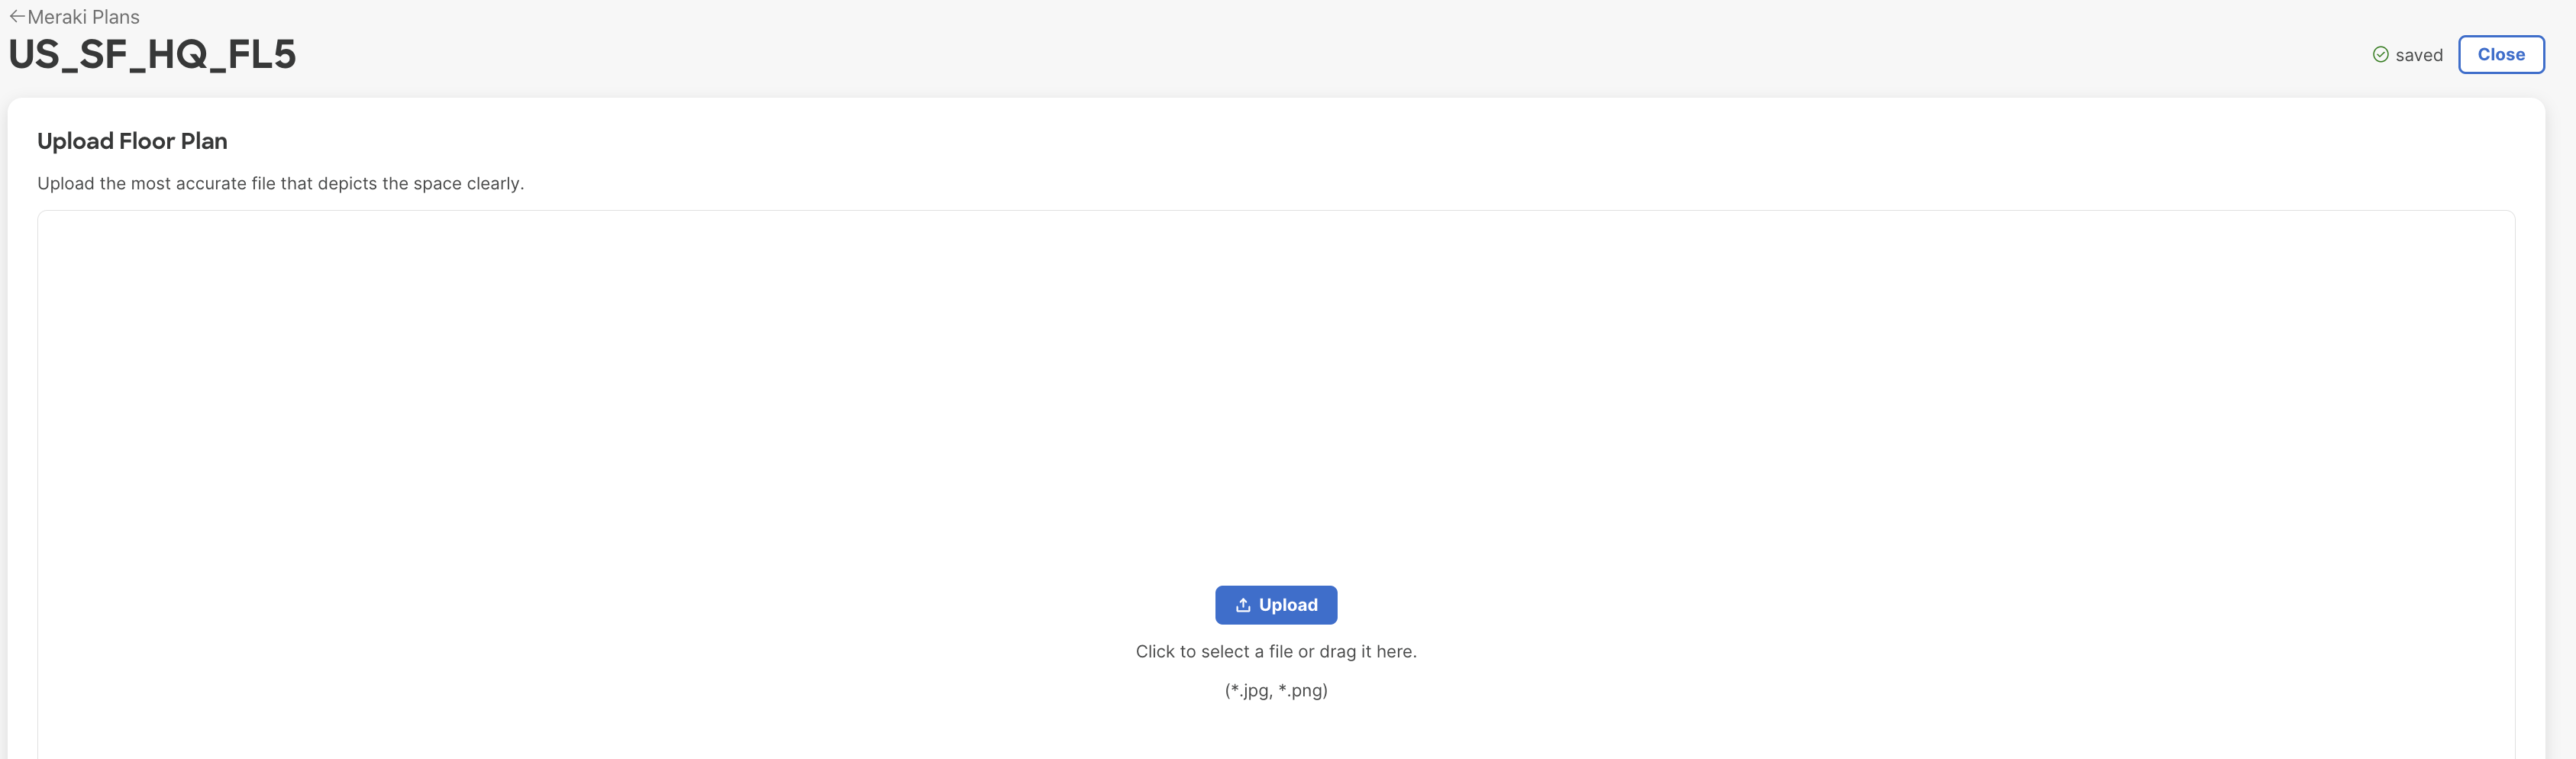
Upload Floor Plan File
When the floor plan is named it is time to upload the actual document. A .png or .jpg file is required.
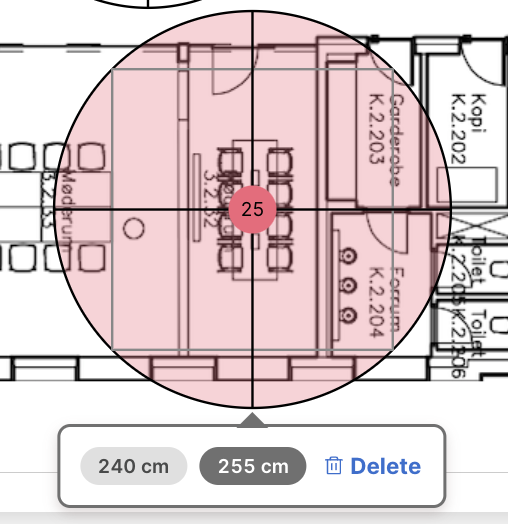
Define Scale
The idea of planning camera positions is to see how much each camera will cover. The coverage is dependent on the mounting height, and to get it as correct as possible it is important to add the correct scale on the floor plan and accurate mounting height for each camera.
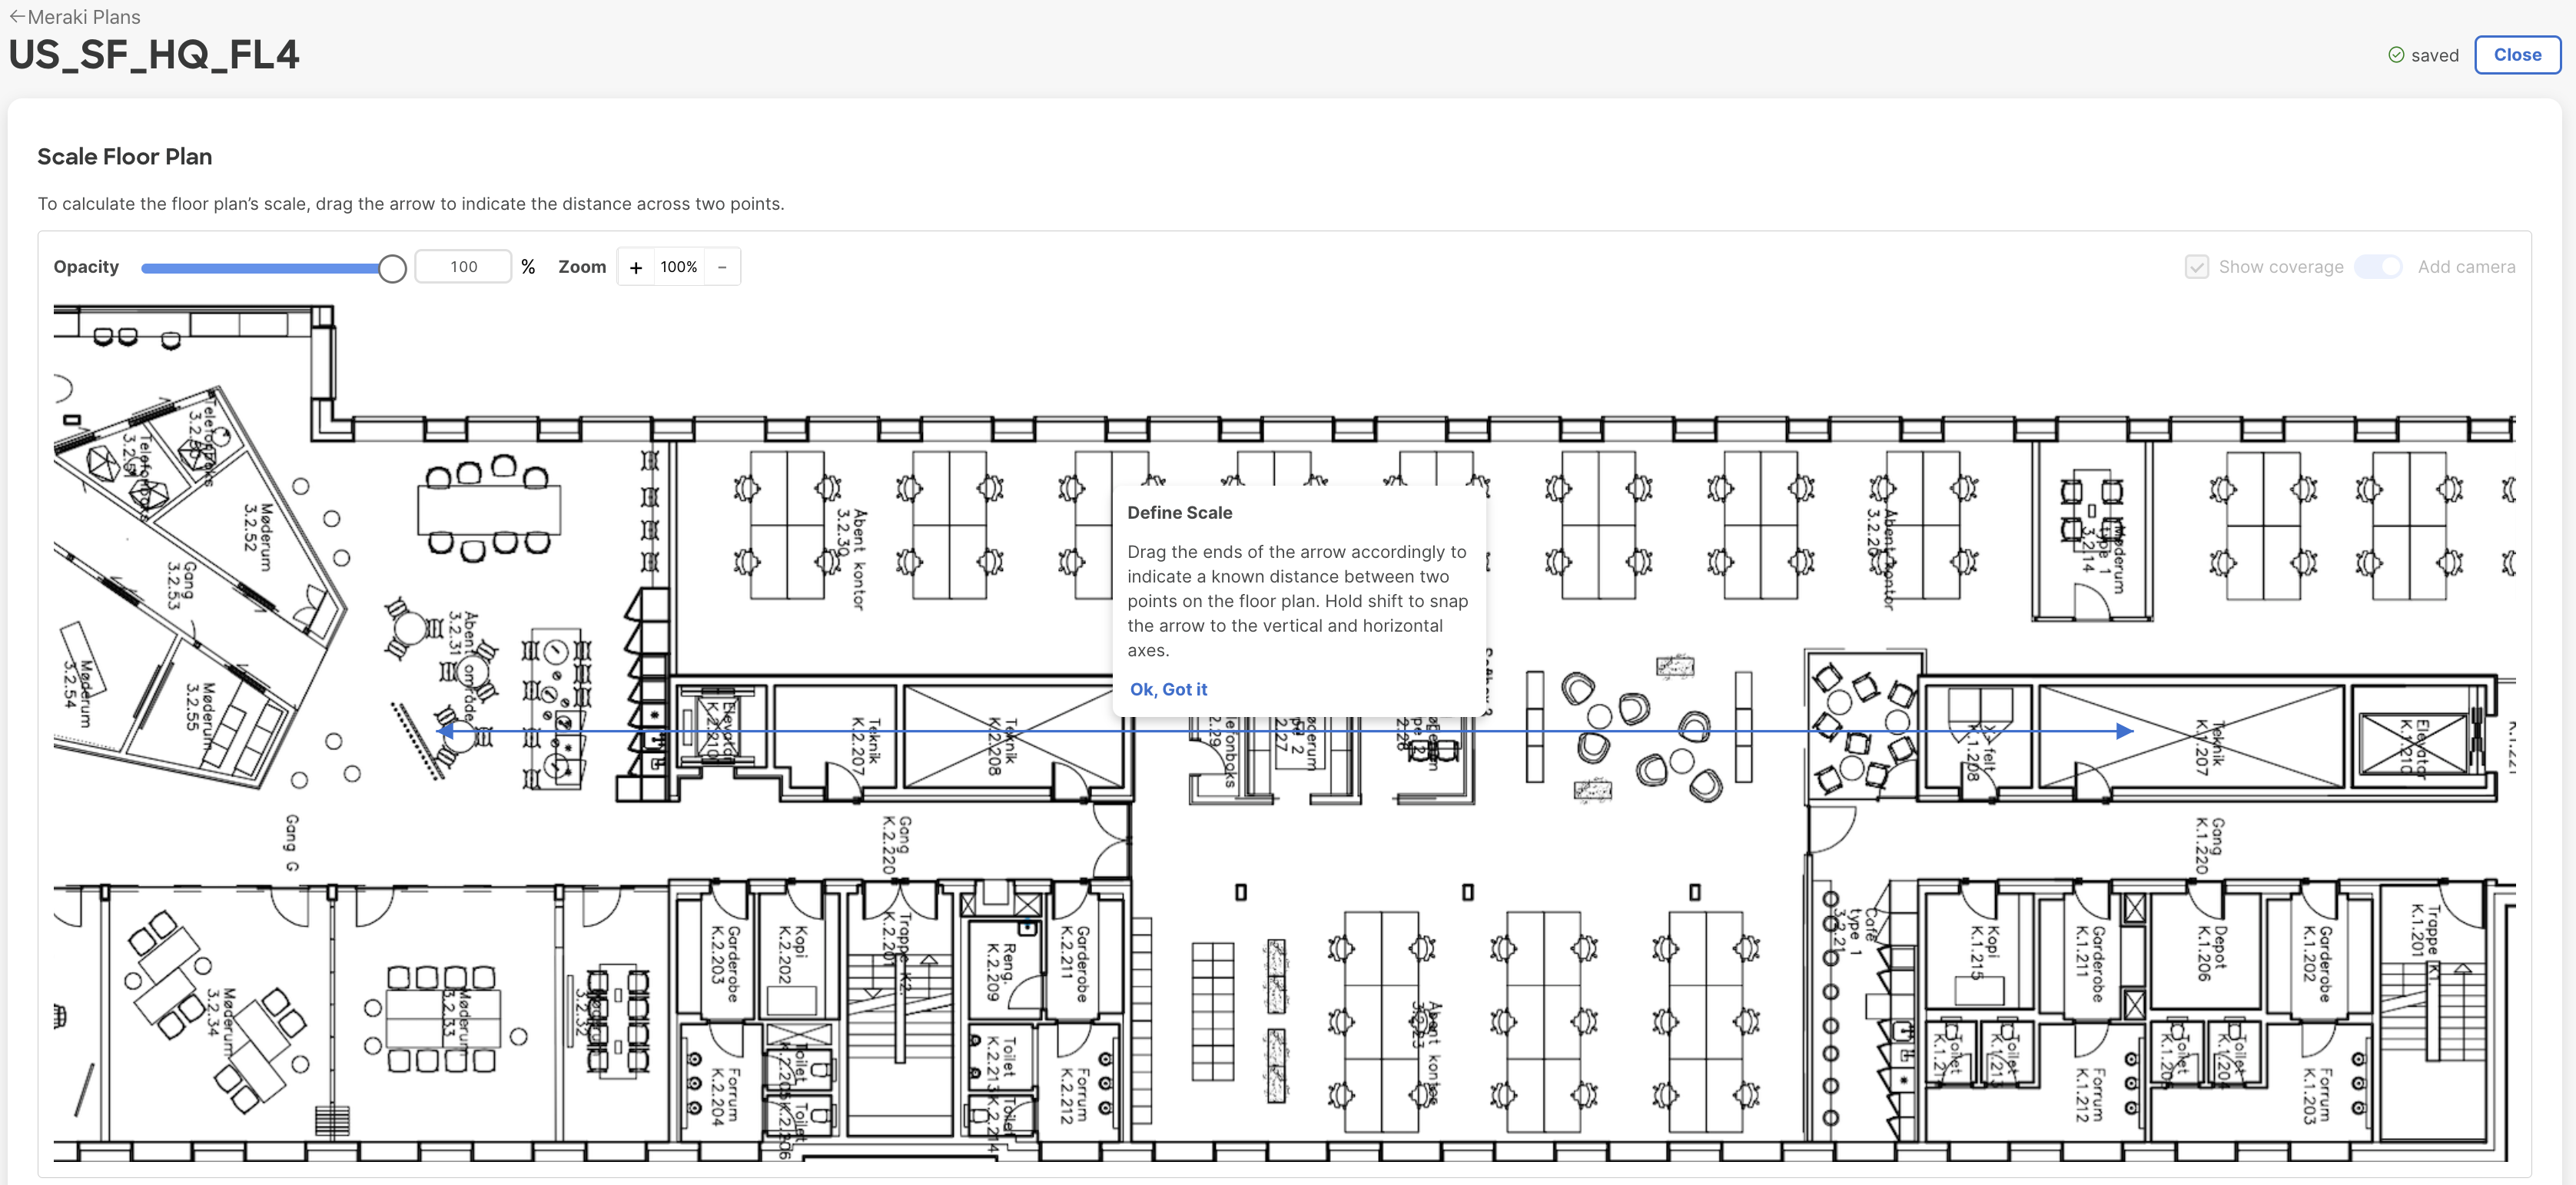
Hover the mouse over one of the points of the arrow to drag it to a known position, adjust the other point of the arrow to another known position and enter the distance between those two spots.
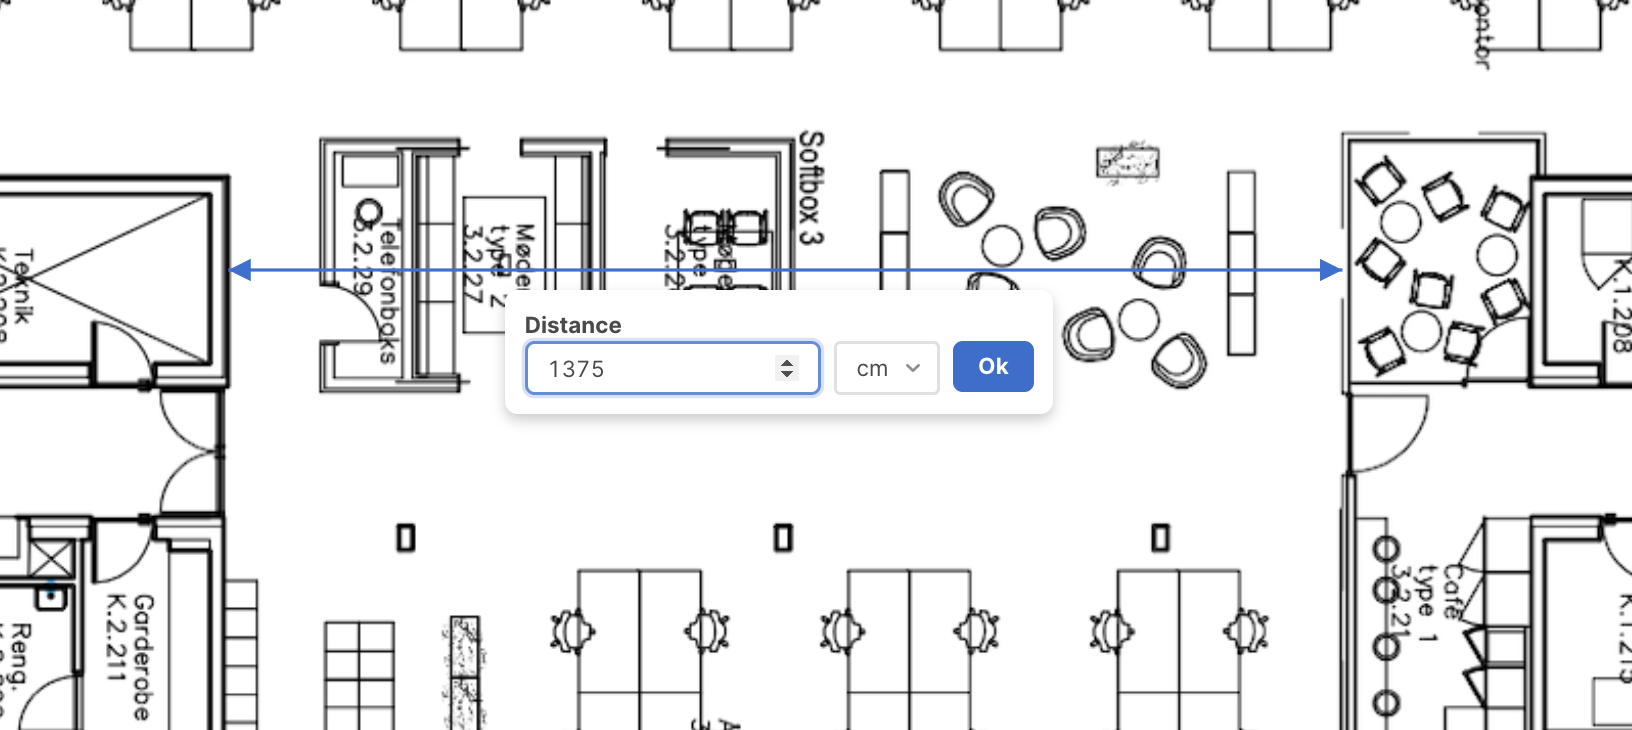
Enter Scale in Centimeters or Inches
The length can be added in cm or inches, since that is the most common on floor plans, but also gives more exact measurements than meters or feet.
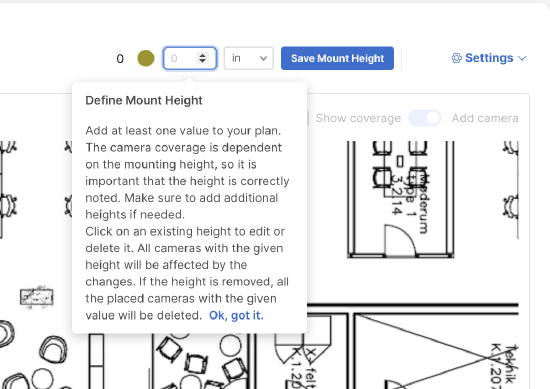
Define Mount Height
Follow the instructions to add the mounting height, on the right - above the floor plan. It can be added in cm or inches. Save the height before starting to position the cameras. Add more heights if it differs throughout the floor.
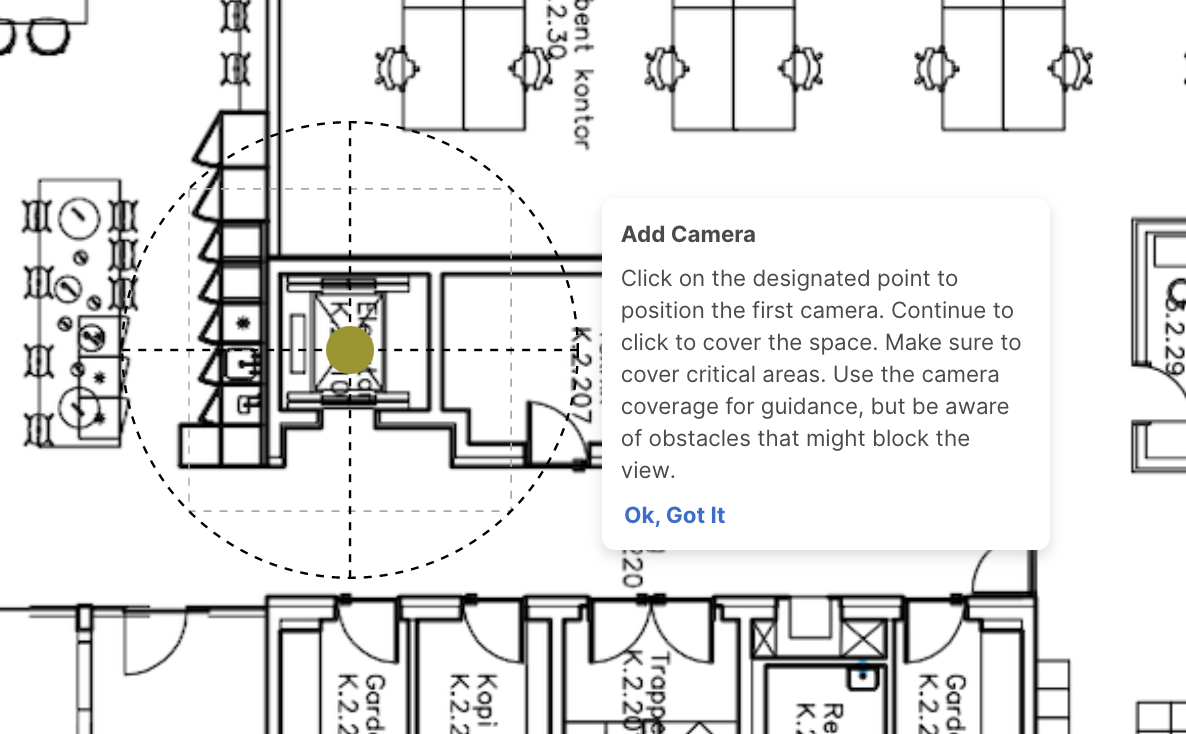
Add Cameras
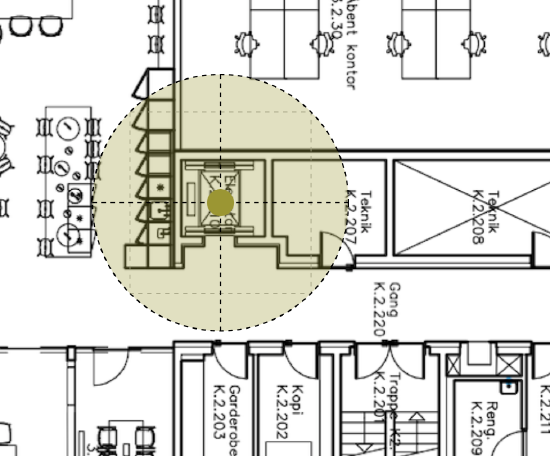
After a height is given the mouse pointer automatically becomes a camera with the coverage for the entered scale and mount height. Click to add a camera to the floor plan. (First click “Ok, got it” in the info popup.)
Edit Camera Details or Position
When hovering over a positioned camera it becomes slightly highlighted. Click to activate it. An active camera can be moved around to adjust the position if needed.
Click again on an active camera to be able to delete it, or change height if there are more than one height added. The current height is the one highlighted, when there are more than one entered for the floor plan.
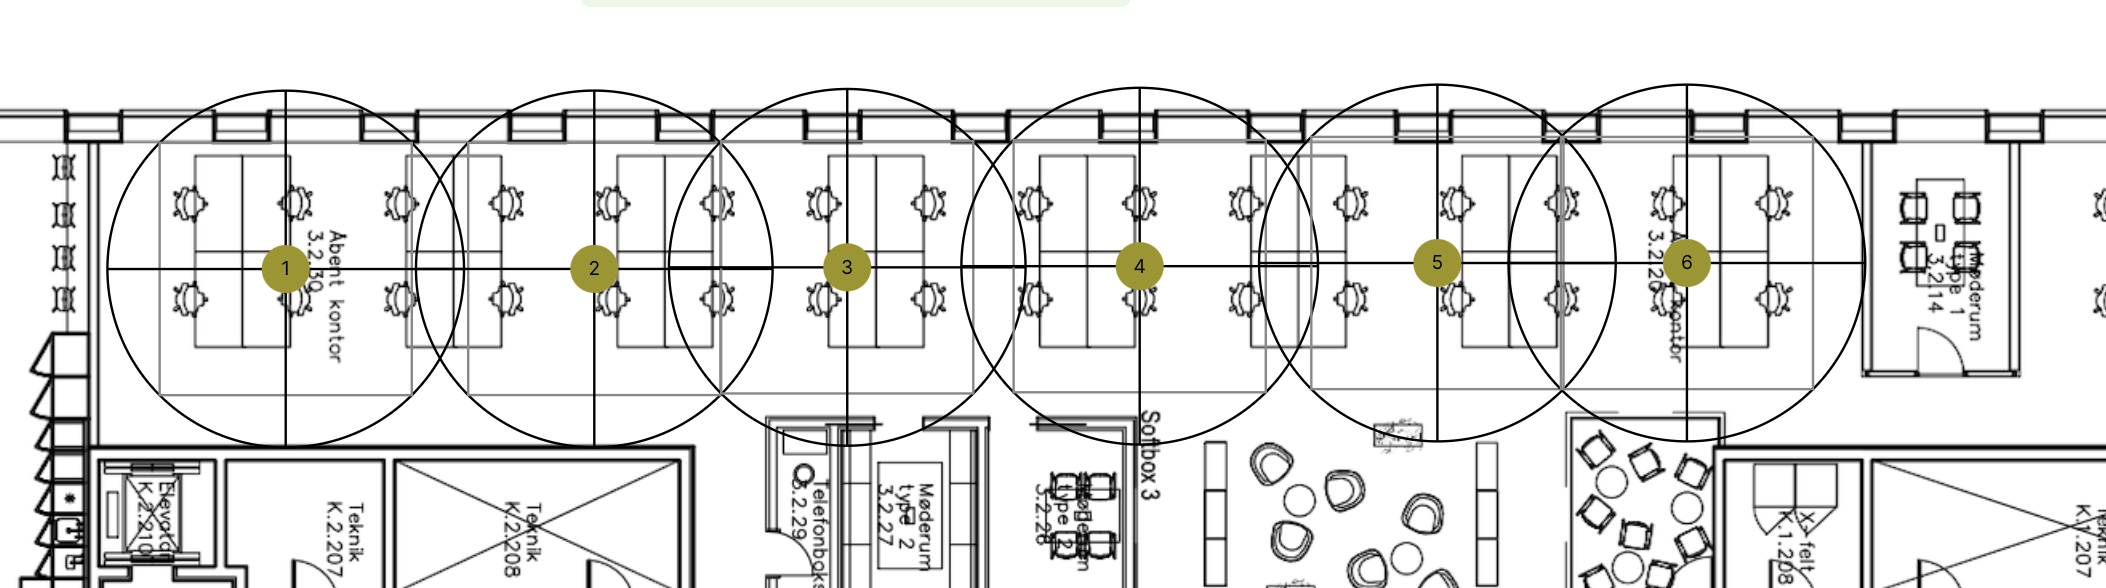
To Think About When Distributing Cameras
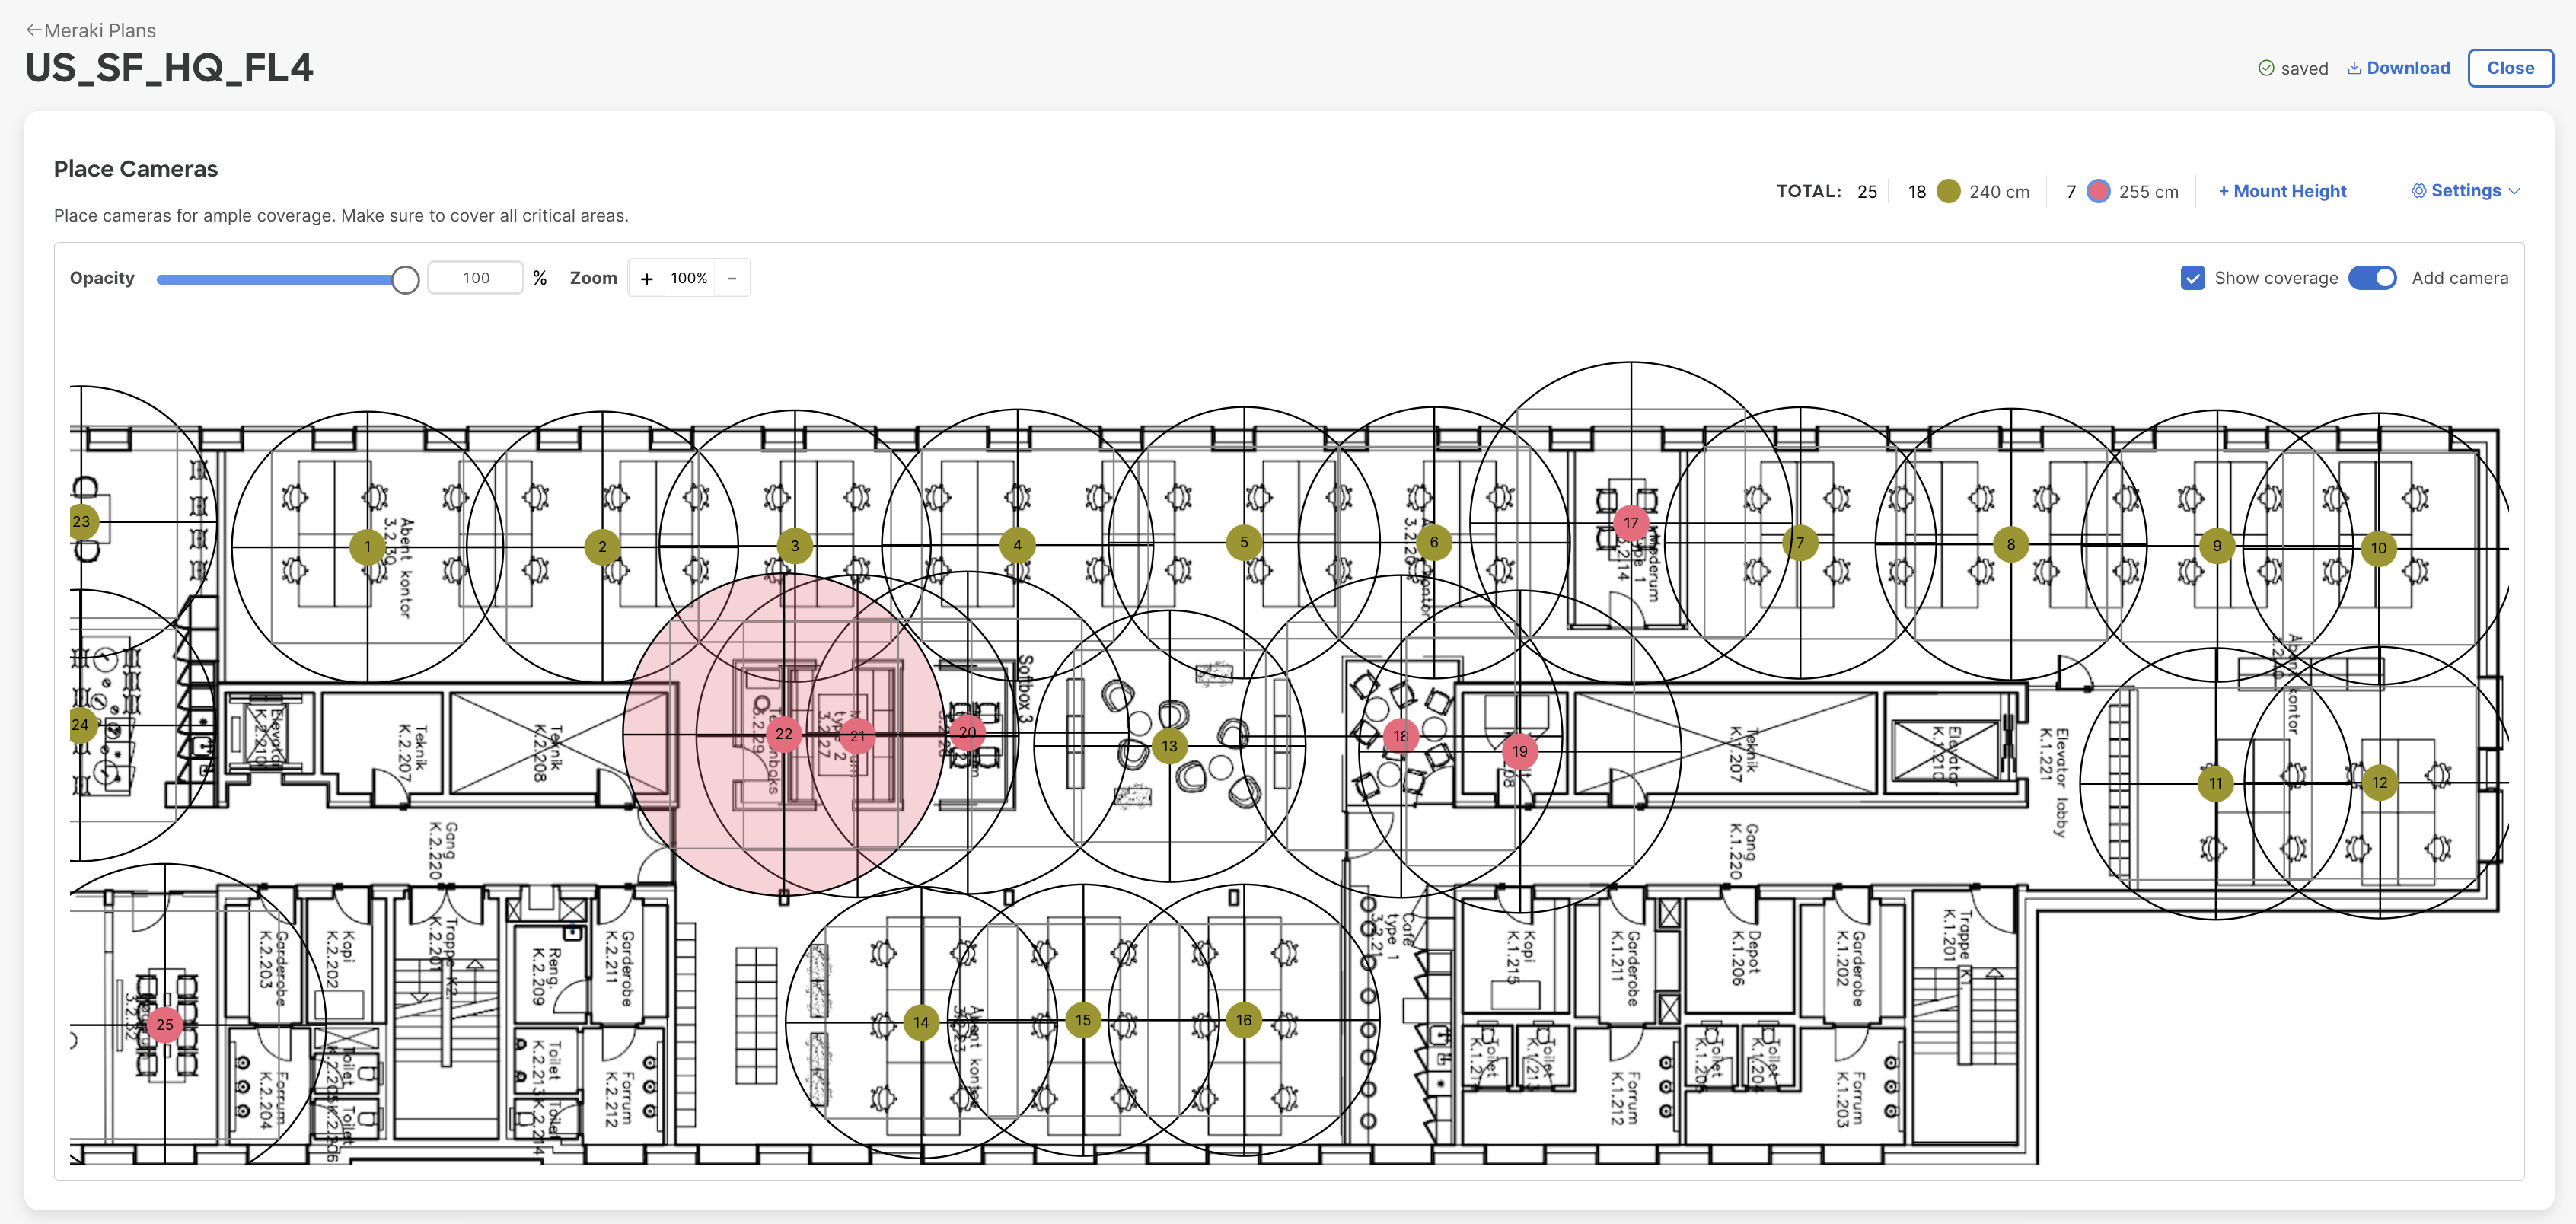
Click on the floor plan to add cameras to cover the areas that should be analyzed.
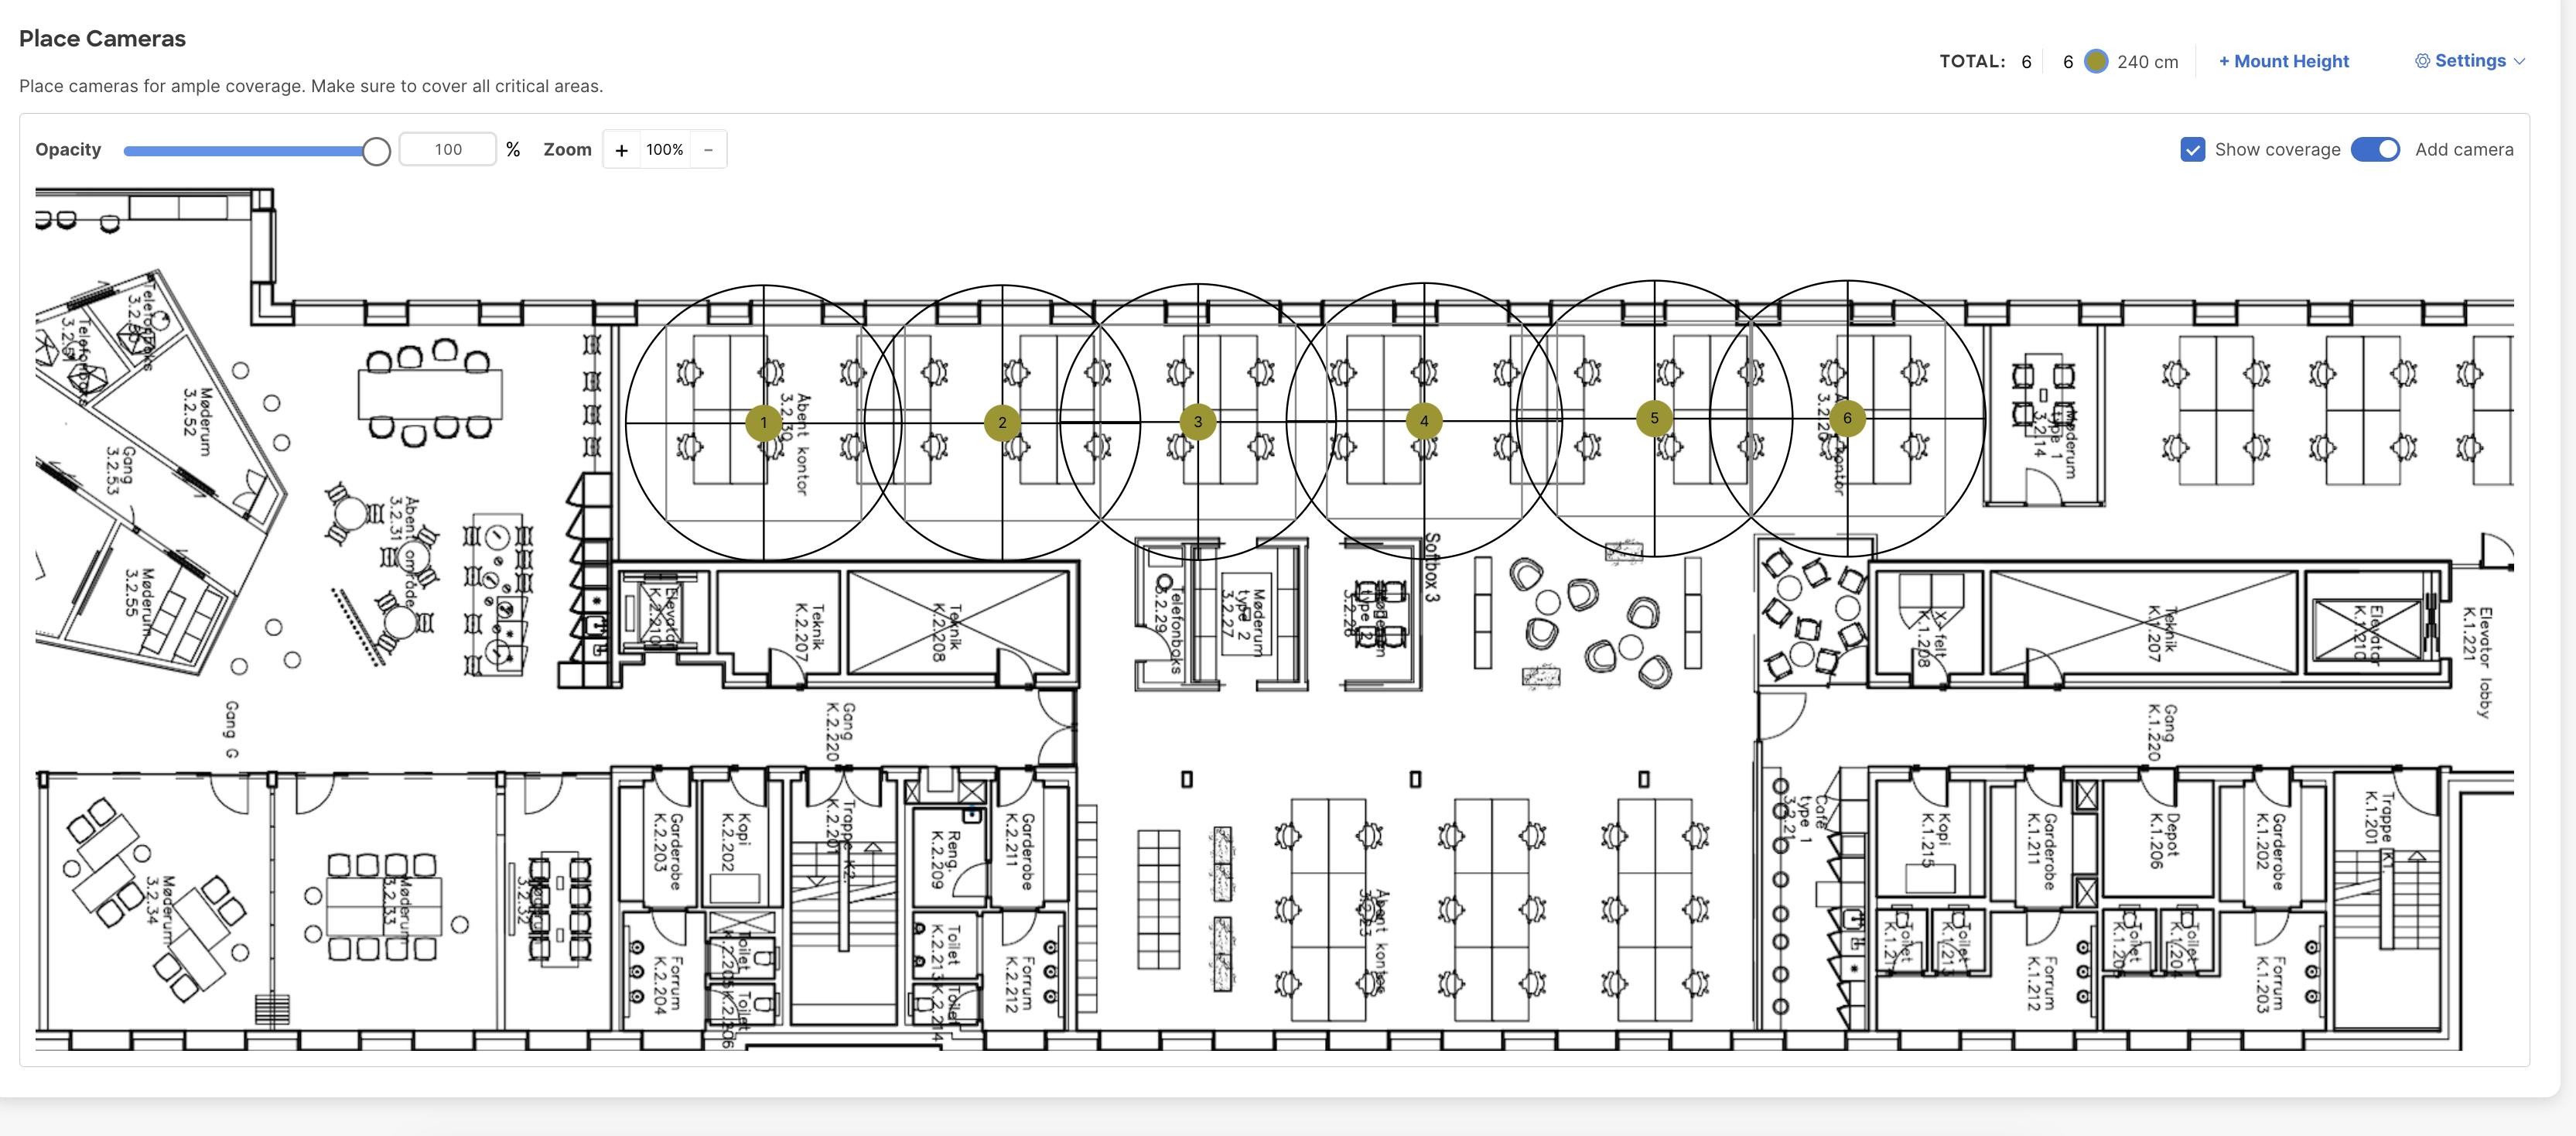
Zoom in if needed to see the coverage better.
Covering Desks or Total Floor Area?
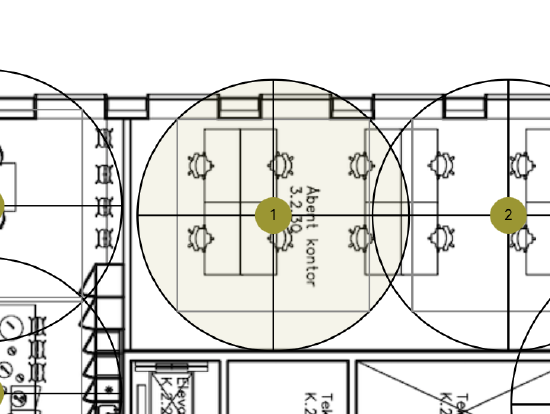
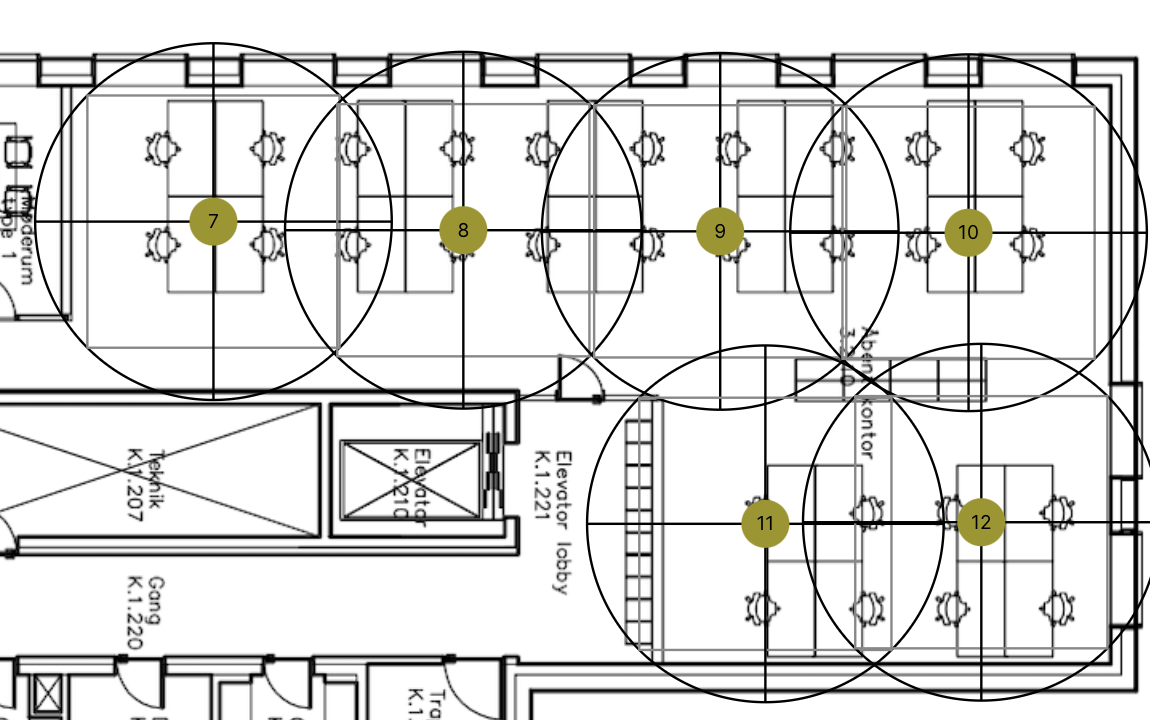
The circle around the camera shows the coverage.
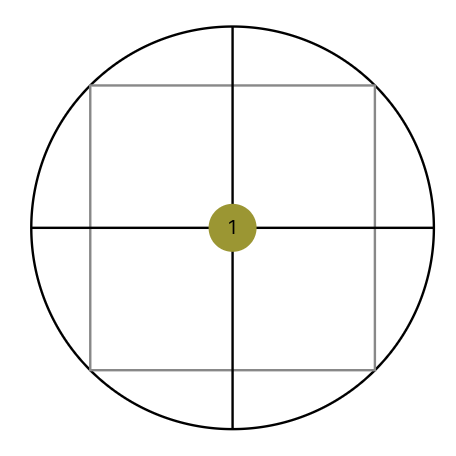
The square within the circle shows where the cameras need to overlap to assure coverage in the area between them.
When covering the desks, ro a single meeting room, it is enough to look at the coverage circle. For complete coverage of the floor it is important to use the square for guidance.
Cover the desks
In a project where the desk positions are fixed, the cameras can be adjusted to make sure that each seat is covered by the cameras' coverage.
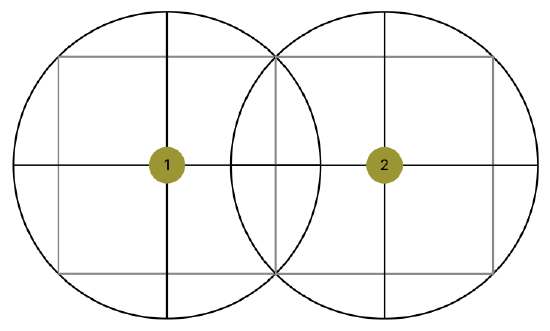
Cover the Entire Floor
If the full area should be covered, to allow re-arrangements with the furniture in the office, the cameras need to overlap by the squares. (Or more, but preferably not more overlap than necessary to avoid double detections - as well as keeping down the number of cameras needed.)
Different Mount Heights on the Same Floor?
Add more heights if needed. Continue to click and arrange cameras on all areas that should be covered. Different mounting heights have different colours to make it visible if there are more than one height specified.
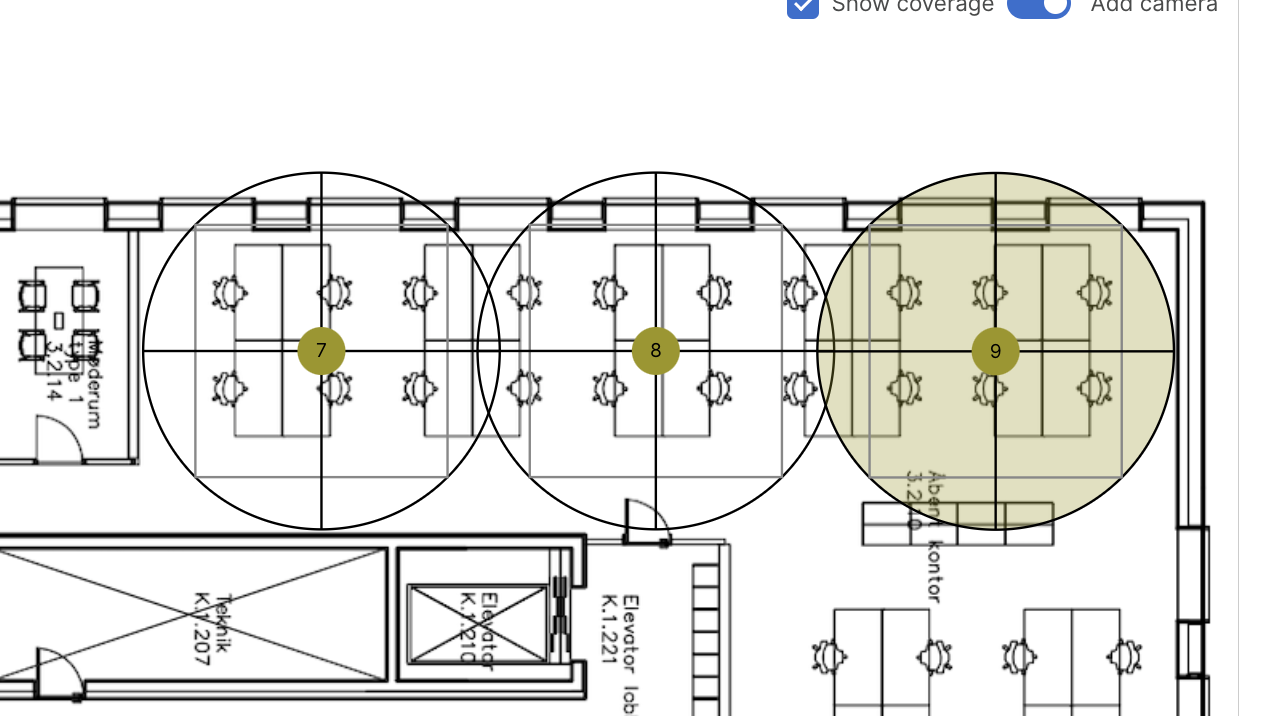
Select What to Show in the Tool
Show Camera Positions
The coverage is needed when planning, to assure that all areas are covered. For the ones that will mount the cameras, only the positions are needed. Therefore there is a check box at the upper right corner, where it says “Show coverage”. Uncheck it to see the actual positions, without the coverage circle.
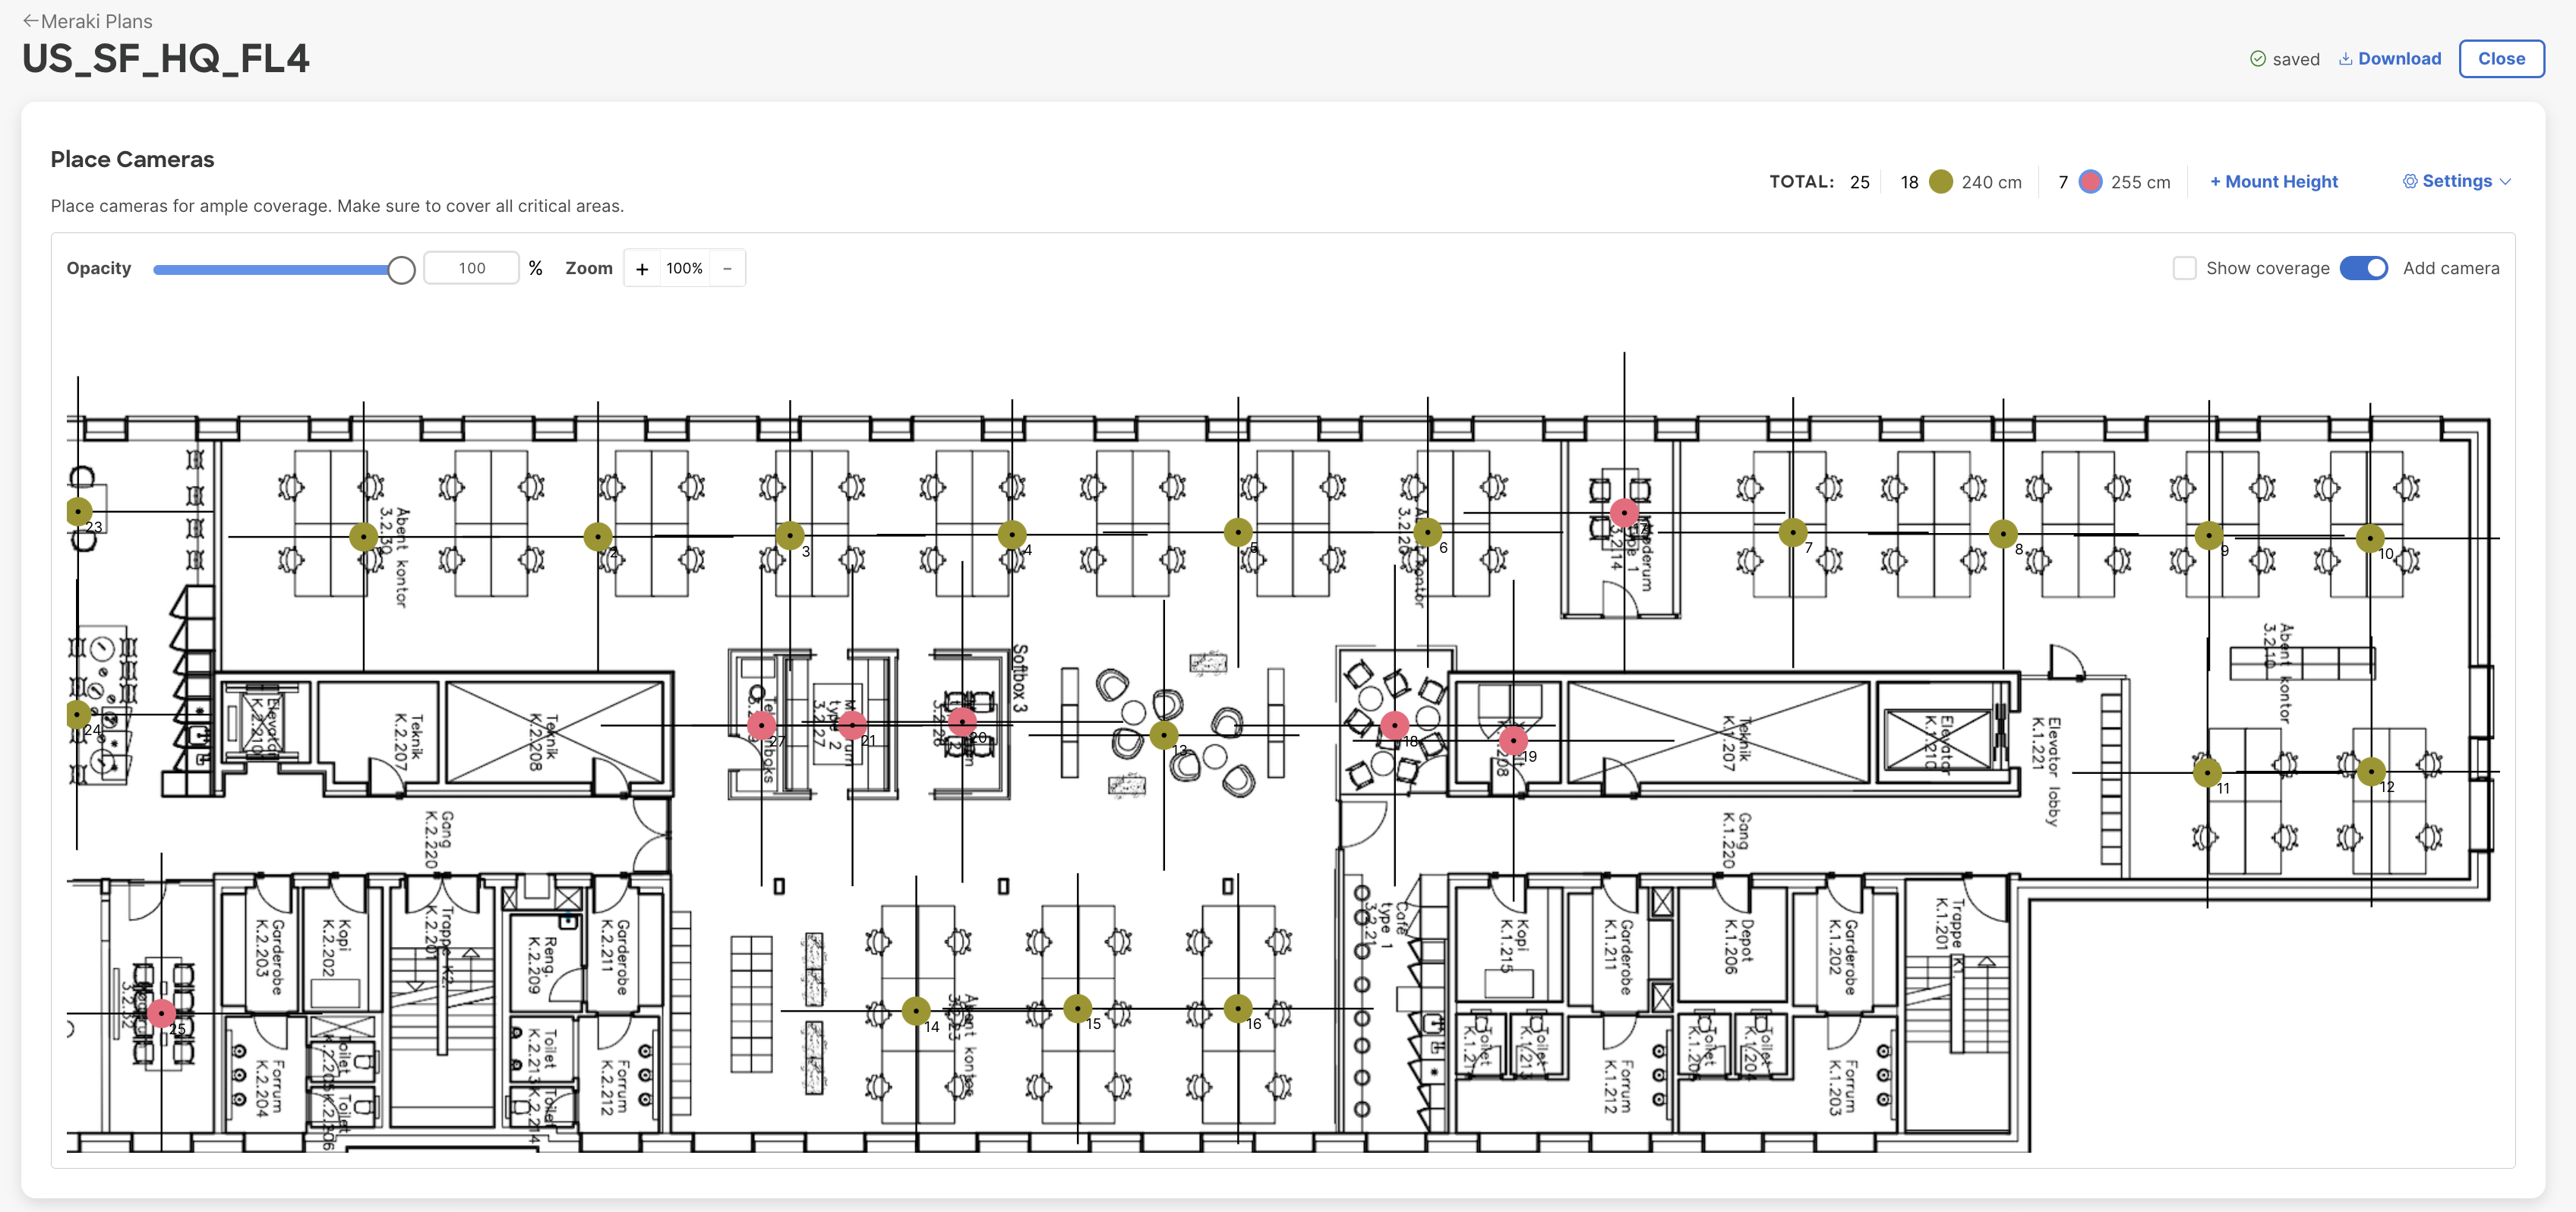
Turn Off "Add Camera" to Avoid Changes in the Plan
It is also possible to turn off the “Add camera” mode, to easier pan around in the view without accidentally adding a camera. The switch button is located on the right, just above the floor plan.
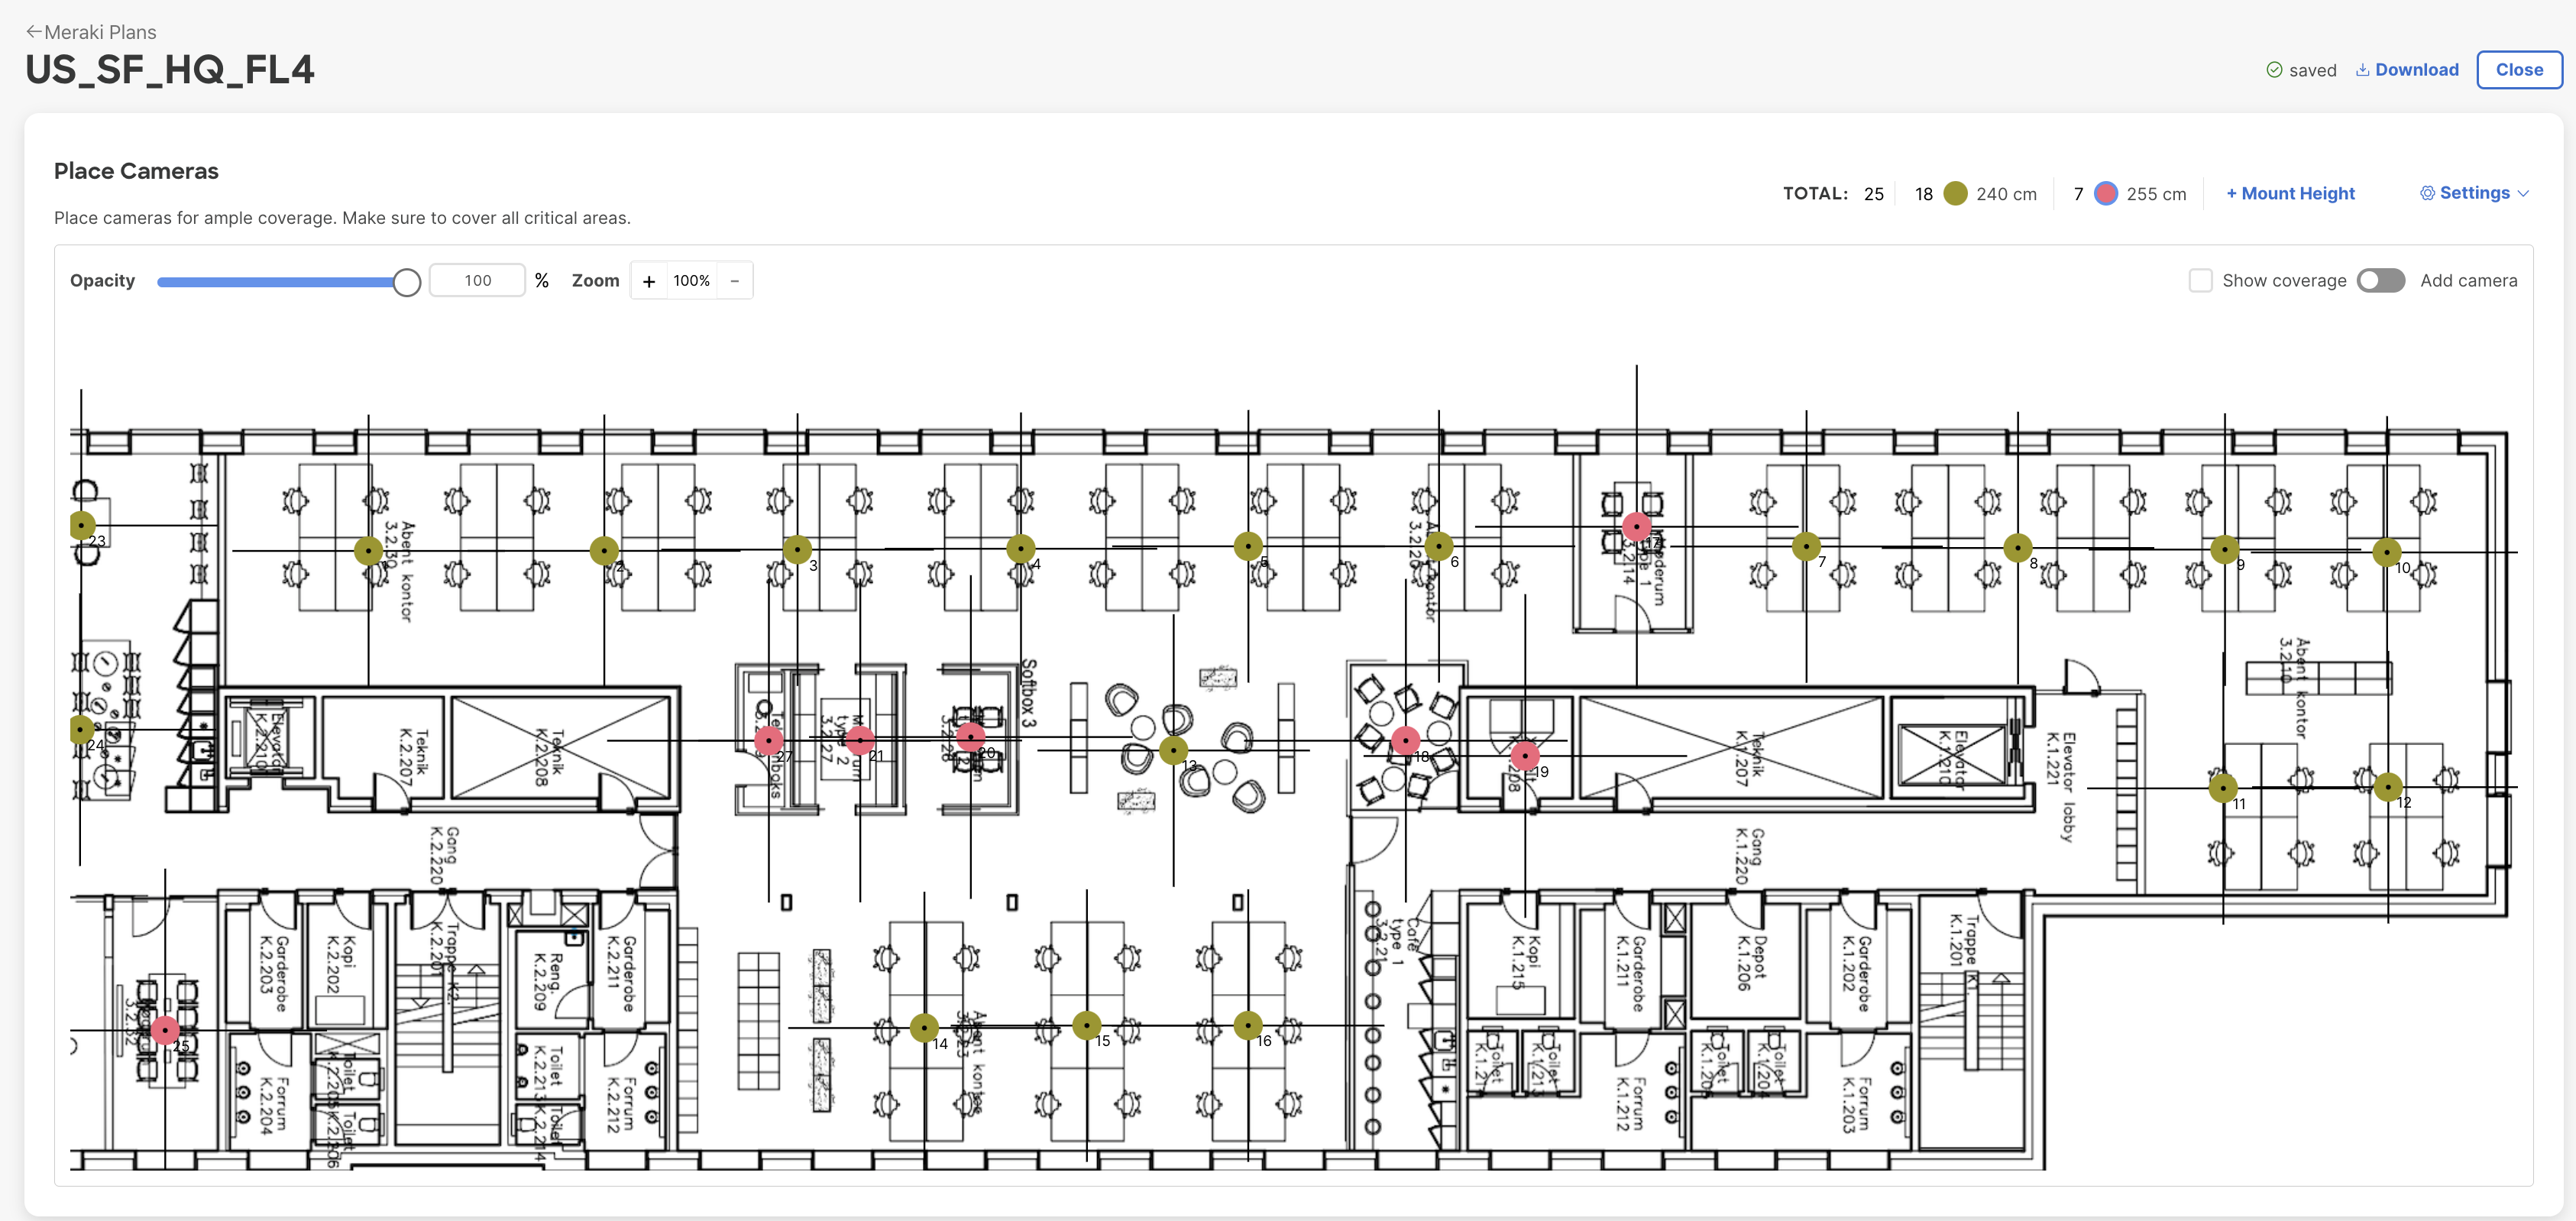
Focus on Floor Plan or On Cameras
At the left upper corner there is a slide bar to adjust the opacity of the background image (i.e. the floor plan).
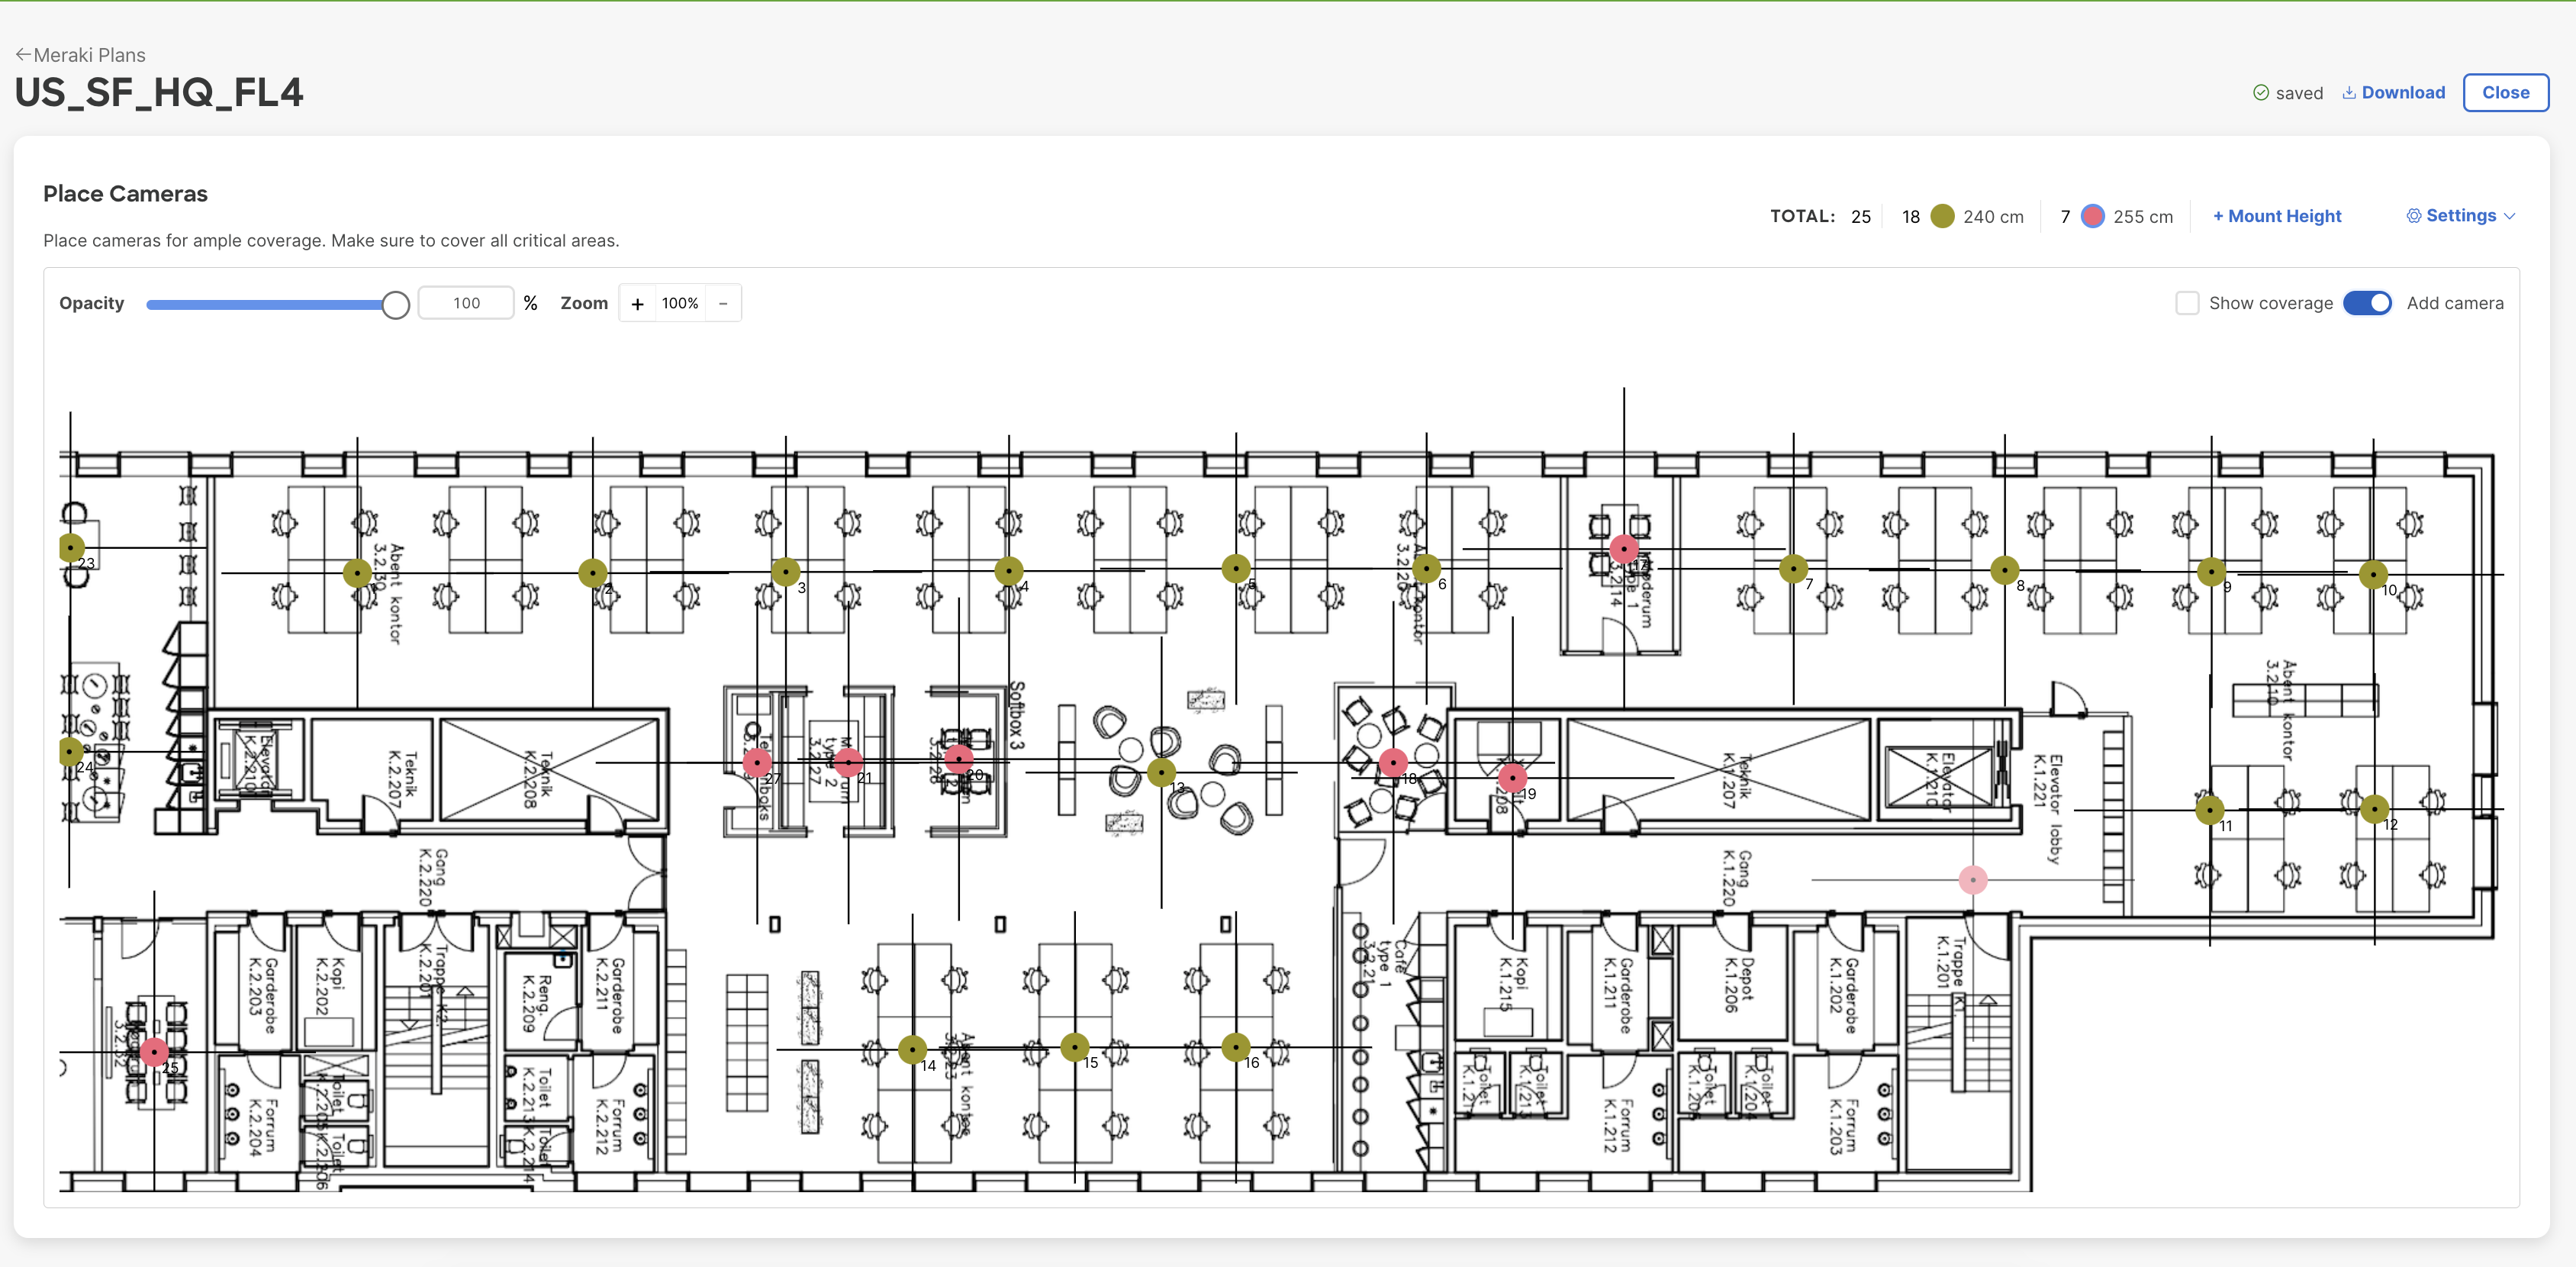
Default - 100%
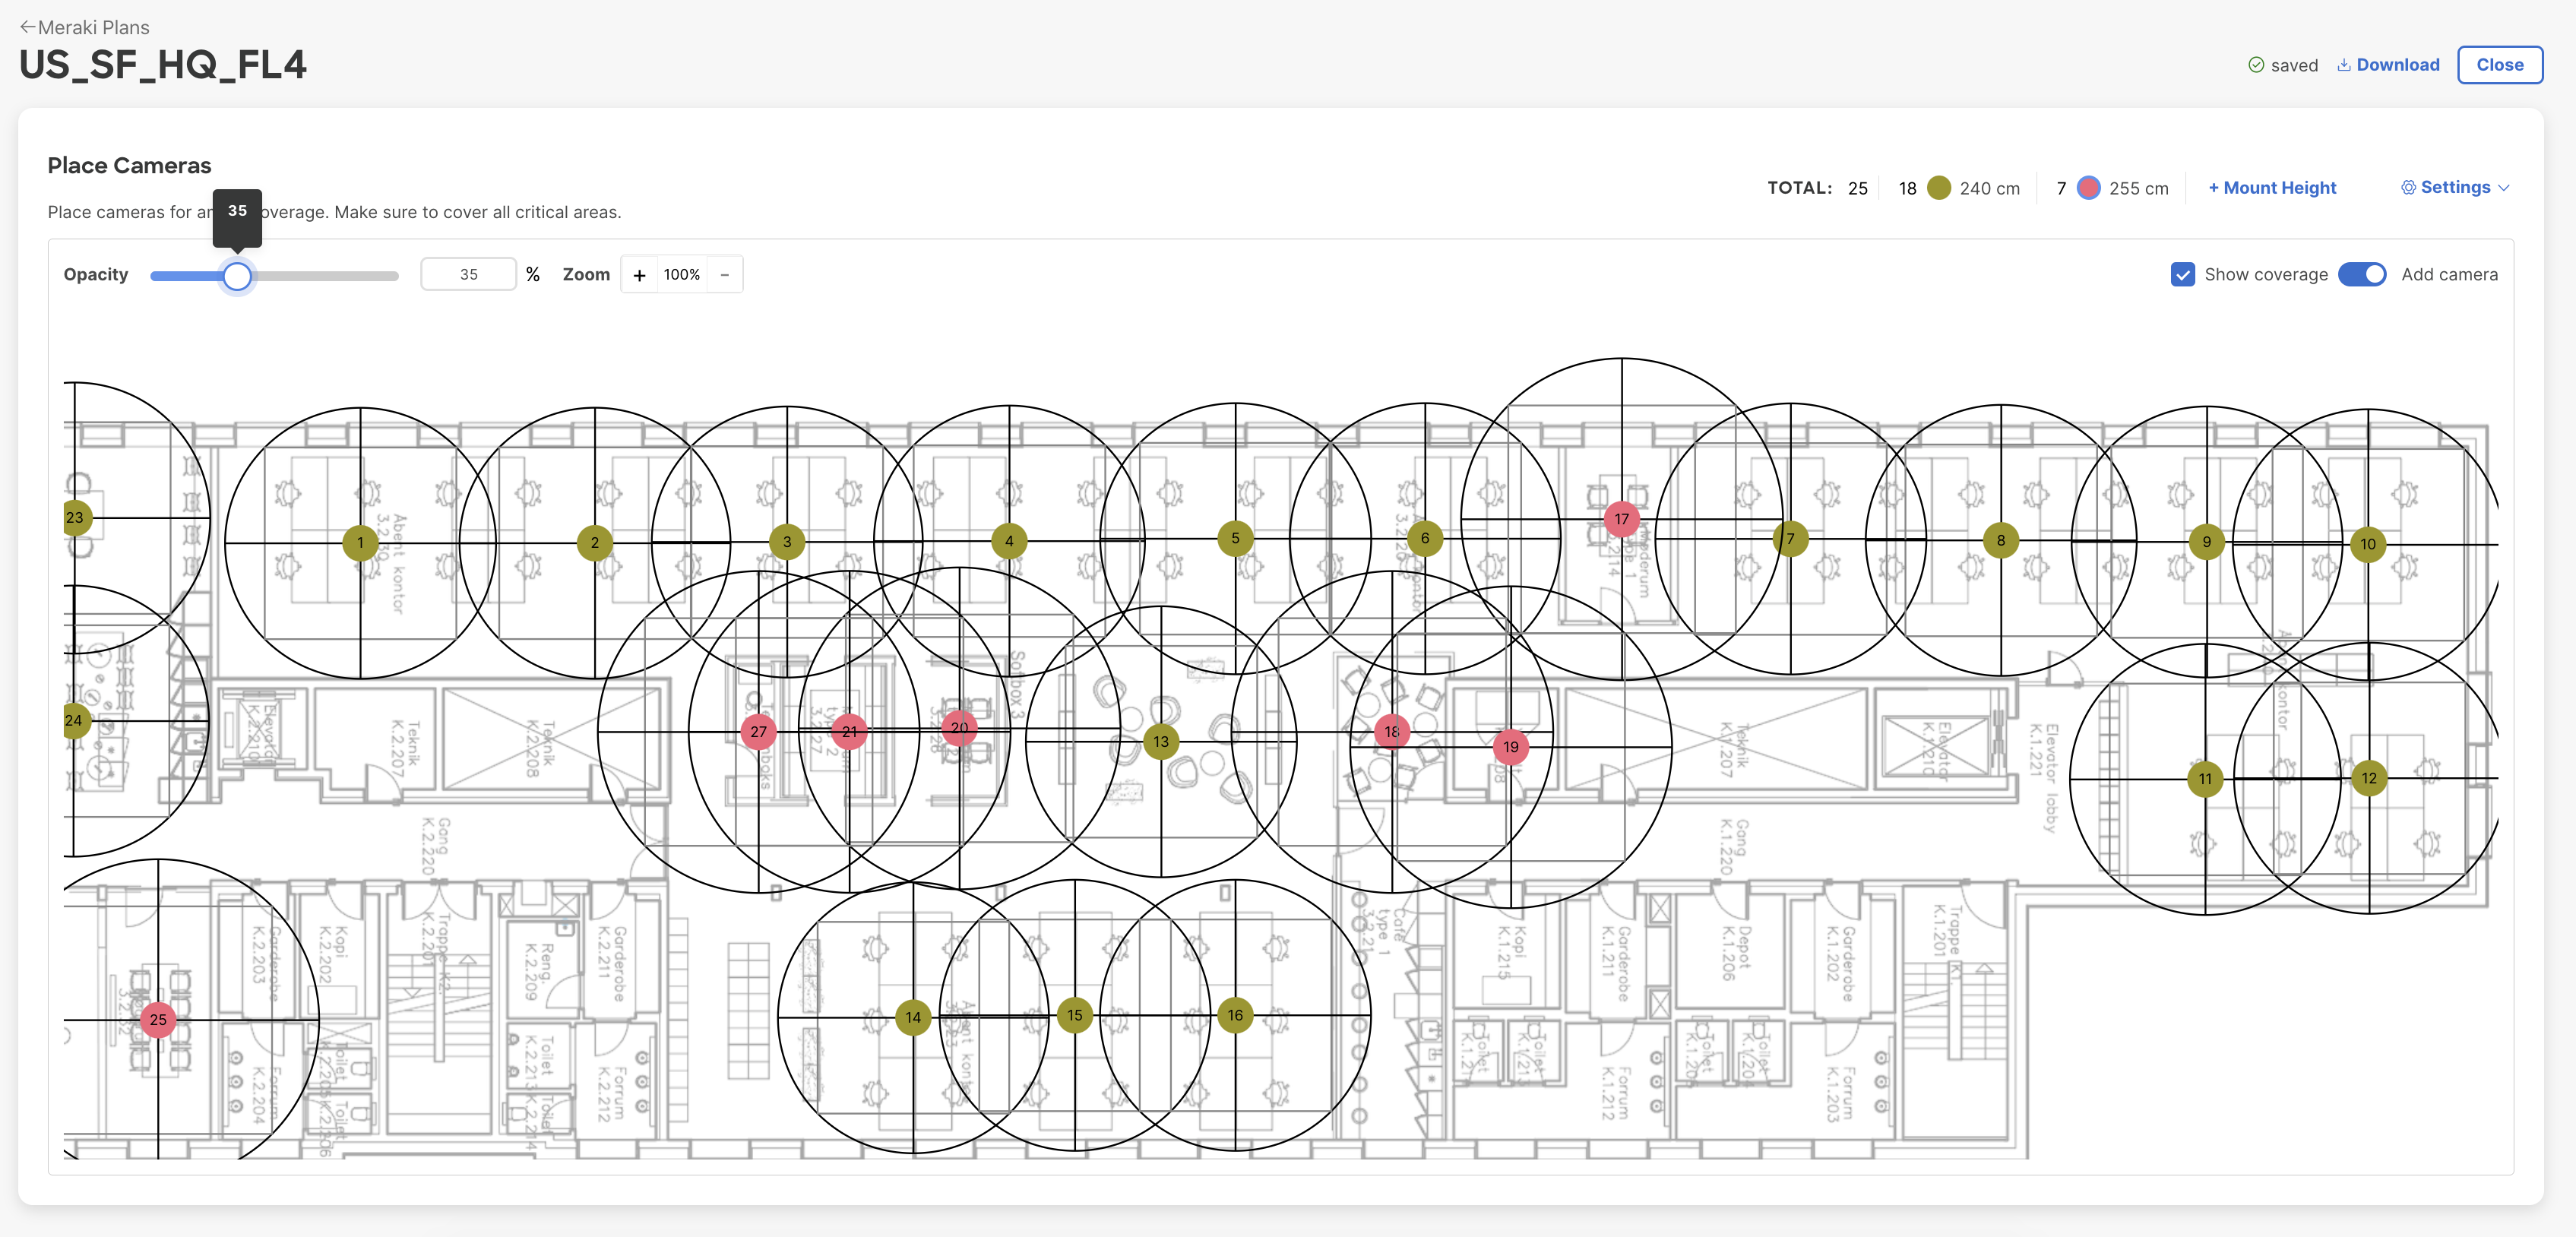
Opacity 35%
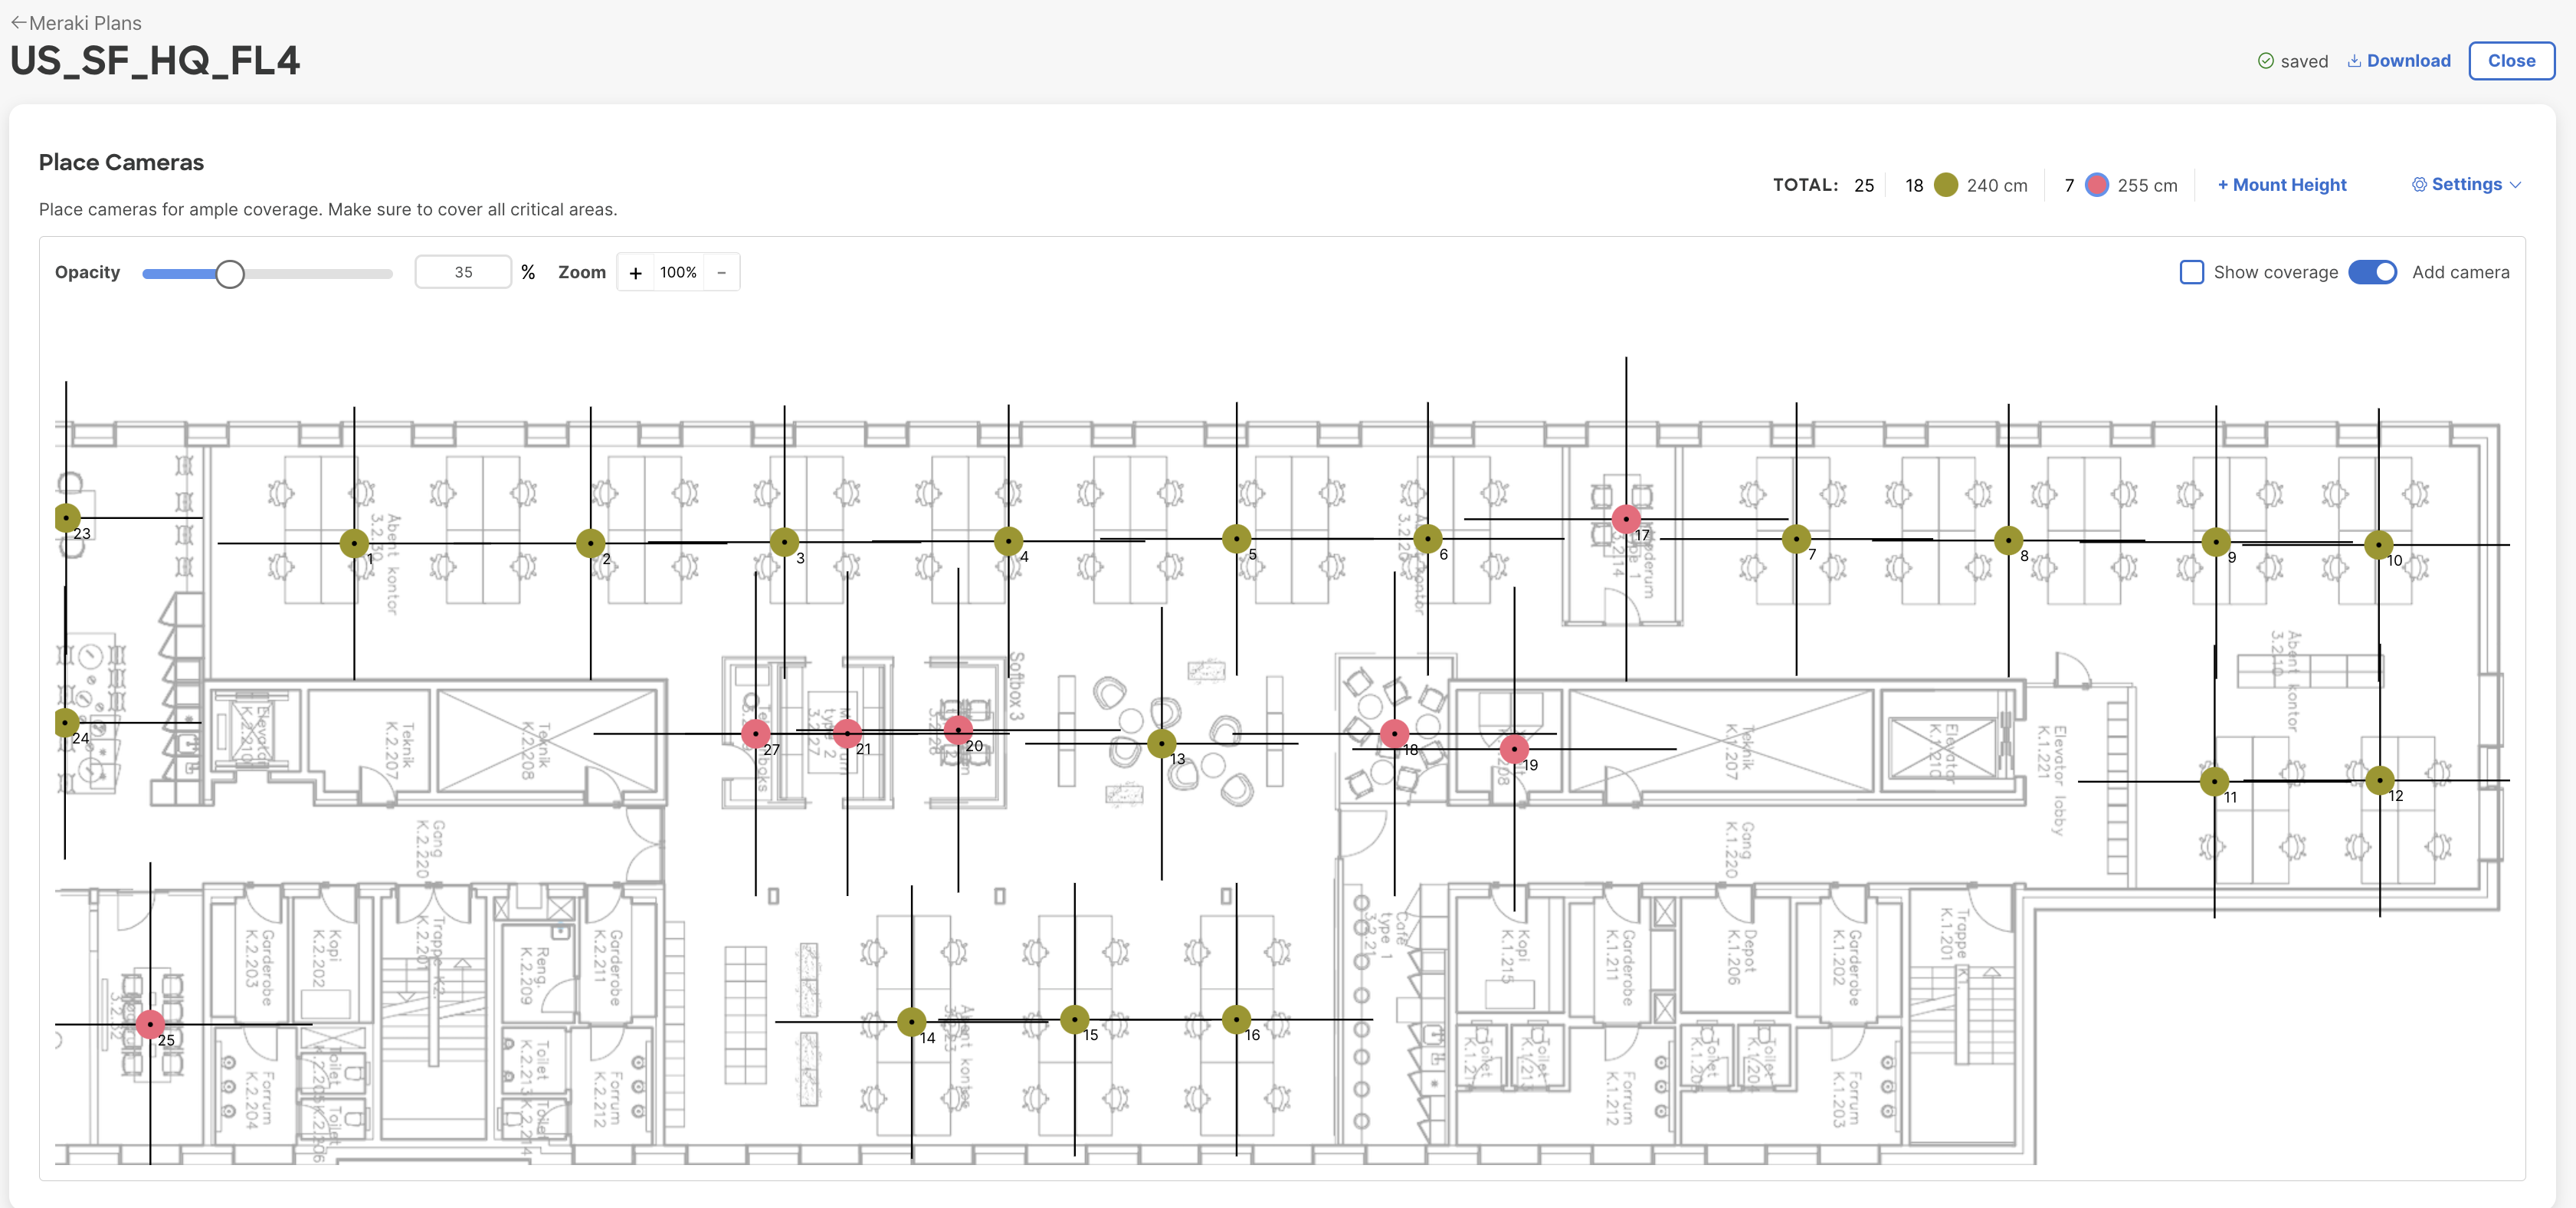
Opacity 35% with only positions shown
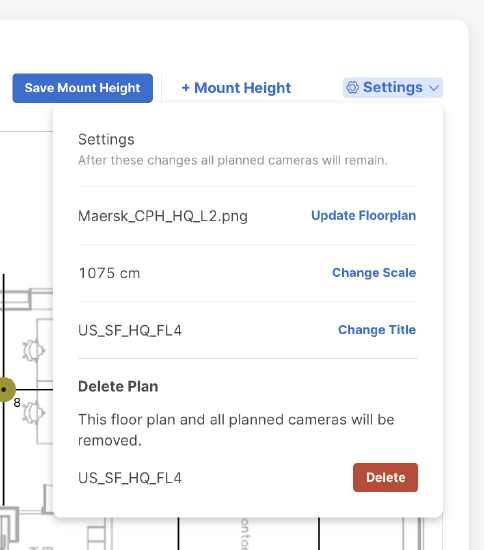
Settings
When working with the floor plan, there is a drop down list, in the title menu, with settings for the floor plan. This can be used if for instance there is a new, updated floor plan, or if the scale is incorrectly added and needs to be corrected. Even if there are changes the cameras will remain positioned on the floor plan. Unless the floor plan itself is deleted, of course.
Download Floor Plans
The ongoing work is saved online, as long as the browsing history remains. Make sure to download each floor plan as a way to save it for later, and to be able to share it with others. Click “Download” before closing the floor plan.

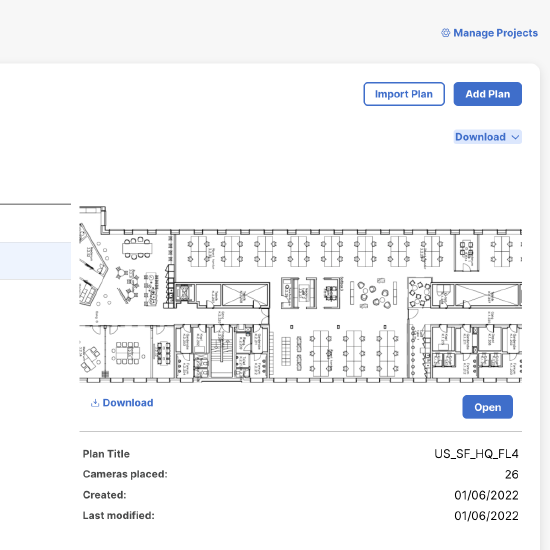
It is also possible to download a floor plan from the project’s “All plans”- list. Select a floor plan in the list and click “Download” on the right, above the preview of the selected floor plan.
Import Floor Plans
A floor plan can be imported from the project overview. It requires that the user has a file for a downloaded floor plan. It could be from a floor plan that the user has been working on, or a floor plan that has been shared by someone else who has been planning the project.
Note! If a floor plan is shared with someone else it has to be shared together with the link to the tool, to enable viewing it, and the user will have to create a project name before importing the plan.
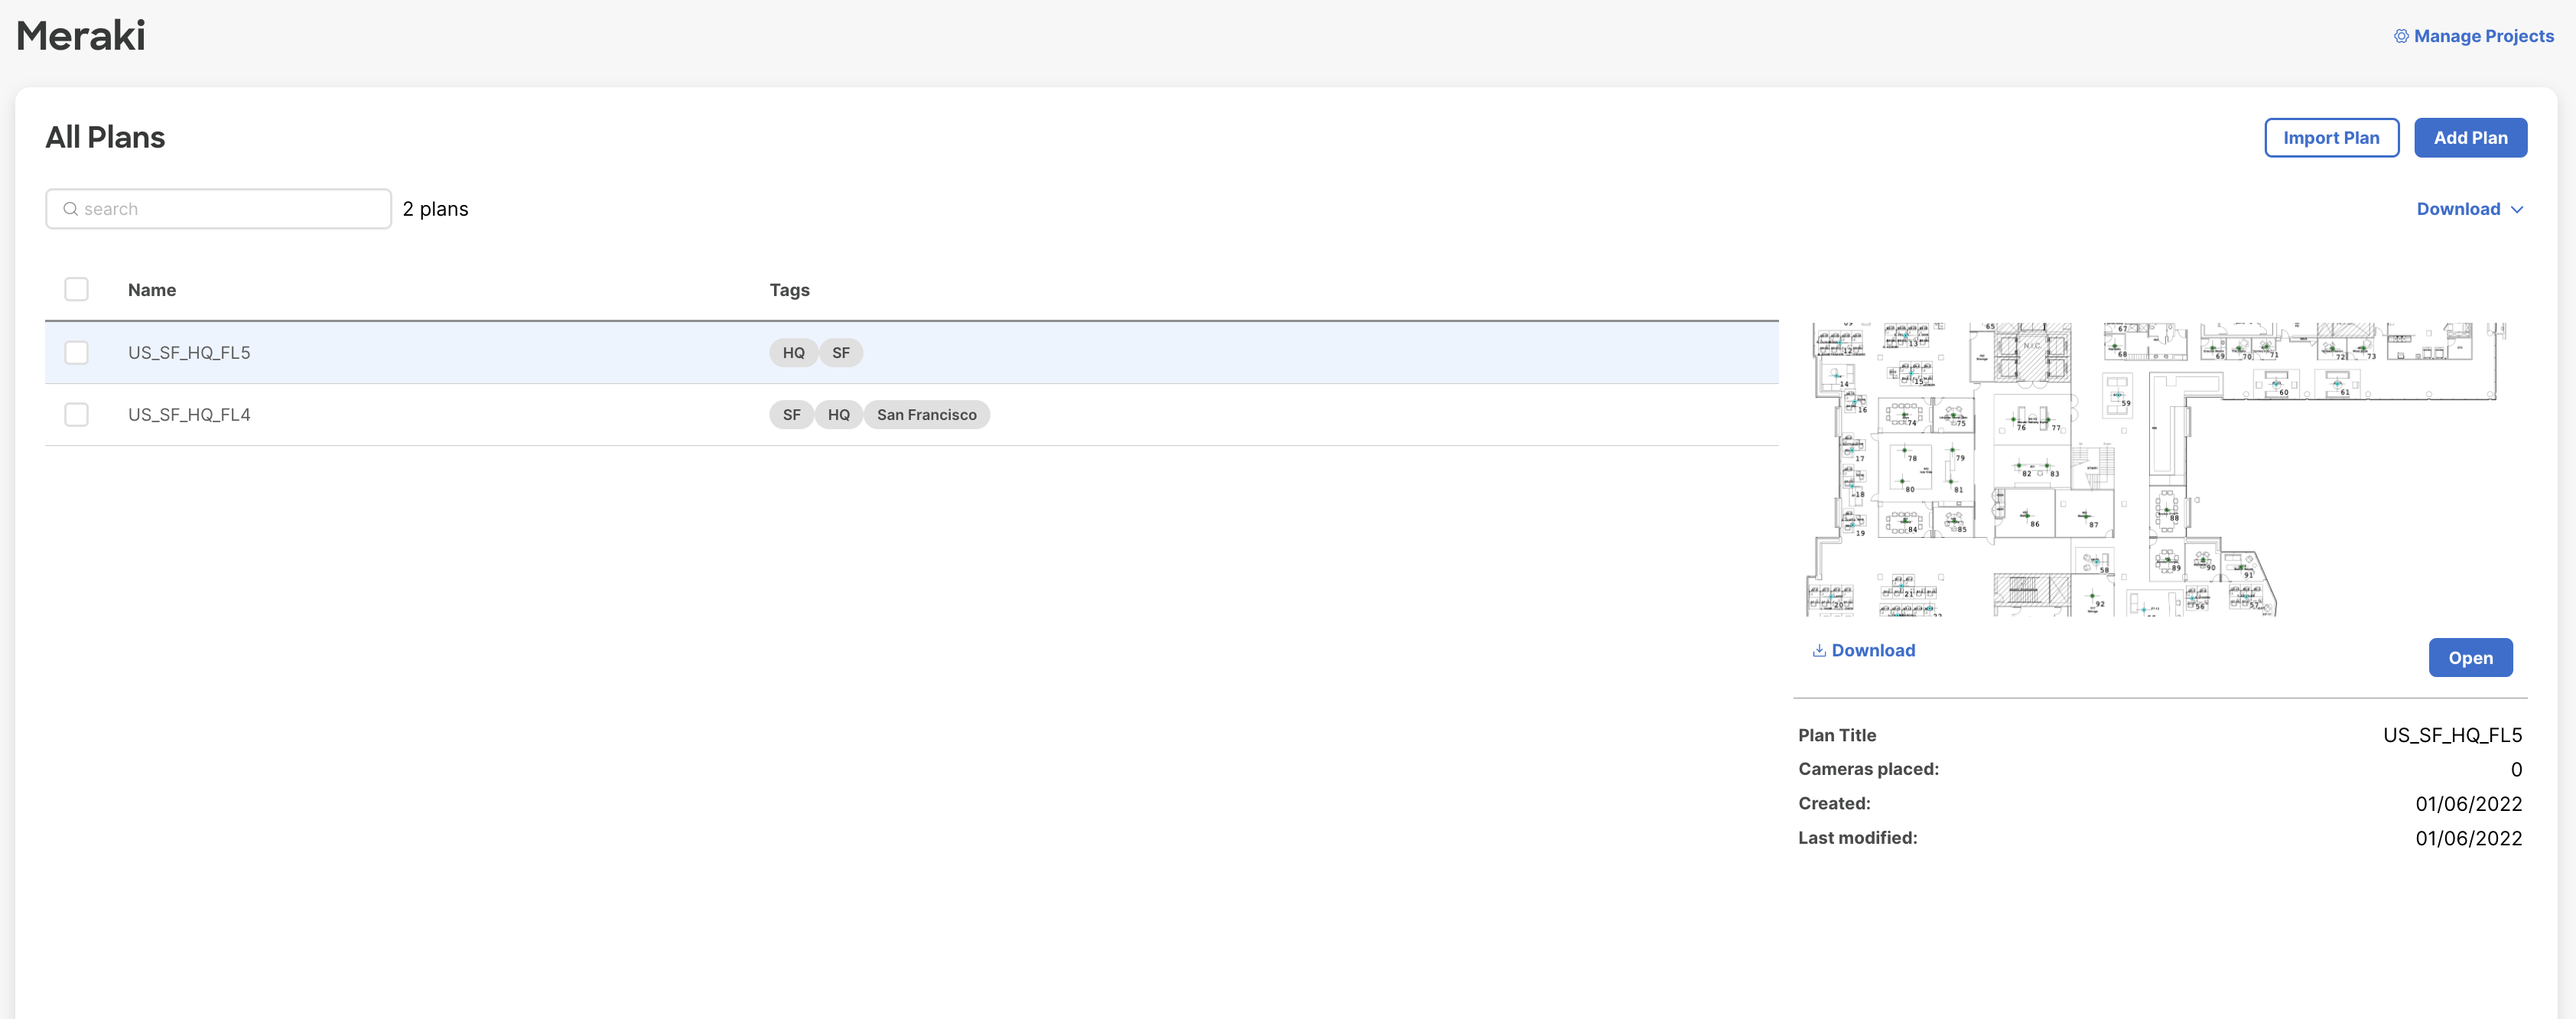
Overview
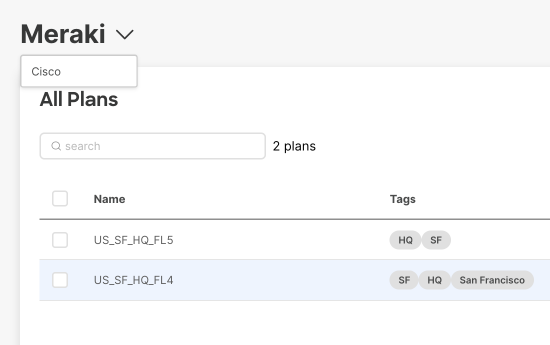
Each project has an overview with a list of all added floor plans. It is possible to search for the floor plans or select one to edit or review. It is also possible to add or select other projects than the current one.
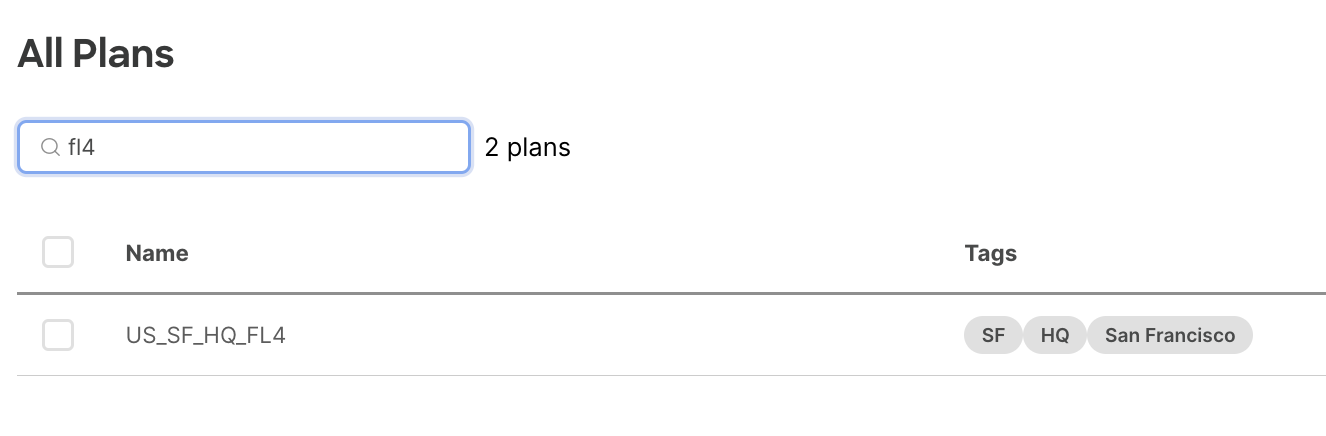
Search Floor Plans
When searching for floor plans the search result will be shown in a list below the search window, and the total number of floor plans in the project shown next to the search field.
Manage Projects
It is possible to add more projects for other companies or sites. Click “Manage Projects” at the upper right corner when in a project overview.
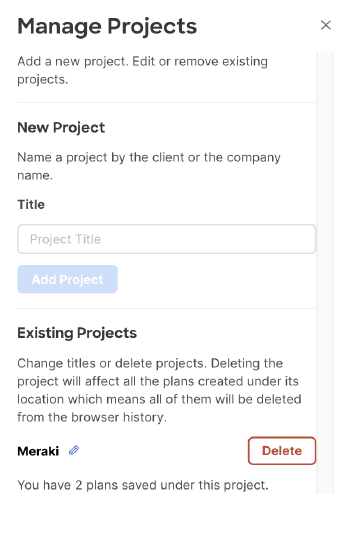
When more projects are added they will be visible in the Manage Project drop down, as well as in the overview where it is possible to change projects via a drop down menu.

Any added project will be visible in the dropdown list, and each project can contain one or more floor plans.
Note! If a project contains more than one floor plan it is necessary to download each floor plan separately. It is not possible to download the project layout, so someone that gets a file for a floor plan can create their own naming for that project. The cameras on the floor plan will remain, but the project structure is individual for each user.