Motion Search and Motion Recap
Overview
The following article will help you search for and view motion events on the Dashboard. This tool helps with incident reporting and quickly retrieving video for these events.
Understanding Motion Detector V1 vs. V2
Motion Detector v1 works only with MV21 and MV71 cameras. For all other cameras, Motion Detector v2 is the default on firmware MV5.5.1 and later. Motion Detector v1 is no longer supported.
Motion Search simplifies event detection on all MV cameras. Due to the presence of a more advanced processor in second-generation cameras, there are notable differences in the way Motion Search functions between first-generation cameras (MV1) and second-generation cameras (MV2). First-generation cameras (MV1) use Motion Search 1.0, while second-generation cameras (MV2) support both Motion Search 1.0 and the advanced Motion Search 2.0 algorithm. Second-generation cameras also include Motion Recap functionality. Motion Search results appear in a list view for first-generation cameras, whereas second-generation cameras offer both list and grid views with Motion Recap images.
Motion Search 2.0 improves on its predecessor by offering higher accuracy for detecting small changes and better performance in low-light conditions. Unlike Motion Search 1.0, which relied on frame-to-frame differencing, Motion Search 2.0 uses background subtraction to isolate motion. This approach enables the capture of more motion events that were previously undetectable. Additionally, background subtraction supports the creation of Motion Recap images, making it easier and faster to locate events. Read more below about some factors to consider when using Motion Recap and Motion Search 2.0.
Motion Search 1.0 detects motion based on changes in color and brightness (chroma and luminosity), as well as spatial and temporal filtering. Small spatial movements can trigger an event if they are intense and last long enough. Short movements are ignored. Motion covering the entire frame can be saved as an event, even if it is brief. For example, changes in lighting or shadows from passing objects that cover a large part of the frame can trigger an event. However, a person standing still in the frame may not be detected as a motion event. Poor lighting conditions may also fail to produce enough color or brightness changes (chroma or luminosity) to register as a motion event..
To optimize Motion Search 1.0 performance in low-light conditions, use an external high-power IR source. This enhances scene illumination and improves motion event detection. Positioning the light source away from the camera reduces motion detection caused by dust or insects near the camera. Cisco Meraki recommends RayTec, which offers a wide range of PoE IR lighting suitable for most deployments.
| Motion Search V1 Pros | Motion Search V2 Pros |
|---|---|
| Lower sensitivity reduces the chance of false positives | Increased sensitivity to motion events |
| Less impact on edge storage retention | Improved detection of motion in low lighting environments |
|
Adds Motion Recap image support |
| Motion Search V1 Cons | Motion Search V2 Cons |
|---|---|
| Unable to detect all sources of motion compared to motion detector v2 | Increased potential for false positives due to sensitivity |
|
No support for Motion Recap images |
Increased motion event frequency will result in reduced video retention duration |
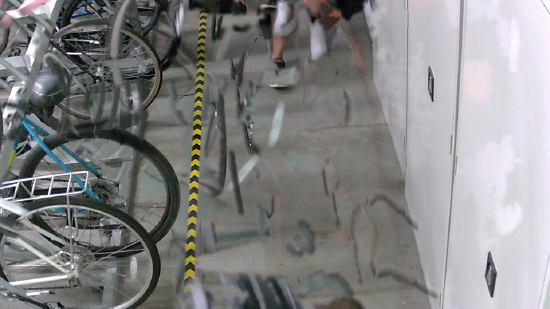
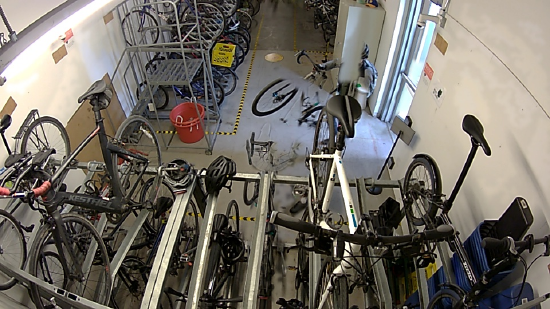
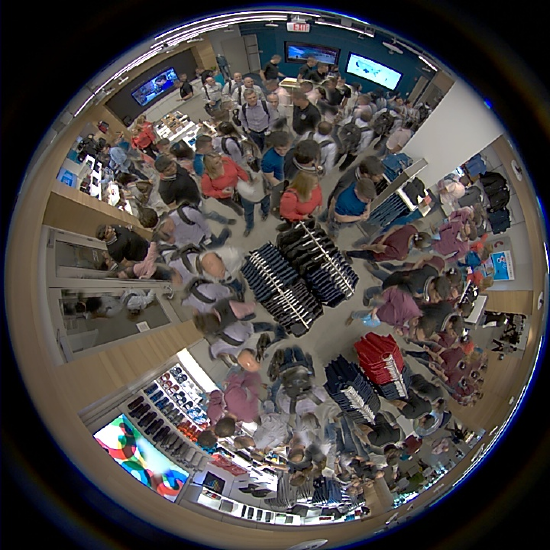
The image below highlights the difference in detection capabilities between Motion Search V1 and V2.

The MV32 fisheye camera does not support Motion Search version 1.0 and cannot toggle between modes.
Optional: Disabling Motion Recap Images
Motion Recap on second-generation cameras speeds up event detection and improves efficiency but uses more bandwidth.
Enabling Motion Recap increases upstream bandwidth and may cause spikes up to approximately 200 Kbps.
You have the option of disabling Motion Recap images and save bandwidth by enabling restricted bandwidth mode through the Quality and Retention settings tab. Refer to Restricted Bandwidth Mode for MV for more information.

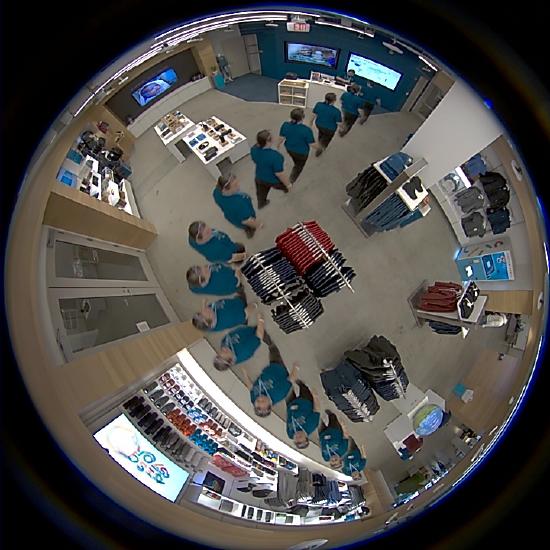
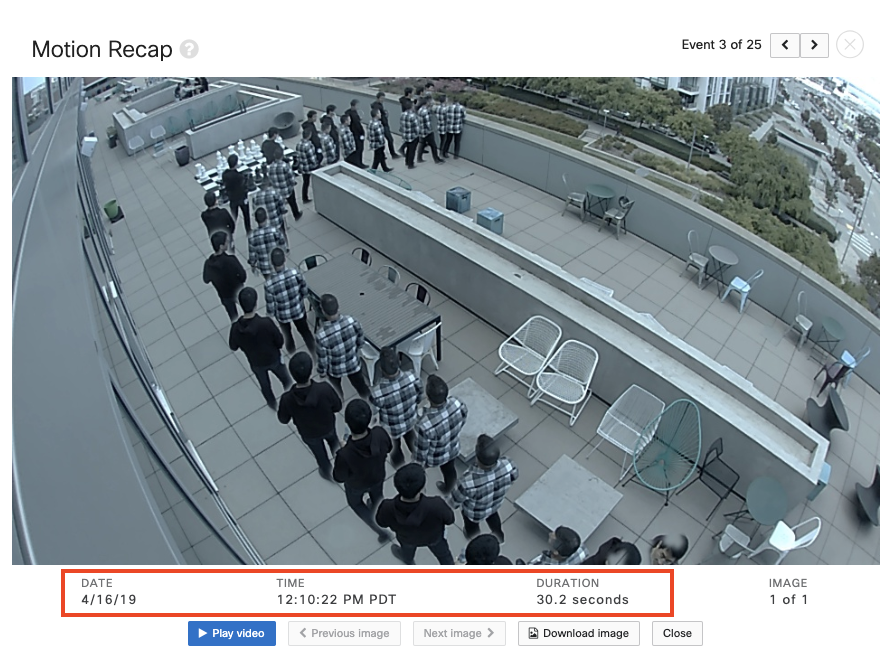
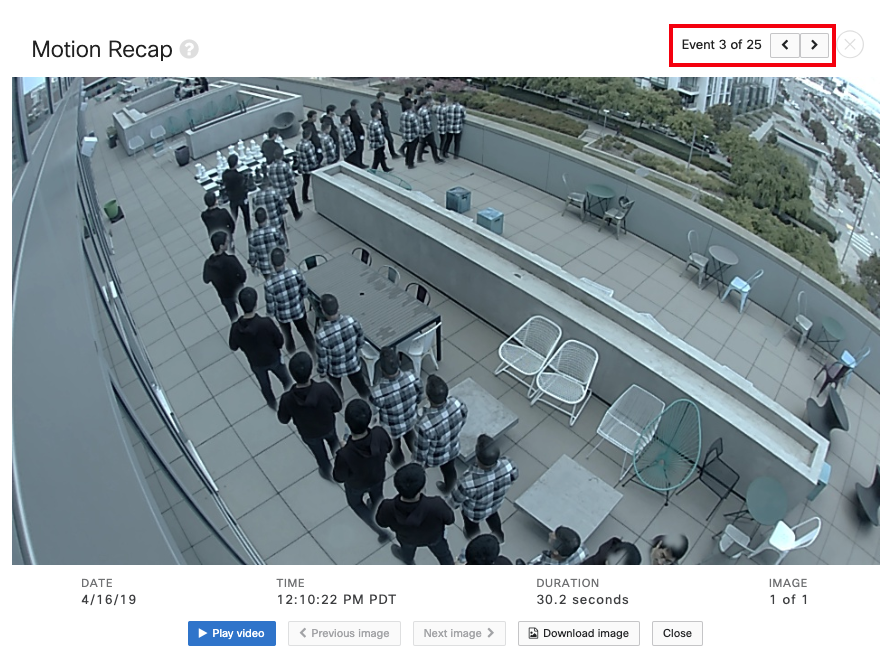
Example Motion Recap image:
How to Use Motion Search
Some of the later screenshots might show a slightly outdated user interface, but the highlighted steps remain unchanged.
-
Navigate to Cameras > Monitor > Cameras. Select a camera from the network list.
-
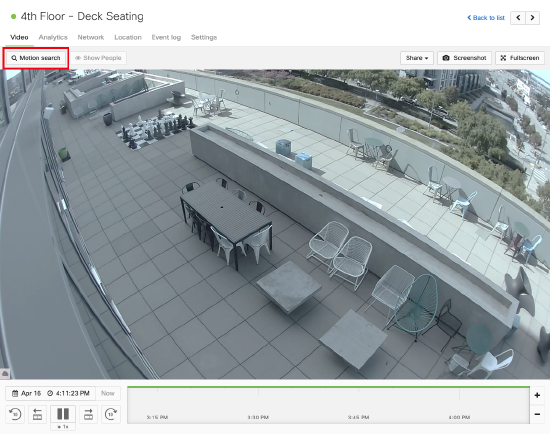
On the Video tab, click Motion Search.
-
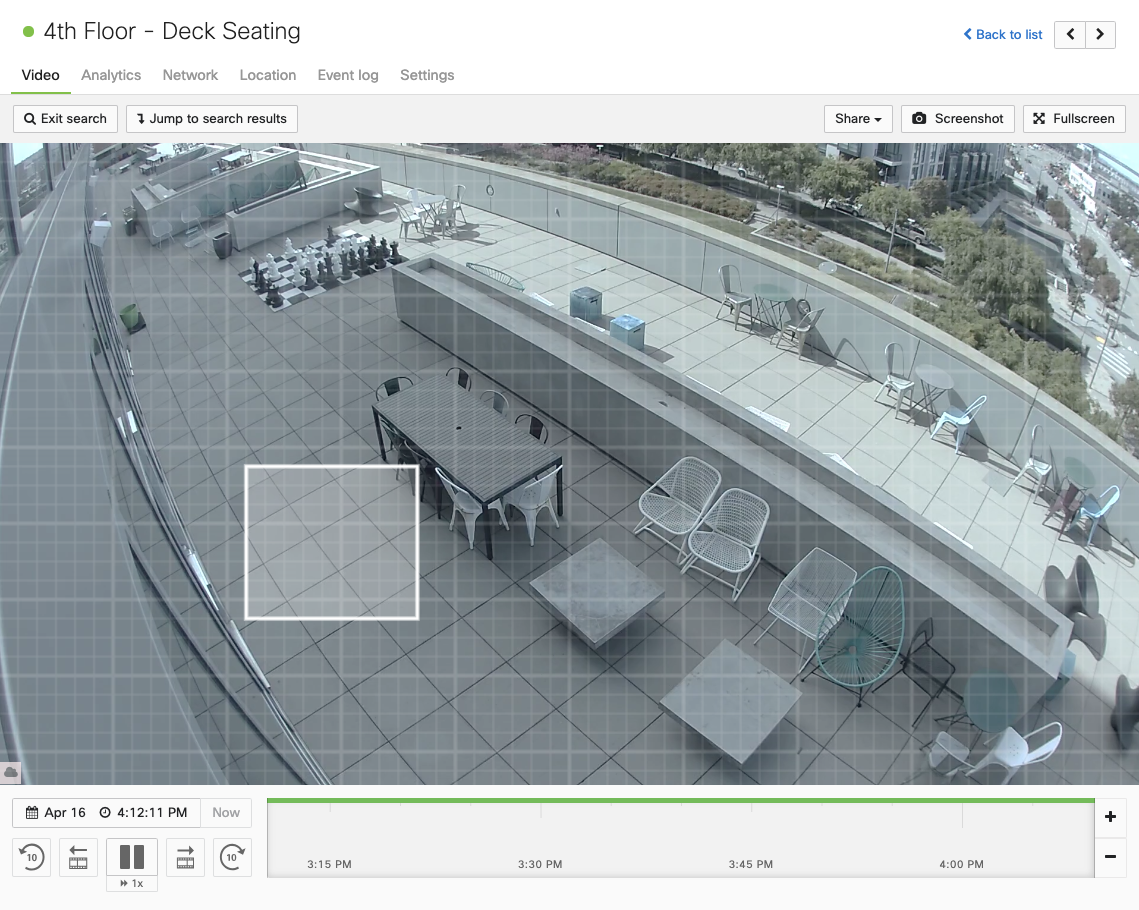
Draw your region of interest on the video feed.
-
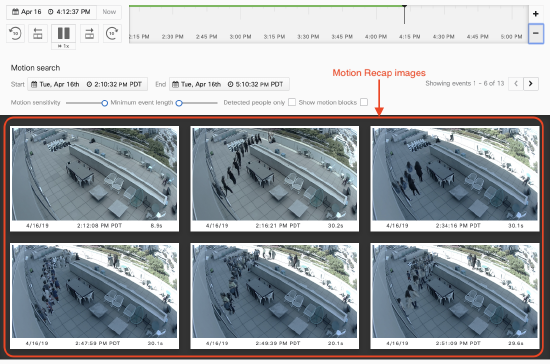
Motion events based on your search parameters will be populated on the dashboard in grid view or list view.
-
GRID VIEW:
-
If restricted bandwidth mode is disabled, Motion Recap images will be displayed. (More details about Motion Recap images are provided in the section below.)
-
If you see "Image Failed to Load" under your Motion Recap images, SSL inspection is likely enabled upstream of the Meraki security camera. Disable SSL inspection to ensure Motion Recap images are viewable.
- LIST VIEW:
- With Motion Recap images enabled, you can toggle between a grid and a list view using the buttons on the right-hand side. In this list view, you can click on the headers to sort by timestamp, duration of the event, how much of the frame it covers, and how much of the region of interest in covers.
- The list view will be the only available view when restricted bandwidth mode is enabled.
.png?revision=2&size=bestfit&width=550&height=308)
The screenshots are outdated and do not show this toggle, but the option is available.
Follow the steps below if you see Motion Recap images and do not have restricted bandwidth mode enabled.
-
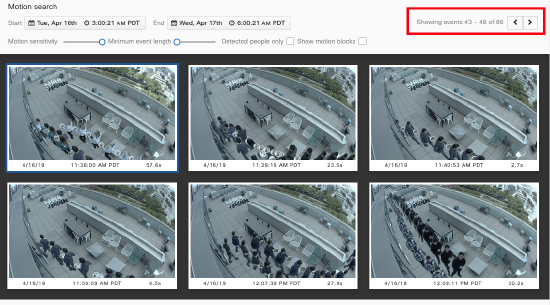
You will not see all your results at once. Use the navigation buttons to view more results.
-
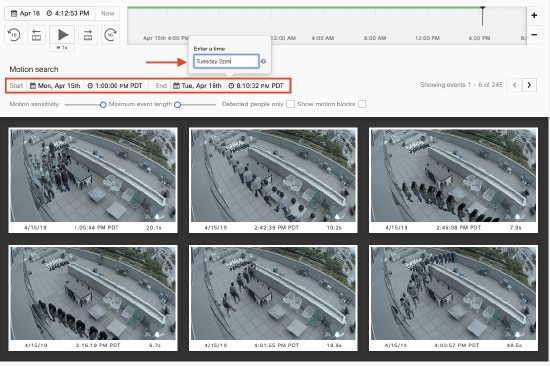
To specify the time period more accurately, follow these steps.
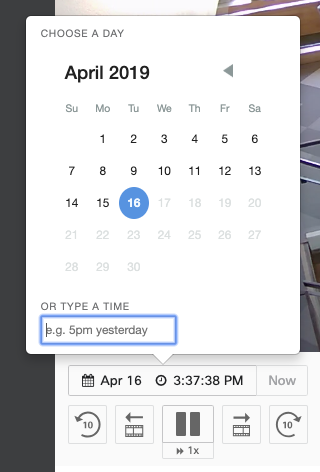
- Changing the time via the calendar box (recommended due to ease of use)
- Click the zoom in and zoom out buttons on the timeline bar to adjust the range of events displayed, as typically done during normal usage.

- Click and drag on the timeline bar as typically done during normal usage.
- Use the day selector as typically done during normal usage.
-
You can refine your results further by using the available options. The text below the options summarizes the number of results excluded due to the applied filters. To remove all filters, use the reset option provided below the text.
-
Change motion sensitivity (0 to 100%)
-
Motion sensitivity slider is represented as a percentage. This percentage is a weighted average of the frame percentage and region of interest percentage.
-
-
Change minimum event length (0 to 35 seconds)
-
Minimum event length slider represents the minimum duration allowed for an event.
-
-
Show results with detected people only
-
Helps eliminate results and focus on motion caused by detected people
-
-
Show motion blocks (see below)
-
Helps correlate the Motion Recap images with the blocks in the selected region
-
-
You can select a Motion Recap image to view in detail. The image displays the event's date, time, and duration. You can also download the image.
-
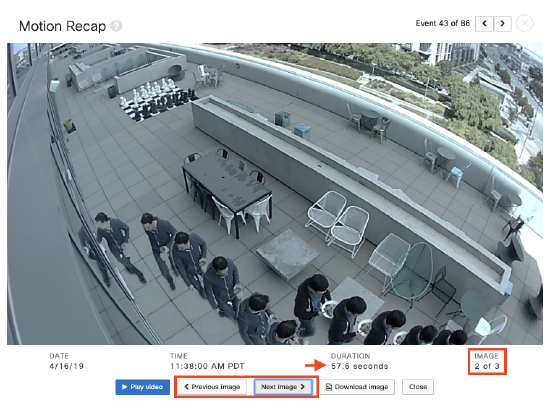
Events which contain sporadic motion or are longer than 30 seconds may have multiple images associated with them. You can toggle between the different Motion Recap images of this event.
-
If you want to see a different result, you can toggle between different Motion search results.
-
Close by clicking on the “X” on the upper right, or “Close” on the bottom right.

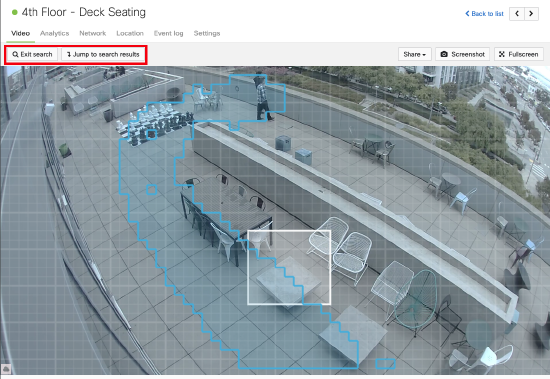
-
You can exit search or jump to search results at any time using these buttons here.
Understanding Motion Recap Images
The images in this view are not simple camera screenshots. They are composite images summarizing an entire motion event. Foreground objects are tracked separately and combined into a single image. Events with sporadic motion or lasting over 30 seconds may include multiple images.
Some factors can negatively affect the resulting Motion Recap image. These factors are listed below. When conditions are not ideal, images like the ones shown below may occur.
Factors Affecting Motion Recap Images
Motion Recap images work best in areas with even lighting, clear subjects, and clean motion paths. Avoid the scenarios listed below. Disable Motion Recap if the images are consistently affected by these issues.
Lighting Changes
Motion Recap depends on distinguishing subjects in the foreground from the background. Significant changes in background lighting can prevent Motion Recap from creating a clear composite image with a distinct foreground. See examples of affected scenes and images below.
-
Outdoor cameras often experience lighting changes in the scene due to passing clouds.
-
Scenes overlooking doors to the outside often experience frequent lighting changes due to the opening and closing of the door.
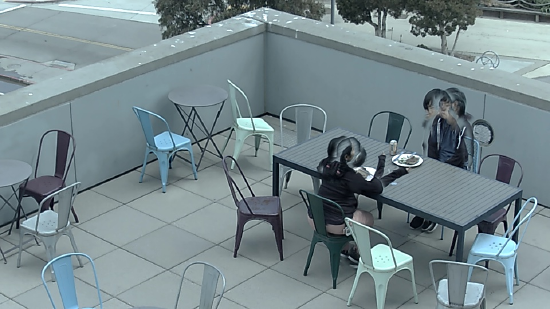
Sporadic Motion
When creating a composite image of subjects moving infrequently in a small space, the subjects in the Motion Recap image may look ghost-like. Limited movement can cause Motion Recap to identify the subjects as part of the background instead of the foreground.
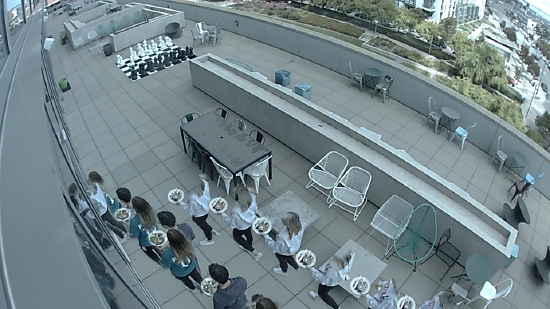
Significant Motion
Motion Recap images with many subjects can provide valuable insights. However, overlapping subjects in the frame can make it difficult to track the movement of a single subject.
Subjects Covering Most of the Camera’s Field of View(FoV)
When a subject occupies a large portion of the camera’s field of view (FoV), nearby light sources may become blocked. This can cause the camera sensor to adjust, leading to changes in the background. Although the light source itself remains unchanged, the amount of light reaching the sensor is altered. As a result, subjects that are too close to the camera, cameras zoomed in on a subject, or large subjects may produce distorted Motion Recap images.