Mobile App - Camera Experience
Overview
Enhance your physical security using the Meraki enterprise mobile app. Onboard, monitor, and manage MV smart cameras directly from your smartphone. Control your security system anytime, anywhere.
The Meraki Enterprise Mobile App seamlessly integrates with the entire Meraki ecosystem, providing a unified platform to access networking, physical security, and environmental monitoring devices. This article explains the camera features.
Download the Meraki Mobile App
Cameras
Efficiency is essential in physical security. The mobile app lets your team easily switch between cameras and review footage. The camera experience appears only if you have at least one Meraki MV camera claimed to your dashboard.
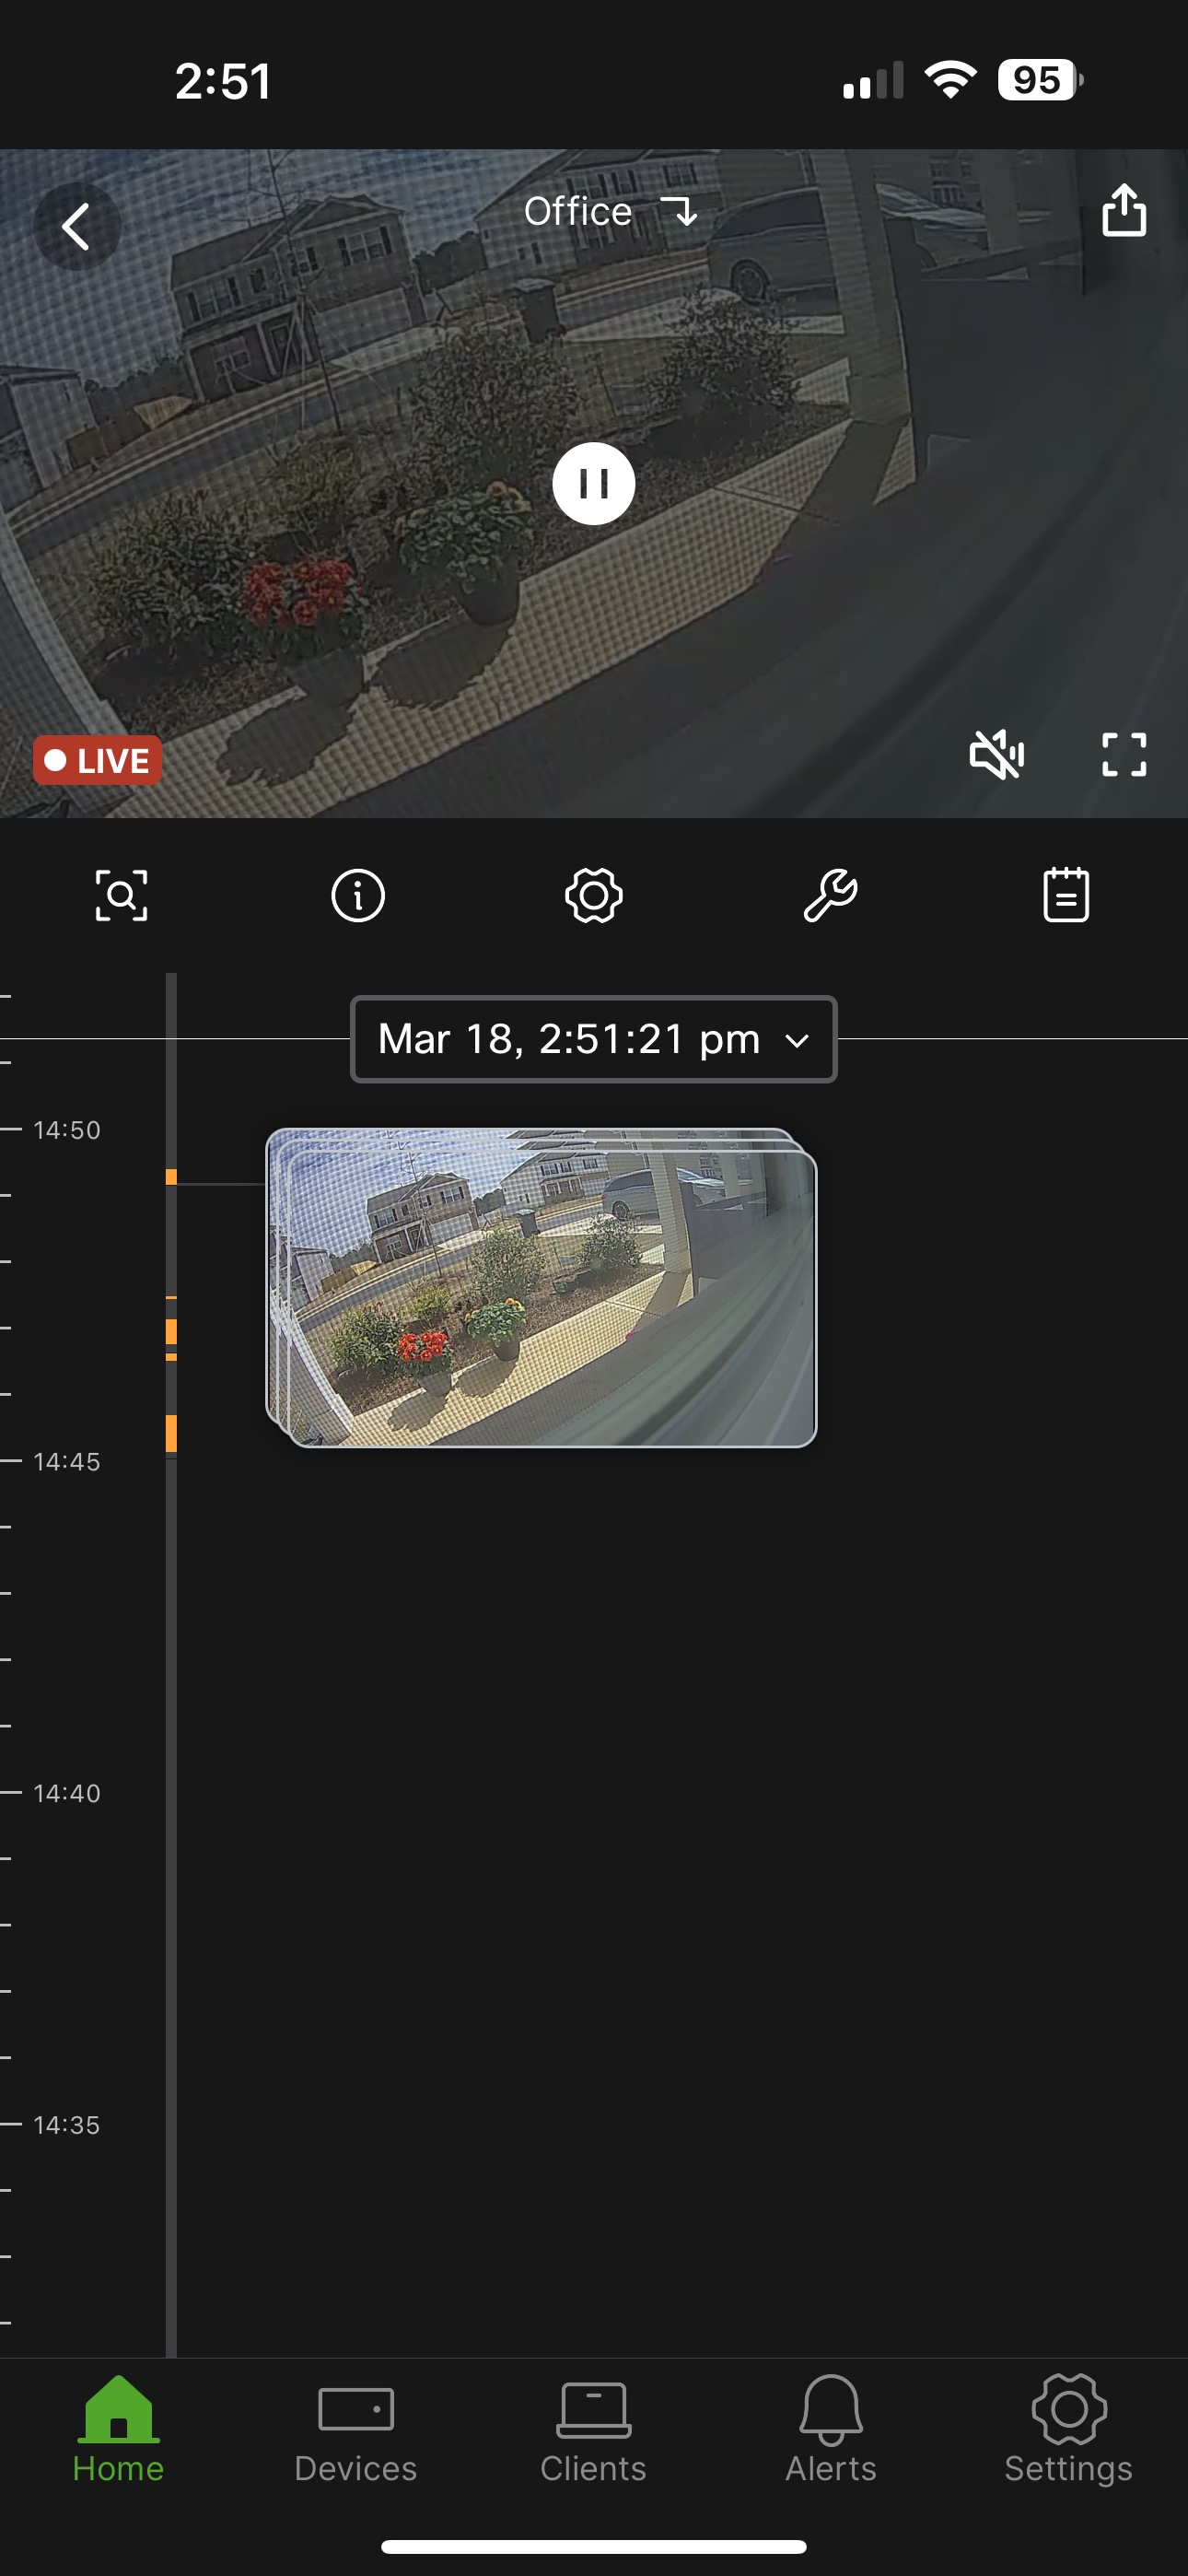
Video player
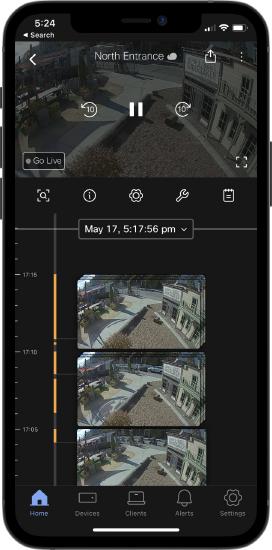
The playback experience is central to physical security. Within the mobile video player, we offer the ability to:
- Zoom in/out
- Fast forward/backward 10 seconds
- Change playback speed
- Go into full-screen mode
- Dewarp fisheye mode
- “Go live” button to return to live streaming mode
- Audio on/off (see MV audio recording)
An icon is located next to the camera name to indicate streaming mode (direct streaming "↴" and cloud proxy "☁️"). We recommend staying on direct streaming when possible for improved reliability and reduced stream delay.
 |
 |
 |
 |
| Direct streaming | Cloud Streaming | Streaming historical footage | Show player control on tap |
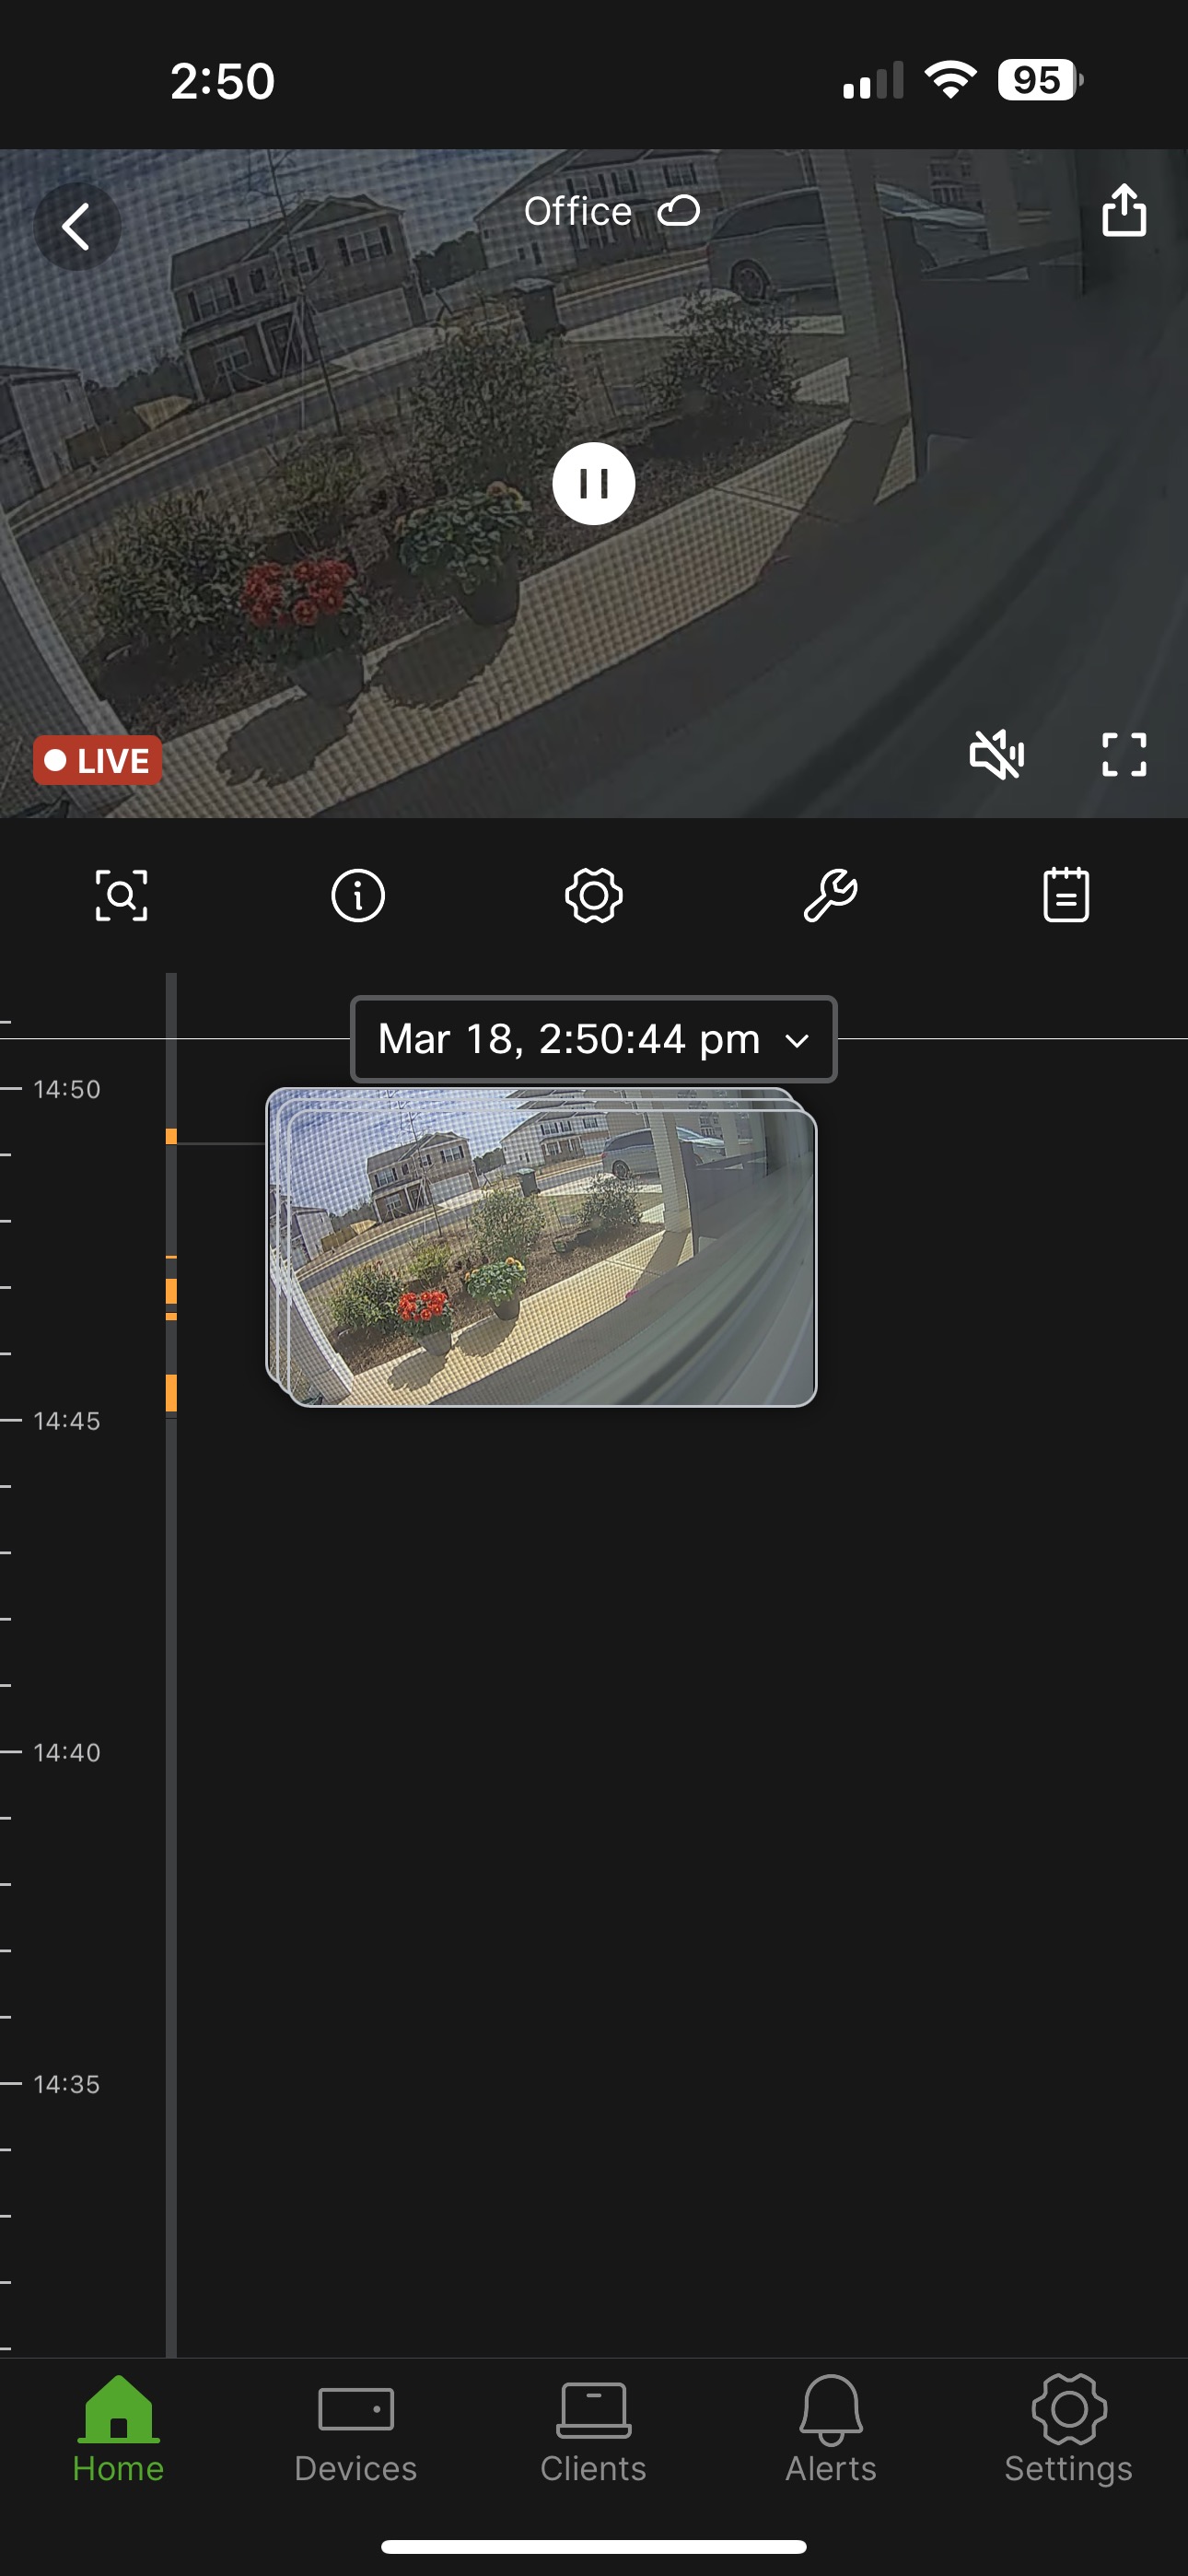
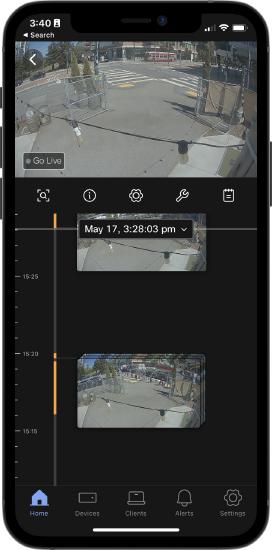
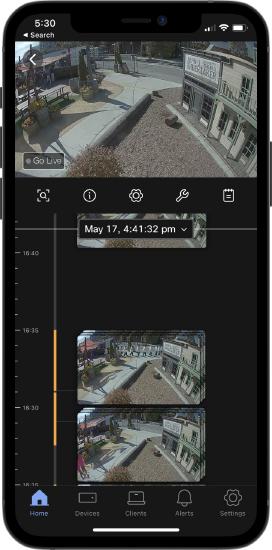
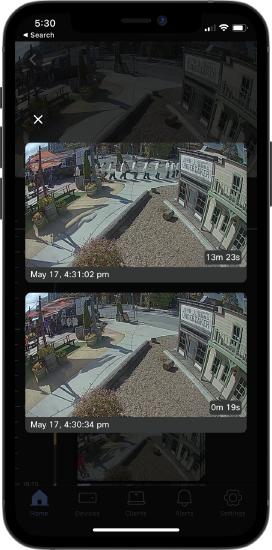
Timeline
The camera timeline is situated directly below the video player. By scrubbing across the timeline, you can access historical footage. An orange bar is visible on the timeline to indicate periods with motion.
Motion recap images are placed next to timeline periods with motion. Tapping on a motion recap image will take you to the beginning of that motion. For timeline periods with many motions, a motion recap stack is shown instead. Tapping on a motion recap stack will bring up more thumbnails to pick from; tapping on a thumbnail will bring you to the start of that event on the timeline.
 |
 |
| Motion recap stack is shown for timeline period with many motions | Selecting on a motion recap stack will show you individual motion recap images in reverse chronological order |
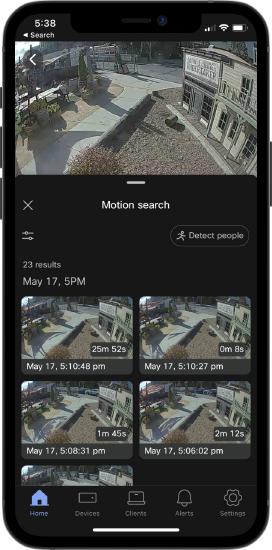
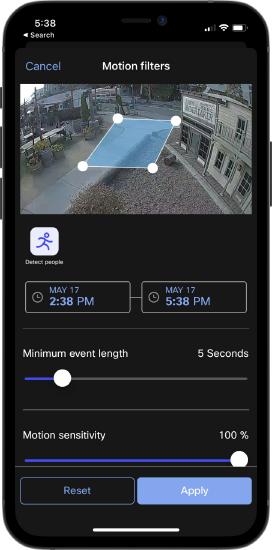
Event search
Finding footage of interest is easy through event search. From the camera page, select on the search icon to bring up the motion search sheet. From the motion search, you are offered parameters to filter events:
- Region of interest
- People detection
- Time
- Minimum event length
- Motion sensitivity
 |
 |
| Motion search sheet | Motion search filters |
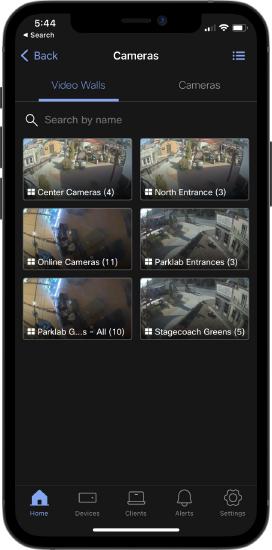
Video wall
With access to video walls from your mobile device, you can monitor multiple cameras and locations simultaneously from a single page, streamlining your team’s security operations like never before.
Configure video wall
Video walls must be first configured from the Vision portal or the Meraki dashboard for them to appear in the mobile app.
Monitor
Monitoring a video wall is simply selecting the option from the list of available video walls. You can turn your phone to landscape mode to show more streams on the same page. You can also use a tablet for even more cameras at once. Selecting a camera stream from a running video wall will bring up the camera page for a deep dive.
 |
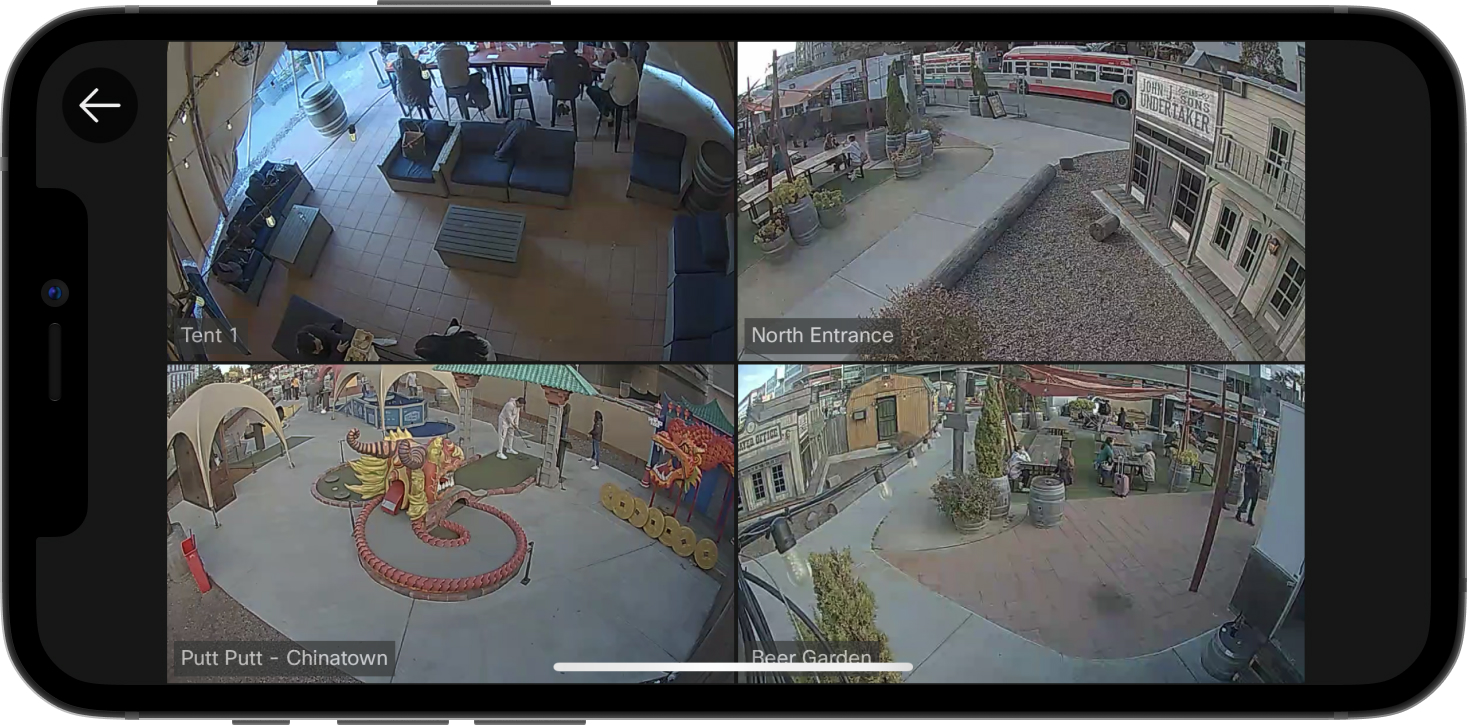 |
| Select video wall | Monitor multiple cameras simultaneously |
Configuration & Troubleshooting
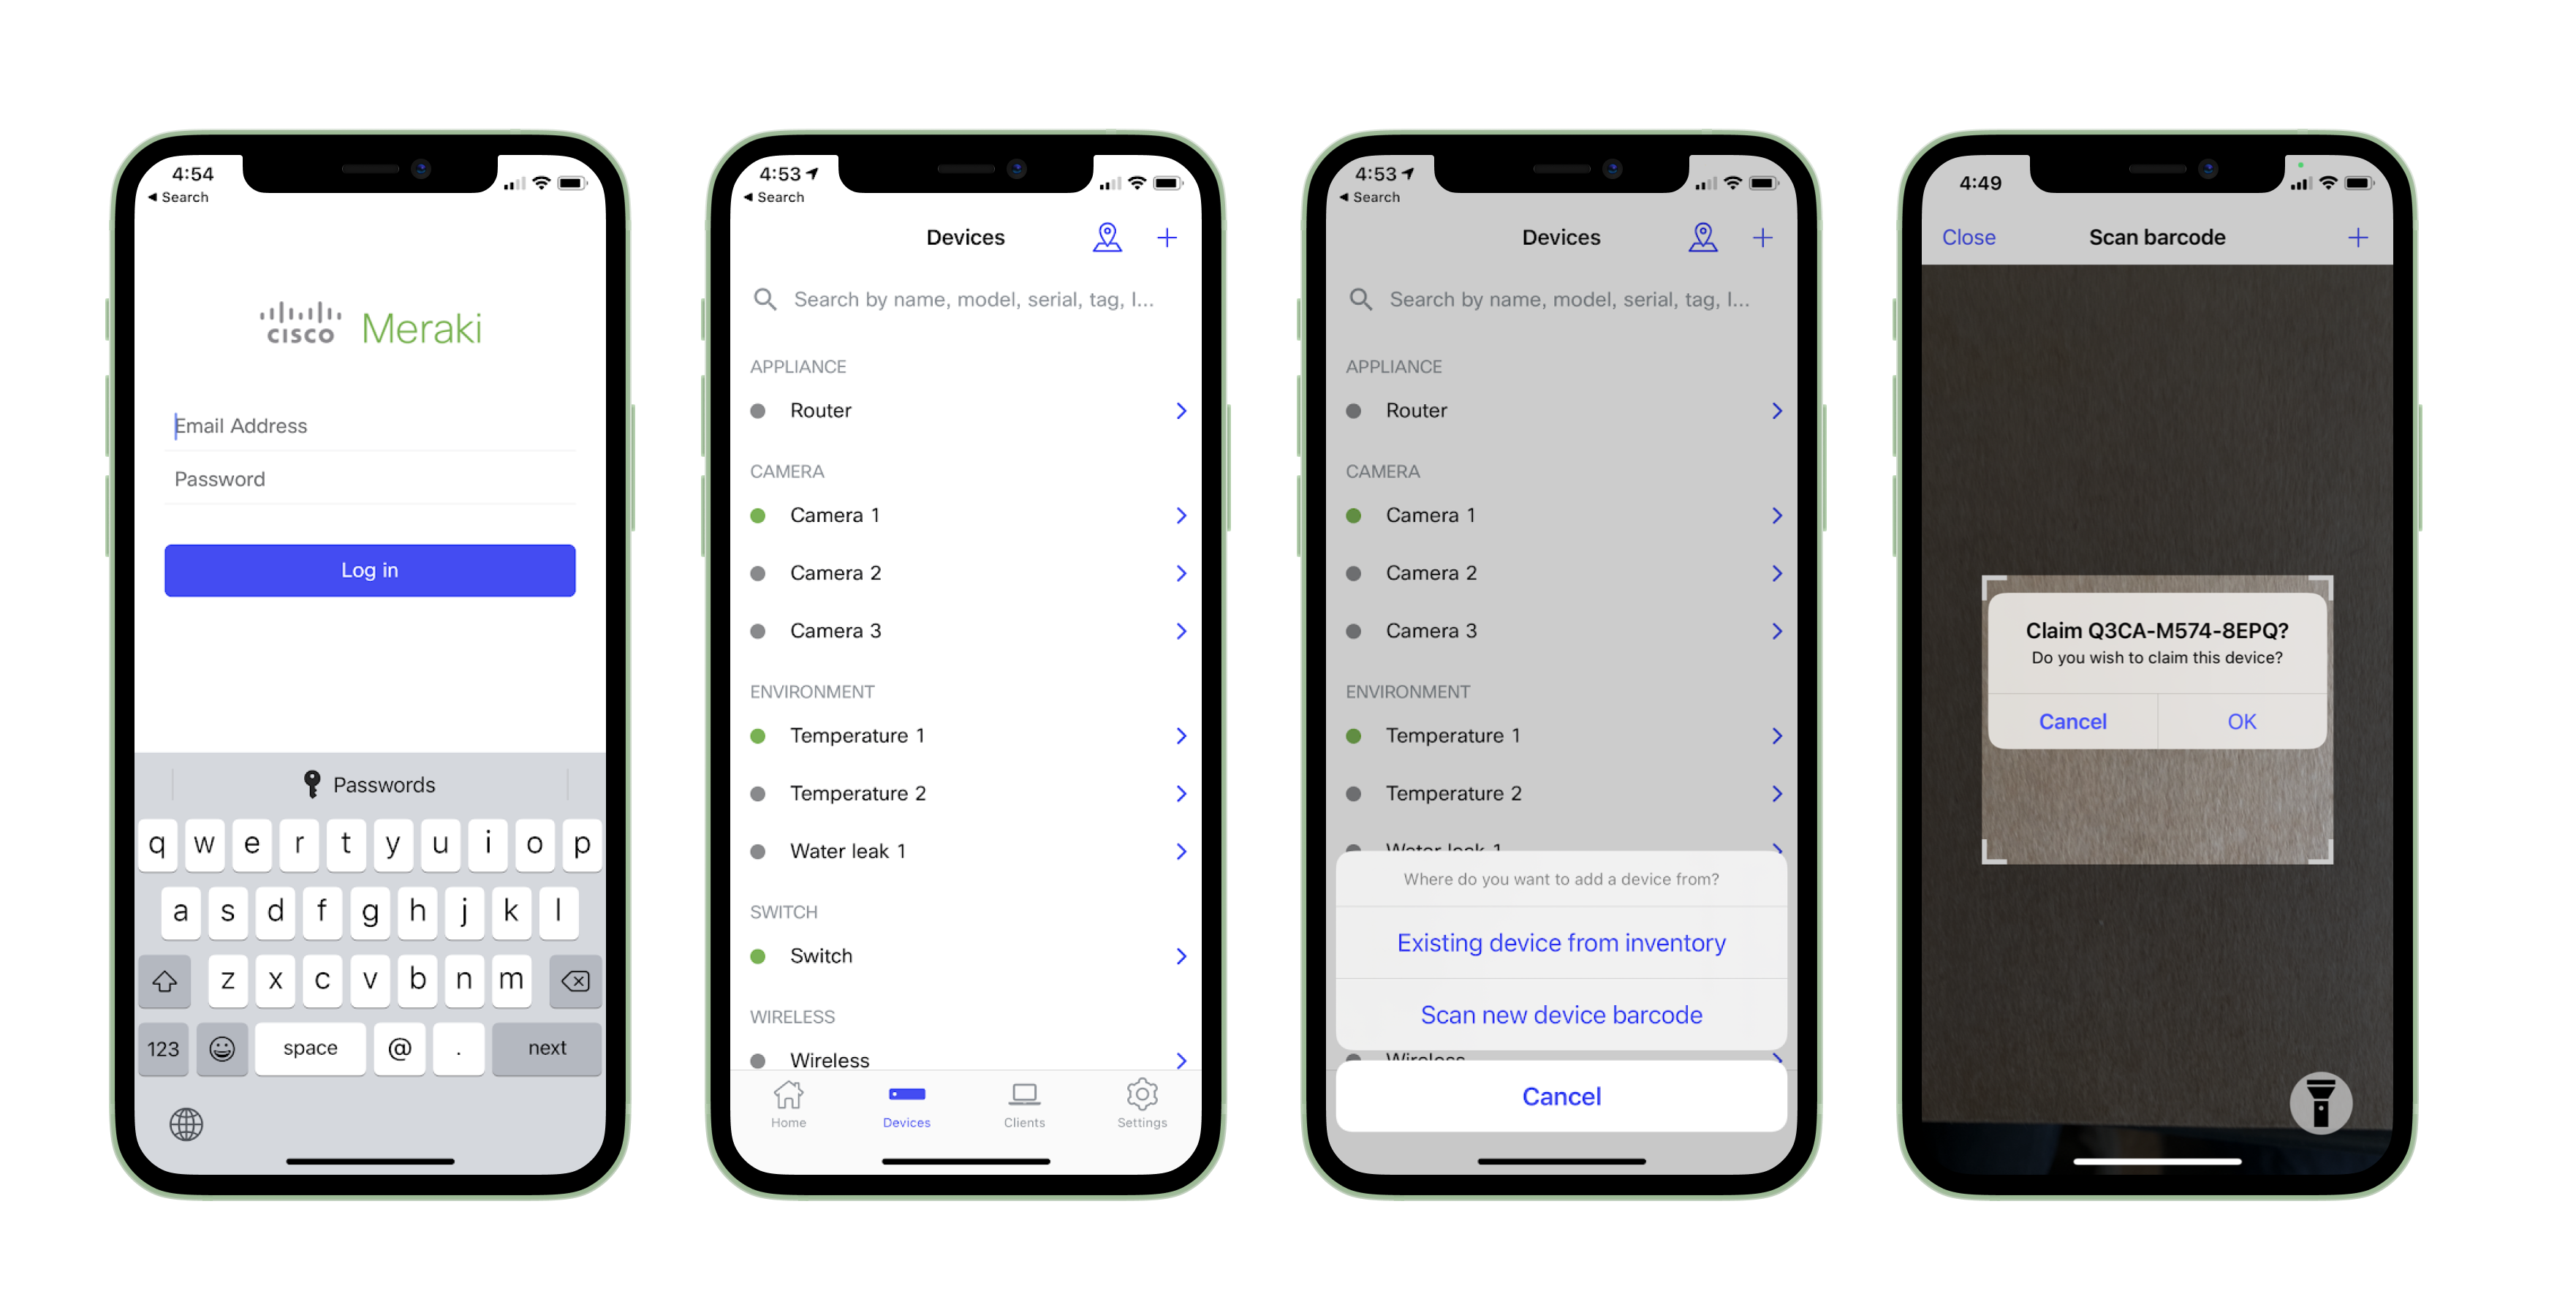
Onboarding
For users with full network/org admin permissions, Device onboarding can be done by selecting the “+” icon on the Devices tab. From the resulting options, you can choose to add an existing device from the inventory, scan the barcode or enter the serial number for a new device.
Video setting
For users with full network/org admin permissions, video setting configuration can be done directly from the app. The following options are available (depending on the camera modal).
- Autofocus
- Manual focus
- Zoom
- Aperture
- HDR on/off
- Rotate 180 degrees
Troubleshooting
Dashboard tools for troubleshooting network devices are also available through mobile. Selecting the wrench icon will bring up the Tools sheet, which offers the option to:
- Ping Host
- Ping
- Dashboard Throughput
- DNS Lookup
- Traceroute
Specifically for MV cameras, you can remotely initiate LED blinking and reboot the camera from this page as well.
Export
Collaboration is important. You can export videos from the player control screen and share them with your contacts using the share sheet.
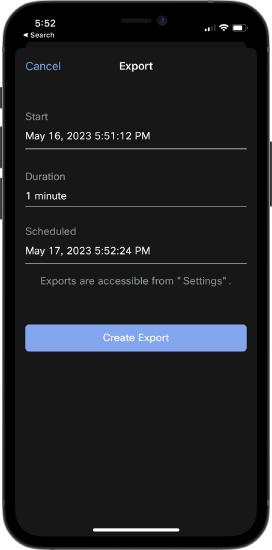 |
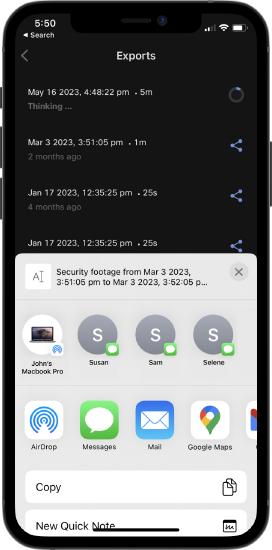 |
| Initiate export from the player | Share export with contact |
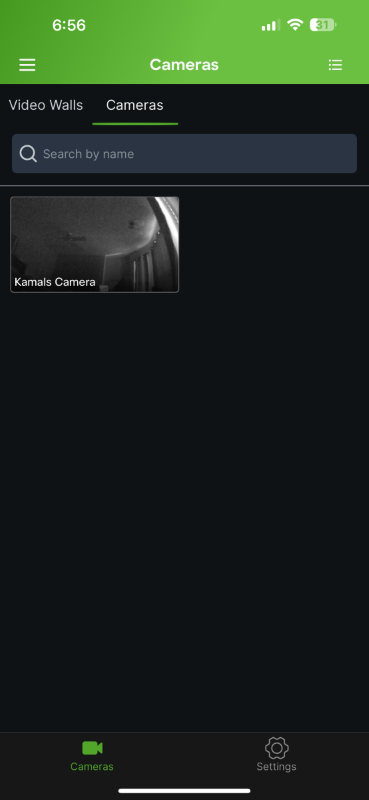
Camera-only Administrator
A Camera-only administrator sees a different view than a full network administrator. The Home, Devices, Clients, and Alerts tabs are not available. Instead, the Camera-only administrator has Cameras and Settings tab as seen below: