
Managing Access for Organization Users
Access to the network can be managed on the Organization > Monitor > Users page for some access types. Bulk changes for multiple users can be accomplished through the users list. Changes in access for individual users can be handled on the Users detail page. The Organization > Monitor > Users page also supports other products with separate access management.
Access Manager
To manage access based on user attributes and configured rule sets, integrate with Access Manager.
Configuring Access Types
Organization End Users can be authorized for access to network zones. These end users can be authorized in bulk and/or individually either on the users table or in the details for a specific user. Currently, administrators can manage the following types of access:
-
Splash with MerakiAuth
-
Client VPN (Meraki-hosted users only)
Splash Access via Meraki Auth
This access type does not include 802.1x login configurations.
Grant access (bulk)
To authorize access for multiple users:
1. Navigate to Organization > Monitor > Users, and select the target users.
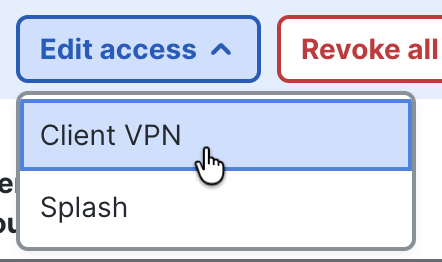
2. Click Edit Access on the action menu
3. Select Splash

4. In the Edit Access drawer, select the target networks and SSIDs from the dropdowns of available access zones.
5. Set a duration for the access
- “Does not expire” gives access with an indefinite end date
- “Limited” grants access for a defined number of days (Duration) or until an exact calendar date (Expiration Date)
- “Do not authorize” will remove existing access for the given network and SSID

Grant access (single user)
To authorize access for a single user:
1. Navigate to Organization > Monitor > Users, and click the target user.
2. On the user details page, navigate to the Access section.
3. Click Add.
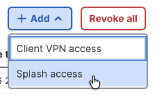
4. In the Add Access drawer, select the networks and SSIDs where Splash access should be granted.
5. Set a duration for the access
- “Does not expire” gives access with an indefinite end date
- “Limited” grants access for a defined number of days (Duration) or until an exact calendar date (Expiration Date)
- “Do not authorize” will remove existing access for the given network and SSID
Edit access time period (single user)
To edit the expiration criteria for Splash access for a single user:
1. Navigate to Organization > Monitor > Users, and click the target user.
2. On the user details page, navigate to the Access section.
3. Select the currently assigned Wireless Splash access types from the list
4. Click the Edit dropdown and select “Change access time period”
5. Set a duration for the access
- “Does not expire” gives access with an indefinite end date
- “Limited” grants access for a defined number of days (Duration) or until an exact calendar date (Expiration Date)
- “Do not authorize” will remove existing access for the given network and SSID

Revoke access (single user)
To revoke Wireless Splash access for a single user:
1. Navigate to the Organization > Monitor > Users page and click the target user.
2. On the user details page, navigate to the Manage Access section
3. Select the target authorizations in the list to remove by enabling the checkmark next to each option.
3. Click Revoke Access.

Client VPN Access
This configuration supports access for Client VPN over L2TP.
Grant access (bulk via users table)
To authorize access for a multiple users:
1. Navigate to Organization > Monitor > Users and select the target users.
2. Click Edit Access on the action menu
3. Select Client VPN
4. In the Edit Access drawer, select the target networks from the available access zones.
5. Set a duration for the access
- “Does not expire” gives access with an indefinite end date
- “Limited” grants access for a defined number of days (Duration) or until an exact calendar date (Expiration Date)
- “Do not authorize” will remove existing access for the given network

Grant access (individual via details page)
To authorize access for a single user:
1. Navigate to Organization > Monitor > Users and click the target user.
2. On the user details page, navigate to the Access section.
3. Click Add and select Client VPN Access.
4. In the Add Client VPN Authorization drawer, select the target zones where the user should be authorized.
5. Set a duration for the access
- “Does not expire” gives access with an indefinite end date
- “Limited” grants access for a defined number of days (Duration) or until an exact calendar date (Expiration Date)
- “Do not authorize” will remove existing access for the given network

Edit access (bulk via users table)
To edit the network scope or the access period for Client VPN access for multiple users:
1. Navigate to the Organization > Monitor > Users page.
2. Select the target users from the list by checking the box next to each user with access you want to edit.
3. Click Edit Access and select Client VPN to make changes.
4. In the Edit Client VPN(s) Access drawer, change the networks or access period, and click Save.
Edit access time (individual via details page)
To edit the expiration criteria for Client VPN access for a single user:
1. Navigate to the Organization > Monitor > Users page and click the target user.
2. Select the desired authorizations from the list by checking the box next to each option you want to edit.
3. Click Edit to make changes and select Change access time period.
4. In the Change access time period popup, change the authorization access period, and click Save.

Revoke access
To revoke Client VPN access for a single user:
1. Navigate to Organization > Monitor > Users and click the target user.
2. On the user details page, navigate to the Access section, and select the target authorizations in the list to remove by enabling the checkmark next to each option.
3. Select the target authorizations in the list to remove by enabling the checkmark next to each option.
4. Click Revoke Access.