

Organization Alerts and Notifications Configuration
Click 日本語 for Japanese
Overview
The Alert Configuration feature acts as your central hub for managing all alerts and notifications within Meraki. It gives you full control over your alerts, allowing you to enable or disable them, customize settings, mute notifications, and manage how you are notified across different channels.
You can set organization-wide alert preferences that apply to all networks, alert types, or notification channels as well as schedules for when alerts are delivered or muted. This flexibility ensures that you stay informed in the way that best suits your needs.
Note: This is an organization-level configuration tool and as such requires organization admin rights
The Alert Configuration page is accessed through the Configure Alerts button on the Organization Alerts page seen here:

The Alert Configuration landing page shows all the available alerts and their respective current settings. This is where you will begin your notification and configuration workflow. The Alert Configuration page includes tabs for these features:
- Organization Rules - This is where you will configure what type of notifications you want and where they will be delivered
- Alert Profiles - where you create specific groupings of alerts, networks and recipients. This also includes a setting for maintenance mode
- Schedules - Where you define the time/day windows for which selected alerts will be displayed or muted.

Use the updateOrganizationWebhooksHttpServer and deleteOrganizationWebhooksHttpServer API endpoints to update or delete existing organization webhook receivers.
Components of the Organization Rules Tab

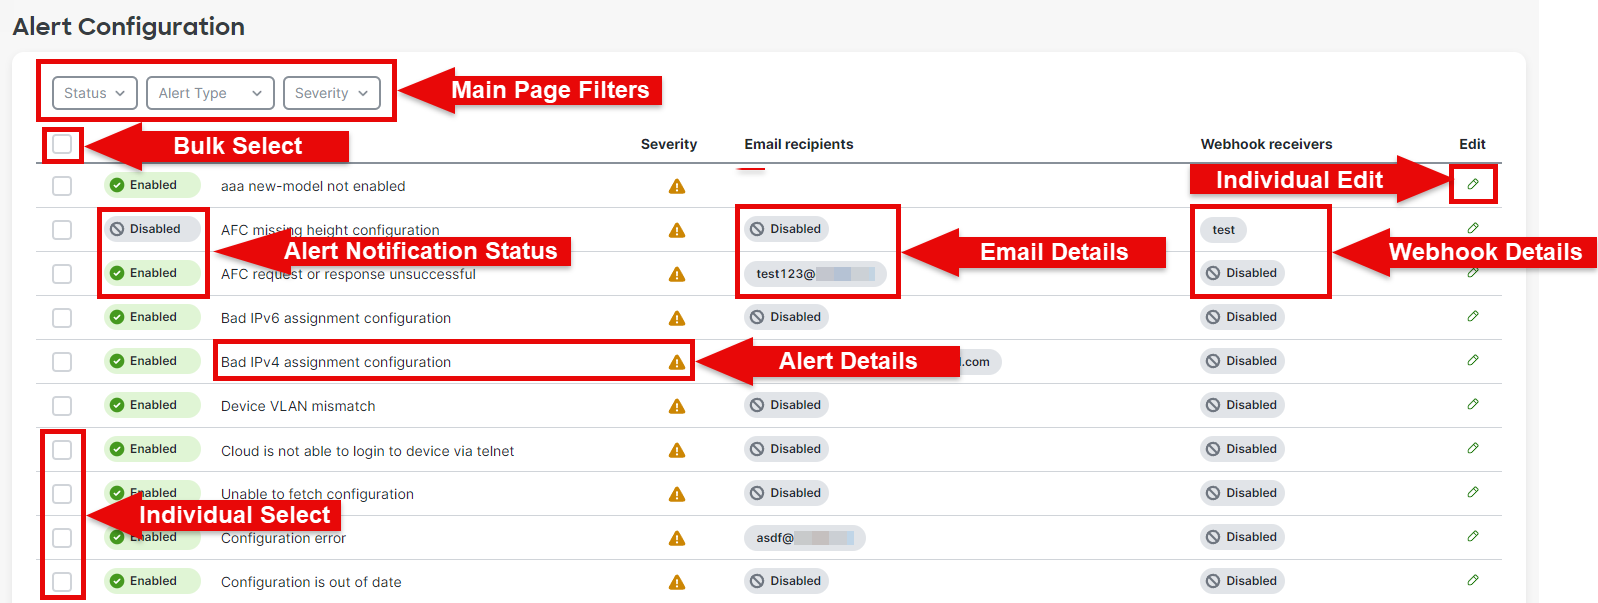
Editing Preferences
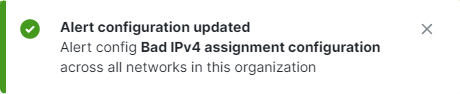
Individual Edit
In order to edit a single entry you simply click the “pencil” icon 

Bulk Edit
You also have the ability to bulk edit alerts. This is useful for setting preferences for a series of alerts to address site-specific contacts and events; like muting alerts that will be triggered during maintenance windows. Upon selecting the bulk edit box a new blue banner appears above the table indicating how many alerts are selected. It also provides drop downs to quickly select email or webhook preferences as well as enable/disable status.
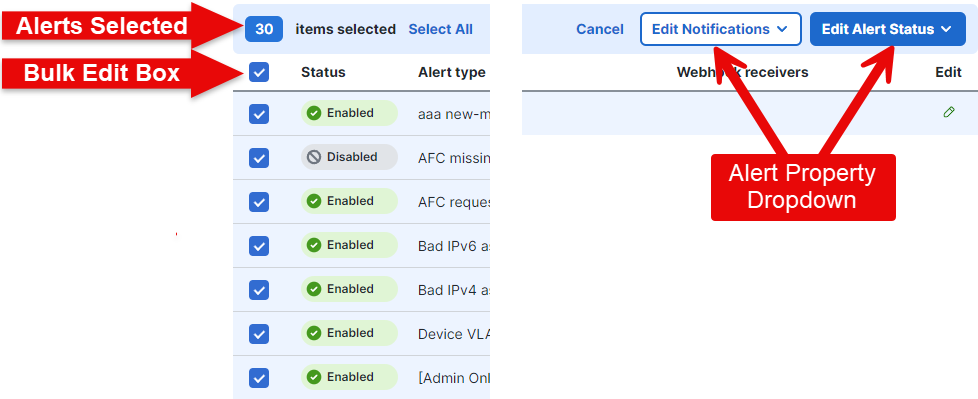
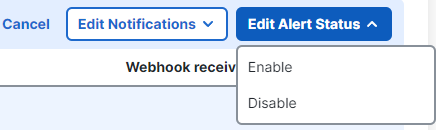
When selecting the Edit Notification button, you are given the option of editing the email or webhook preferences as shown in the screenshots below:


When selecting the Edit Alert Status button, you are given the option of enabling or disabling the selected alerts
Components of the Alert Profiles Tab


Adding a New Profile
Click the "+ Create alert profile" button to initiate a new profile creation window. Add a profile name, select which alerts you want included, which networks you want linked to this profile, and whether or not this is a maintenance mode profile. Next enable the alerts for the profile, and add your email and webhook destinations.

Maintenance Mode
Setting the maintenance mode switch will cause this profile to take priority for the selected alerts above all other rules set in the alert configuration screens

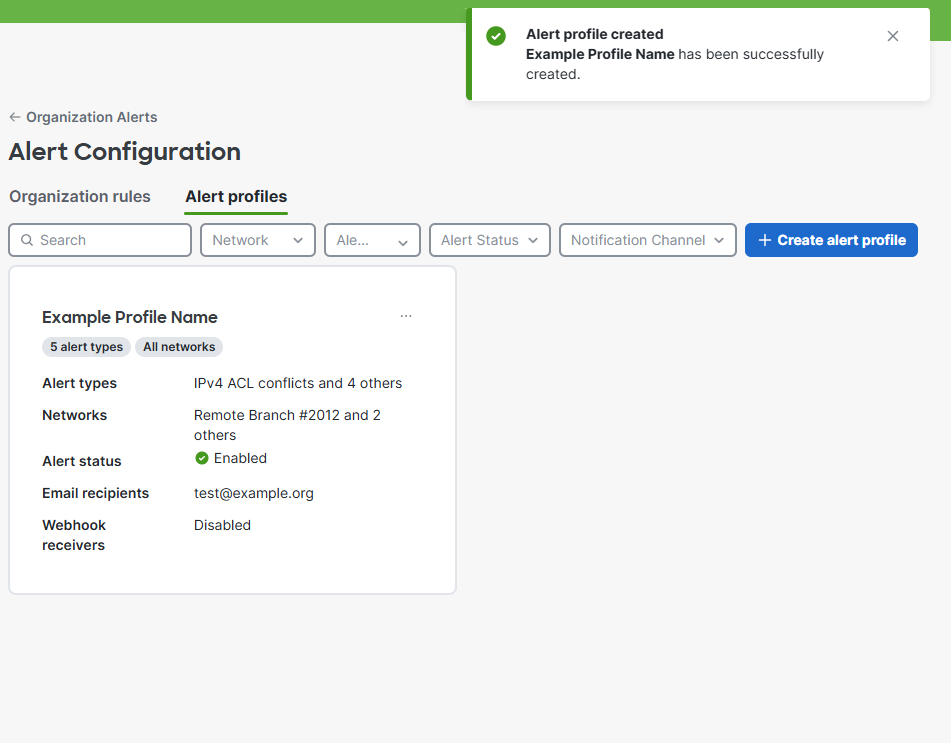
Select "Save changes" and you will be taken back to the Alert Profile main tab page and you will see your new profile card listed with the details of the profile.
Components of the Scheduling Tab


Creating a New Schedule
There are two ways to create a new custom schedule. You can click the Create Schedule button in the Schedules tab or create a new schedule when you define a new alert profile.
When you click on the Create Schedule button you are presented with an interface for a week and 24 hour timelines, that lets you select which days and time you want this schedule to be active for.

In the Alert Profile creation interface you can select Create Custom Schedule and it will pop up the same interface as above with the week and times to select.

After creating the new schedule your schedule shows up as a card on the main schedule tab

After creating a schedule you'll be able to apply these custom schedules to alert profiles that are created under the Alert Profiles tab
