

Meraki eSIM AT&T FastActivation Guide
MG52:E eSIM activation guide.pdf
Overview
Devices equipped with Meraki eSIMs are able to utilize the latest 5G SA (Stand Alone) cellular capabilities to provide high-speed, flexible alternatives to traditional broadband, especially in areas where fiber is not available or when providing a secondary uplink for SDWAN (Software Defined Wide Area Networks) use cases.
AT&T and Cisco jointly developed an innovative out-of-the-box experience with these devices by offering a deep integration with AT&T Wireless services to help businesses get started even faster.

What does this mean and why is this important?
The Meraki eSIM digital buy flow, powered by AT&T, is an industry first solution leveraging eSIMs to provide true out of box connectivity on a fixed platform. This is a unique partnership between Cisco Meraki and AT&T that provides a unique, integrated solution tying the Meraki dashboard with AT&T's fastactivation IoT (Internet of things) portal.
This allows customers onboarding devices using Meraki eSIMs to directly purchase data plans from AT&T digitally. Customers purchasing AT&T wireless service via the digital buy flow will be offered a 30 day complimentary introduction period where users will have the flexibility to cancel the plan anytime within the trial period free of charge. Once the plans are purchased from AT&T, they can be activated on Meraki eSIMs through the Meraki dashboard.
eSIM Service Provider Availability per-Region
|
Region |
Service Providers |
|---|---|
|
Americas |
AT&T (with 30 day complimentary introduction period) |
|
EMEA |
TBD |
|
APAC |
TBD |
We value feedback and if you have any, please feel free to reach out to your TSA contact or reach out to the MG PM team.
Definitions
AT&T fastactivation portal: Cisco has partnered with AT&T to provide a complete digital experience in buying wireless/cellular data plans. Users will be able to buy data plans (communications or COMM & rate plans) via the fastactivation portal.
Communication (COMM) plan: The Comm plan assigned to an eSIM profile determines what kind of services (data, voice, SMS, roaming, etc.) will be available to an eSIM that has been assigned that profile.
Rate plan: The Rate plan assigned to an eSIM profile dictates the price, speeds, and data caps for services available to an eSIM that has been assigned that profile.
eSIM: The eSIM is the embedded hardware component that is physically soldered to the board of a cellular enabled device. It provides theft protection compared to physical external SIM cards in addition to remote profile activation and management capabilities.
eUICC: The eUICC is the software component of the eSIM that allows for the remote provisioning of multiple eSIM profiles.
eSIM profile: A wireless carrier profile acquired from a Service Provider (SP), such as AT&T, which includes various fields like the ICCID, IMSI, etc., that are necessary for activating an eSIM on a cellular network.
ICCID: The ICCID is the Integrated Circuit Card Identification Number. It is a unique 18–22-digit code that identifies a SIM card’s country, home network, and identification number. The ICCID can be found printed on the back of a physical SIM card and is locked to the physical sim card or an individual eSIM profile.
IMSI: An International Mobile Subscriber Identity (IMSI) is a unique number, usually fifteen digits, associated with GSM, UMTS, LTE, and 5G network mobile phone users. The IMSI is a unique number identifying a subscriber globally within that network and can be assigned to a physical SIM card or eSIM profile.
IMEI: The IMEI (International Mobile Equipment Identity) number is a unique 15-digit serial number for identifying a physical cellular device. Meraki devices equipped with cellular capabilities each have a unique IMEI associated with them, which can be found on the package label or on dashboard once the devices are claimed.
EID (eSIM ID): The EID (Embedded Identity Document) is a serial number corresponding to the physical eSIM. This serial number is unique for each eSIM and does not change when assigning new profiles. Like the IMEI, the EIDs for Meraki devices with embedded eSIMs can be found on the package label or on dashboard once the devices are claimed.

Comparing eSIM and Physical SIM Deployments
Cellular-enabled Meraki devices equipped with onboard eSIMs, like the MG52/E or C8000 Secure Routers with MX OS, can provide WAN connectivity out of the box using either physical SIM cards or by leveraging the onboard eSIM.
Only one SIM slot can be active at any given time. Meraki cellular devices do not support load balancing across multiple SIM cards.
At any point in time, the priority of a SIM slot i.e., primary or secondary, can be changed via the Uplinks tab on the device status page in the Meraki dashboard.


Meraki eSIM Requirements
Solution Requirements
| Supported Hardware | Minimum Firmware |
|---|---|
| MG52 / MG52E | MG 3.211+ |
| C8111-C-G2 / C8121-CW-G2 | MX 19.2+ |
Licensing Requirements
- 1x Meraki MG52/E Enterprise dashboard license per-MG
- 1x Meraki MX Enterprise / Advanced Security dashboard license per-MX
APN Requirements
Currently the only supported default APN for Merkai eSIMs is “nrbroadband”. This APN is automatically provisioned when the AT&T fastactivation account is created on AT&T fastactivation portal.
While Meraki cellular devices do support private/static APNs, these APNs cannot be automatically provisioned to Meraki eSIMs via the AT&T fastactivation portal. If you need a private/static APN provisioned for your eSIMs, please reach out to your AT&T account team. If you are unsure who your AT&T account team is, please send an email to dl-fastactivationexperts@att.com and AT&T will assist in identifying your account team.
Before You Begin
Before you bring a Meraki device online via the onboard eSIM, please read the following carefully:
-
Embedded cellular details (IMEI, EID, etc.) for Meraki devices are listed both in the Meraki Dashboard after claiming your device and adding it to a network, as well as directly on the label of the device packaging from Meraki.
-
Do not insert a physical SIM card in any slot if you intend to only use the embedded eSIM.
-
Before powering on a device when intending to use the onboard eSIM, please follow the steps described in “Purchasing AT&T COM/Rate plans and Activating Meraki eSIMs” to purchase a rate plan on the AT&T fastactivation portal.
-
Close any unnecessary dashboard instances related to the device, any open device pages on Dashboard will actively pull live stats from the device and could result in over-utilization of SIM data if left unchecked.
-
The eSIM bootstrap data profile is only intended for providing connectivity to activate the eSIM with a valid long-term target Service Provider profile.
-
While the Meraki eSIM is Active and using the bootstrap profile, all data from the LAN of the device is blocked from using the cellular uplink to ensure the eSIM bootstrap data is only used to check in to dashboard and for device management.
-
-
If a device using the onboard Meraki eSIM is not coming online/checking to dashboard via the bootstrap data, please reach out Meraki support. It’s possible the bootstrap data profile has been exhausted or otherwise deactivated.
-
If you have exhausted bootstrap data, please follow these guidelines:
-
Refrain from powering on the device unnecessarily.
-
Deactivate SIM failover to prevent the device from failing over to the eSIM from an external/physical SIM.
-
Purchase an AT&T rate plan ASAP. AT&T is providing 30-day complimentary introduction period for customers who sign in via AT&T IoT fastactivation portal from the Meraki dashboard.
-
Contact Meraki Support to assist in temporarily reactivating the bootstrap data to allow a long-term AT&T rate plan to be applied to the eSIM.
-
-
-
If a device starts using the bootstrap data and does not have an AT&T rate/comm plan applied to the eSIM within 90 days, the bootstrap data will be deactivated. To temporarily re-activate the bootstrap data, please contact Meraki support.
Meraki eSIM Operation
To leverage the onboard eSIM by default, do not insert any physical SIM cards into the device. If no physical SIM cards are inserted, then the device will automatically detect that and use the onboard eSIM for cellular connectivity by default. If physical SIM cards are detected, the device will automatically disable the eSIM and default to using the physical SIMs instead of the onboard eSIM for cellular connectivity.
Once the device is online in the Meraki Dashboard, the eSIM can be changed to act as either a primary or secondary SIM, or be disabled entirely. Please refer to the SIM ordering guide for more information.
Although devices like the MG52/E (shown below) provide 2 physical/external SIM slots and 1 built-in eSIM, only 2 of the 3 available SIM slots can be configured to be used at any given time. The 3rd SIM slot (not configured as either Primary or Secondary) will be disabled and shown as "not in use".


Devices with more than 2 SIM slots like the MG52/E will only operate using the configured Primary and Secondary SIM slots. If both the Primary and Secondary SIMs fail, the MG52/E will fall offline.
To set the SIM slot priority, click on the PRIMARY, SECONDARY or NOT IN USE buttons for the corresponding SIM under the Uplink tab on the device status page in Dashboard to change the SIM ordering priority accordingly.

Purchasing AT&T COM/Rate Plans and Activating on Meraki eSIMs
If you plan to use physical SIM cards with your Meraki devices the below sections do not apply to you. If you plan to utilize the embedded/onboard eSIM, then please follow these instructions carefully to activate the eSIM successfully.
Initial Meraki Setup
Step 1 – Claim your Meraki eSIM devices in your "Organization > Inventory" page and add them to a network.
Step 2 – Navigate back to the Inventory tab on the "Organization > SIM Cards" page.

AT&T fastactivation Account Setup
Step 3 – Click on the hyperlink labeled “Visit fastactivation.att.com get started” to open the AT&T fastactivation portal in a new tab to purchase COM and rate plans.
AT&T Fast Activation link to get started with AT&T connectivity with your MG52 & MG52E.
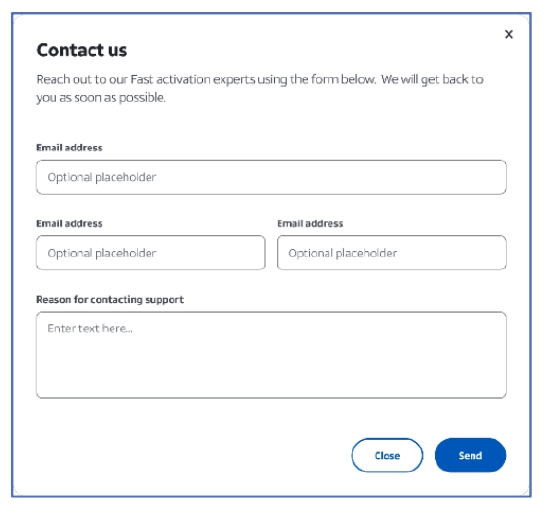
Please contact AT&T support using the "Contact Us" button at the bottom of AT&Ts website for questions related to signing up, filling out forms, creating an AT&T account, etc.
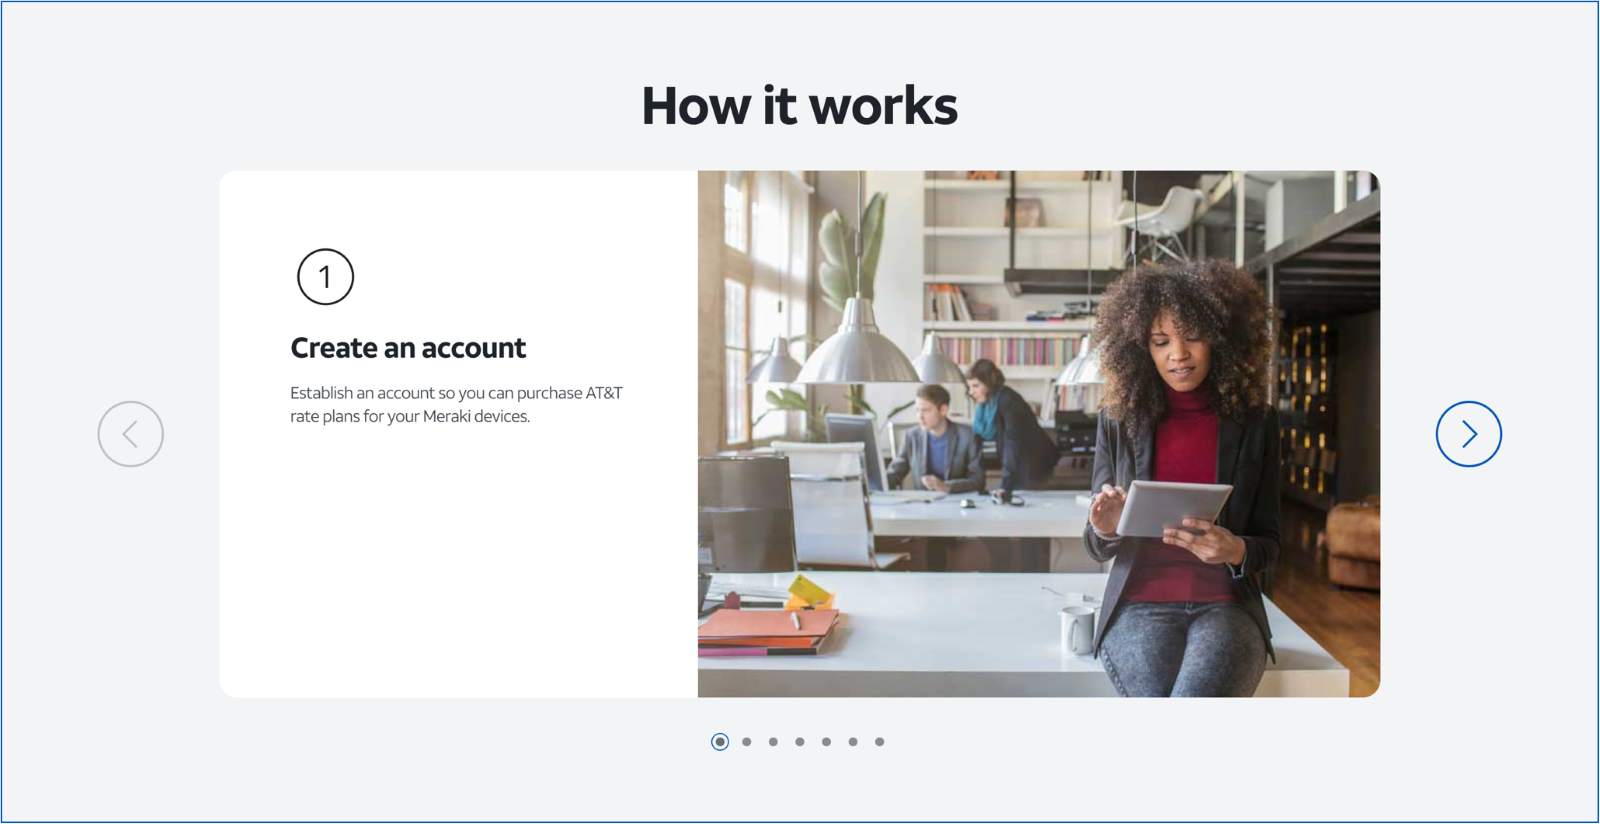
Step 4 – Read through how it works before creating a new account.

Step 5 – Check for AT&T coverage and select an appropriate rate plan for your use case.
Step 6 – Read AT&T's “Help and FAQs” section before proceeding further.
Step 7 – Read through the rate plan information and other terms/conditions before proceeding to the next page.
Step 8 – Click on the “Get Started” link to create an AT&T fastactivation account.
Step 9 – Enter the necessary information and click "Continue" to create an account


Step 10 – After completing the "Get Started" page and clicking continue, AT&T will send a PIN code to the email address you entered on the page to validate your identity. Please retrieve the PIN code from the email and utilize it to sign into your account.

Step 11 – Login into the account using your User ID and provided PIN code
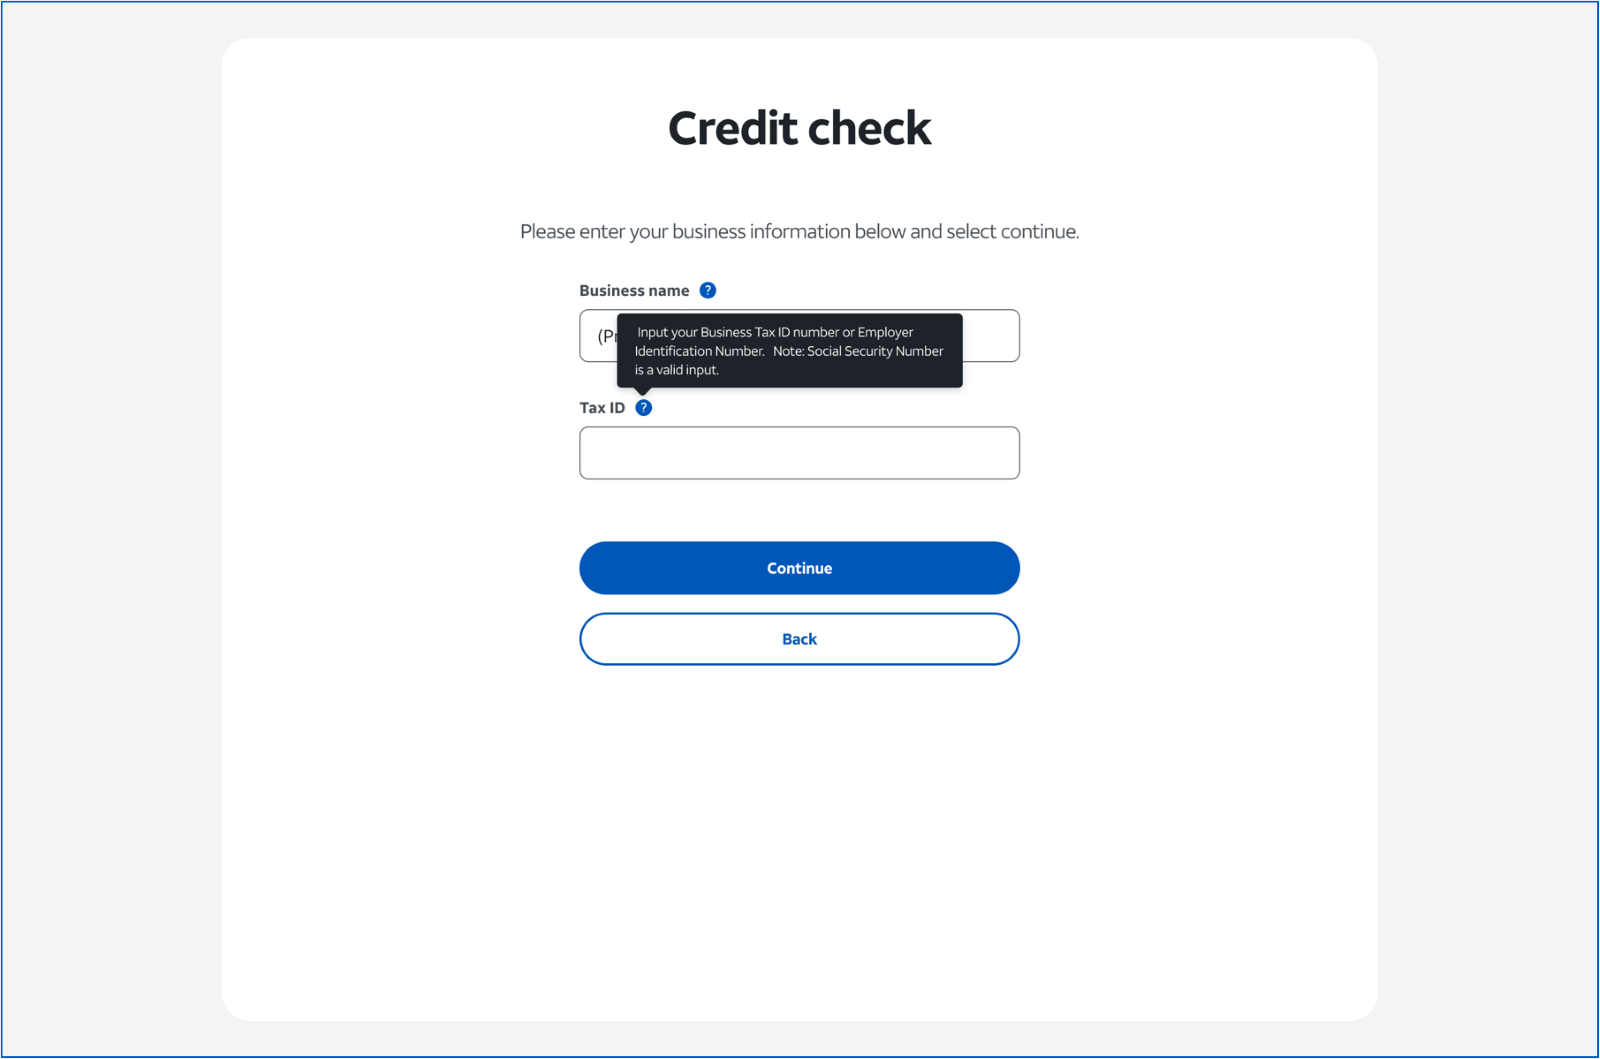
Step 12 – Once logged into your account, you will be directed to proceed with entering the information necessary to complete a credit check.
Step 13 – You will see a similar screen below once the credit check is approved and receive an email including your AT&T userID and confirmation of your credit check status.
If you receive a message stating "Credit check submitted for manual review", please follow the support process outlined at the end of this document to reach out to AT&T support.

Step 14 – View the selected rate plan and click on the “Features and Benefits” section to learn more. Click on “Add plan to my order to proceed further.”
Step 15 – Scroll through the order page and accept the terms & conditions. Click on “Submit my order” to finalize the rate plan selected.


Step 16 – Wait a few seconds to receive/confirm your Account name, Account ID, User ID, and API key. If you do not see that information provided for you, reach out to AT&T support for more information in the Help section.
Copy the information from this page (Account Name, Account ID, User ID, and API key) and store it in a secure vault or take a screenshot of this page and store it securely. You will need this information in the future to connect your AT&T service provider account on the Meraki dashboard.

Linking your AT&T Service Provider account with the Meraki Dashboard
Step 17 – Switch to the Meraki dashboard and navigate to the “Organization -> SIM cards” page. Go to the “Connect Service Provider Account” section and select AT&T.

Step 18 – Copy the Account name, Account ID, UserID (username that was used to create the login on the fastactivation.com portal), and API Key to the corresponding fields i.e., Account title, Account ID, Username & API key on the “Connect Service Provider Account” section.

Step 19 – Click “Connect” to finish connecting your account. This step ties your AT&T fastactivation account to the Meraki dashboard as a new Service Provider account.

If you get an error message, address the error and try again after a few minutes, check any related error codes in the Common Error Codes section of this document, or contact Meraki support for additional assistance.

Once the connection is successful, you will see a success banner pop up. Your AT&T fastactivation account is now linked to the Meraki dashboard as a new Service Provider account.

Applying a COM/Rate Plan from the Meraki Dashboard
Step 20 – From the Inventory page of the "Organization > SIM Cards" page, select “Swap Service Plan” for the relevant eSIM. This step is needed to move your Meraki eSIM from the initial day-0 bootstrap profile to a long-term target profile or between different target profiles.


Step 21 – On the Swap Service Plan popup modal, you should be able to view the communication plans (COMM plan) and rate plans that you have purchased via the AT&T fastactivation portal. Select the appropriate Communication and Rate plans to apply and click Next.

IMPORTANT
The default APN configured for Meraki eSIMs is "nrbroadband". Before swapping plans, verify the primary APN on the final target plan is "nrbroadband". If it is, continue with the swap.
If your plan lists a primary APN other than "nrbroadband", DO NOT continue with the swap.

First, configure the primary APN listed for your plan on each device by navigating to Cellular Gateway > Device Details > Uplink > eSIM > Edit > Custom APN. Once you configure the matching primary APN for the eSIM on each device, wait for a minute for the MG to receive the new device configuration, then proceed with the profile swap.
Step 22 – Select Swap Plan to commence the swap to the target eSIM profile. This step will take several minutes for the new SIM profile to be downloaded on the eSIM and activated.

Please wait up to 10 minutes for the swap to complete. If the swap fails for any reason, try again after a few minutes or reach out to Meraki support for more assistance.
Verifying the profile swap in the Meraki Dashboard
You can view the current status of an eSIM and the profile swap process from the Inventory tab of the Organization > SIM Cards page under the Status column. A SIM status of Activated indicates a successful profile swap.
The page also provides additional details like the current profile and plans assigned as well as the date and time of the last profile swap request for each EID in the Organization.


Verifying the COM/Rate Plan Swap from the AT&T portal
Once the Meraki eSIM successfully downloads the target AT&T profile for the plan you chose you should be able to see any activated devices in the “Devices” section on the AT&T fastactivation portal.


Common Error Codes
Below are some potential error codes that may be returned on the Meraki Dashboard as part of a failed service provider account linking process or profile swap request. Some errors can be addressed directly without intervention of a support team, like those related to invalid credentials. Errors that persist after more than one attempt or require additional assistance to resolve will require reaching out to a dedicated support team.


|
Error code |
Meaning |
|
SDO_INVALID_TARGET_ACCT_CREDS |
Invalid Control Center credentials. |
|
INVALID_ACCOUNTID |
Invalid Control Center account ID. |
|
400201 |
Control Center authorization error. |
|
1000100 |
Control Center account not found. |
|
10000062 |
Meraki does not have access to your AT&T Control Center account. |
|
10000075 |
Meraki is not authorized to access your AT&T Control Center account. |
|
10000076 |
Meraki is not authorized to access your AT&T Control Center account. |
|
10000079 |
Your AT&T Control Center account does not have API access. |
|
10000080 |
Your AT&T Control Center account does not have access to the requested resource. |
Support Processes
While both the Meraki and AT&T Support teams are available for your assistance, directing your case to the most appropriate team will help ensure it receives the quickest resolution.
When to reach out to Meraki support
- Questions about known device issues or Meraki or Cisco cellular devices
- First time / bootstrap profile connectivity issues
- General device installation queries
- eSIM bootstrap / profile swap issues or questions
- Issues with the Meraki dashboard portal functionality
- Questions about other Cisco products
Cisco Meraki Support Links
When to reach out to AT&T Support
- Questions about AT&T communication or rate plans
- Questions about AT&T billing
- Questions or issues relating to the AT&T web portal or fastactivation process
- Issues with AT&T connectivity (not including bootstrap profile connectivity)
- Questions or issues relating to AT&T account or provisioning services
AT&T Support Links
- AT&T Fastactivation Portal - Select 'Contact us' at the bottom of the page.