
Renaming Systems Manager Client Devices with a .csv and Meraki API using Postman Runner
Renaming devices one at a time can be performed on the Meraki Dashboard in the Systems Manager > Clients page UI. However, more complex tasks, such as renaming devices on a mass scale, can be completed with the steps in this guide in conjunction with the powerful Meraki Dashboard API. This will allow you to rename all (or a subset of) devices to a name of your choosing with a .csv file of desired names.
Be sure to enable the Meraki API in your Organization prior to completing these steps. You will need your Meraki Organization's API key (X-Cisco-Meraki-API-Key) to perform these steps.
1. Create a .csv file containing the top columns: serial & name. Add the enrolled devices' serial numbers and the desired names in the rows under these columns. An example .csv table is provided below. For further convenience a sample .csv can be downloaded here as an example: name-change-data.csv Feel free to use this file and fill in your devices' serial numbers & desired names.
| serial | name |
| DM7S3SERIALNUMBERG5XT | My-iPad-1 |
| DRPS4SERIALNUMBERG7VE | My-iPad-2 |
| DMPX4SERIALNUMBERGCVF | My-iPad-3 |
2. Download and install Postman. Postman is a tool to send API requests, and helps make this process very easy. Postman will be used to filter through the .csv file and send multiple API requests automatically so that devices' names can be changed on a mass scale.
We will be using Postman's Runner feature to read the .csv and send multiple API requests to change devices' names. For more information about the Postman Runner feature see the related Postman documentation.
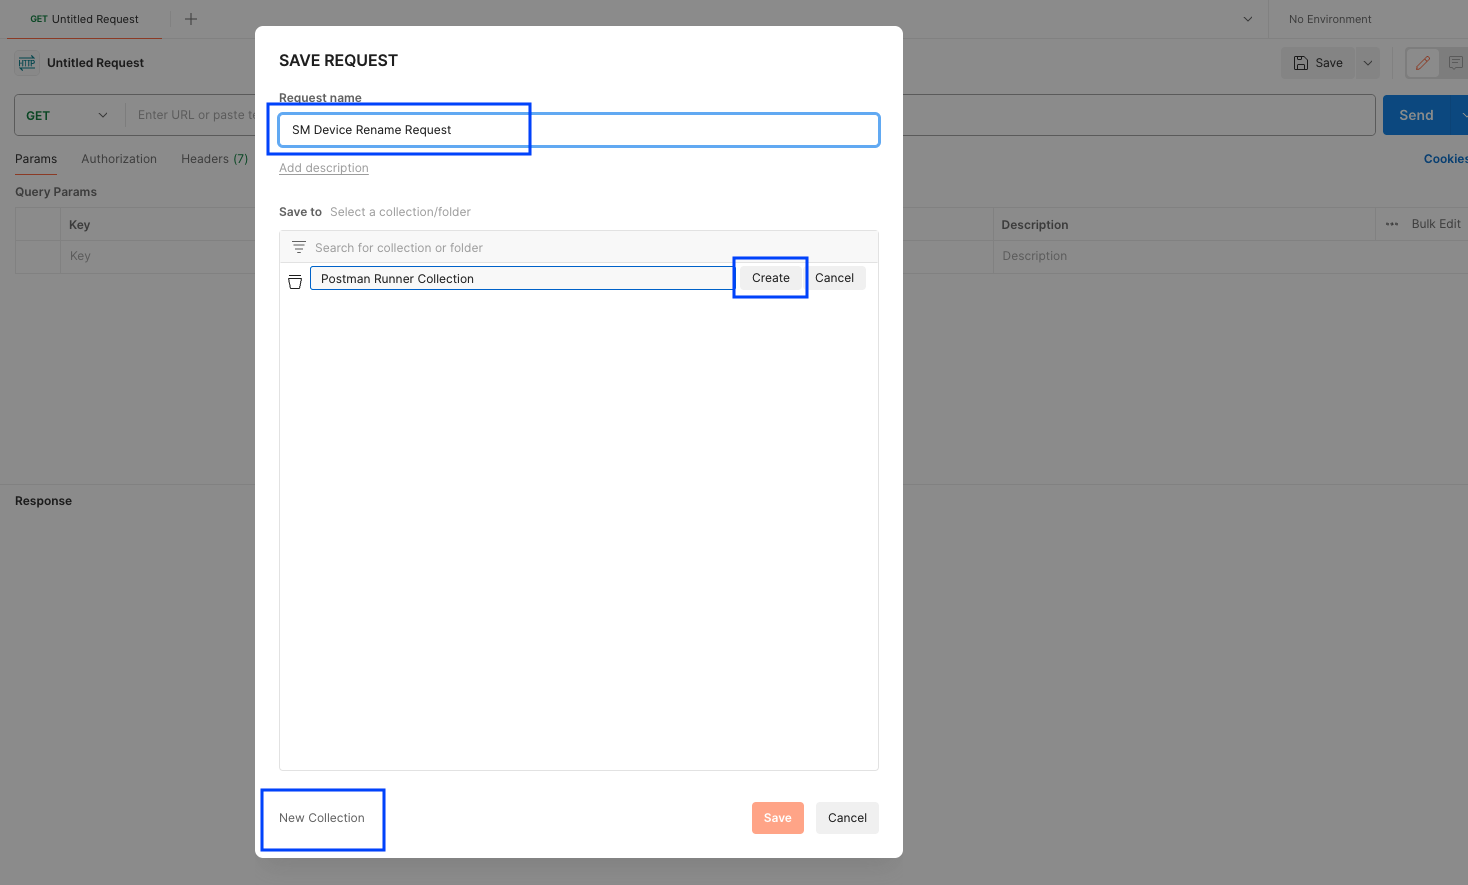
3. Open Postman and create a new HTTP Request. Name your new Request, Create a Collection, and then save this new Request to the new Collection.
4. Change the request type to the following endpoint:
[PUT] https://api.meraki.com/api/v1/networks/{networkId}/sm/devices/fields
Note: You will need to know your Organization's networkId to fill it in for the request on your network.
If you are unsure of your networkId, you will need to use two API calls. First, you will need to discover your OrganizationID using this API endpoint (with X-Cisco-Meraki-API-Key):
[GET] https://api.meraki.com/api/v1/organizations
With the response from above endpoint you should have your OrganizationID. Now you can use the following endpoint to find all of the networkIds within that OrganizationID:
[GET] https://api.meraki.com/api/v1/organizations/{organizationId}/networks
The response from the above endpoint will return all networkIds within your OrganizationID.
More information about these two API endpoints can be found here: Get Organizations and Get Organization Networks
Click on Headers and fill in the value for your X-Cisco-Meraki-API-Key. The request should look like this:

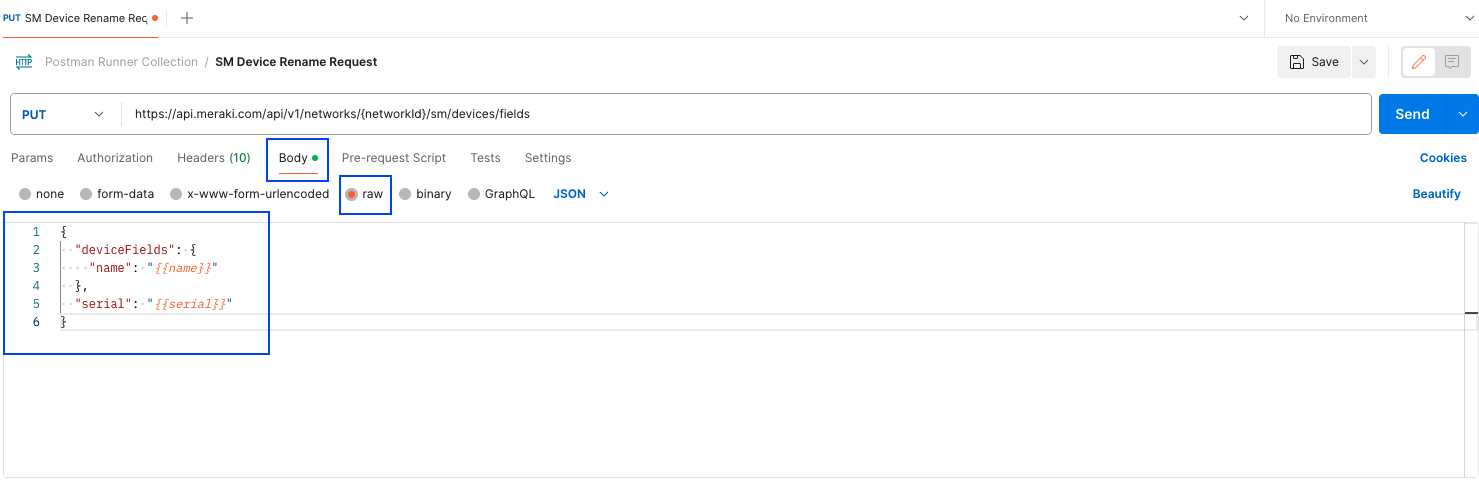
5. Click on Body > Raw and input the following raw JSON data:
{
  "deviceFields": {
    "name": "{{name}}"
  },
  "serial": "{{serial}}"
}
Your request body should look like the following:
At this point, be sure to save all the changes made to the request
6. Go to File > New Runner Tab. This will open a new Postman Runner tab. You can now drag and drop the Request you created from Step 3 into the Runner tab.
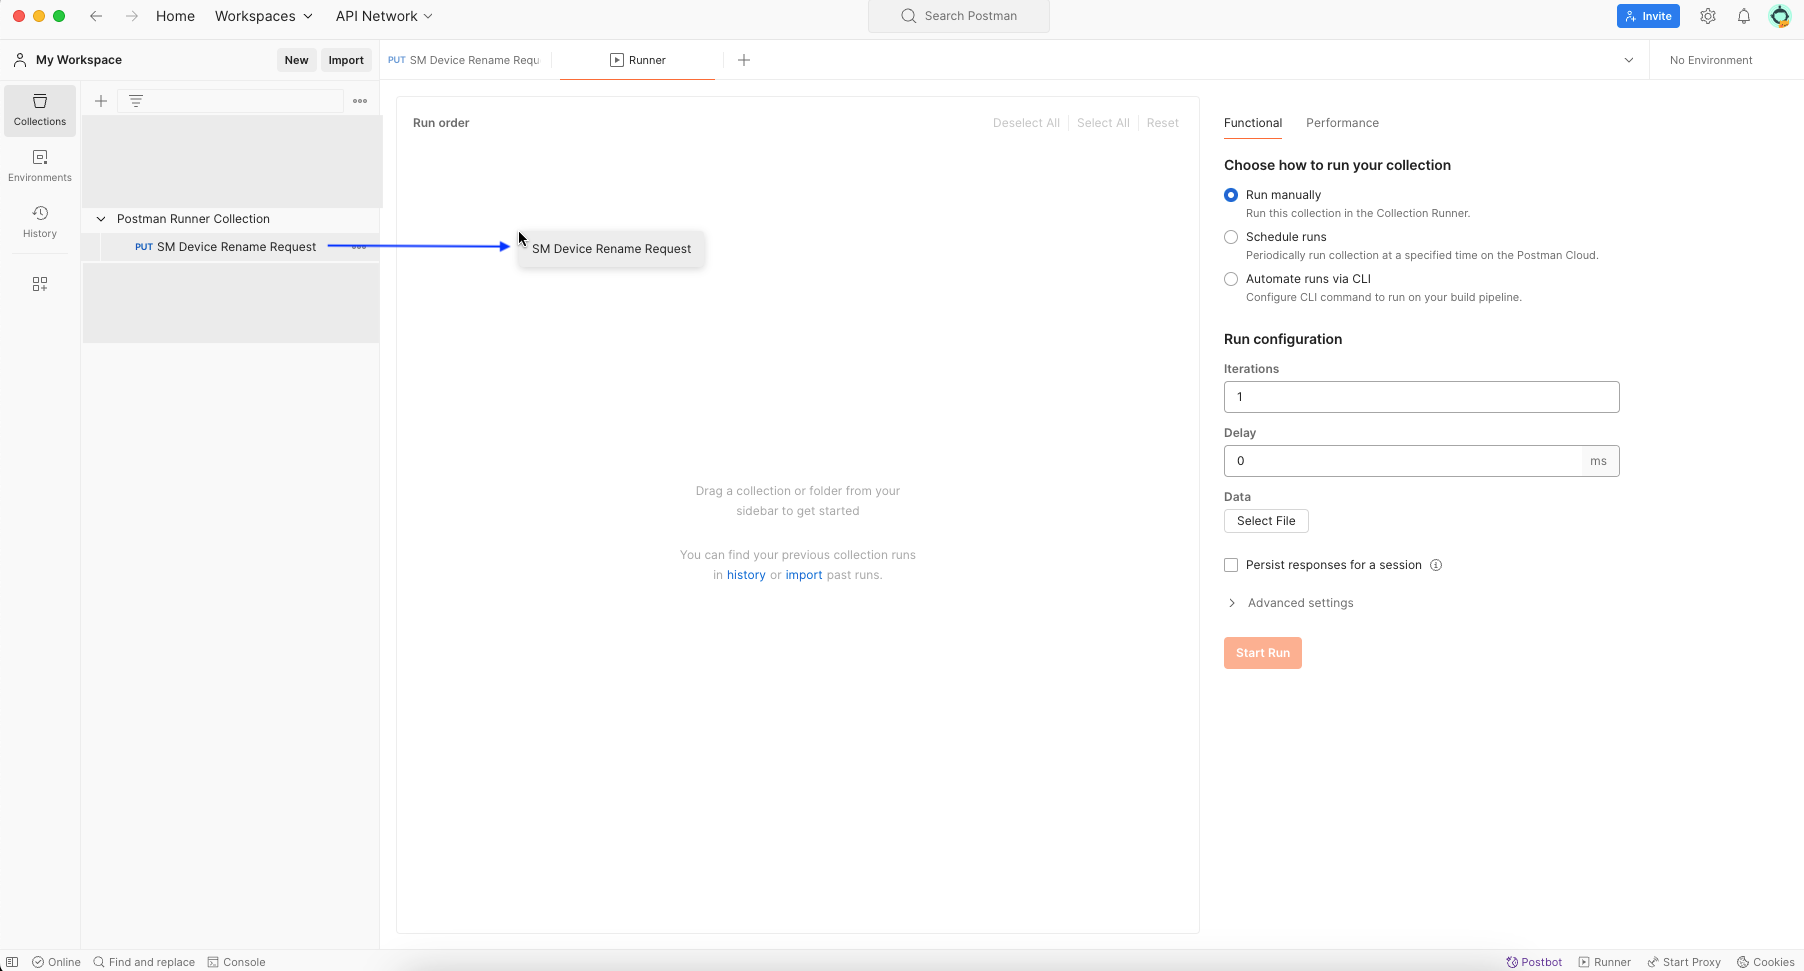
You should now see the Request you created under the "Run Order" column. Choose the number of iterations that are needed. The number of iterations is the number of API requests that will be sent & should match the number of rows in your .csv file (IE the number of devices' names to change). Upload the .csv with your serial and name data. When everything looks good, click Run Postman Runner Collection:

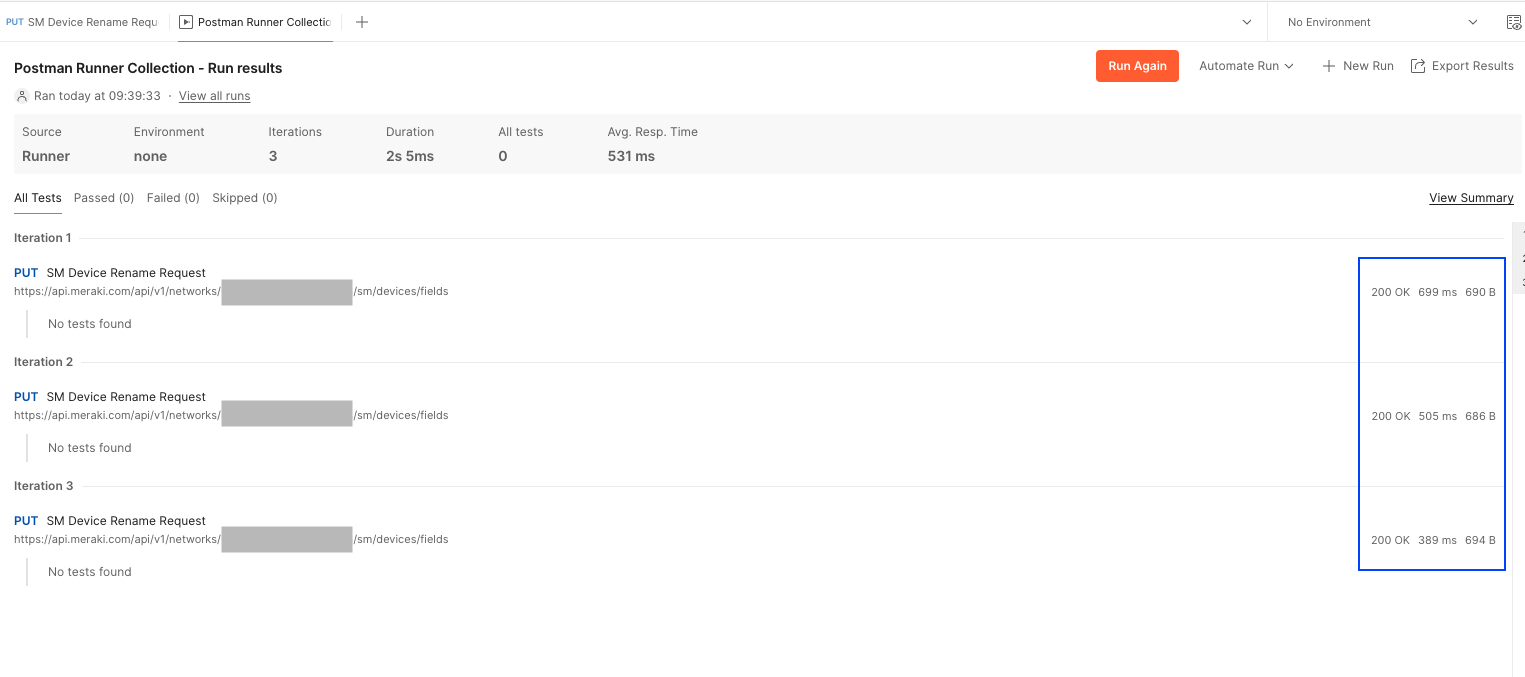
7. After the process completes, you will see something similar to the screenshot below. This shows the results of the Postman Runner action and will show the results of every individual endpoint. The response codes will be listed to the right of each endpoint and if the endpoint successfully ran you will see a 200 response code. For additional information on response codes, please reference our Meraki API Documentation.
If the API endpoints were successful, the devices' names will have changed on your Meraki Dashboard to the name specified for that device's serial number in the .csv file. Congratulations & enjoy using this powerful feature!