
AP Auto Locate
Overview

Network planning and deployment require significant time and effort, as each AP has to be carefully located and labeled in the network layout/floor plan. Additionally, maintaining accurate and up-to-date information about Access Point (AP) locations is an added difficulty. Time constraints, resource limitations, and the ever-evolving nature of network configurations can lead to inaccuracies that impact client device location accuracy.
AP Auto Locate automatically determines AP locations and places them on floor plans, saving time, reducing complexity, and enhancing overall network performance.
This solution delivers accurate, automated, up-to-date AP location leveraging Fine Timing Measurement (FTM) and Global Navigation Satellite System (GNSS) when available. If GNSS is not accessible, you must place a few manual anchors per floor. This feature requires an AP density such that neighboring APs can hear each other at maximum power. The accuracy of the Access Point Auto Location feature depends on the building type and the distances between APs.
Requirements
Firmware
MR31.1. and above
Hardware
AP Auto Locate is supported on the following models:
-
MR78
-
MR36
-
MR46
-
MR56
-
MR57(GPS capable)**
-
CW9162 (GPS capable)**
-
CW9164 (GPS capable)**
-
CW9166I (GPS capable)**
-
CW9172I (GPS capable)**
-
CW9174I (GPS capable)**
-
CW9176I (Integrated GPS)
-
CW9176D1 (Integrated GPS)
-
CW9178I (Integrated GPS)
**Note: Supported via optional USB GPS/GNSS module (CW-ACC-GPS1=)
Anchor APs
Ensure your network is equipped with a minimum of 4 anchor APs that can either have their location determined via GPS module or can be manually placed based on their relative position to serve in calculating the position of remaining APs in the network.
Anchor AP Placement
Compatible AP models with a built-in USB port i.e MR57, CW9166, CW9164, and CW9162 will be able to be automatically placed on the floor plan based on their reported GNSS measurements. APs without an attached GPS module can have their position manually set as an anchor on the floorplan to aid in the calculation of other AP positions on the floor.
CW-ACC-GPS1 Requirements
-
Compatible with AP models with built-in USB port, i.e. MR57, CW9162, CW9164, CW9166
-
Access Points (at least 1 or 2) need to be mounted where they can obtain satellite signals (e.g., near a window).


Installation
-
Insert the GPS module into the USB port of the access point.

-
Ensure the USB port is receiving power via dashboard.
GNSS Antenna Installation
PID: CW-ANT-GPS1-M-00
Compatible with Wi-Fi 6E APs i.e. MR57, CW9162, CW9164, CW9166
APs installed further away from a window can extend satellite reception by 10 meters by utilizing the CW-ANT-GPS1-M-00 GNSS antenna.
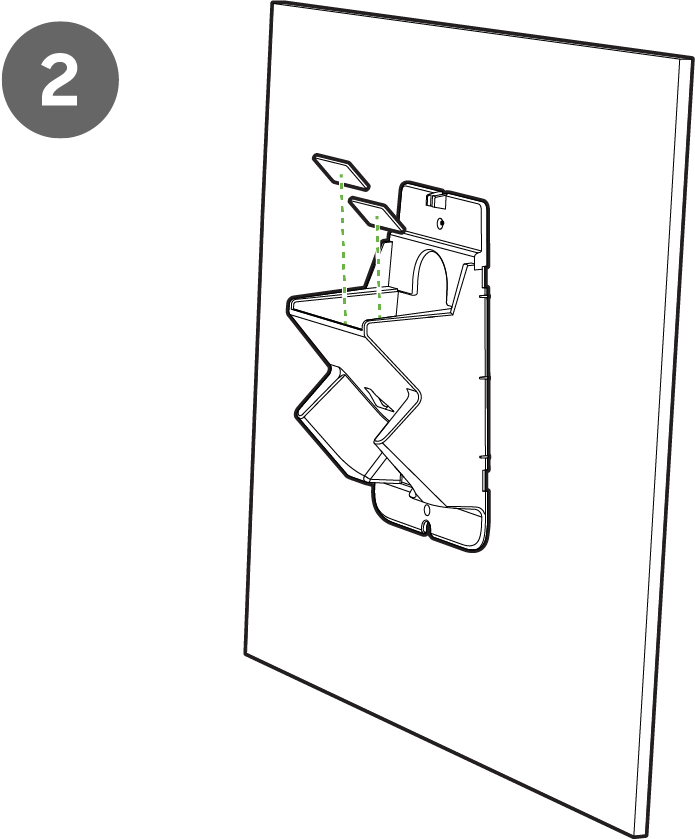
- Insert the CW-ACC-GPS1 GPS module into the USB port of the access point.
- Remove the covering on the GPS module to reveal the GNSS port and insert the antenna.
- Determine the desired placement of the antenna bracket on a window pane that allows for a clear line of sight to the sky.
- Apply the adhesive strips to the top and bottom portions of the bracket.
- Apply adhesive strips to the inside of the bracket to secure the antenna.
- Insert the antenna into the bracket and ensure proper adhesion to the strips.
- Clip the outer casing to the bracket and thread the cabling through the case opening.
Indoor Deployment

 .
. 

Outdoor Deployment
Outdoor GPS antenna deployments require a 180-degree rotation of the mounting bracket to allow the antenna to be positioned toward the sky.

 .
.  .
.  .
. 
Mounting GPS-Capable Anchor APs

-
Ensure the AP is mounted near a window or has a clear line of sight to the sky to allow the GPS module to obtain the satellite signal.
AP Auto Locate Configuration
-
Navigate Wireless Network-wide -> Maps and Floor Plans
-
At the top of the page, select AP Auto Locate

-
Select APs from this list and assign them to the floor where they are confirmed to be located.
Note: Please ensure that each floor has a minimum of five access points in the network. Four APs will be placed as anchors, and at least one of them will be auto-placed.

-
Select the floor plan to assign APs to. and click next.
Note: You can either upload a new floor plan or select from the existing one.

4. Select Generate now or Schedule the ranging process

Generate now: Select this option to generate AP Any Locate Measurement data immediately.

Schedule: Once a date and time are set for the floorplan’s ranging process, APs will begin the FTM ranging process.

Note: The RF measurement process should be scheduled during off-peak times to minimize impact on client performance.
AP Auto Locate utilizes FTM to accurately measure the time it takes for a signal to travel between APs. When the calculation is run AP channel settings are temporarily adjusted to establish FTM links between APs. This creates a webbed layout of APs’ calculated locations in the network. Unknown APs will get their relative location by measuring distances to anchor APs. Measurements are stored in dashboard, and once the process is complete, AP channel settings are returned to their previous state, and AutoRF is re-enabled.
Note: The calculation process will take ~15 mins for manually placed anchor APs. If anchor APs use either an internal or external GPS module, the auto-location process will take 24 hours to complete.
12. After completing the FTM ranging process, Dashboard will prompt users to 'Define more anchors' for the floor plan.

13. Select a minimum of 4 APs from the listed floor plan to be used as anchors in calculating the relative location of the remaining APs on the floor.
Note: If a GPS-capable AP can establish a GNSS signal it will be automatically placed on the floor plan as an anchor AP. Once the AP is placed, its position can be further adjusted for accuracy.


Note: While reviewing placement, you can drag and drop APs to override the auto location latitude and longitude values of the APs.
Ultra Wide Band Enhancements
Firmware: MR 32.1.1
Hardware: Wi-Fi 7
- CW9176I
- CW9176D1
- CW9178I
- CW9179F
AP Auto-location is leveraging FTM on a wide range of APs to compute AP location automatically. To increase accuracy, Wi-Fi 7 APs embed a UWB chip that allows sub-centimeter level range measurement to improve accuracy and flexibility in location-based services.
UWB ranging depends on the line of sight APs have from one another. APs should be within 40 meters of one another for accurate ranging measurements.
Note: AP Auto location will continue to support FTM (Fine Time Measurement) ranging. In addition, it will now also support UWB (Ultra-Wideband) ranging simultaneously. Supported APs will take advantage of UWB and unsupported APs will not. They can be mixed together, however, depending on how their APs are mixed the APs supporting UWB may be too far apart to successfully range with one another.
API Configuration
|
Description |
Path |
|
List floor plans with auto-placement status from latest job |
GET /organizations/{organizationId}/floorPlans/autoPlacement/statuses |
|
Bulk create jobs w/ optional bulk floor plan assignment (end of stepper) |
POST /networks/{networkId}/floorPlans/autoPlacement/jobs/bulk |
|
List APs with auto-placement status (anchor / calculated locations) |
GET /organizations/{organizationId}/floorPlans/autoPlacement/devices |
|
Trigger recalculation w/ optional bulk anchor position updates |
POST /networks/{networkId}/floorPlans/autoPlacement/jobs/{jobId}/recalculate |
|
Mark job as published w/ optional bulk AP position updates |
POST /networks/{networkId}/floorPlans/autoPlacement/jobs/{jobId}/publish |
|
Cancel scheduled job c |
DELETE /networks/{networkId}/floorPlans/autoPlacement/jobs/{jobId} |
-
Select APs from the presented list that you are certain to exist on the floor plan.
-
Click Assign floor plan.
-
Click Save.
-
Once the Assign APs pop-up closes, select Done.
-
On the floor plan list screen, select Auto-placement.
-
Choose the scheduling option to generate AP Any Locate measurement data.
Schedule: Select this option to specify a date and time to generate AP Any Locate Measurement data. -
Select the AP to adjust its position manually. The APs are color-coded as:
Red = Manual placement
Green = Automatic placement (GNSS and FTM, or FTM only) -
Once at least 4 Anchor APs have been selected and placed on the floor plan, select 'Done' to start the measurement process.
-
Once the FTM Measurement process is complete the Auto-placement status will update to 'Review and publish'.
-
Once satisfied with the final placement, click 'Publish' to save the AP's location coordinates.
Ultra-Wideband (UWB) Enhanced Client Wayfinding
Overview:
Support for Ultra-Wideband (UWB) based asset tracking and live indoor wayfinding for smartphones, focusing exclusively on UWB ULTDOA (Ultra-Wideband Localization Time Difference of Arrival) technology.
By leveraging UWB capabilities available on Wi-Fi 7 access points, smartphones can accurately localize themselves within indoor environments. This functionality supports real-time navigation and wayfinding scenarios, similar to “Google Maps Indoor,” allowing users to determine their precise position and navigate complex indoor spaces using their smartphones.
Firmware: MR32.2.1
Prerequisite:
Enhanced Client Wayfinding will first need to be enabled on the Organization via the Early Access page.

Configuration
1. Navigate Network-wide > Configure > General

2. Enable Enhanced Client Wayfinding

Note: By default, UWB Wayfinding is disabled. When enabled, a maintenance window for potential re-clustering is required. This window can be determined automatically using AI-RRM or set manually.
Wayfinding Status (per floor)
|
Wayfinding status |
Status |
User action (if any) |
Notes |
|
|
Enabled/OK |
N/A |
Conditions: · Wayfinding enabled in network · APs in floor have locations · Floor number available |
|
|
Floor number missing |
Add floor number to floor (in building manager) |
|
|
|
AP locations missing |
Place manually or configure AP autolocation |
|
|
|
Clusters outdated |
Wait for the next maintenance window or modify the maintenance window |
When clustering couldn’t be done during the maintenance window |
|
|
No clusters (due to internal reasons) |
Wait for the next maintenance window or modify the maintenance window |
Errors internally, such as wall-e errors (scheduling, calculation, …) |
|
|
No clusters - no ndp neighbors |
Add more APs |
If the APs are not close enough and they’re not ndp neighbors, there are no uwb measurements |
![]() All good
All good
![]() Clients will receive a position but it might be inaccurate
Clients will receive a position but it might be inaccurate
![]() Clients won’t get a position
Clients won’t get a position