
Cisco Secure Connect - Manage DNS Policies
Overview
Domain Name System (DNS) protection is your first line of defense. Nothing stops attacks earlier than DNS-layer security. DNS protection identifies where malicious domains and other dangerous internet infrastructures are staged. Secure DNS servers then block requests coming from these staging sites over any port or protocol, preventing both infiltration and exfiltration attempts. DNS-layer security stops malware earlier and prevents callbacks to attackers if infected machines connect to your network. In addition, you can use DNS protection to enforce your organization internet usage policies by blocking unwanted website categories. DNS Security is a great solution for protecting guest networks as it doesn't require decryption or an endpoint agent.
Cisco Secure Connect is integrated with Cisco Umbrella for DNS Security. Cisco Umbrella uses statistical and machine learning models to uncover new attacks staged on the internet in combination with the threat intelligence data from Cisco Talos, a team of over 300 security researchers. A more detailed guide to DNS Security and Cisco Umbrella can be found here.
DNS Design
To utilize DNS security protection, DNS packets for public addresses must reach one of Umbrella DNS Resolvers. One of common DNS design is to have local internal DNS resolver for internally defined domains and have set forwarder to resolve the public addresses. Though this is up to a network administrator and company preferred DNS design.
Plan Before You Start
Before you start implementing policies, we recommend that you read through these policy sections of our documentation in full. Decide what security and access controls should be put in place by users or groups of users.
You can have more than one DNS policy and your identities can be added to any number of policies, however, the order of the policies matter. Umbrella applies the first matching policy to your identity and immediately stops evaluating policies. If no matching policy is found, Umbrella applies the DNS default policy. Because of the way Umbrella evaluates identities against policies, it's important that you configure policies correctly for each of your organization's identities. An error in configuration may result in unintended results: identities being left unprotected to various threats or users accessing destinations you may want blocked. Plan and design your policies before you build them. For some helpful suggestions, see Best Practices for DNS Policies.
There is always at least one policy—the Default policy. This default policy applies to all identities and cannot be deleted—you can, however, configure it to meet your organization's unique requirements. The default policy is applied to an identity when no other policy matches that identity. Thus, the Default policy is a catch-all to ensure that all identities within your organization receive at least a minimum of Umbrella protection.
You create DNS policies through the Policy wizard, which is made up of two parts. In the first part of the wizard, you select the identities to which the policy applies and select which components should be enabled and configured for the policy. In the second part of the wizard, you configure each component of the policy that was selected in part one of the wizard. These components are made available as steps in the wizard. Once the new policy is saved, it may take upwards of five minutes for the policy to replicate through Umbrella’s global infrastructure and start taking effect.
MX Auto VPN and DNS Security
Secure Connect will default all traffic to the Auto VPN tunnels, except more specific routes to other SD-WAN sites. This rule applies to all DNS traffic as well.
When DNS traffic gets routed into AutoVPN tunnels, and reach Umbrella DNS Resolvers with source IP as public IP address, the network identity is lost. In that situation, Umbrella DNS Resolvers cannot apply DNS-based policies as the source IP will not match your organization.
There are two ways to ensure that DNS Layer security is not impacted by the cloud firewall. The first scenario is send traffic for destination port 53 to IP address 208.67.222.222 and 208.67.220.220 outside of the Secure Connect tunnels. This can be accomplished by configuring VPN exclusion for DNS traffic which will send DNS traffic outside of VPN tunnel and all DNS traffic is subject to single policy. The second method is to configure DNS API integration that registers network devices to umbrella organization and adds device identifier to all traversing DNS packets. API DNS integration can be configured more granular as it can apply different policies to different group types (subnets, clients, SSIDs). DNS API integration feature is available for an MX with Advanced Security license.
L3 VPN Exclusion
To configure L3 VPN Exclusion for the Umbrella Resolver IP addresses in Meraki Dashboard follow these steps:
- Navigate to Security & SD-WAN > Configure > Site-to-Site VPN
- If the site is configured as a Spoke ensure that the two Secure Connect tunnels are configured as Hubs and that they do not have the Default route option checked.
- Navigate to Security & SD-WAN > Configure > SD-WAN & traffic shaping
- Scroll down to Local Internet breakout > VPN exclusion rules and click Add +
- Under Customer expressions, Select protocol Any.
- For the Destination, input the Umbrella resolver IP address 208.67.222.222/32 and port 53, click Add expression
- Repeat for IP address 208.67.220.220
- Save Changes
DNS Security must have ability to identify source IP of DNS packets that belongs to your org. For this we need to register public IP to the Umbrella organization. Two different organizations cannot have same public IP address registered.
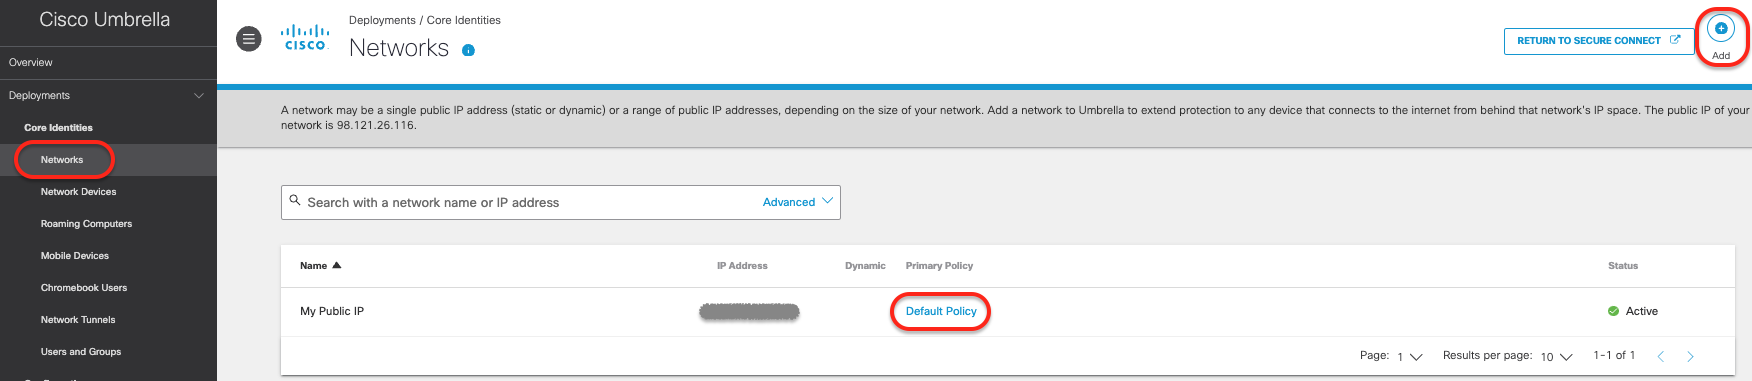
- Navigate to Secure Connect > Settings > Additional Configurations
- Navigate to Deployments > Core Identities > Networks and click Add +
- Add Network Name, IP Address and click Save
- By default Default DNS Policy is assigned to this Identity
DNS API Integration
If your organization has not yet implemented DNS protection for your Meraki sites, another option is to configure the API integration for Umbrella DNS policies in the Meraki Dashboard. This method will use network devices as the identity to apply policy to as opposed to using the public IP address from the Meraki Site. Given the nature of how this integration works, it also prevents users from circumventing Umbrella DNS policies by changing their DNS resolver configuration on their end user system. MX DNS integration will send all UDP DNS (port 53) traffic through the VPN tunnel with network device as identifier. MR DNS integration will send all UDP and TCP DNS (port 53) traffic via VPN tunnel with network device as identifier. This integration currently doesn't support DNS over HTTPS (DOH), and DNS over TLS (DOT) using TCP port 853.
To exclude certain DNS packets from inspection by MX or MR, DNS Exclusion should be configured under Umbrella Protection. This allows administrators to specify domains that should be excluded from Umbrella filtering. DNS requests for excluded domains will not be redirected to Umbrella and will instead be forwarded to the DNS server specified by the client. This is extremely useful for preventing DNS requests for local resources from being redirected to Umbrella and instead allowing them to reach internal DNS servers to resolve correctly.
Details on how to perform API DNS integration and the configuration options:
Remote VPN Access and DNS Security
By default, DNS Policies will not be applied to Remote Access users. The recommended method is to install the Umbrella Security Module (was Roaming Security Module) which will add a 'roaming computer' identity to the DNS requests. Roaming Security Module is used with AnyConnect Client. Since we are moving to Secure Client for Remote User VPN Access we will solely focus on Umbrella Module which can be installed directly with Secure Client.
Umbrella Security Module will send all DNS queries directly to Umbrella except for configured internal domains. To ensure uninterrupted access to internal resources, administrators should add the appropriate domains to the Internal Domains list. Umbrella syncs the internal domains to your roaming users. All domains added to the Internal Domains list resolve DNS records as if the Umbrella roaming client was not installed on the computer.
Follow the configuration steps at Domain Management before installing Umbrella Security Module.
More information on deploying Cisco Secure Client can be found here: Cisco Secure Client with Umbrella Module Installation
Remote VPN Access configuration also affects how DNS is handheld. Check Network and Traffic Steering Configuration here.
To apply DNS polices to Remote VPN Access users please follow the steps here:
Create Policies for Remote Access (Secure Connect) Users
Umbrella Module allows clients to have DNS and SWG provided cloud security even if not connected via VPN. This can be configured under Remote Access configuration page.
Adding Policies
Presently DNS policies are being configured on the Cisco Umbrella dashboard. You will need to navigate to Umbrella dashboard from Cisco Secure Connect.
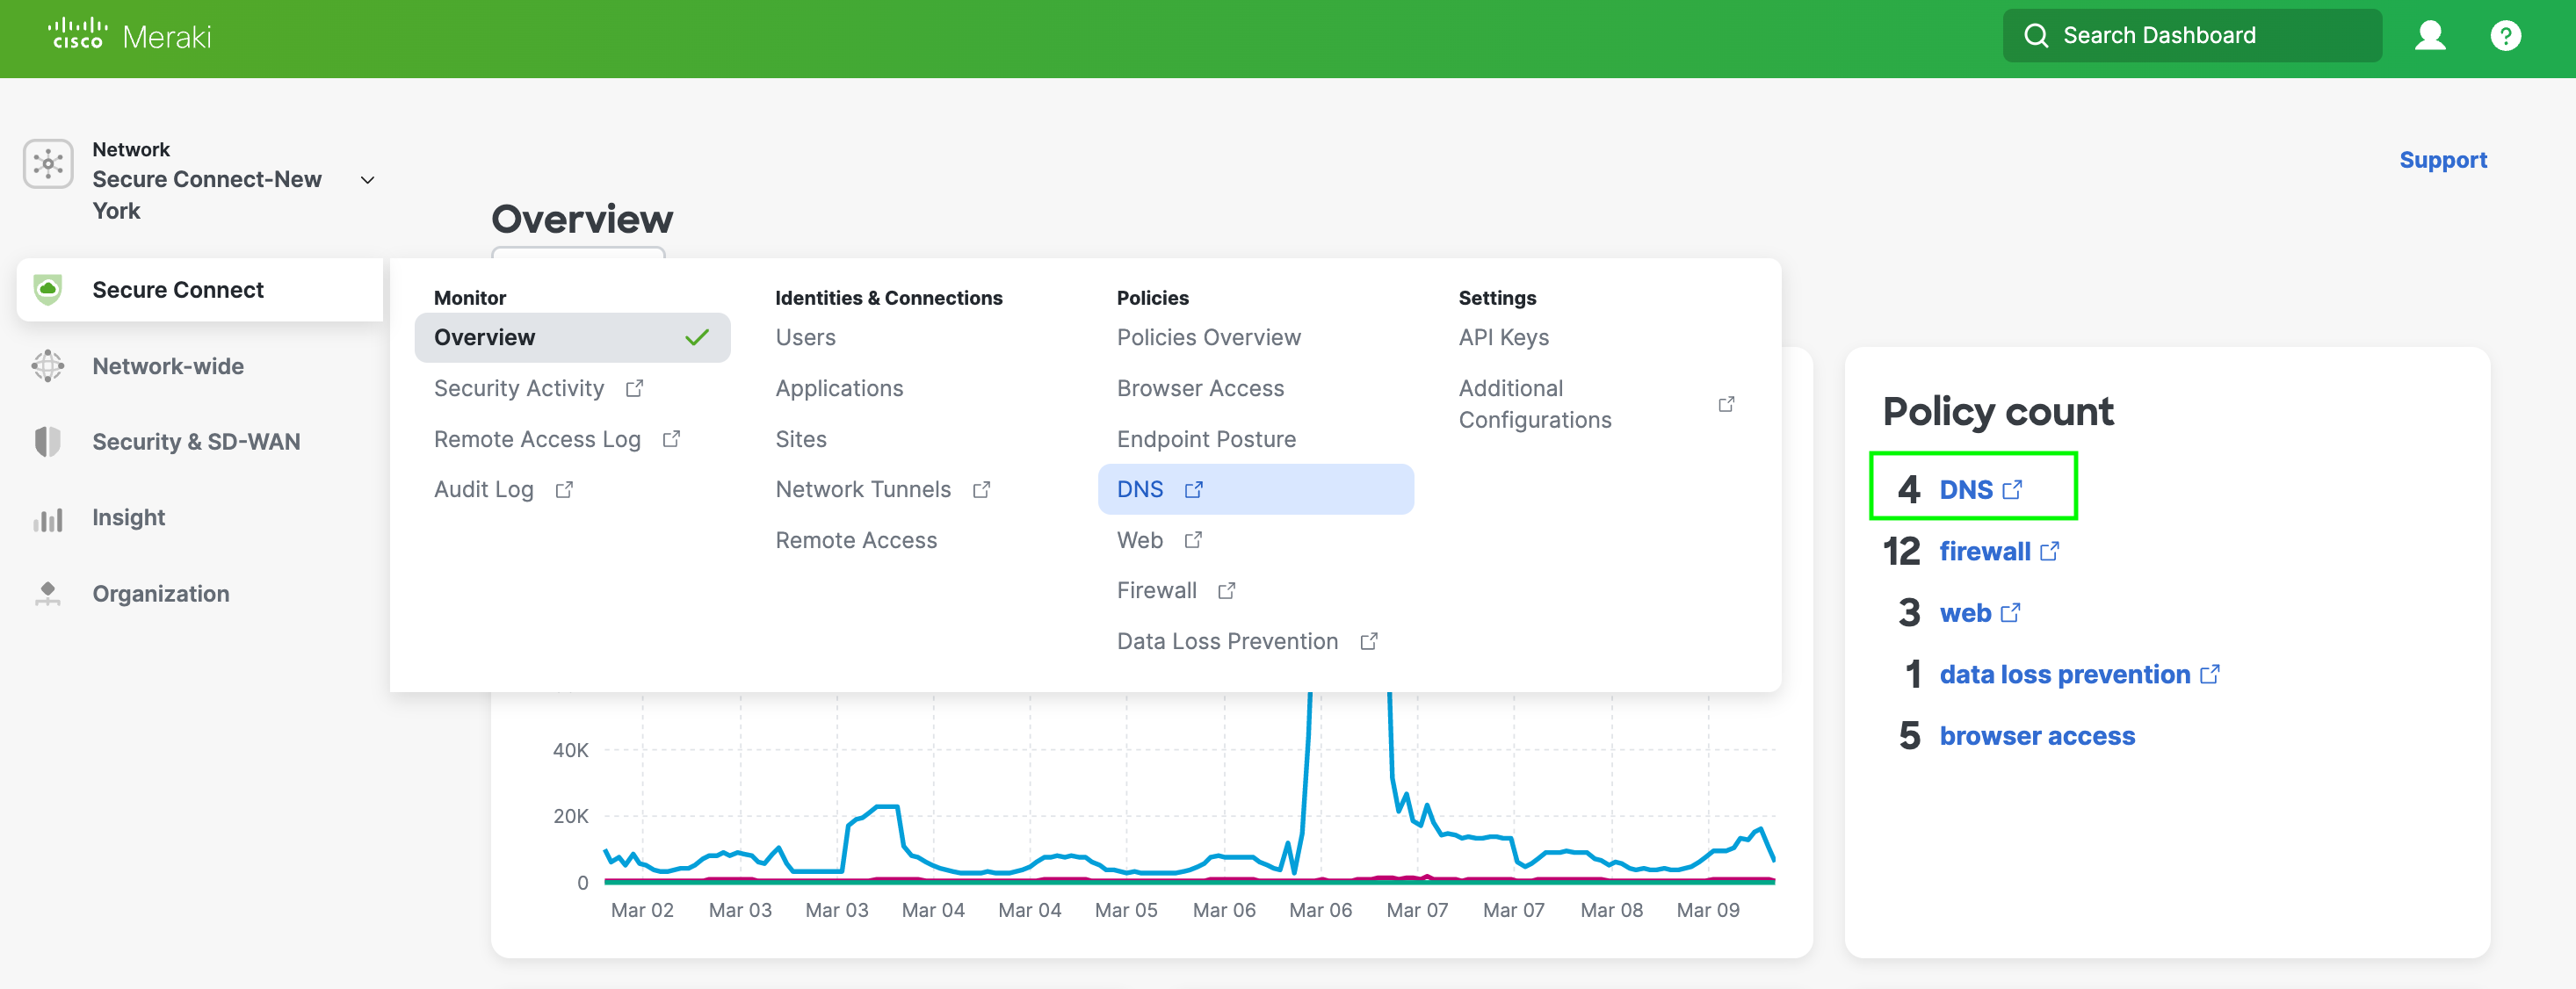
- To get to the Umbrella DNS Policies page from the Secure Connect Dashboard click on the DNS link in the Policy Count card or go to the menu and click on DNS under Policies column.
- Below is the Umbrella DNS Policy page. You click on the Add button in the top right corner to add a policy.

- Go to the Resources section below for more information on how to create and test web policies.
Resources
The Cisco Umbrella sites has detailed information on configuring and testing policies. Below are links to the key DNS policy guides.
Best Practices for DNS Policies
Umbrella Roaming Security: Cisco Secure Client
Enforce SafeSearch for DNS Policies