

Customizing the Splash Page
Click 日本語 for Japanese
The Cisco Meraki Splash page (also known as a 'captive portal') can provide a customized branding experience to wireless users in addition to prompting for username/password credentials. For example, the splash page can be customized to display a corporate logo and include an acceptable use agreement or a privacy statement for an open guest wireless network.
This article provides an overview customizable options on the Splash page once it is enabled.
Basic Splash Page Customization
Custom Messaging/Terms of Access
To create a custom messaging/terms of access:
-
In Dashboard, navigate to Wireless/Security appliance > Configure > Splash page.
-
Select the desired SSID/VLAN from the SSID/VLAN drop-down menu at the top of the page.
-
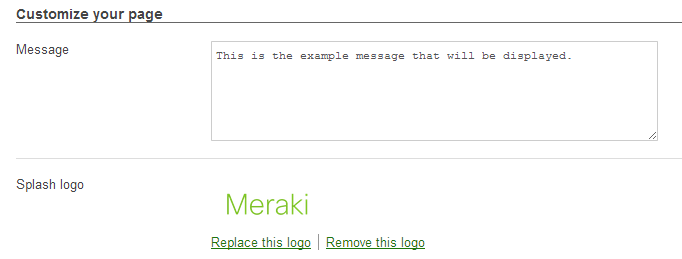
In the Customize your page region of the page, enter the statement for your end users in the Message box.
- Select Save Changes at the bottom of the page.
The custom Message is treated as HTML. Thus, any formatting and spacing will be lost when presented on the splash page. Any special formatting will need to be done in HTML.
ex. For a new line, insert a <br/>

Custom Consent Message
Meraki splash pages allow you to create a custom consent message, enabling administrators to notify end users that their data may be collected if they connect to the network. This custom splash page message can also be used to refer users to tools they may use to opt out of certain data collection services. The custom Consent Message is treated as HTML. Thus, any formatting and spacing will be lost when presented on the splash page. Any special formatting will need to be done in HTML.
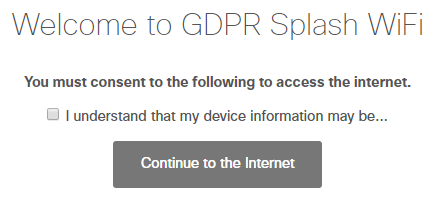
It is the administrator's responsibility to provide notice to, and obtain any necessary consents from, your network users regarding collection, processing, and storage of their data. Be sure to review applicable law for consent requirements in your location if you rely on consent to collect and process personal data.
To create a custom consent message:
- In the dashboard, navigate to Wireless/Security & SD-WAN > Configure > Splash page
- Select the desired SSID/VLAN from the SSID/VLAN drop-down menu at the top of the page
- In the Customize your consent message region of the page, select "On"
- Enter your custom message, which users must consent to in order to use your network
- Choose "Save changes" at the bottom of the page
Note that this Custom Consent Message is not compatible with/will not be displayed with the Fluid Theme, and must be used with the Modern theme.
Additionally, 'Cisco Identity Services Engine (ISE) Authentication,' 'Endpoint management enrollment,' and 'Sign-on with Facebook Wifi' are not supported with this Custom Consent Message because Meraki does not render the splash page for those splash-types. For the listed options, the splash pages are rendered through a 3rd party service.
Custom Logo/Branding
To upload a custom logo:
-
In Dashboard, navigate to Wireless/Security & SD-WAN > Configure > Splash page.
-
Select the desired SSID/VLAN from the SSID/VLAN drop-down menu at the top of the page.
-
In the Customize your page region of the page, select Upload a logo from the Splash logo section.
-
Click Choose File.
-
Select the desired file and click Open.
-
Click Save Changes at the bottom of the page.
To change this logo in the future select Replace this logo, to remove it altogether select Remove this logo. See "About Splash Page Logo, Image, HTML and CSS files" for required specifications of logo file-type and size.
Changing Language
For changing the language on your Splash page, refer to our primary Splash Page article.
Billing (paid access)
When Billing (paid access) is chosen as the Splash page, the basic configuration from sections 1a through 1c are the only options available. Customization is unavailable because it would expose the network to possible malicious behavior. If the customized page is not properly written, it could easily result in a hacker modifying code to grant unauthorized access and possibly harvest customer information.
Examples of Simple Click-through and Sign-On Splash Pages
The following are previews of what the end-user will see on their browsers:
Click-Through Splash Page:

Sign-on with Meraki authentication Splash Page:

Splash Behavior - Frequency and URL Redirect
Splash behavior can be configured for Splash frequency and URL redirects.
For Splash frequency information, see the knowledge base article found here.
To redirect clients to a specific URL after the splash page, enter the specified URL as seen below:

Advanced Splash page Customization
The Cisco Meraki dashboard offers many capabilities for customers to fully customize their pages beyond the basic configuration. The following lists these options along with corresponding Knowledge Base articles that will dive deeper into the subject.
Custom Themes
There are three official themes available for Splash pages which will determine the look and feel of your page:

Much like creating a website, Splash pages offer the capability to customize themes even further outside of the Official themes. This section will walk you through some of the steps needed for creating a custom theme.
Custom splash page themes are shared across dashboard organizations, which means they can be used across different networks in the organization. Admins with network write permissions on one network will be able to edit custom splash pages that span the entire organization, which would affect other networks in the same organization that also use splash pages.
Creating a Custom Theme
- Click on Create something new to start creating the custom theme for the splash page.

- Pick a base theme from the drop-down menu.
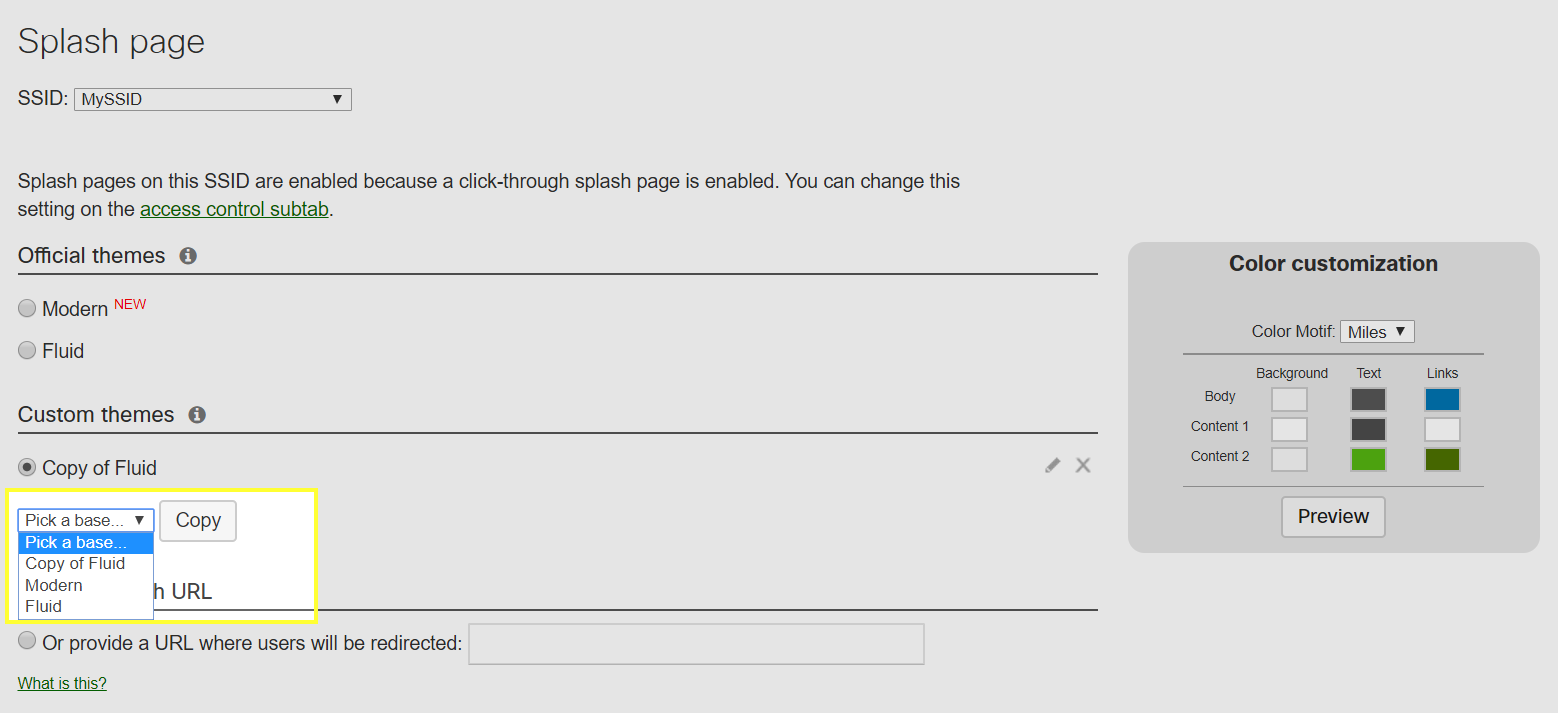
- Click the Copy button.
Editing a Custom Theme Color
- Choose the custom theme to edit.
- Customize the color of the background, text and links as desired.
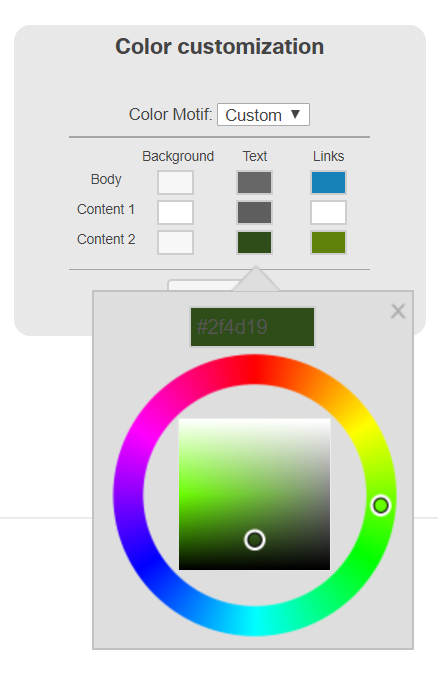
- Click on Save changes at the bottom of the page to apply the changes.
- The Color Motif will automatically change to Custom.
Editing the Custom Theme's HTML Files
This section requires working knowledge of HTML and CSS.
- Click on the pencil icon right next to the custom theme.

- Select the available HTML files and click on edit.

- continue_with ads.html – This is the click-through HTML file that includes a side advertisement.
- auth.html – This is the authentication portal HTML file.
- continue.html – This is the click-through HTML file without the side advertisement.
- sms.html – This is the HTML file for Short Message Service (SMS) authentication.
- blocked.html – This is the HTML file of the blocked page displayed to users that cannot authenticate successfully.
If the page becomes unusable after an edit and cannot be corrected, delete the custom theme and start again. While making changes to the templates, it is important to make note of what is being added and/or removed. Deleting certain lines can have unintended effects. Specifically, if the variable <meta name="viewport" content="user-scalable = yes"> is removed, the page will no longer scale when moving from a computer browser to a phone or tablet.
- Click on save to apply the settings.
Renaming a Custom Theme
- Click on the pencil icon right next to the custom theme.
- Double click the name of the custom theme.

- Rename as desired and click ok to apply changes.
Deleting a Custom Theme
- Click the "X" next to the custom theme to delete.
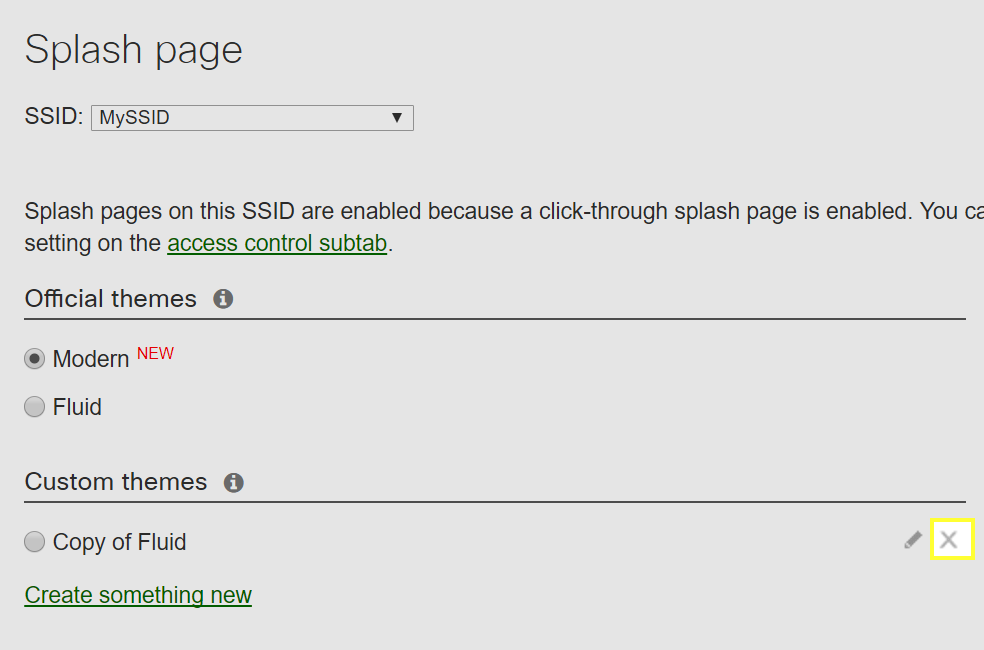
- Click on Save changes to apply.
Previewing the Splash Page
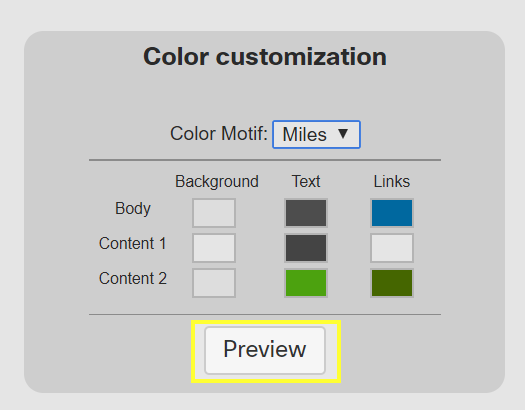
- Choose the custom theme to preview.
- Click on the Preview option on upper part of the grayed box.
Custom Splash URL
Splash pages can be used with an externally hosted captive portal. Details for configuring your SSID with these settings can be found in this KB article here.
For an explanation of data flow and necessary network configurations to allow communication with the cloud, please refer to our whitepaper on the subject.
Allowed HTML Tags and Attributes
The Cisco Meraki Dashboard only allows the following HTML tags and attributes in custom splash page themes:
Tags:
a, abbr, b, bdo, big, blockquote, body, br, caption, center, cite, code, col, colgroup, dd, del, dfn, div, dl, dt, em, form, figcaption, figure, font, h1, h2, h3, h4, h5, h6, head, hgroup, hr, html, i, img, input, ins, kbd, label, li, link, mark, meta, ol, p, pre, q, rp, rt, ruby, s, samp, small, span, strike, strong, style, sub, sup, table, tbody, td, tfoot, th, thead, time, title, tr, u, ul, var, wbr
Attributes allowed on all tags:
class, dir, id, lang, name, style, title
Attributes allowed only on specific tags:
- a - href, target (Ensure all URLS have https:// prepended or the URL may not work)
- blockquote - cite
- col - span, width
- colgroup - span, width
- del - cite, datetime
- font - color, face, size
- form - method, action
- h1,h2,h3,h4,h5,h6 - align
- hr - align, noshade, size, width
- html - xmlns
- img - align, alt, height, src, width
- input - type, value, name, width
- ins - cite, datetime
- label - for
- link - href, media, rel, type, charset
- meta - name, content
- ol - start, reversed, type
- p - align
- q - cite
- style - type, media, dir, lang, title
- table - border, cellspacing, cellpadding, summary, width
- td - abbr, align, axis, colspan, rowspan, scope, valign, width
- th - abbr, axis, colspan, rowspan, scope, width
- time - datetime, pubdate
- ul - type
Splash Page Variables
Cisco Meraki defines a set of variables to represent custom values in the HTML and CSS of the click-through splash page, the splash page with username/password login, or the blocked access page. Each of these pages is editable within a splash page theme under the Configure tab on the Splash Page page.
The following pages are used for the full Splash Page experience:
- auth.html: Displayed for the splash page with username/password login.
- blocked.html: Displayed when a user or device has been blocked.
- continue.html: Displayed for the click-through splash page.
- oauth.html: Displayed for splash pages with oauth enabled.
Note: Only supported with the Modern splash theme. - prepaid.html: Displayed for billing splash with prepaid codes.
- sms.html: Displayed for splash pages with sms auth.
- sponsor.html: Displayed for splash pages with sponsored guest login auth.
When a user is served a splash page, each of these custom strings will be replaced with its underlying value in a simple substitution. The variables can be used anywhere in the HTML or CSS. They should only be used in places where the underlying value will make sense.
For example, the variable $MERAKI:CONTENT2_LINK_COLOR$ will return a value representing a color in the form "#rrggbb" and thus is appropriate for use in style sheets or HTML style attributes where a color is required.
In addition, a variable such as $MERAKI:NETWORK_NAME$ which is intended to return the value of the attached SSID, will only do so if splash for this client is assigned to a specific SSID, and not a VLAN on an MX (which can have multiple associated SSIDs). If the splash page is assigned to a specific SSID, this variable is substituted for said SSID as documented below.
Custom Variable Definitions
$MERAKI:AD_TAG_300x250$
- Returns: HTML (including Javascript)
- Value: An ad tag that inserts a 300 x 250 ad frame.
- Arguments: None
$MERAKI:AUTH_ALREADY_HAVE_ACCOUNT_SIGN_IN_HERE_FORM$
-
Returns: HTML
-
Value: The login form, with fields for the user's email address and password. Used for networks with user-based authentication enabled.
-
Arguments: None
$MERAKI:AUTH_ALREADY_HAVE_ACCOUNT_SIGN_IN_HERE_TEXT$
- Returns: Text string
- Value: “If you already have an account on this network, sign in here” in the local language of the network.
- Arguments: None
$MERAKI:AUTH_AND_CONTINUE_URL$
- Returns: URL
- Value: The URL that the user should follow to get authorized on the network. The user will be redirected to the URL that he was trying to fetch when he was served the splash page. Used to create the "Continue to the Internet" link. Used for open access (free) networks.
- Arguments: None
$MERAKI:AUTH_CREATE_ACCOUNT_FORM$
- Returns: HTML
- Value: The form that allows the user to create an account.
- Arguments: None
$MERAKI:AUTH_CREATE_ACCOUNT_TEXT$
- Returns: Text string
- Value: “If you don’t have an account, create one here” in the local language of the network.
- Arguments: None
$MERAKI:AUTH_REQUIRED_FOR_ACCESS$
- Returns: Text string
- Value: "You will need to be on the list of authorized users for this network in order to access the Internet.".
- Arguments: None
$MERAKI:AUTH_URL(http://example.com/)$
- Returns: URL
- Value: Similar to AUTH_AND_CONTINUE_URL, but redirects to a URL that the administrator specifies, rather than the URL the user was originally trying to load. This can be used to display a post-splash "Welcome" or "Thank you" message.
- Arguments: URL
$MERAKI:BODY_BACKGROUND_COLOR$
- Returns: Color value in the form "#ffffff"
- Value: The background color of the splash page.
- Arguments: None
$MERAKI:BODY_LINK_COLOR$
- Returns: Color value in the form "#ffffff"
- Value: The color for links as specified in the <body> tag on the splash page.
- Arguments: None
$MERAKI:BODY_TEXT_COLOR$
- Returns: Color value in the form "#ffffff"
- Value: The color for the body as specified in the <body> tag on the splash page.
- Arguments: None
$MERAKI:CLASSIC_TOP_HALF_RIGHT_PADDING$
- Returns: “0” or “215px”Meraki Cloud Controller Product Manual | 121
- Value:
- 0 = there is no custom image on the splash screen
- 215px = there is a custom image on the splash screen
- Arguments: None
$MERAKI:CONTENT1_BACKGROUND_COLOR$
- Returns: Color value in the form "#ffffff"
- Value: Background color to the row of colors with the same name as “CONTENT1”.
- Arguments: None
$MERAKI:CONTENT1_LINK_COLOR$
- Returns: Color value in the form "#ffffff"
- Value: The color for links for the row of colors with the same name as “CONTENT1”.
- Arguments: None
$MERAKI:CONTENT1_TEXT_COLOR$
- Returns: Color value in the form "#ffffff"
- Value: Text color for the row of colors with the same name as “CONTENT1”.
- Arguments: None
$MERAKI:CONTENT2_BACKGROUND_COLOR$
- Returns: Color value in the form "#ffffff"
- Value: Background color for the row of colors with the same name as “CONTENT2”.
- Arguments: None
$MERAKI:CONTENT2_LINK_COLOR$
- Returns: Color value in the form "#ffffff"
- Value: Link color for the row of colors with the same name as “CONTENT2”.
- Arguments: None
$MERAKI:CONTENT2_TEXT_COLOR$
- Returns: Color value in the form "#ffffff"
- Value: Text color for the row of colors with the same name as “CONTENT2”.
- Arguments: None
$MERAKI:NETWORK_ADMIN_BLOCK_MESSAGE$
- Returns: HTML
- Value: Contains the message the administrator entered on the Clients page of the MCC to be displayed for blocked users.
- Arguments: None
$MERAKI:NETWORK_ADMIN_BLOCKED_YOU$
- Returns: Text
- Value: “This network administrator has prevented you from using the network” in the local language of the network.
- Arguments: None
$MERAKI:NETWORK_LOGO_IMG_TAG$
- Returns: <img> HTML tag
- Value: References the network’s logo.
- Arguments: None
$MERAKI:NETWORK_MESSAGE$
- Returns: Text String
- Value: The custom message entered on the Splash Page page in the MCC. Does not include HTML tags in the text.
- Arguments: None
$MERAKI:NETWORK_NAME$
- Returns: Text String
- Value: The name of the SSID.
- Arguments: None
$MERAKI:NETWORK_SPLASH_IMAGE_IMG_SRC$
- Returns: URL
- Value: Link to the custom image on the splash page.
- Arguments: None
$MERAKI:NETWORK_SPLASH_IMAGE_CONTAINER$
- Returns: <img> HTML tag
- Value: References the network’s Splash Image.
- Arguments: None
$MERAKI:NETWORK_SPLASH_IMAGE_VISIBILITY$
- Returns: “block” or “none
- Represents: Presence of a custom image on the splash page.
- “block” = Image present
- “none” = Image not present
- Arguments: None
$MERAKI:ROUND_CORNERS(div_name,rounding_preferences)$
- Returns: JavaScript
- Value: Rounds the corners of the specified division ("div")
- Arguments: name of the div, a comma, followed by a list of space separated values indicating what corner is to be rounded. Valid rounding_preferences are: Top, Bottom, Left, Right, or any of tl, bl, br, or tr, corresponding to top-left, bottom-left, etc.
- Example: $MERAKI:ROUND_CORNERS(DIVISION_NAME, top bottom)$
$MERAKI:TOOLBAR_PRIVACY_POLICY_LINK$
- Returns: Text String
- Value: “The use of this network is subject to Cisco Meraki’s privacy policy” The words “Privacy policy” are a link to Meraki’s privacy policy statement. If the toolbar is disabled this returns an empty string
- Arguments: None
$MERAKI:USER_ALERTS$Meraki Cloud Controller Product Manual | 123
- Returns: HTML
- Value: A div containing alert messages resulting from the submission of a form (e.g., "login incorrect").
- Arguments: None
$MERAKI:MODERN_AUTH_SMS_INFORMATION_FORM$
- Returns: HTML
- Value: A login textbox, expected input is the user's phone # Used for networks with SMS-based authentication enabled.
- Arguments: None
<div id="right_col">
<div class="login-error $MERAKI:HIDDEN_UNLESS_ERROR_MESSAGES$">
<p>$MERAKI:WARNING_IMAGE$$MERAKI:ERROR_MESSAGES$</p>
</div>
<div id="signin_form" class="formarea form_links">
$MERAKI:MODERN_AUTH_SMS_INFORMATION_FORM$*
</div>
$MERAKI:MODERN_AUTH_SPONSOR_INFORMATION_FORM$
- Returns: HTML
- Value: A form that allows users to enter their names and emails
- Arguments: None
Implementing Terms and Conditions on Splash Page
Some network operators may want to force users to agree to a terms and conditions statement prior to allowing them on the network. This article outlines two possible solutions for T&C implementation on a Splash Page.
Note: These options cannot be implemented for splash pages in networks with a billing plan.
Option #1: Add a scrolling text area for the terms and conditions wording.
- Wrap the T & C wording in an HTML scroll box. Be mindful of users on small screens. There are many ways to do scroll boxes, here is a simple way:
<div style="height:120px;width:450px;overflow:auto;">Add your T&C code here</div>
- Add Meraki magic strings to the code for any continue links:
<p><a href="$MERAKI:AUTH_AND_CONTINUE_URL$" title="I Agree to Terms" id="continue_link">I agree</a>
- [Optional] Keep users on the continue page if they do not agree
<a href="continue.html">I do not agree</a></p>
- [Optional] Keep users on the continue page if they do not agree
- Remove the magic string that automates authorization, delete it from the bottom of the continue page:
$MERAKI:AUTH_ON_PAGE_LOAD$
Option #2: Create a second page with the T&C.
- After creating a custom theme, upload a page for the T & C's on the splash page of the Dashboard. For example "T_and_C.html".
- Create a link on the continue page for users that want to read the T & C:
By clicking continue I agree to <a href="T_AND_C.html"> the terms and conditions.</a></p>
- Ensure the proper Meraki magic strings are associated with any continue links on either page:
<p><a href="$MERAKI:AUTH_AND_CONTINUE_URL$" title="I Agree to Terms" id="continue_link">I agree</a>
- [Optional] Keep users on the continue page if they do not agree:
<a href="continue.html">I do not agree</a></p>
- [Optional] Keep users on the continue page if they do not agree:
- Remove the magic string that automates authorization, delete it from the bottom of the continue page:
$MERAKI:AUTH_ON_PAGE_LOAD$