
Assigning Static IP to Devices on Your Meraki Go Networks
If you prefer to have complete control over what IP addresses your Meraki Go devices have on your network, you can assign a static IP address to them. This document will walk you through how to do that.
The Meraki Go App
As of app version 2.27.0 a static IP addresses can now be configured under the device details view.
- Navigate to Hardware Tab > [Device]
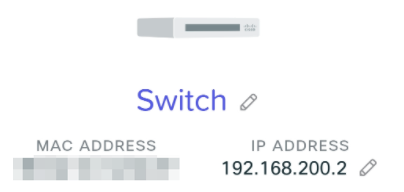
Note the pencil icon next to the IP address.
- Tap the pencil to edit the IP configuration (default is set to DHCP):

- Press Save when you have configured the desired static IP.
Note: It may take up to 5 minutes for your static IP to be reflected in the app. If you provide an invalid IP address the Meraki Go equipment will continue to use and report the DCHP assigned address.
Troubleshooting: Always check the local status page for any potential errors. If the static IP is not reflected within 5 minutes in the app, try using the local status page method below.
The Local Status Page
All Meraki Go devices have a local status page that allows you to view the current status of the Meraki Go device you are connected to, as well as perform some basic configurations. To access the local status page, you will want to connect to one of your Meraki Go networks, and then open a web browser and browse to “my.meraki.com”.
More details about the local status page can be found here.
Assigning a static IP
To assign a static IP, you will need to:
-
Choose the Configure tab at the top of the local status page
-
Enter the serial number of the device you are connected to (all capitals with dashes) as the username, with no password
-
Change the IP Assignment section from DHCP to Static IP
-
Fill in the appropriate static IP details for your network
-
Select save