
How-to Guide: Nearby Cameras in Vision Portal
Introduction
This guide explains how to use the Nearby Cameras feature in the Vision Portal to streamline your monitoring workflow. By allowing you to manually drag and drop cameras into your viewing area, Vision Portal makes it simple to navigate between related feeds.
Purpose and Benefits Nearby Cameras provides full control over your layout, helping you track movement across your site. Benefits include:
- Manual Tracking: Group relevant cameras to follow objects between views.
- Spatial Context: Better understand the physical placement of your cameras.
- Efficiency: Quickly switch between related feeds by dragging them directly into your workspace.
Prerequisites
Software Requirements
This feature requires Vision Portal version v1.27.0 or later. To verify your current version, select What’s New in the top navigation bar.

Role-based Access Control (RBAC)
Because Nearby Camera configurations are applied network-wide, the ability to create or edit these layouts is restricted to administrators. This access model aligns with the existing Video Wall RBAC structure.
| Role | Permission |
| Organization Admin | Create, edit, or delete across all networks. |
| Network-wide Admins | Create, edit, or delete network-wide. |
| Camera Admin | View access (requires access to at least one camera within the layout). |
How to use Nearby Cameras
| Use Case | Description | Benefit |
| Live and Historic Object Tracking | Follow a person or vehicle as they move from the field of view of one camera to an adjacent one. | Keeps the subject in view continuously. |
| Incident Response | Quickly pivot to nearby cameras during an active event to gain different angles or wider coverage of the scene. | Enables faster situational awareness and more informed decision-making during critical moments. |
Step-by-Step Instructions
Configuring Nearby Cameras
- Select Nearby in the control bar located in the bottom right-hand corner of the screen.
- To enter configuration mode click 'Configure'.
- Drag and drop your desired cameras from the list onto the viewing area.
- Tip: If you have your map configured, you can use it to identify camera placement and proximity.
- Note: For help setting up your map, refer to the Mapping and Navigation Guide
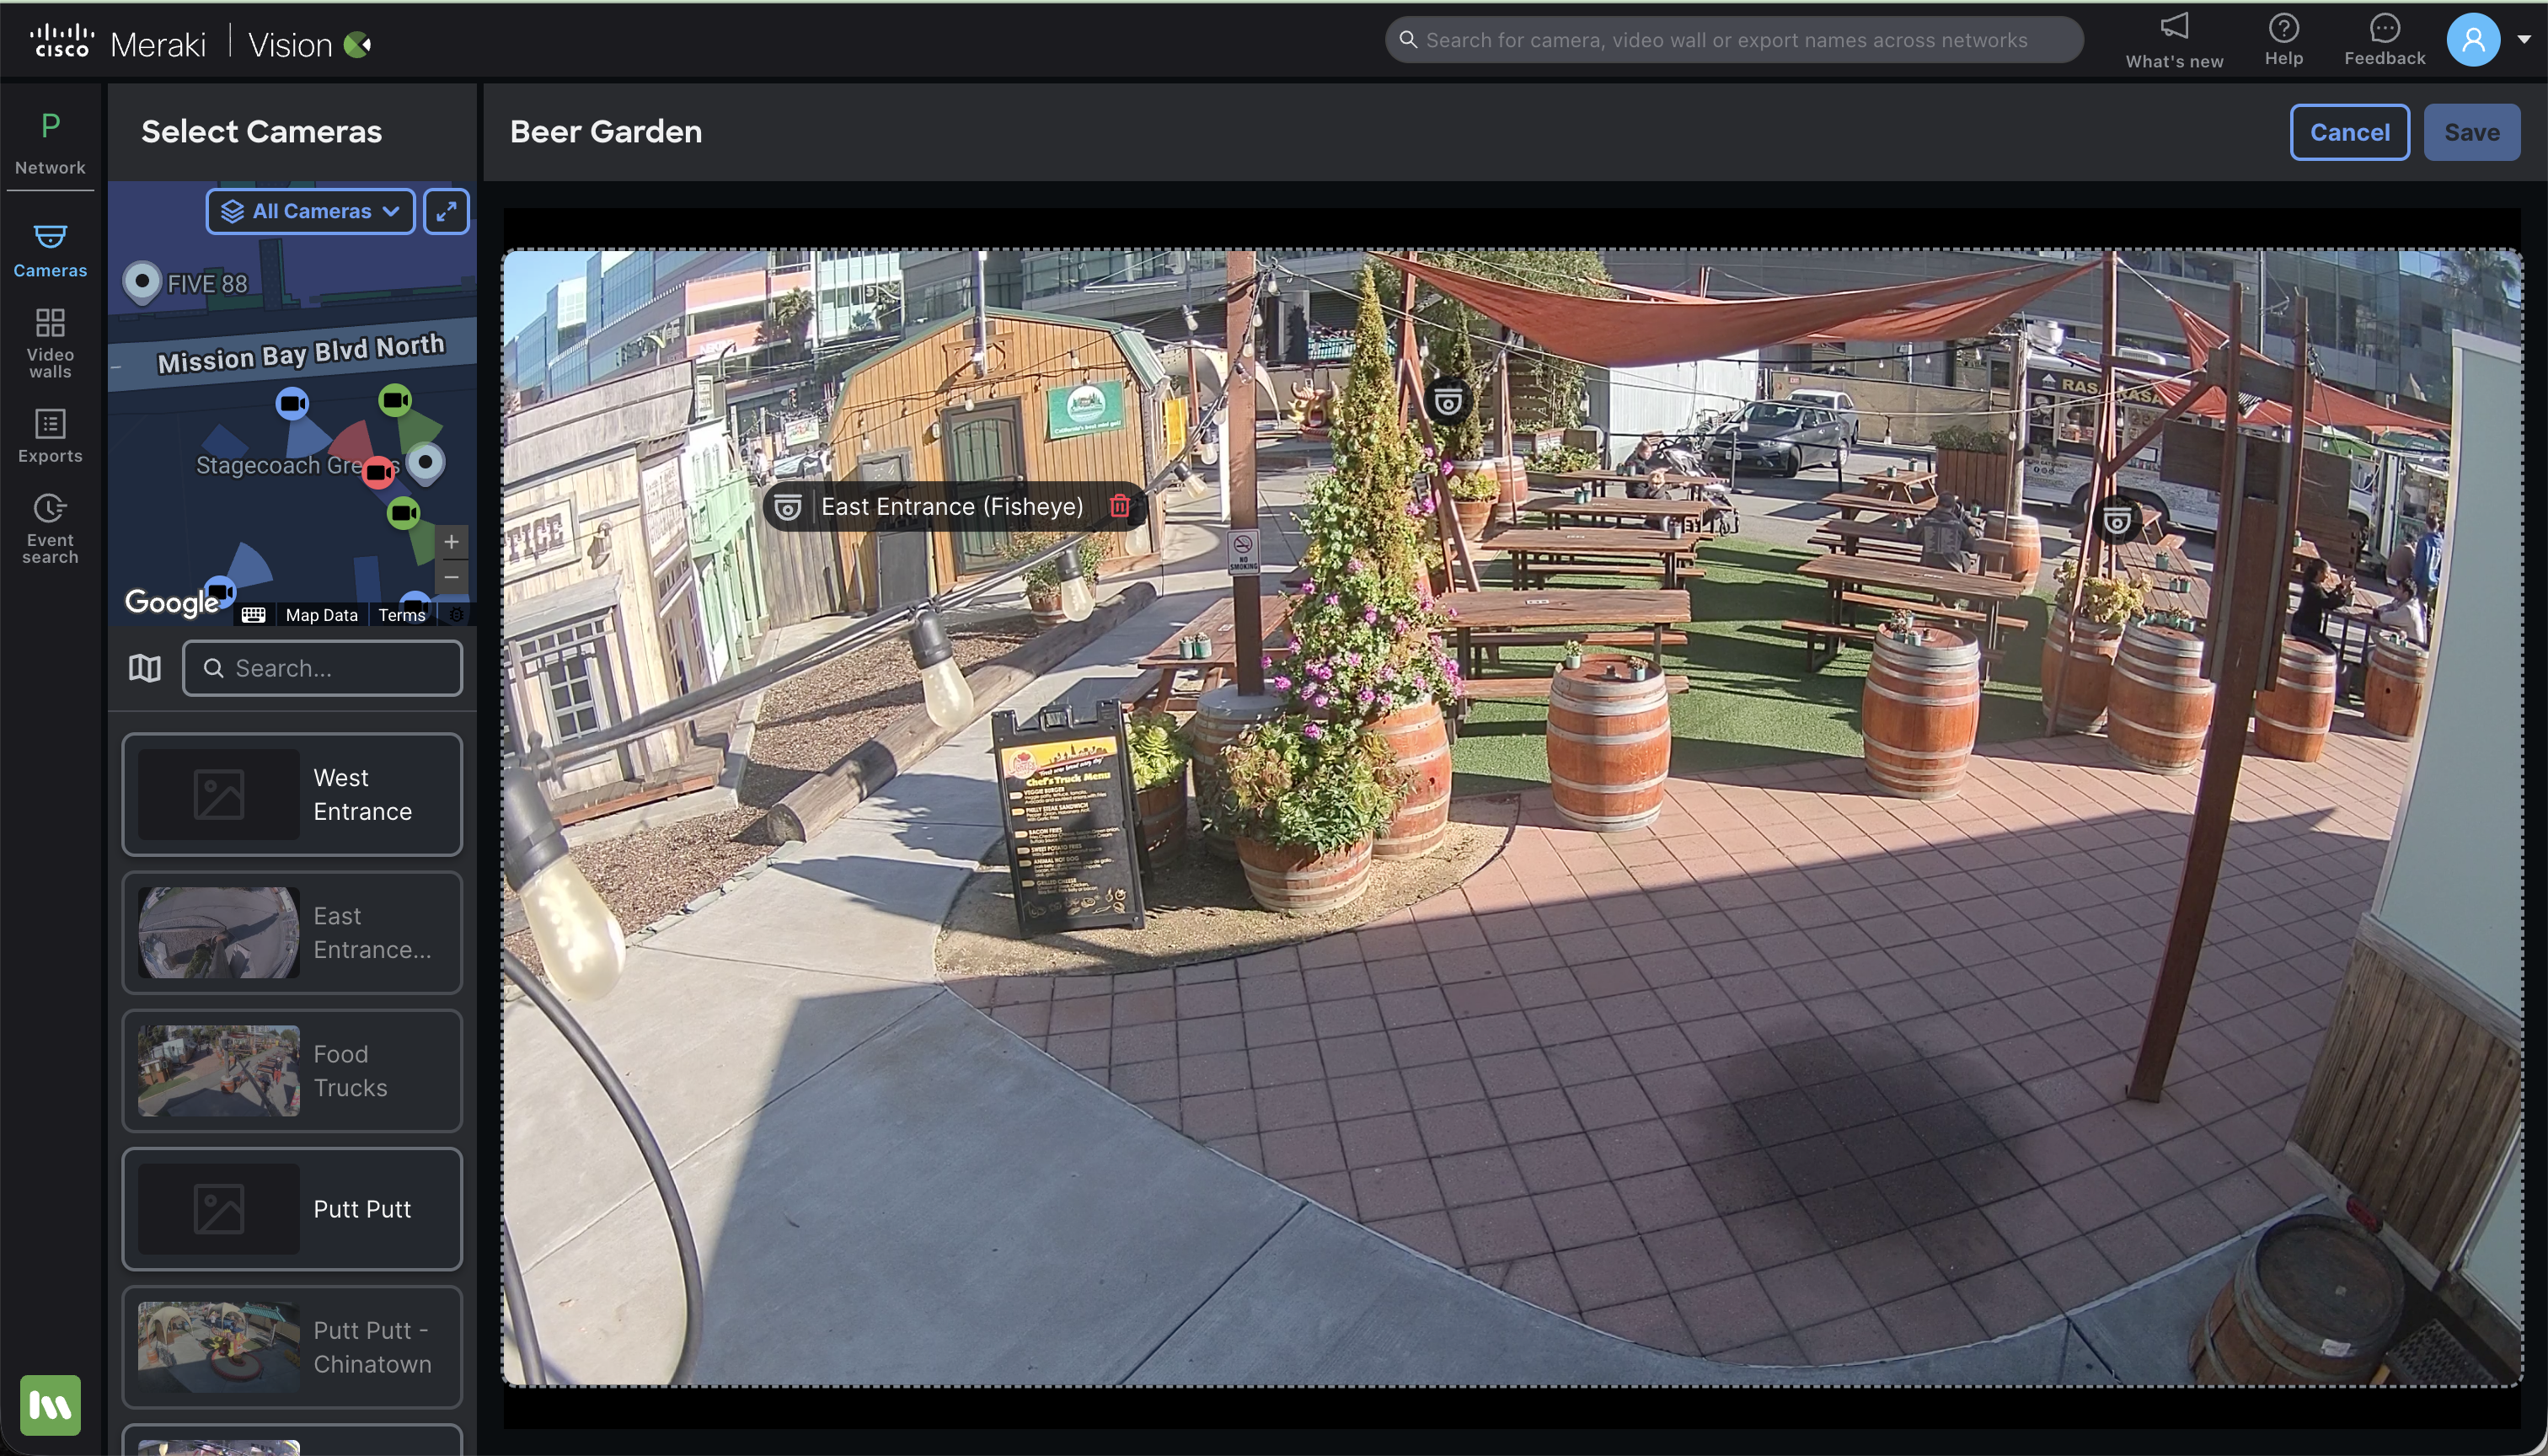
- To confirm your selection, once a camera is added to the view, it will be removed from the selection list.
- Select 'Save' to save your selection.


Viewing your Nearby Cameras
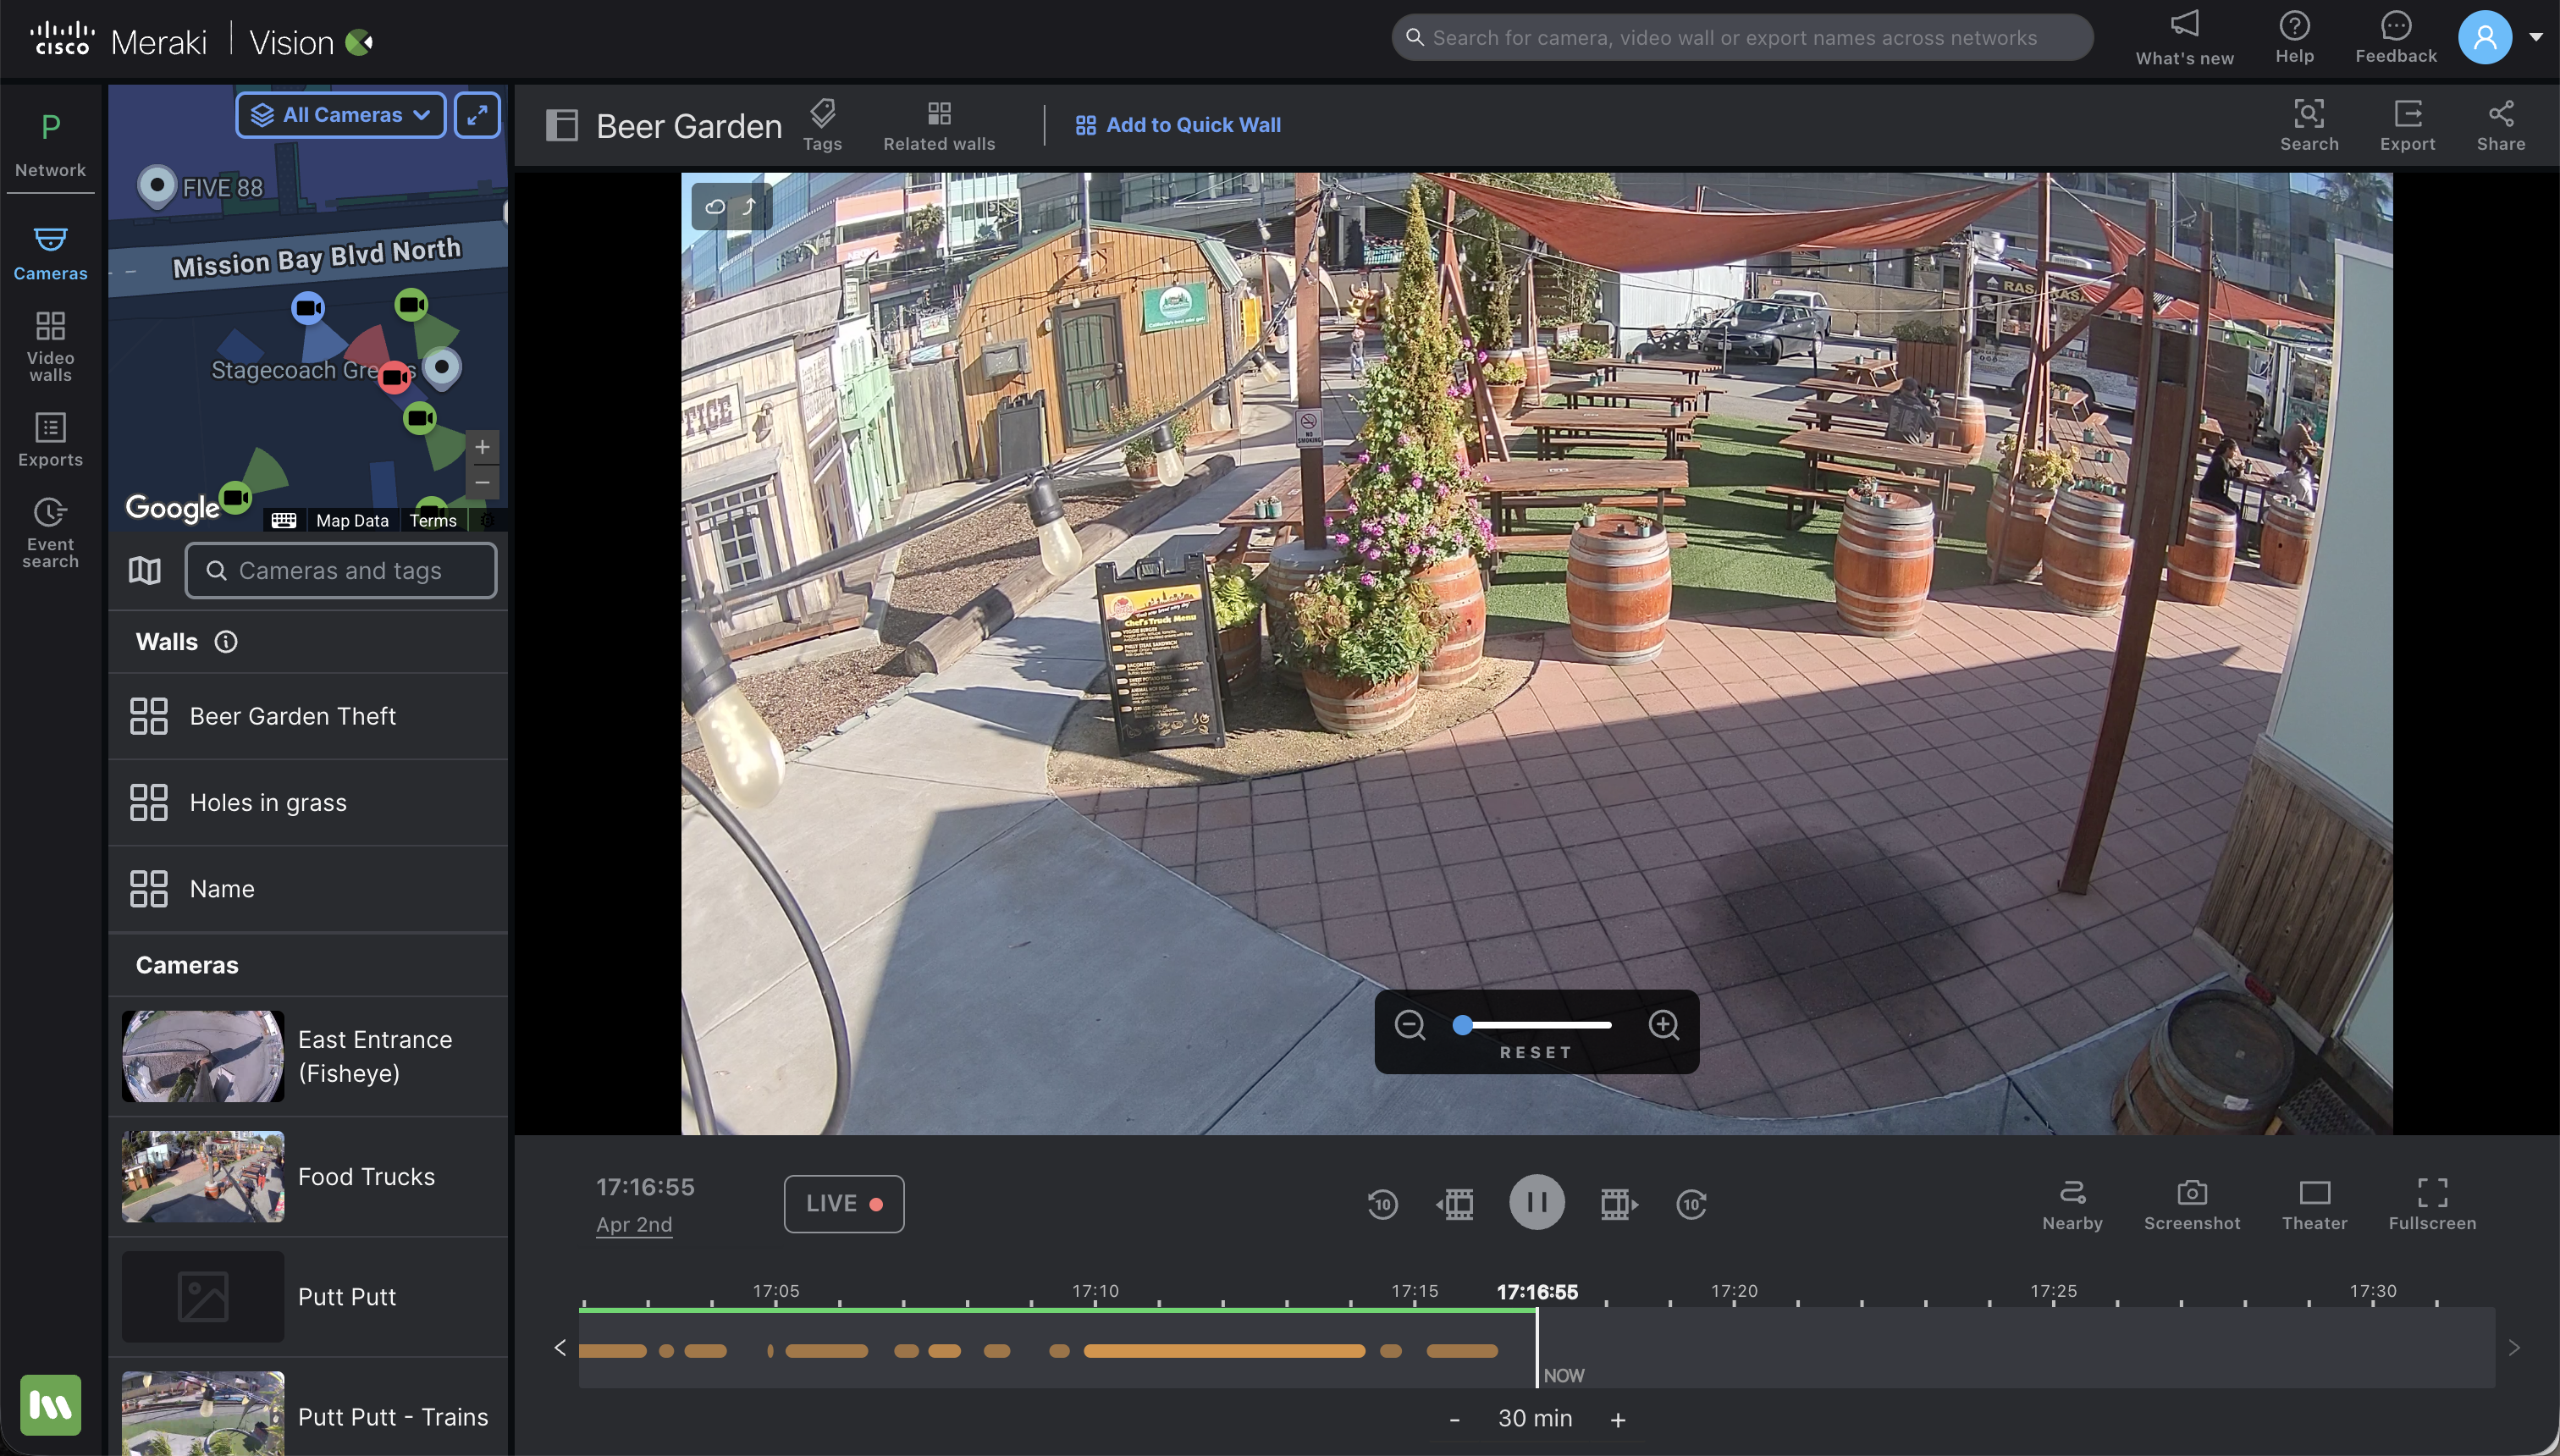
- Select Nearby in the bottom right-hand control bar.
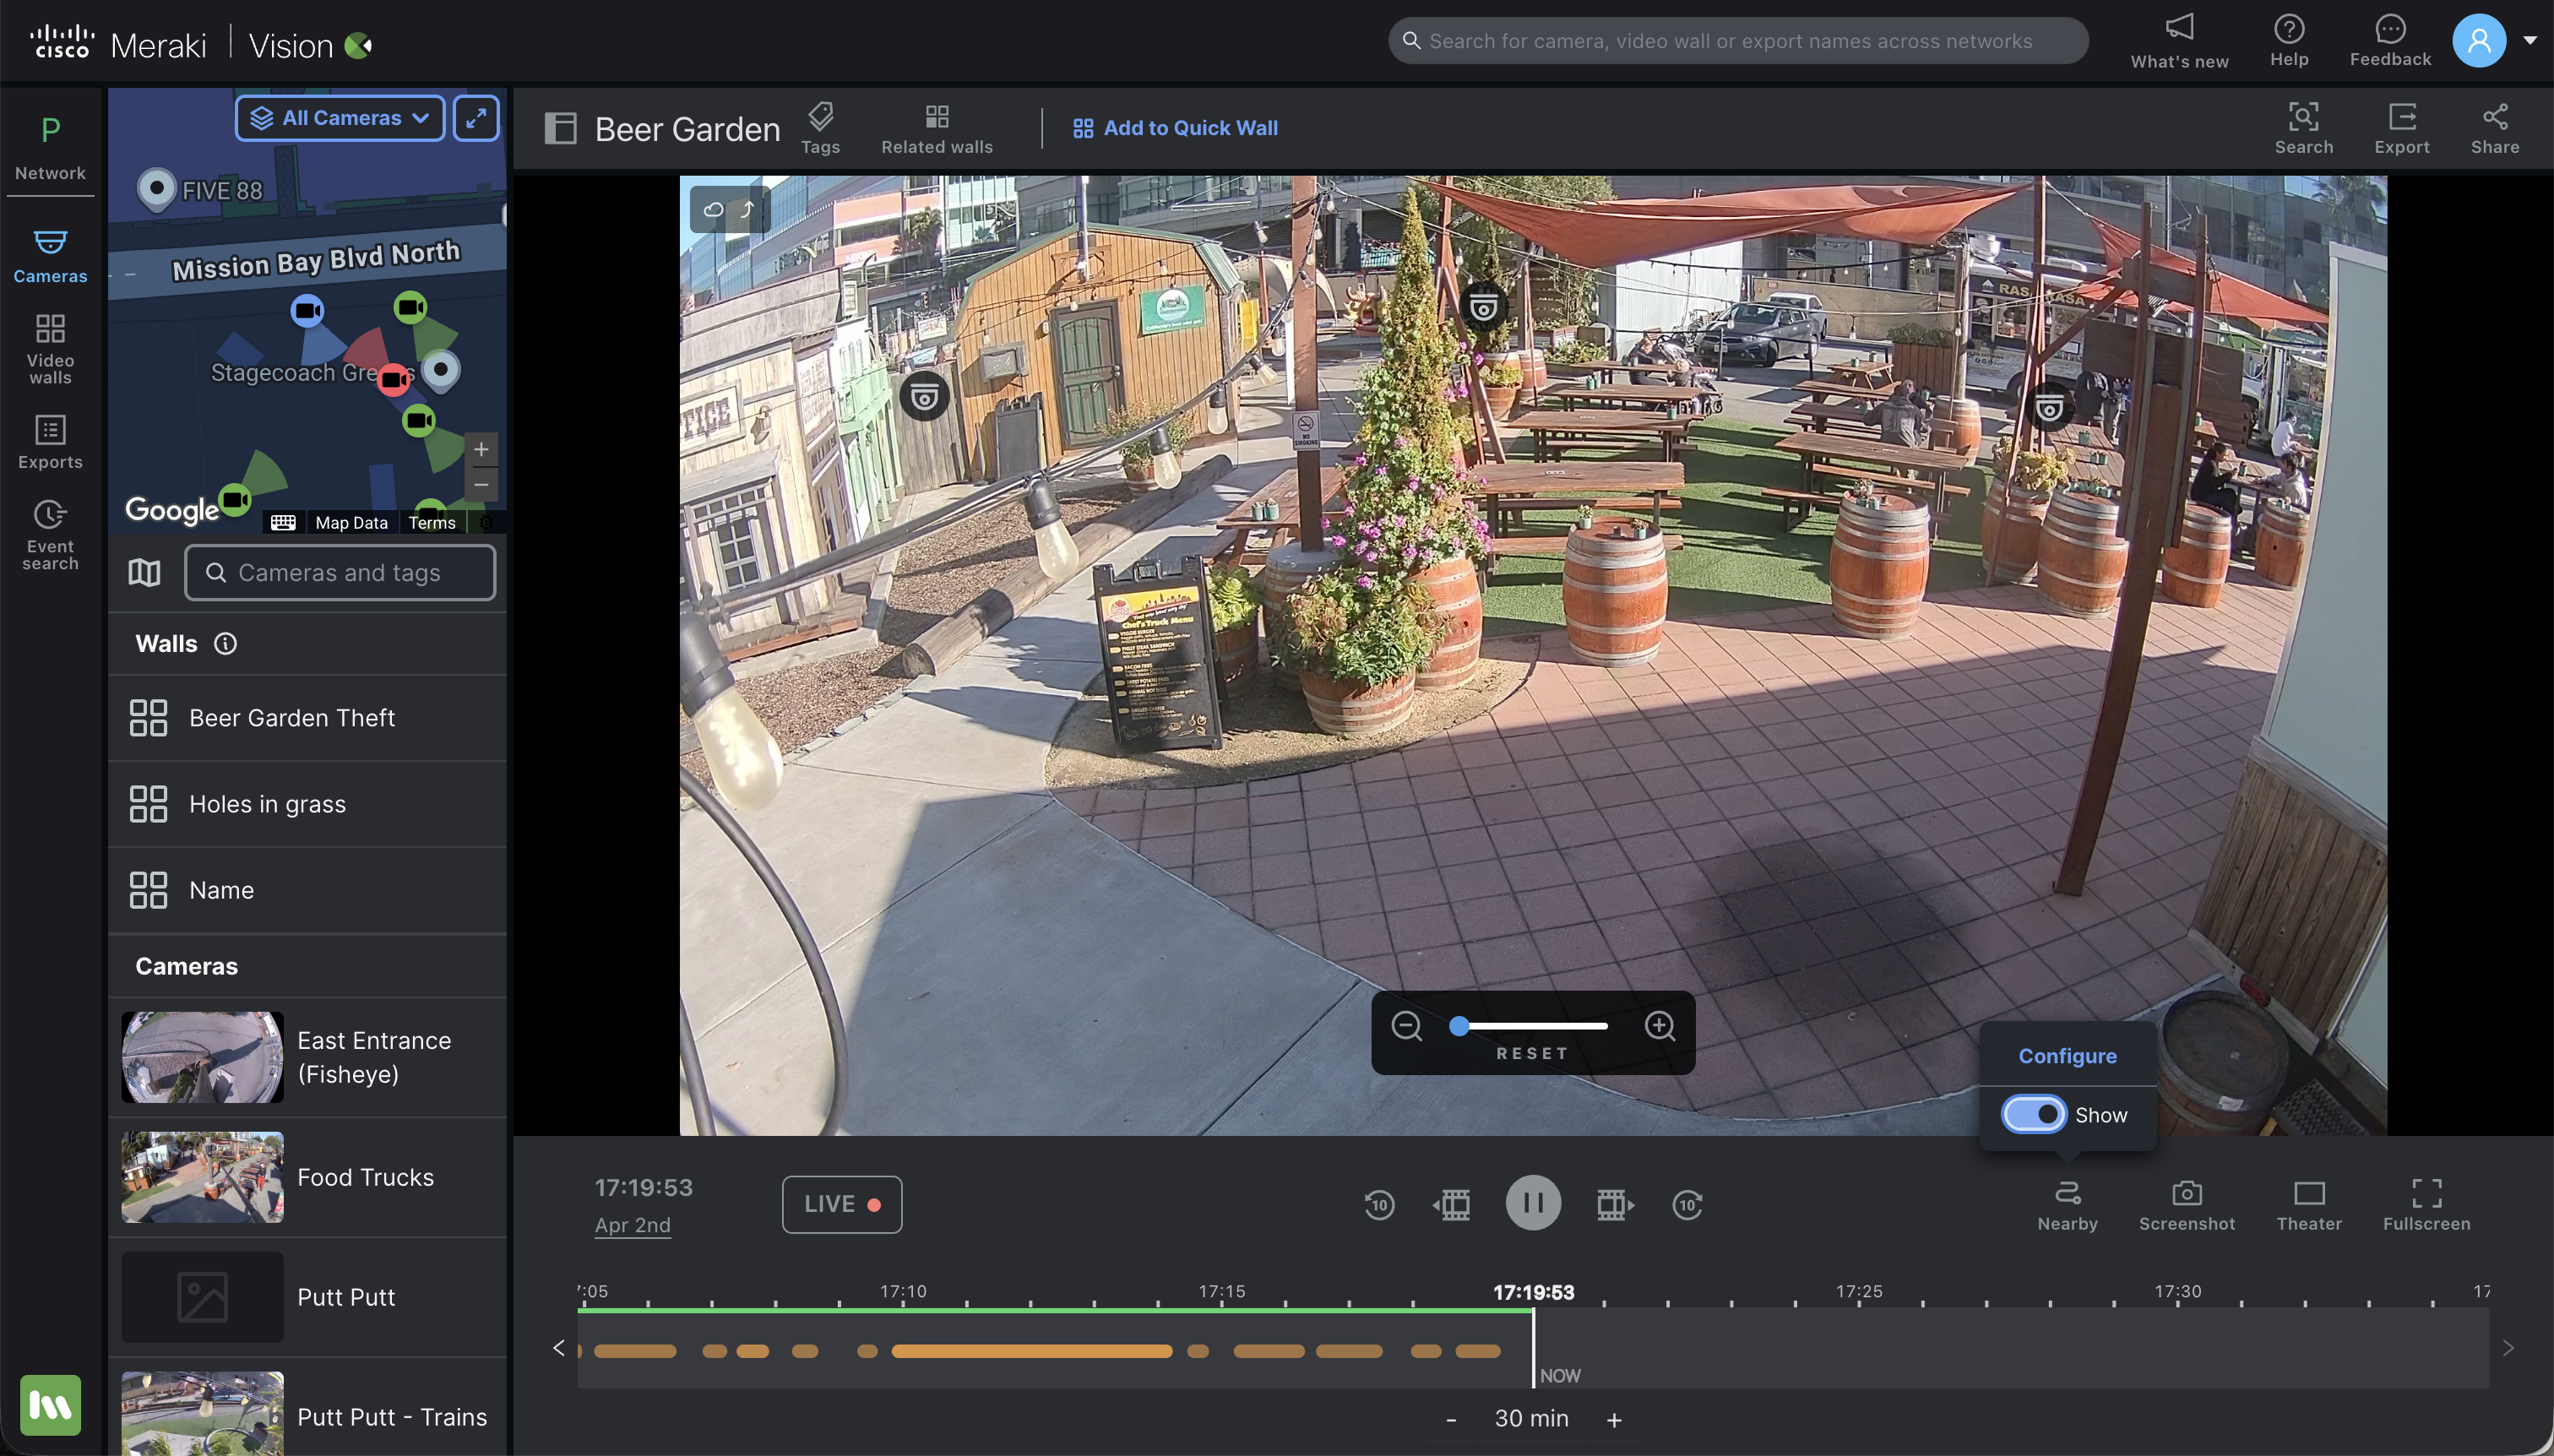
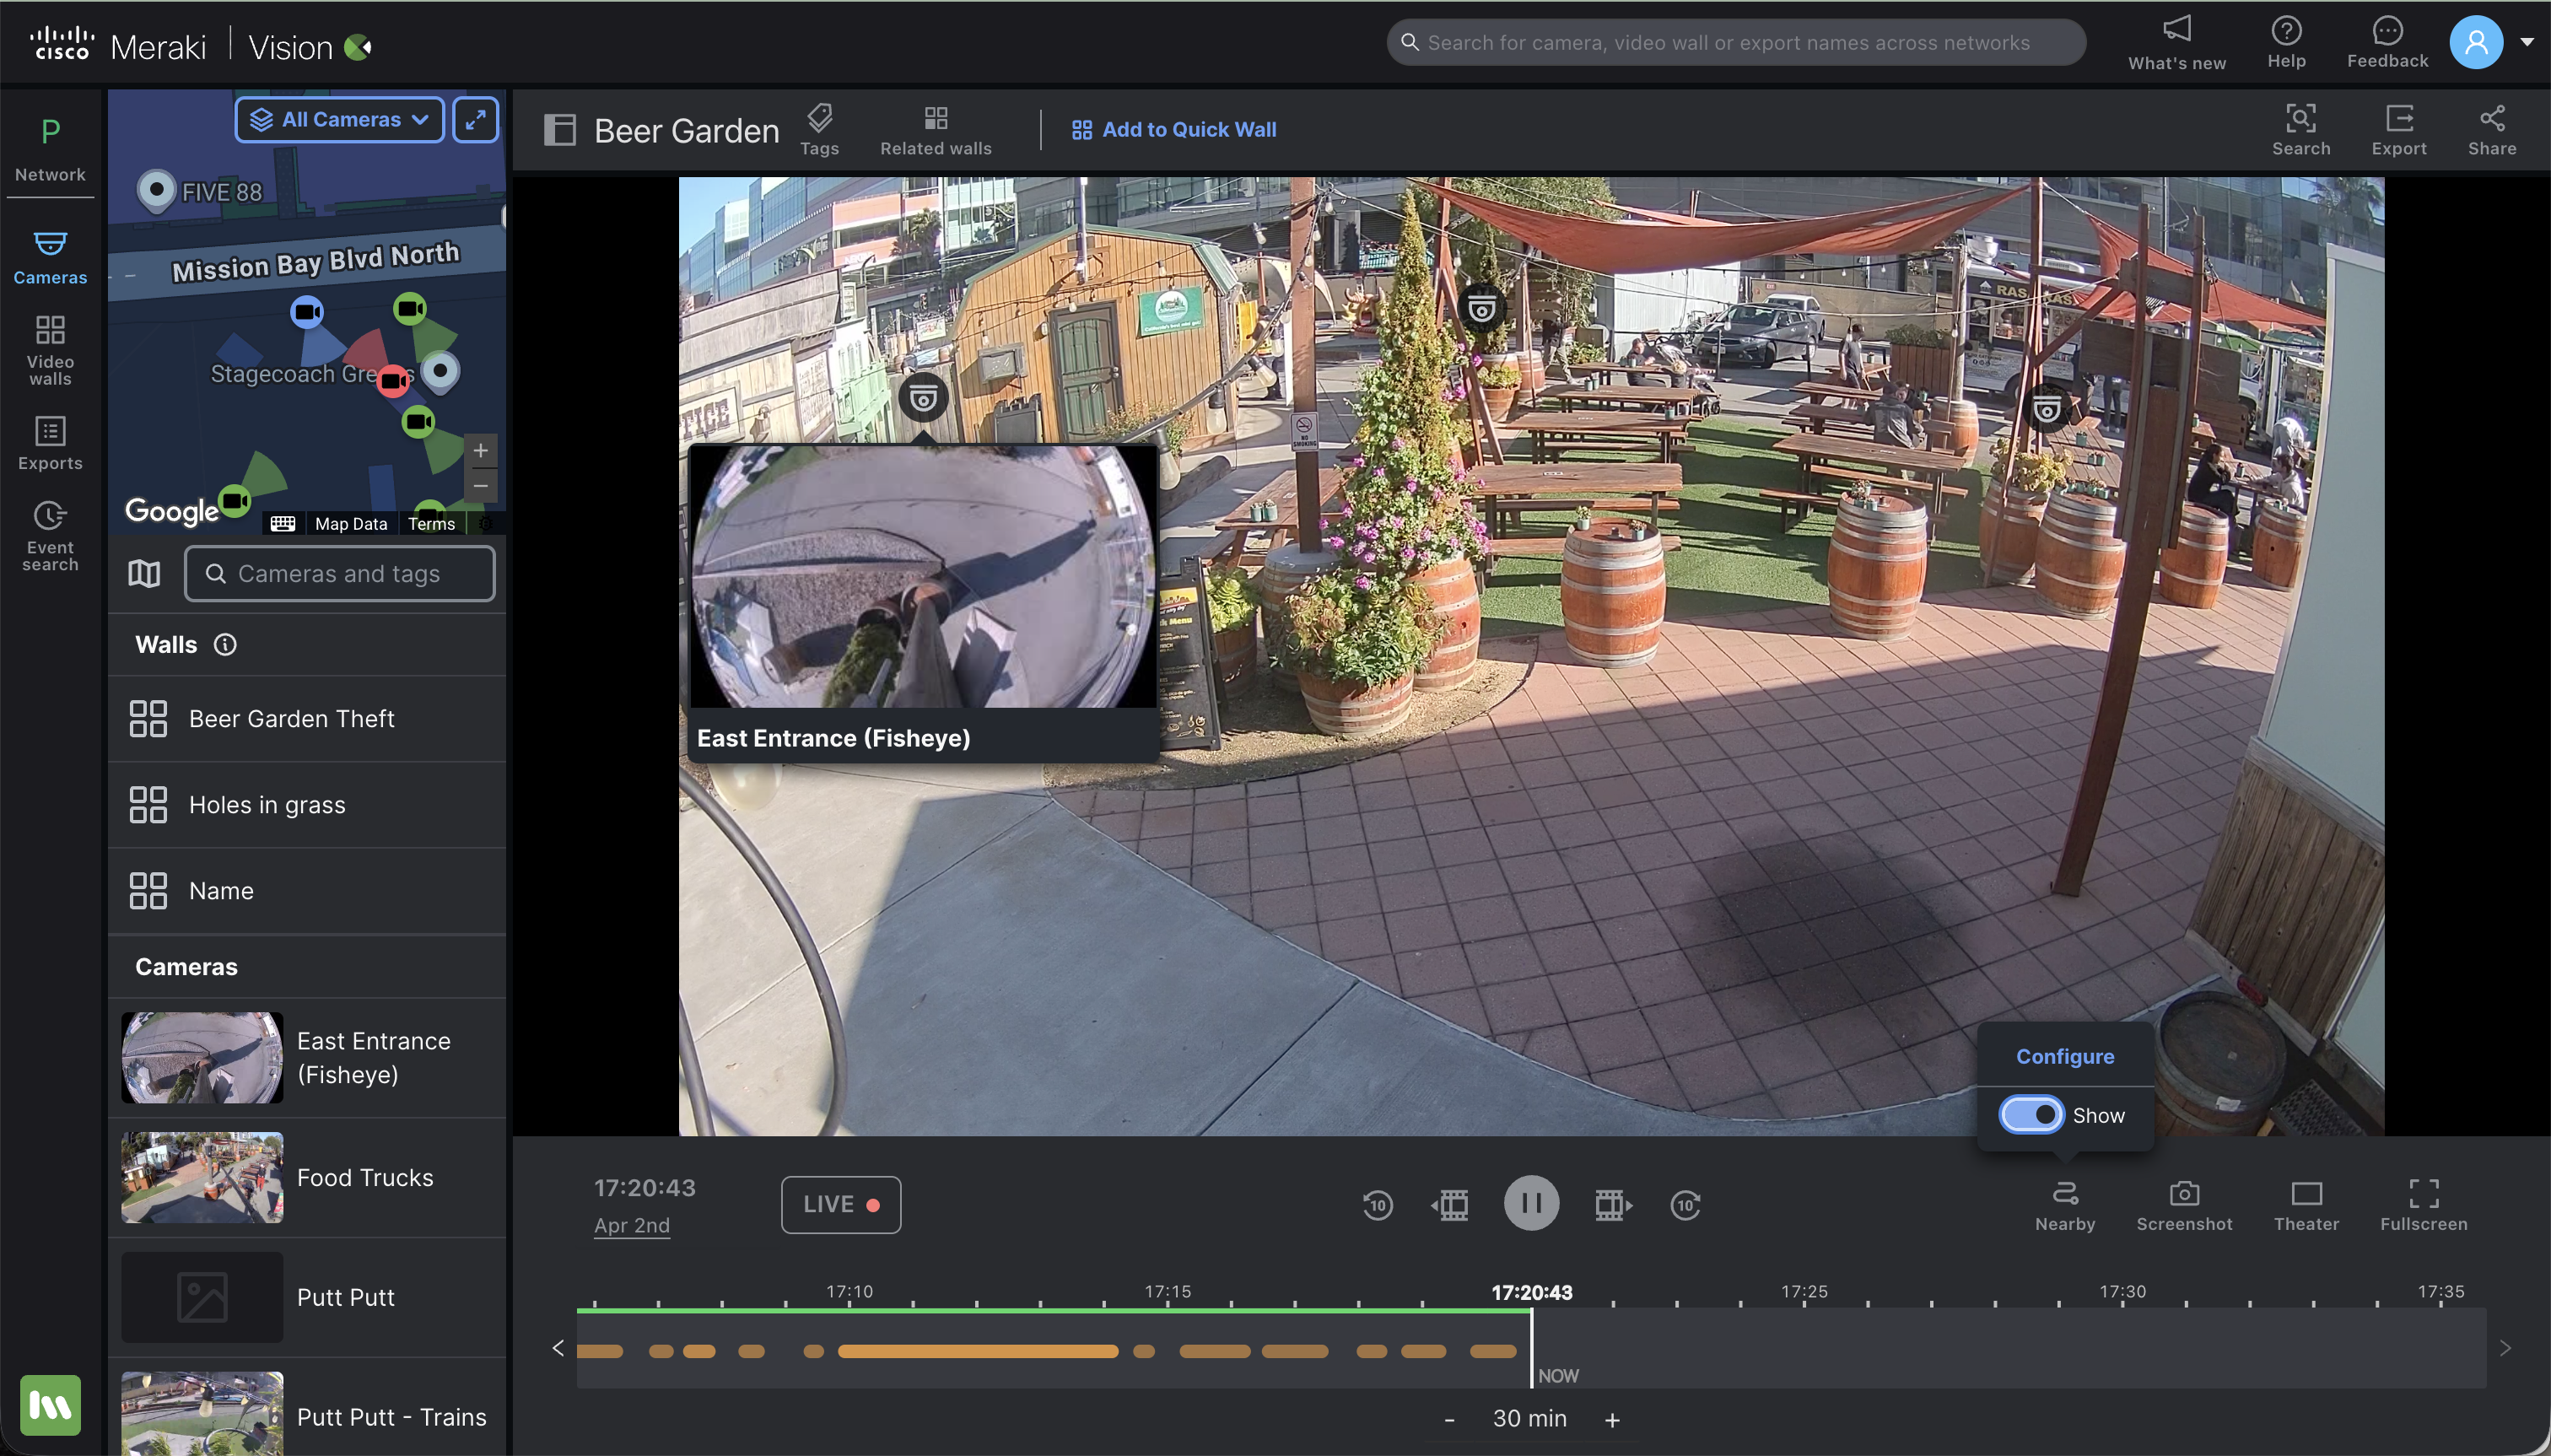
- Toggle Show to On. Camera icons will appear as an overlay on your current view.
- The icons will now appear on the screen until toggled off in the Nearby menu.
Note: To clear your workspace, toggle Show to Off. This will hide the camera icon overlays while keeping your configuration saved for future use.
Verification
After configuring your nearby camera layout, use these steps to confirm the feature is active and functioning correctly:
- Check Menu Visibility:
- Ensure the Nearby button is visible in the bottom right-hand control bar. If it is missing, verify that you are using a supported version of the Vision Portal.
- Confirm Configuration:
- When you toggle show to on, you should immediately see the camera icon overlays appear on your current view.
- Test Snapshot Preview:
- Hover your cursor over one of the camera icons. A live snapshot of that camera should load.
- Test Feed Switching:
- Click the icon. The camera feed should switch to the selected camera, confirming the link is active.
Additional Resources
For additional information on configuring the maps to assist you in configuring nearby cameras, please visit: