
AP Zero Touch Deployment
AP Zero Touch Deployment is only available in the Commercial clusters (URL ending in .com). At this time, it is not available in Geographical Specific clusters (URL ending in .ca, .cn, .in, etc.).
Overview
The deployment of Access Points (APs), especially in remote site environments, poses significant operational challenges for Network Operations (NetOps) teams. The AP deployment process is labor-intensive and frequently outsourced to third-party vendors. This can make it difficult for the NetOps team to monitor deployment progress and perform tasks remotely.
NetOps typically uses staging to mitigate remote deployment risks. Staging involves delivering, unpacking, inventory management, labeling, upgrading firmware, applying configurations, testing, and repackaging. This process increases costs and carries the risk of errors due to differences between staging and production environments.
AP Zero Touch Deployment (ZTD) aims to enhance AP deployment by automating key deployment steps and providing NetOps teams with management tools to control and manage deployments more effectively. Through AP auto-discovery, auto-network assignment, and auto-configuration migration, this approach minimizes the risk of errors, reduces the need for staging, speeds up deployments thus improving operational efficiency.
Use Case
AP ZTD allows customers to easily:
- Deploy new APs - Quickly provision new APs into exisiting networks with the correct settings (network assignment, names, RF profile and tags)
- Replacing exisiting APs - Replace existing APs with new APs while maintaining the same network and settings (names and tags)
Prerequisites
-
Access points must already be claimed into the Meraki Organization, but not added to a Meraki Network
-
Access switch (or switch the AP is connected to) must support CDP / LLDP.
-
This can be a Cisco switch or a 3rd party switch that supports CDP / LLDP.
-
LLDP allows APs to be marked as replacing an existing AP. For more information, please go to the Replace existing APs section.
-
Configuration
Enter the Zero Touch Deployment Workflow
- Navigate to Organization > Inventory.
- In the Organization Inventory page, there will be a new banner with the title "There are X APs ready for network assignment". Click on Deploy X new APs to enter the Zero Touch Deployment workflow.

Deploy new APs
- New access points (claimed but not added to a network) will appear in the Deploy new APs tab.

- Select the APs that should be provisioned and click Provision selected APs.

- In the Provision APs page, set the Network, AP name, and Tags for the each AP.
If all the APs will be provisioned in the same Network with the same naming scheme and Tags, click Apply first row to all. This will apply the settings configured on the first AP to the rest of the APs that were selected.
The naming scheme for the APs when using Apply first row to all will based on the AP name of the first AP.
- Case 1: AP name is a pure number
- If the AP name is only a number (ex. 5), the APs will be numbered sequentially.
- Example
- First AP: 1
- Subsequent APs: 2, 3, 4, and so on.
- Case 2: AP name ends on a number
- If the AP name ends with a number (ex. MyAP5), the ending number will be replaced with a suffix in the format -0X, where X starts from the original ending number and increments for each AP.
- Example:
- First AP: MyAP5
- Renamed APs: MyAP-05, MyAP-06, MyAP-07, and so on.
- Case 3: AP name does not contain a number
- If the AP name does not contain any numbers (ex. MyAP), a suffix -0X will be appended, starting from 1.
- Example:
- First AP: MyAP
- Renamed APs: MyAP-01, MyAP-02, MyAP-03, and so on.
The AP name can be at most 64 characters. When using Apply first row to all to name all APs, the system will remove characters from the end of the name, if necessary, to ensure there is enough space to append the numbering suffix, while keeping the total length within the 64-character limit.
An example of this is shown in the image below.

Note: The APs do not all have to be provisioned into the same network. Each AP can also be provisioned individually into different networks with different names and tags.

- Once the settings are configured, click Provision APs.
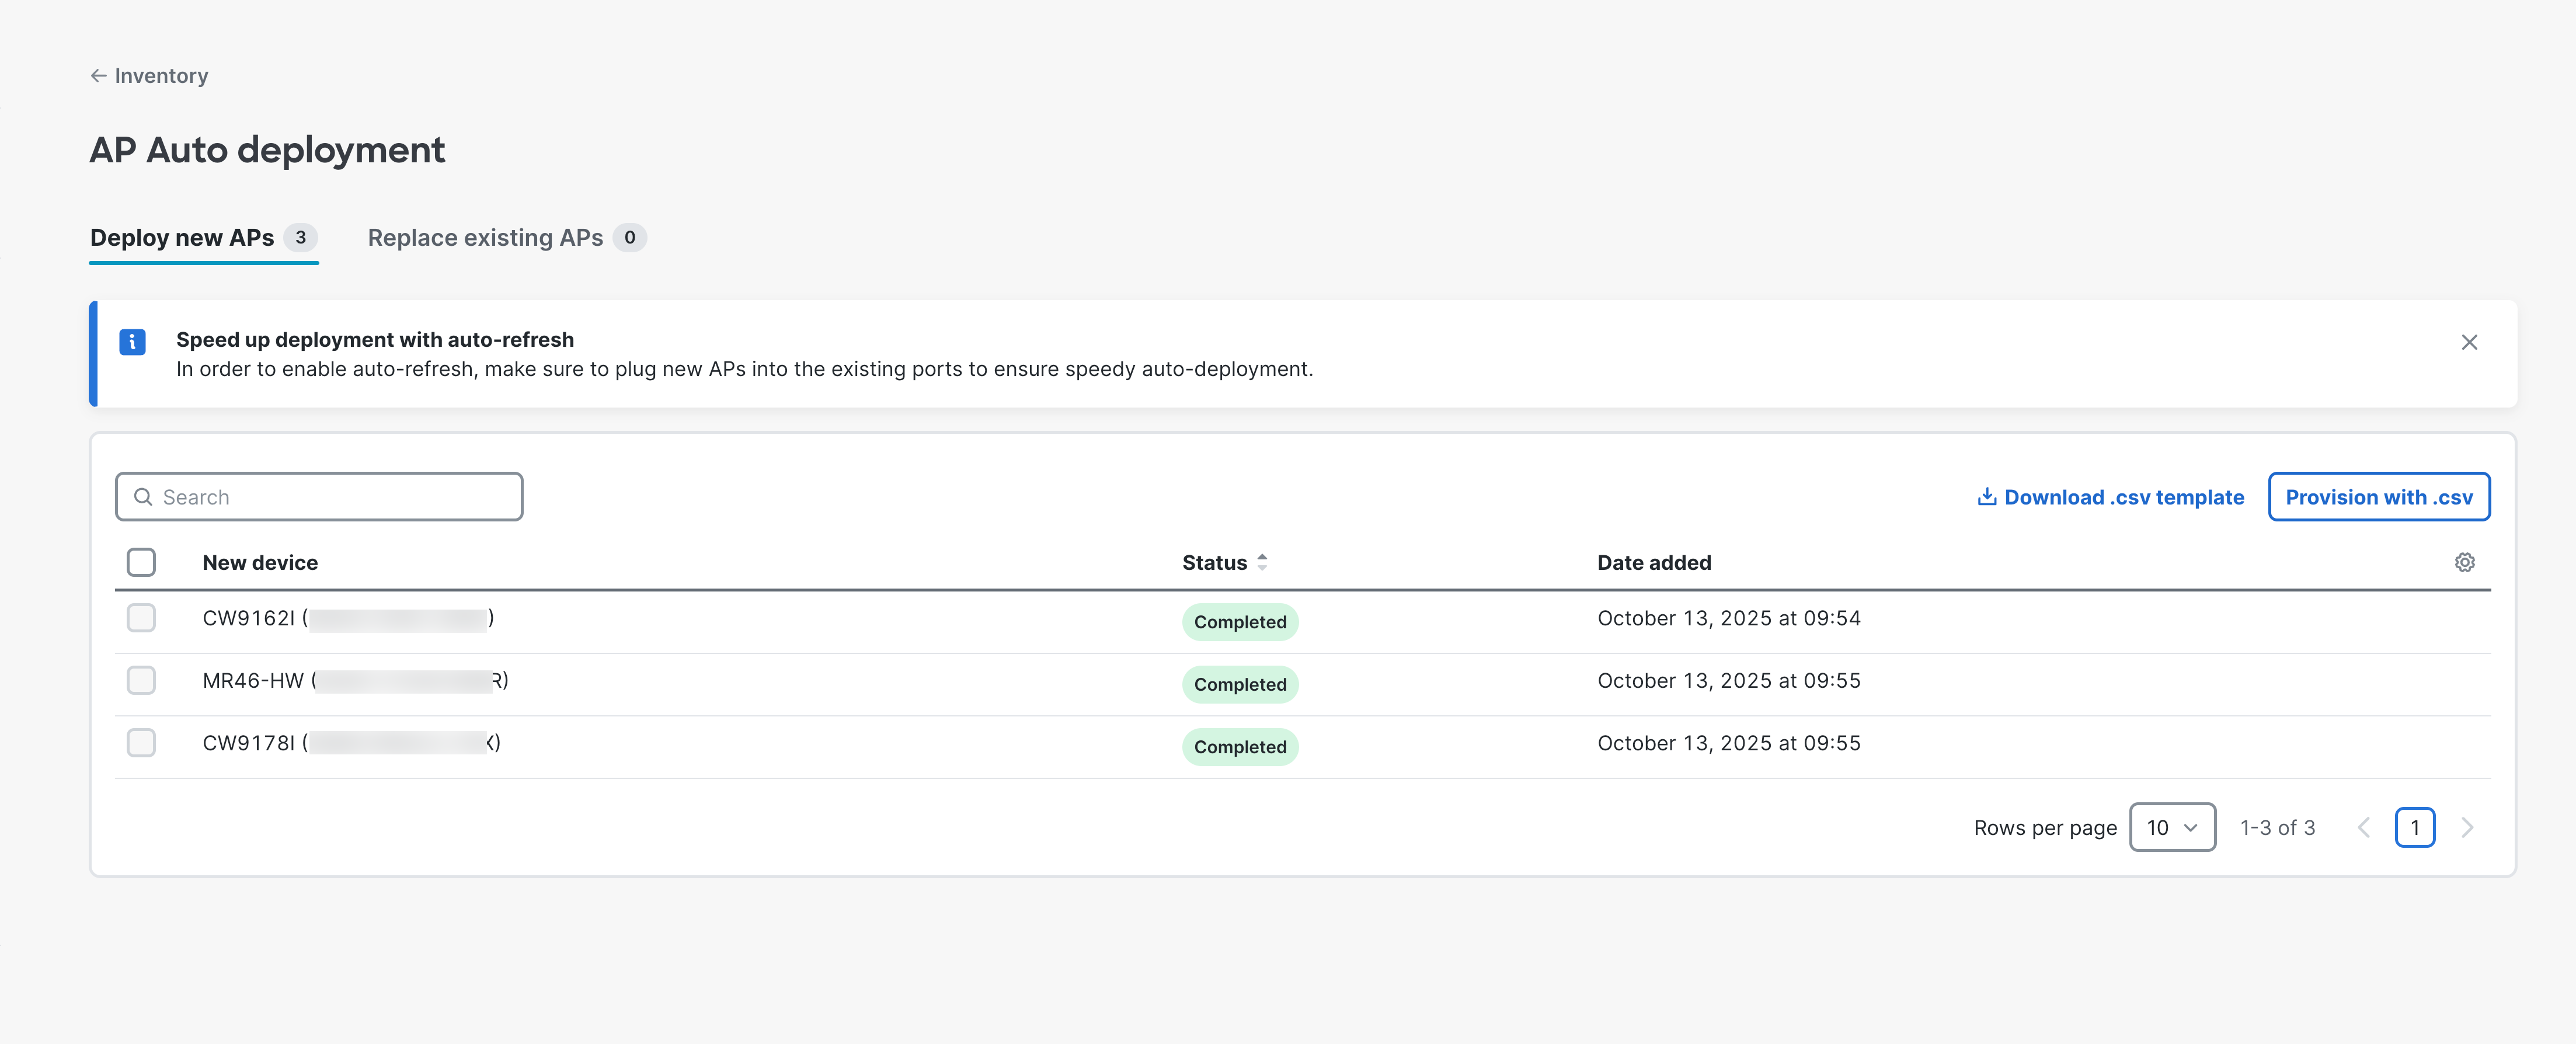
- The status of the APs can be monitored on the AP Auto deployment page.
The status will go from In progress to Completed for each AP.
Replace existing APs
AP Zero Touch Deployment relies on the CDP / LLDP information to automatically map a new AP to an existing AP that it is replacing. Because of this, ensure that new AP is connected to the same switch and switch port as the existing AP it is replacing. If the CDP / LLDP information matches between APs, the new AP will automatically have its settings pre-populated during the workflow.
Note: It may take up to 10 minutes for an AP to be marked as replacing an existing AP. This is because once the new AP is powered on, it will need to report back the CDP / LLDP information back to Dashboard. Dashboard will then match the new AP with the AP which previously had the same CDP / LLDP information.
- Access points that are marked as replacing an existing AP will appear in the Replace existing APs tab. These are APs that are plugged into the same switch and switch port as the old APs.

- Select the options for what to do with the existing AP. This is located in the Existing AP Action column.

- Return device to inventory - The device will be removed from its current network but will still remain in the Organization's inventory list.
- Unclaim the device - The device will be removed from its current network as well as be removed from the Organization's inventory list.
- Mark existing AP as old - This will append "old " to the beginning of the name of the existing AP to allow users to easily identify the APs that were replaced through AP ZTD. For example, if the name of the AP being replaced is originally AP-01, it will be renamed old AP-01.
- After selecting the APs and the respective Existing AP Action, select Provision selected APs.

- In the Provision APs page, the Network, AP name, and Tags for the new APs will be automatically populated based on the settings for the existing AP it is replacing. Change the preconfigured settings as need.

- Click Provision APs to configure both the existing and new APs.
- The status of the APs can be monitored on the AP Auto deployment page.
The status will go from In progress to Completed for each AP.

- In the AP List page, the replaced APs and new APs can both be seen. The replaced APs will be denoted with "old " at the beginning of their names.

Provisioning via a CSV file
In order to easily provision APs at scale, customers can also use a CSV file to quickly configure the correct settings for the required APs. Within the AP Zero Touch Deployment workflow, customers can upload the CSV file in the following format.
Deploy new APs
MAC address,Model,Serial number,Network,AP name,Tags,RF profile
Replace existing APs
MAC address,Model,Serial number,Existing Serial number,Existing AP Action,Network,AP name,Tags,RF profile
An example of the template can be downloaded by clicking Download .csv template, and this will generate a CSV file with all the APs available to be deployed and/or replaced.

The following steps are for deploying new APs, but the steps also apply to replace existing APs.
- Fill out CSV with the required information: Network, AP name, Tags, and RF profile. An example of the CSV is shown below.
MAC address,Model,Serial number,Network,AP name,Tags,RF profile
aa:bb:cc:dd:ee:ff,CW9172H,Q5XX-XXXX-XXXX,AP Zero Touch Deployment Demo,AP-1,DEMO-TAG,Radio Profile Demo
- Once the CSV field is filled out, click Provision with .csv and upload the file. This will bring up the Provision APs page.
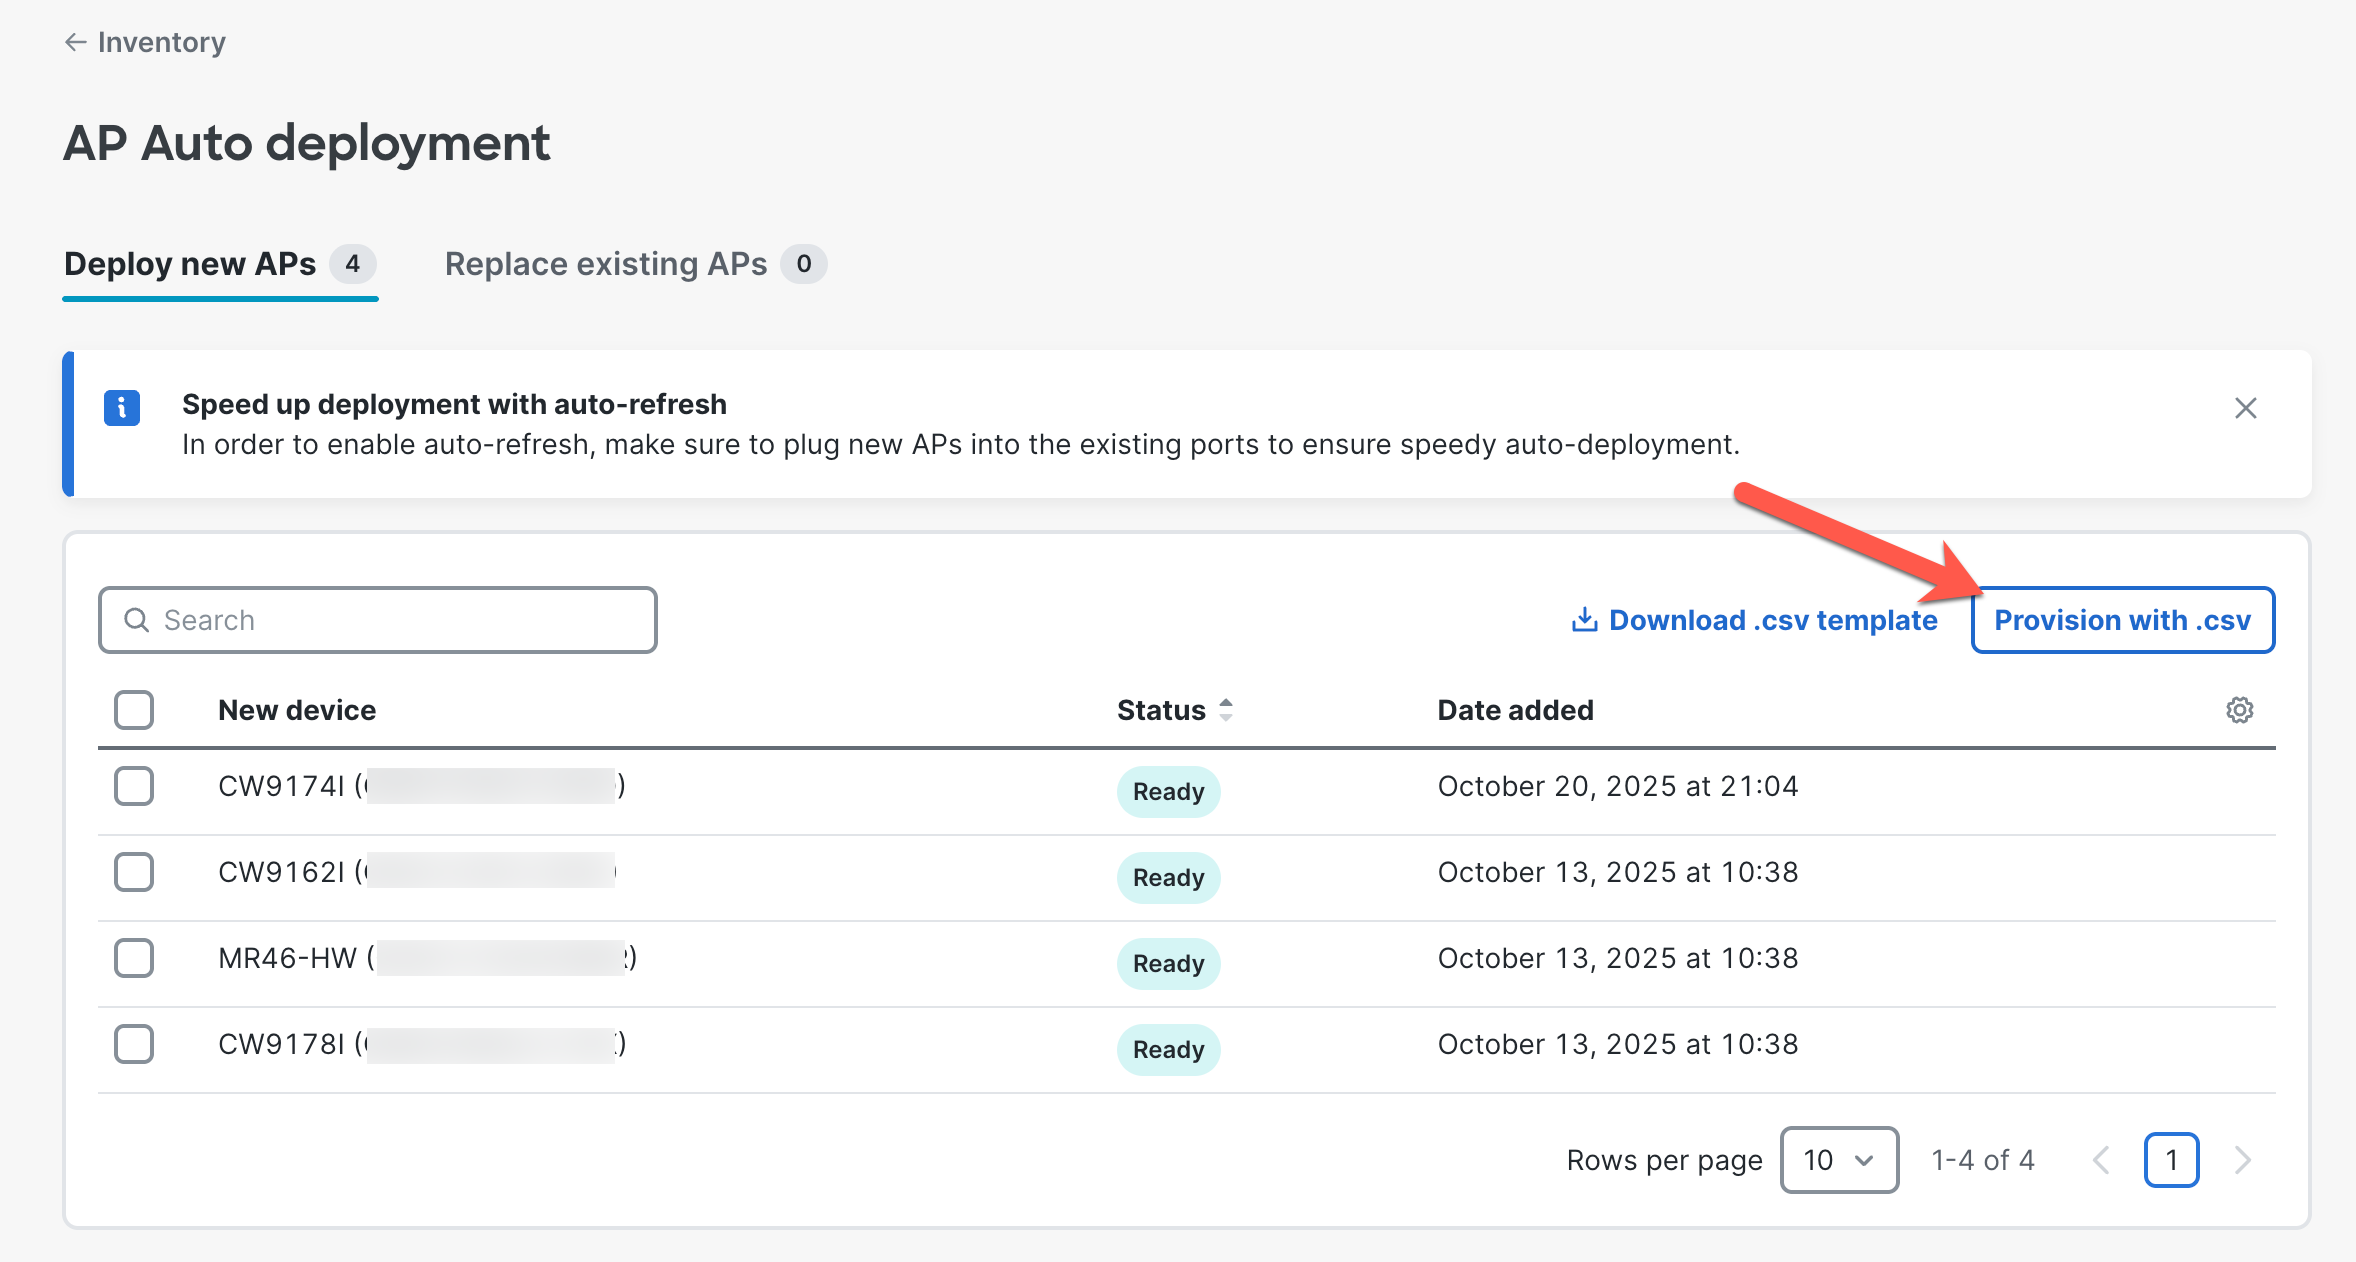
- Verify the configurations and click Provision APs.
Configuration via API
Please see the documentation on Cisco DevNet here: https://developer.cisco.com/meraki/api-v1/create-organization-wireless-devices-provisioning-deployment/