
Restricting Access to Cameras
Overview
This article explains the camera and sensor permission levels in the Dashboard. It describes how to create camera roles or privileges, assign them to users, and outlines the available options for these users.
Camera and Sensor Only Admin
There are 2 methods to manage IoT (MV and MT) permissions.
Local Camera and Sensor Admins on Network Level
This method outlines the steps on how to create a camera and sensor privilege role and assign it to a specific Network Administrator:
-
For MV networks, navigate to Cameras > Configure > General. For combined networks, navigate to Network-wide > Configure > Administration.
-
Under the Camera and Sensor Only admins section, select an existing Network Admin from the dropdown or Create a new user.
-
Assign the appropriate permissions to the User:
|
Permissions |
Scope |
|
|---|---|---|
|
Camera Permissions |
View and export any footage |
All Cameras |
|
View any footage |
||
|
View Live footage |
||
|
No Access |
||
|
Sensor Permissions |
Full Sensor Access (includes write Access to Alert Profiles) |
All Sensors |
|
Read-only Sensor Access |
||
|
No Access |
-
Click Save changes to save the User.
Users with view-only camera permissions can see the cameras but cannot modify settings like focus, zoom, or aperture.
Role-based Camera and Sensor Permissions for SAML/SSO
Initial Dashboard SAML/SSO configuration
To enable SAML 2.0, configure your organization and set up your SAML Identity Provider (IdP) settings. Ensure your Identity Provider is ready to use this feature. OneLogin and other providers offer free trials for testing in a development environment.
Follow this guide to get started:
Camera and Sensor Role Restrictions include the following key points:
-
SAML user roles can consist of:
-
a single Organization or Network Administrator Role defined in Dashboard
-
one or many Camera Roles defined in Dashboard
-
SAML role attribute should be sent as a semi-colon separated list with no spaces
-
-
SAML roles will match a Network/Organization Admin role first if there are conflicting roles defined between Network/Organization Admin roles and Camera roles.
-
Camera and Sensor role name(s) created do not need to be created under Organization > Configure > Administrators > SAML administrator roles. SAML Administrator roles are different from SAML Camera and Sensor Roles, for more information on Administrator roles view Configuring SAML Single Sign-on for Dashboard.
-
For best practice, an Organization/Network role should be passed first and camera role(s) afterward.
-
Ensure to avoid conflicting permission sets between Organization/Network role and camera roles. For example, do not pass a read only network role while also passing a full video access role for the same network.
-
For additional information on resolving possible SAML/SSO authentication issues, refer to SAML Login History Events article.
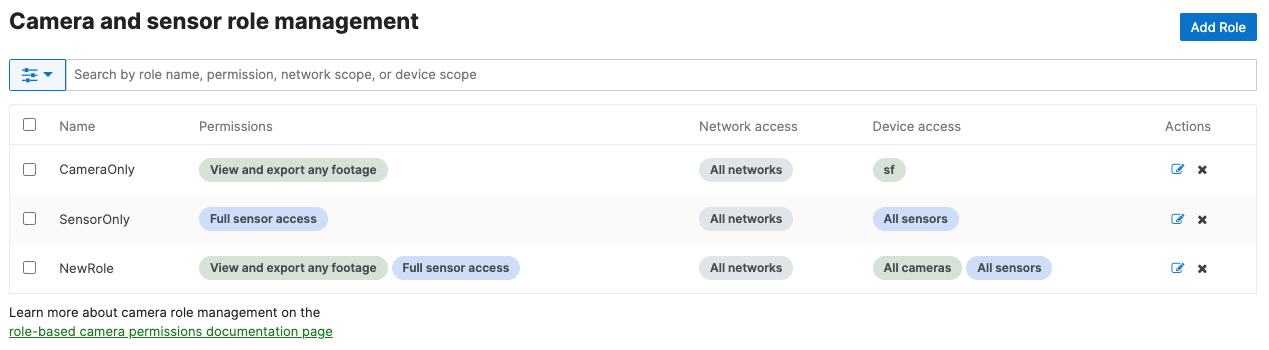
Creating a Camera and Sensor Role in Dashboard
Navigate to Organization > Configure > Camera and Sensor roles. Click Add Role to get started.

Step 1: Role naming and Network access permissions

-
Enter the SAML Role to be mapped to these permissions precisely as configured in the Identity Provider.
-
Select Network permissions (either all or by tags)
-
Selecting `All networks` provides users with this role access to all Networks contained within the current Organization.
-
Selecting `Networks by tag` provides users with this role access to Networks with the specified tag(s) contained within the current Organization.
-
See this page for information on Managing Tags for your Networks
-
-
The role name must match the SAML role and is case-sensitive.
Step 2: Set Camera Permissions

-
Configure camera viewing permissions
-
This value is set for all permitted cameras and cannot be configured to be a different value for a subset of resources.
-
-
Select camera permissions (either all or by tags)
-
Selecting `All cameras` provides users with this role access to all cameras contained within the previously selected Networks in Step 1.
-
Selecting `Cameras by tag` provides users with this role access to cameras with the specified tag(s) contained within the previously selected Networks in Step 1.
-
See this page for information on Managing Tags for your Devices
-
-
Selecting ‘No Access’ allows users with this role to be completely restricted from accessing Cameras in the network.
-
Step 3: Set Sensor Permissions

-
Configure Sensor Permissions
-
Full Sensor access - Allows full View and Edit access to the sensors in the network the role is scoped to. This includes creating, editing and deleting Alert Profiles for sensors.
-
Read-only Sensor access - Allows only View access to the sensors in the network the role is scoped to. Users with this permission cannot view or edit Alert Profiles.
-
No Access - No sensor network access is granted to the role. Allows a role to be a Camera-only user.
-
Step 4: Confirmation

A simple confirmation page will summarize the proposed changes. Review and hit `Create role` when ready, or navigate back using the `Back` button to make changes.
After committing the changes, the system will save the updates and display a confirmation dialog after a brief wait.
You will return to the Roles overview page. Confirm your role is in the list with the correct parameters configured.
If the above steps are completed and an identity provider is configured for the organization, users can log in as a Camera role using the Meraki application within the identity provider.
Restricting and Enabling Meraki Support Access to Cameras
This will allow Cisco Meraki Support to view your Dashboard as well as Vision Portal.
Cisco Meraki support technicians cannot view video or hear the audio by default. You may choose to allow temporary access to receive help with focusing, zooming, or other video or audio quality issues. Temporary access is automatically revoked when the time expires or can be manually revoked at any time.
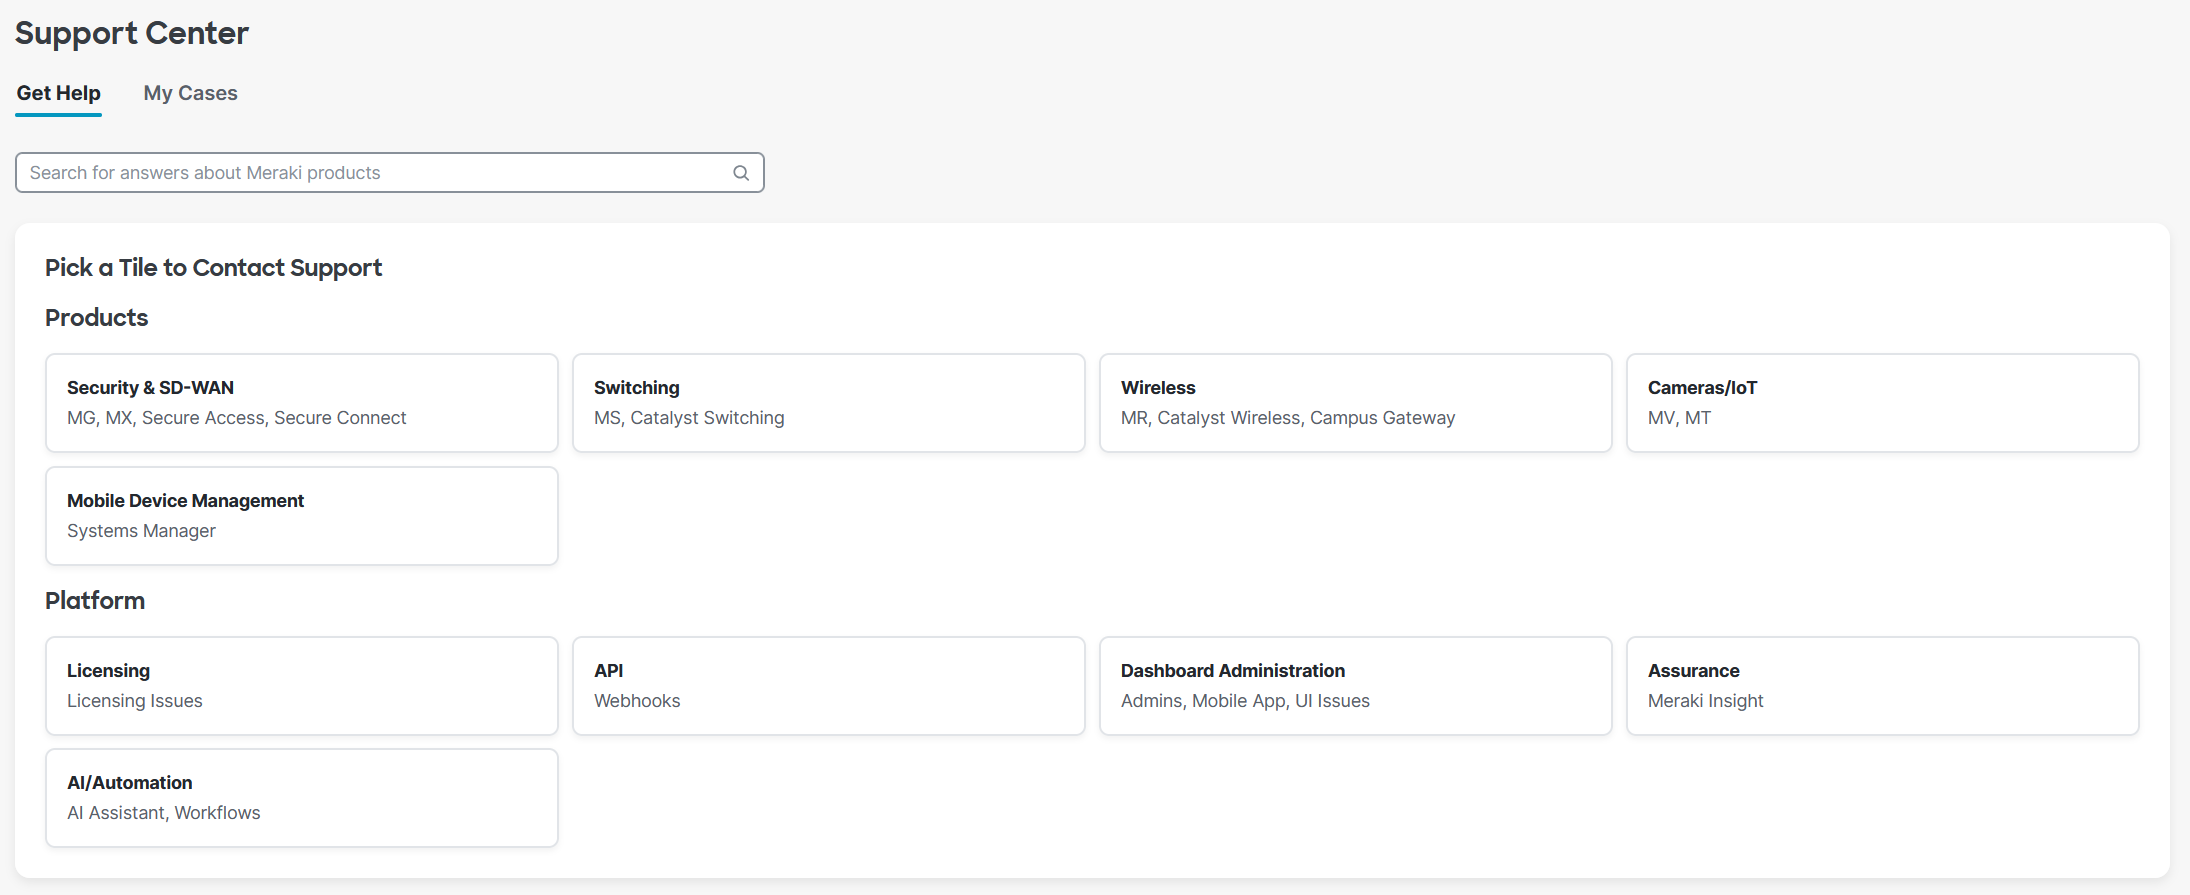
Temporary permission to view camera footage can be granted to Cisco Meraki support agents by navigating to Help ( ? symbol on the top right of Dashboard) > Get Help in the dashboard.
Help Page
Ensure you have selected a network with cameras. Next, navigate to Help > Support Center (My Cases). On this page, select Cameras/IoT.
At the bottom of the page, if your organization has cameras, a Full Organization Admin can enable video access for Meraki support.
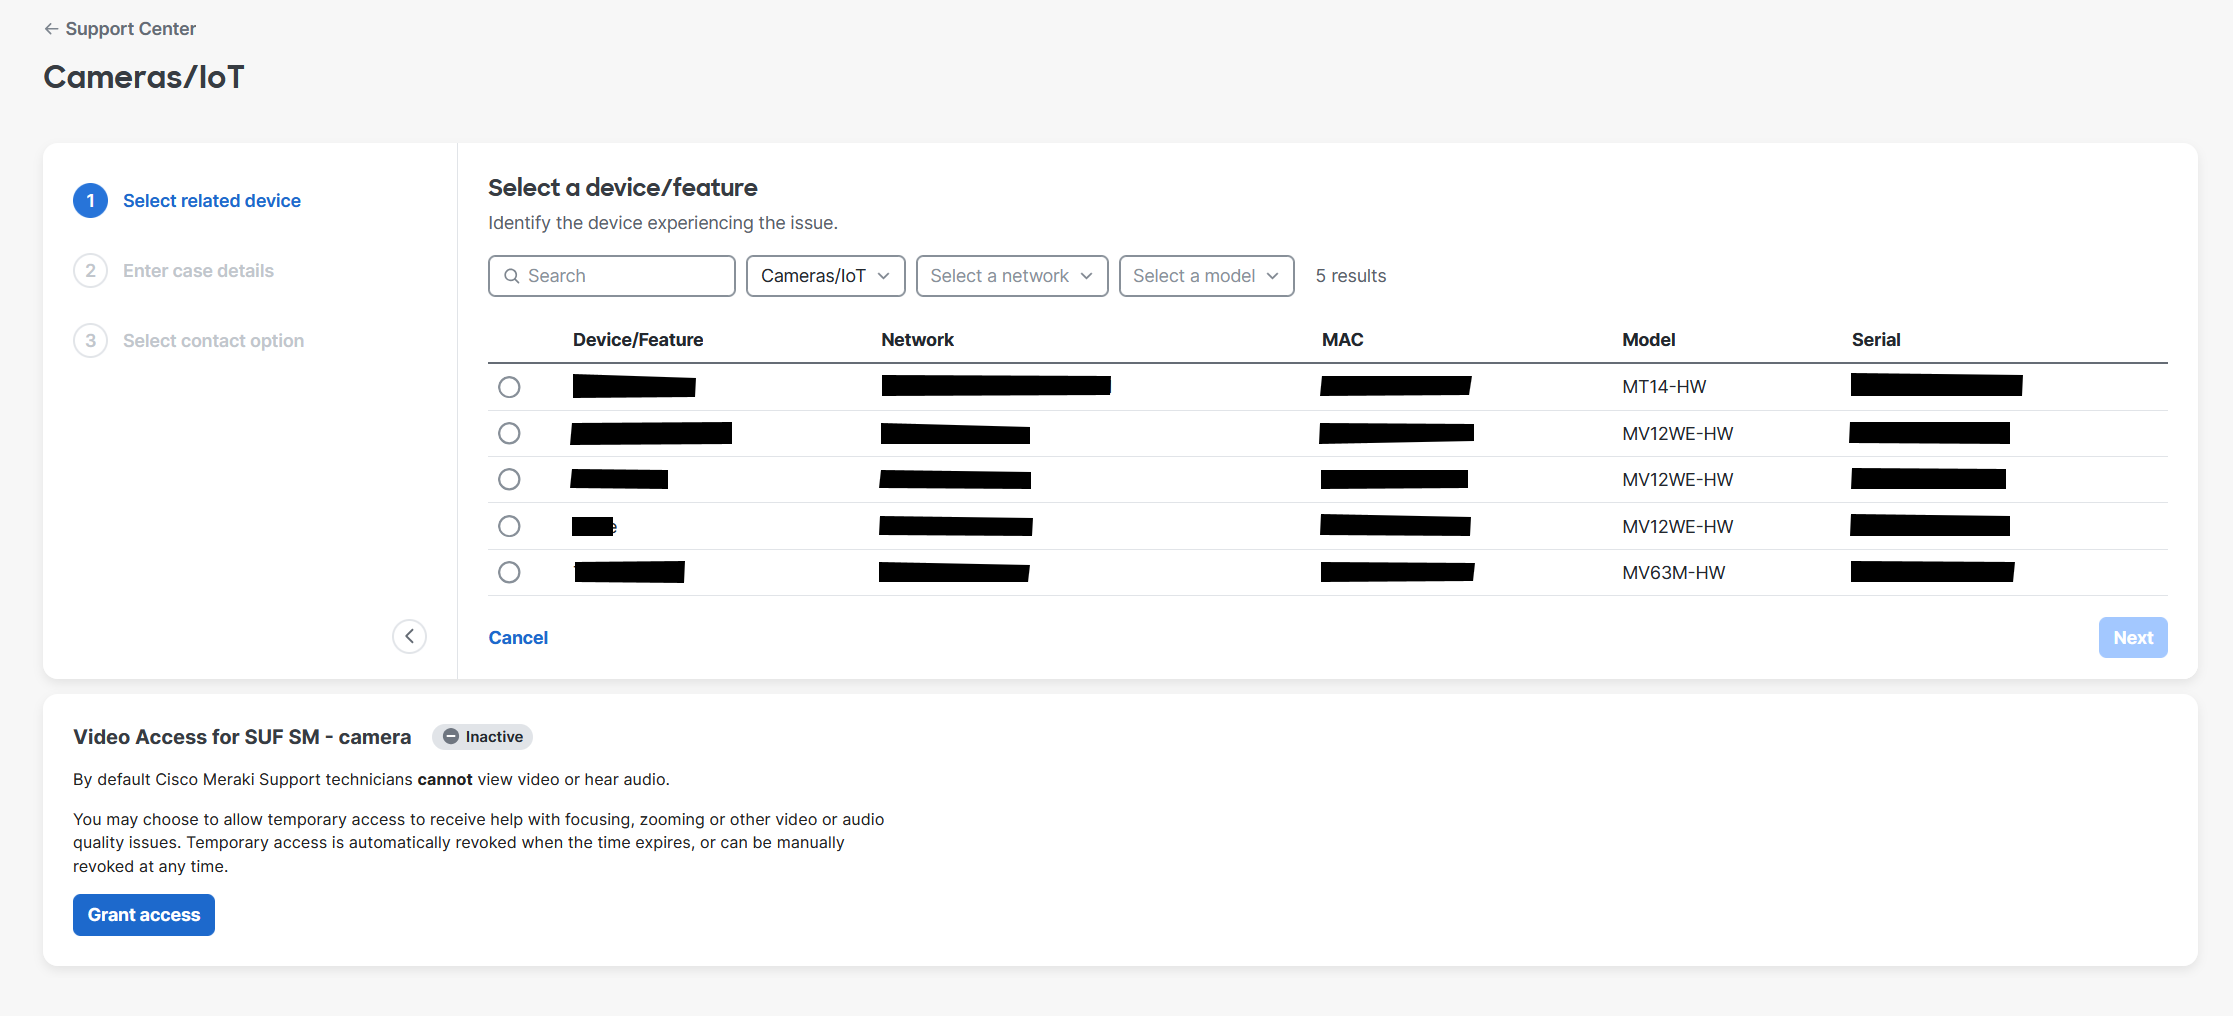
Ensure that you have selected a network containing cameras to access this section.
To revoke video access that has already been granted, navigate to the same page where access was enabled and select the 'Revoke Access' option.
Only organization admins can grant support access to the video feed.
Tracking Meraki Support Access
Meraki Support access granting, revoking, and expiring actions are logged in the Organization's Change Log. Additionally, the Cameras > Monitor > Video Access logs track which cameras were viewed.
