Video Walls
Overview
This article outlines how to setup and stream video from Meraki MV cameras using a video wall. For dedicated video wall workstation guidance, refer to our video wall hardware recommendations article.
Learn more with these free online training courses on the Meraki Learning Hub:
Using Video Walls for Investigations
You can use a video wall to conduct investigations by seeing an event unfold across multiple cameras. From any wall, you can do Motion Search and Share video.
Timestamp synchronization allows you to switch between video walls, while keeping the same timestamp!
In this example below, the biker is seen inside the bike room in one video wall layout, and leaving the bike room in another.
Creating a Video Wall
Creating video wall layouts is network-wide and requires network admin permissions. However, any camera admin with view permissions to a camera in the network will be able to see video wall layouts, as long as they have access to at least one camera within that layout. All other layouts where they cannot view any camera within the layout, will be hidden. Camera-only admins (view live, view historical, view and export footage) may still be able to see the "Edit Layouts" button on the Video Wall, however, they cannot make changes to the Video Wall.
- Go to Cameras > Monitor > Video wall. Select Edit Layouts.
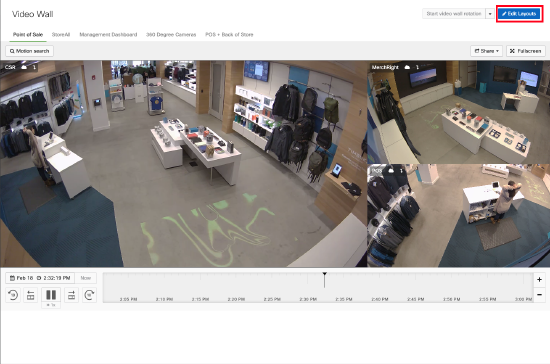
- Select New Layout. This will create a new video wall tab.
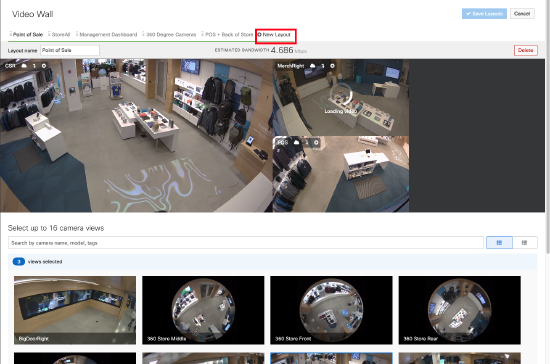
- You can select the Layout name field to update the name of the layout.
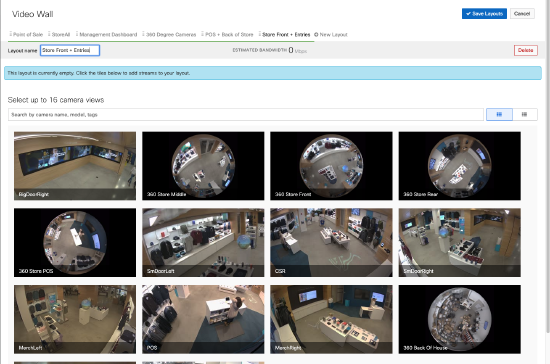
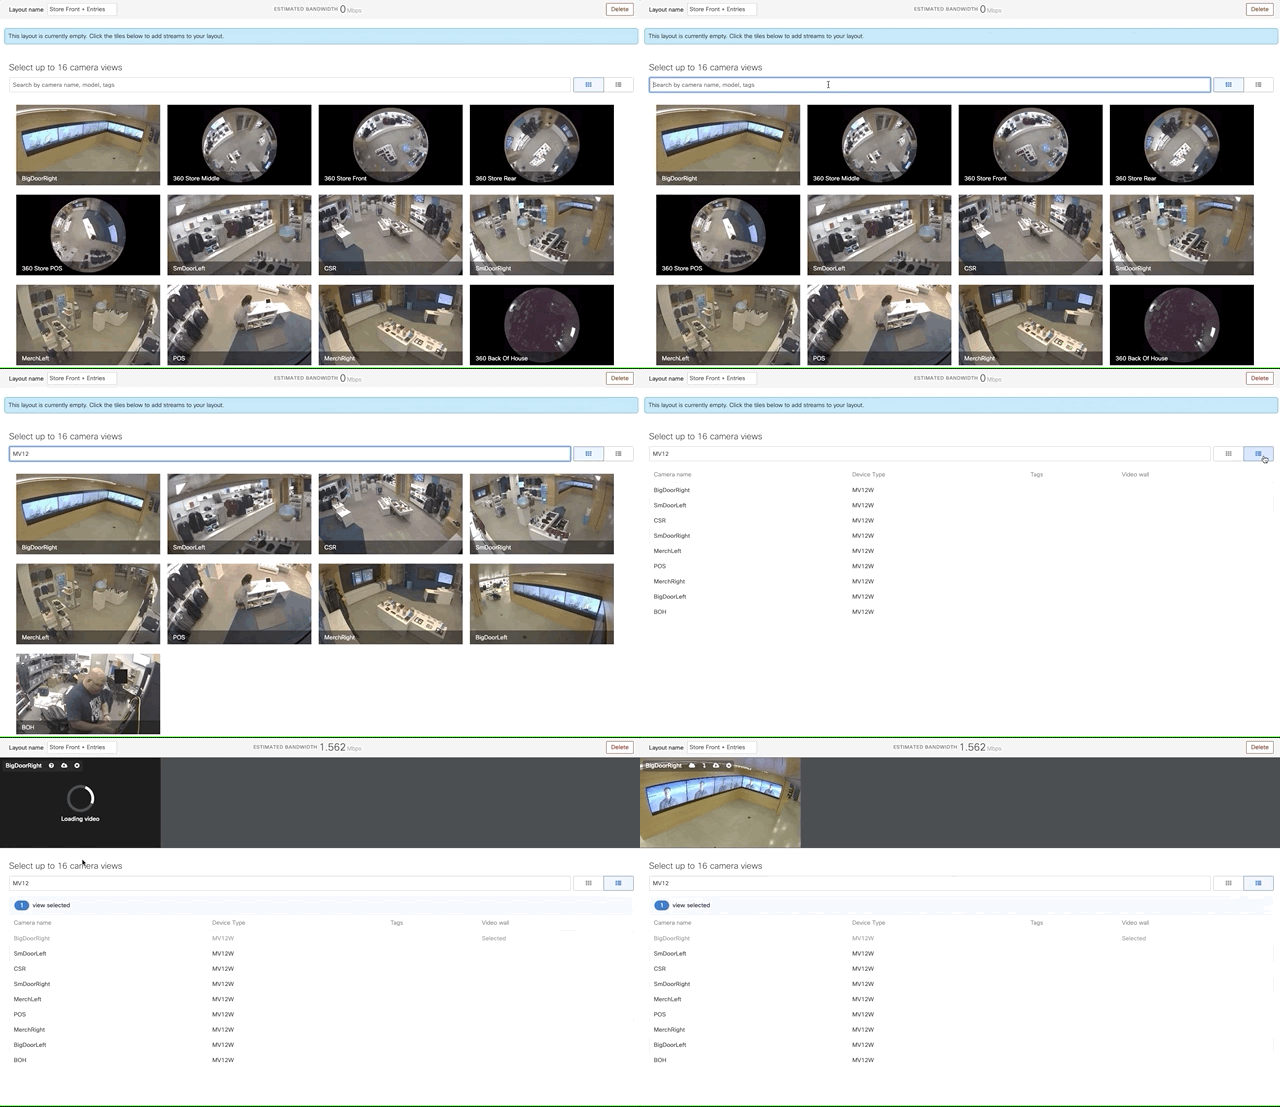
- You can review the cameras in your network to select from, either by Thumbnail or List view, and can also search by camera name, model, or tags
- Select a camera to add to the video wall by clicking on the camera thumbnail (in Thumbnail view) or row (in List view)
A video wall supports up to 16 video tiles.
- Design the video wall by resizing camera nodes. This is done by clicking and dragging the corner of the camera node.
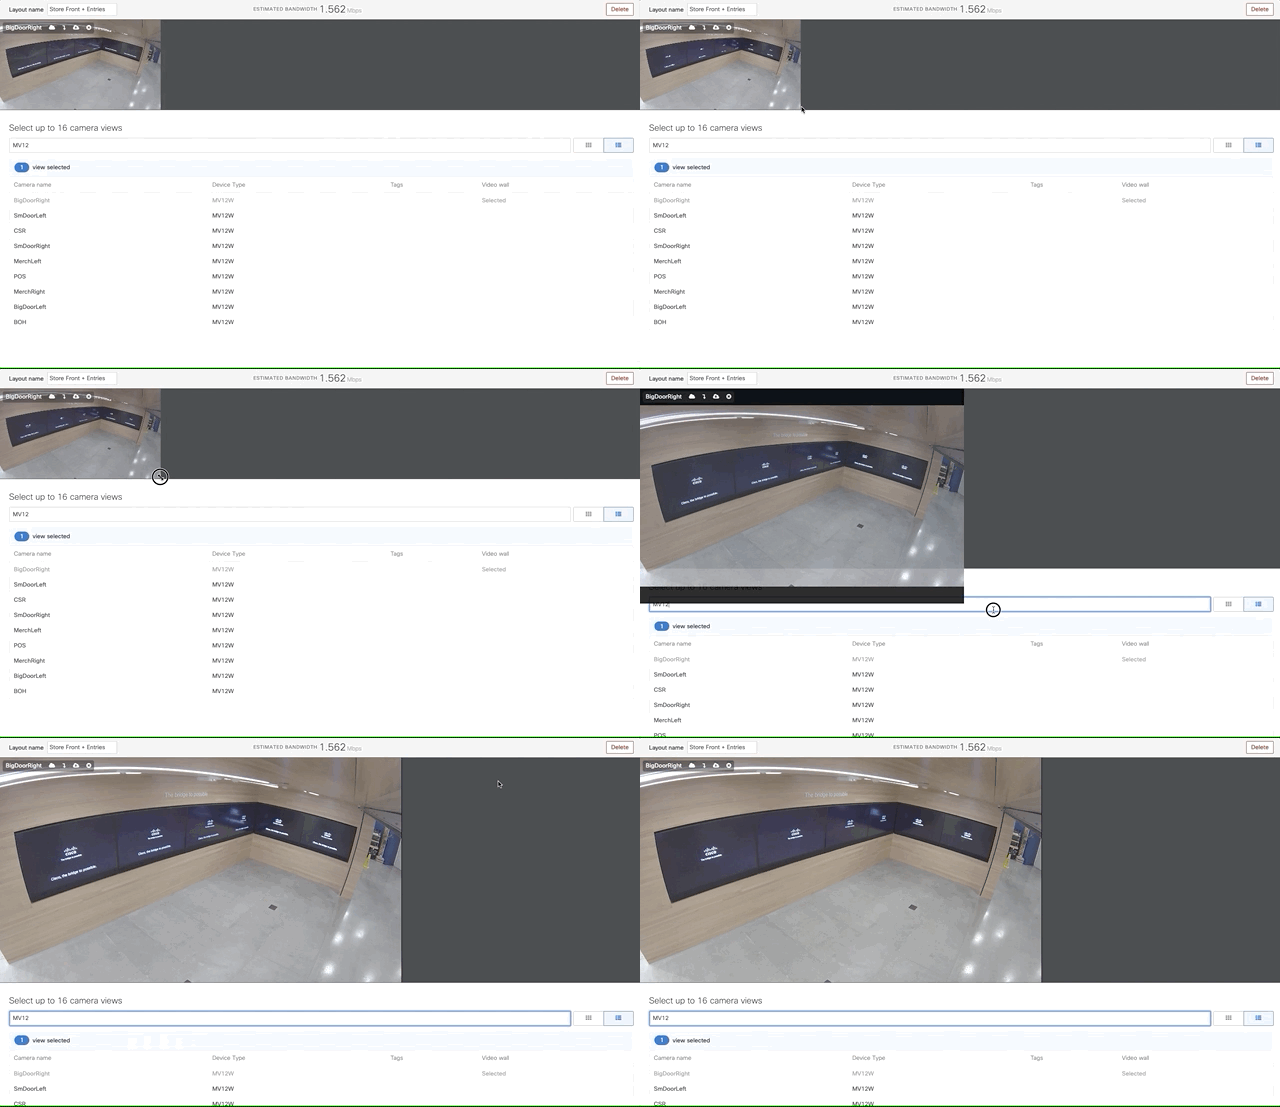
- Click Save Layouts to finalize the video wall changes.
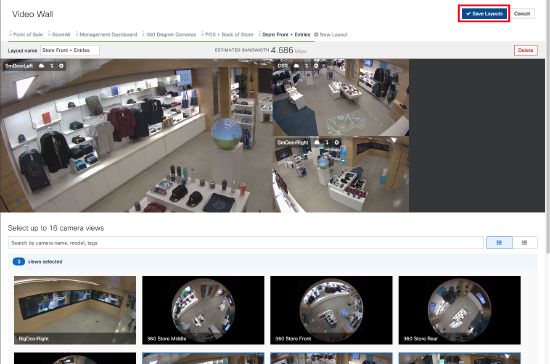
Adding a Dewarped Fisheye View to a Video Wall
To add a dewarped fisheye view to a video wall,
- Select the fisheye camera by either thumbnail or row entry, as detailed in the section above.
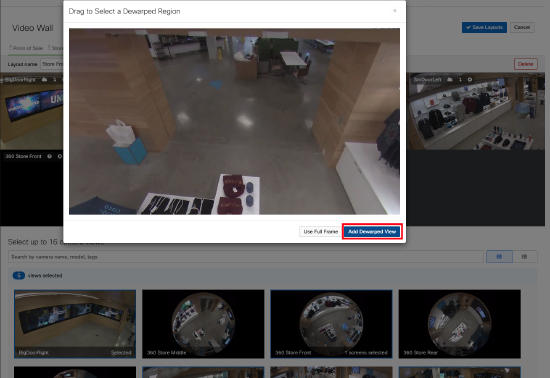
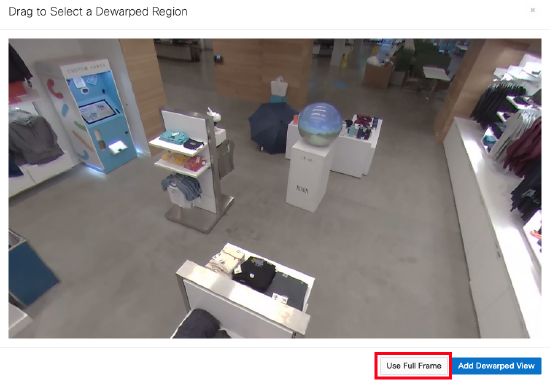
- Once selected, you will be presented with a modal to select a dewarped region to set as a view.
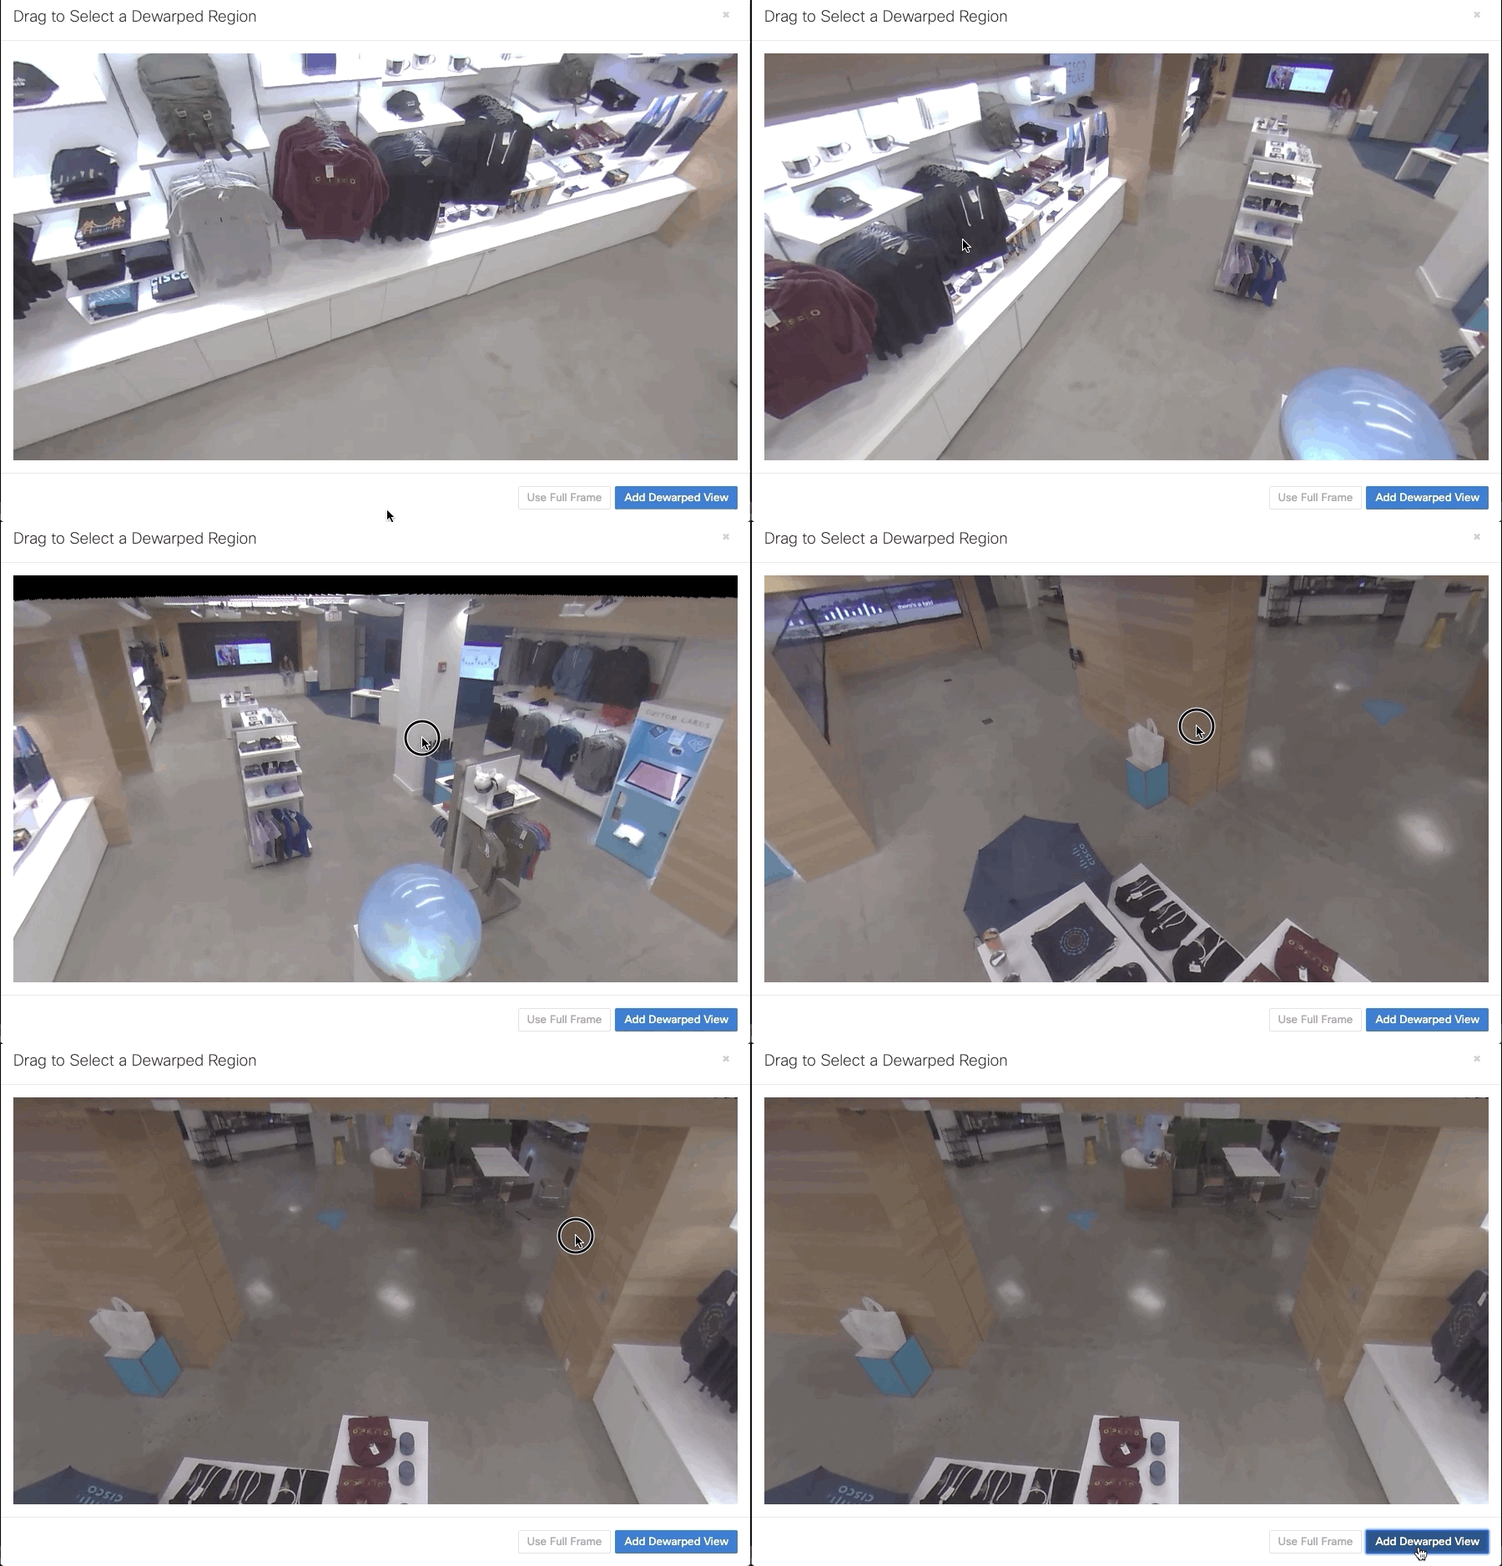
- Drag to select the desired region and click the Add Dewarped View button.
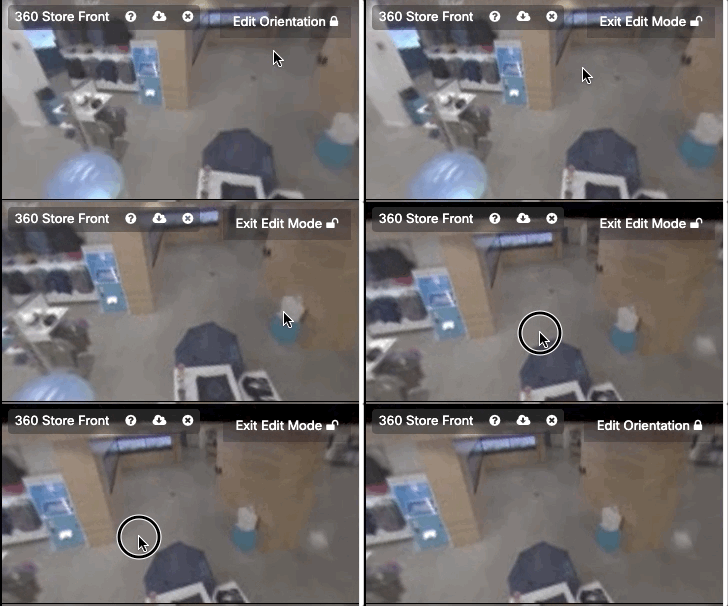
- Once a dewarped view is added to a video wall, you can use the Edit Orientation button to make fine-tune adjustments
- If you would like to add the full frame fisheye view, click the Use Full Frame button instead.
Deleting a Video Wall
- Navigate to Camera > Monitor > Video Wall
- Select Edit Layouts
- Select the Layout of your choice and click on the Delete button
- Click Save Layouts to finalize the video wall changes
Rotating Video Walls
You can also auto-rotate through your most important video walls.
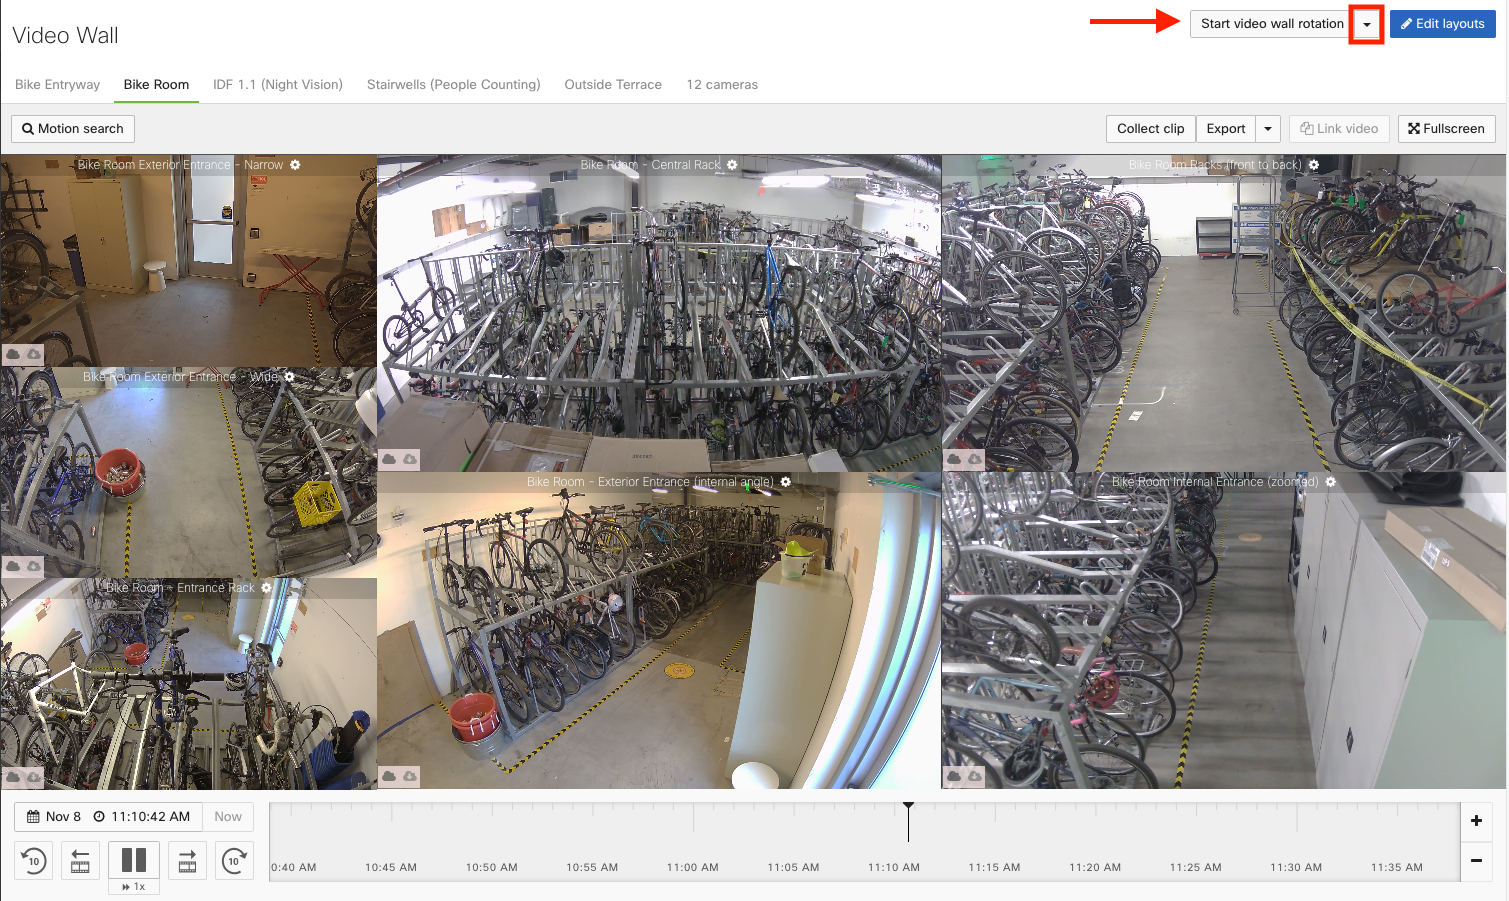
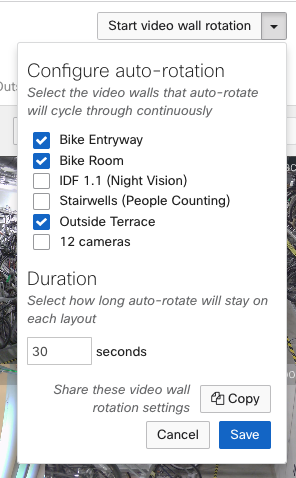
To use this, navigate to Cameras > Video Wall. On the top right of the screen, select the dropdown arrow next to the “Start video wall rotation” button to configure auto-rotation.
Use the checkboxes to select relevant video walls for your rotation, set the time interval between rotations, and copy or share these settings.
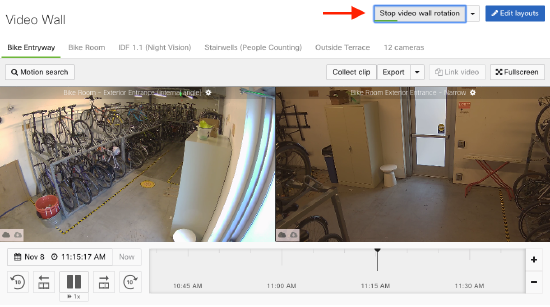
Click the “Start video wall rotation” or “Stop video wall rotation” button to toggle the rotation.
Video Wall Change log
Any action to add, delete or edit the video wall layouts are indicated on the organization change log.

Video Wall Bandwidth Usage
When creating and editing a video wall, dashboard will present an estimated bandwidth requirement for the current video wall.

Audio Playback on Video Walls
Refer to Audio Playback Capabilities for more information.


