
MX100 Installation Guide
Note - The MX18.1 firmware release will be the maximum running build for MX64, MX64W, MX65, MX65W, MX84, MX100, and vMX100 platforms. These platforms will not run MX 18.2 and above firmware builds. We recommend you stay up to date with all the latest features with the next-generation hardware platforms. Please consult your sales representative for more information on the latest hardware and software releases. Thank you
This document describes how to install and set up the MX100 security appliance. Additional reference documents are available online at: www.meraki.com/library/products.
MX100 Overview
The Meraki MX100 is an enterprise security appliance designed for distributed deployments that require remote administration. It is ideal for network administrators who demand both ease of deployment and a state-of-the-art feature set. This security appliance provides the following new features:
- Two GbE SFP connections (requires optional Meraki SFP-1GB-SX transceiver).
- USB port, to support approved 3G/4G cards for failover to cellular networks.
- 1TByte cache storage for WAN acceleration.
- LAN 2 port can be configured to be a LAN or WAN connection, allowing support up to 2 WAN connections.
- Dedicated management port.
- Front-panel rack mounts.
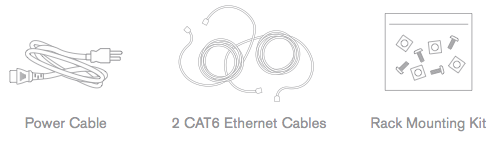
Package contents
In addition to the MX100, the following are provided.
The MX100 front panel
Ports and Status Indicators
The MX100 uses LEDs to inform the user of the device's status. When the device powers on, all the Internet LEDs flash twice. Additional functions are described below, from left to right.
|
Item |
Function |
LED Status |
Meaning |
|
1 |
Power |
Solid orange |
Power is applied |
|
Rainbow colors |
Unit is attempting to contact the Cloud |
||
|
Flashing white |
Operation in progress |
||
| Solid white | Fully operational | ||
|
2 |
USB connectivity |
Off |
During boot or no USB link |
|
Solid orange |
Initial link |
||
|
Flashing orange |
Internet connectivity not complete |
||
|
White |
USB connection detected |
||
|
3 |
HA status |
Off |
No high availability available |
|
Orange |
Initial link |
||
|
Flashing orange |
High availability not complete |
||
|
Green |
High availability available |
||
|
4 |
Internet |
Green |
Port is configured as an Internet uplink port |
|
LAN |
Green |
Port is configured as a LAN port |
|
|
5 |
SFP connectivity |
Off |
No SFP connection |
|
Green |
SFP connection |
Note: The MX100's internet port light up orange if it is operating at 100 Mbps. It lights up green if it is at 1Gbps.
For detailed information on the specifications for our SFP modules, view the datasheet here.
|
Reset button |
Insert a paper clip if a reset is required.
|
|
USB port |
USB 2.0 for 3G/4G wireless cards. Traffic status is indicated by the USB LED. |
|
SFP ports |
Ports 10 and 11 are designed for SFP-SX (fiber) or SFP-TX (RJ45 copper) GbE connectivity. |
The MX100 back panel
Please note that the serial number is located on the product label at the back panel of MX100
Mounting hardware
The mounting hardware includes four sets of standard slot-head rack screws and nuts. The additional screws and nuts are for use with optional rear brackets if rear support is required. When installing the appliance, make sure that there is sufficient space between the rear of the rack and other obstacles to ensure adequate airflow. Additionally, other devices should not be placed directly on the MX.
Safety guidelines
Regardless if you are using a wall power outlet (MAINS) or any other type of power connection (e.g., a UPC device), always ensure that the power cord can be readily disconnected from the hardware unit.
MX100 comes with a built-in battery for system date and time. You should never attempt to replace the battery yourself. Return the MX100 to Cisco Meraki for battery replacement. Opening the unit to replace the battery will void the warrant.
Connecting to WAN
All Meraki MX devices must have an IP address. This section describes how to configure your local area network before you deploy it. A local management web service, running on the appliance, is accessed through a browser running on a client PC. This web service is used for configuring and monitoring basic ISP/WAN connectivity.
Setting up a static IP address
Do the following to configure basic connectivity and other networking parameters:
- Using a client machine such as a laptop, connect to the management port of the MX.
- Using a browser on the client machine, access the appliance's built-in web service by browsing to http://setup.meraki.com. (You do not have to be connected to the Internet to reach this address)
- Click Uplink configuration under the Local status tab. The default credentials use the device serial number as the username, with a blank password field.
- Choose Static for the IP Assignment option.
- Enter the IP address, subnet mask, default gateway IP and DNS server information.
Setting up a DHCP IP address
By default, all MX devices are configured to DHCP from upstream WAN / ISP servers. Simply plug the MX's WAN / Internet port to your upstream circuit and wait a few minutes for the unit to negotiate a DHCP address.
Additional settings
Setting VLANs
If your WAN uplink is on a trunk port, choose VLAN tagging > Use VLAN tagging and enter the appropriate value for VLAN ID for your network.
Setting up secondary WAN interface (dual WAN)
You can toggle the LAN2 port between LAN and Internet/WAN through the Local Status Page or in dashboard under Security & SD-WAN > Monitor > Appliance Status > Uplink tab "Add another WAN port..."
Setting PPPoE
PPPoE authentication may be required if you are connecting MX device to a DSL circuit. You need to know your authentication option and credentials (supplied by your ISP) in order to complete these steps.
- Choose Connection Type > PPPoE.
- Select your Authentication option.
- If you select Use authentication, enter appropriate values for Username and Password.
Web proxy settings
These settings take effect if the MX device has to fall back to using HTTP to contact the Cloud Controller. By default, web proxy is disabled. To enable web proxy, do the following:
- Choose Web proxy > Yes.
- Enter values as appropriate for Hostname or IP and Port.
- If you require authentication, choose Authentication > Use authentication, and enter appropriate values for Username and Password.
Configuring physical link settings
To configure physical link settings on the Ethernet ports, click Local status > Ethernet configuration. You can enable half duplex, full duplex, and autonegotiation, as well as set 10- or 100-Mbps data rates.
Warranty
MX Warranty coverage periods are as follows:
|
Product |
Warranty Period |
Warranty Information |
|---|---|---|
|
MX100 |
Lifetime |
Full lifetime hardware warranty with next-day advanced replacement included. |
|
MX100 Accessories |
1 Year |
The following are considered accessories: SFP Modules, all mounting kits and stands, interface modules, additional power cords |
Additional warranty information can be found on the Return Policy and Requesting an RMA page of the Cisco Meraki website.
If your Cisco Meraki device fails and the problem cannot be resolved by troubleshooting, contact support to address the issue. Once support determines that the device is in a failed state, they can process an RMA and send out a replacement device free of charge. In most circumstances, the RMA will include a pre-paid shipping label so the faulty equipment can be returned.
In order to initiate a hardware replacement for non-functioning hardware that is under warranty, you must have access to the original packaging the hardware was shipped in. The original hardware packaging includes device serial number and order information, and may be required for return shipping.