
vMX and AWS Cloud WAN
Overview
This document goes over the step by step configuration and provides a reference architecture for deploying the Meraki vMXs with AWS Cloud WAN. It helps organization to extend their Meraki SD-WAN fabric to the application running on AWS.
Why AWS Cloud WAN
Customers are increasingly moving towards multi-region deployments in the cloud and require a more dynamic, secure and a reliable way to connect from branch sites to cloud workloads across different regions. While this can be done using VPC peering across different regions and using static routes, but this can quickly become cumbersome and difficult to manage.
AWS Cloud WAN provides a central dashboard for making connections between your branch offices, data centers, and Amazon Virtual Private Clouds (VPCs) in just a few clicks. With Cloud WAN, you use network policies to automate network management and security tasks in one location. Cloud WAN generates a complete view of your on-premises and AWS networks to help you monitor network health, security, and performance.
Meraki vMX integrates with AWS Cloud WAN to allow admins to define a multi-region, segmented, dynamically routed global network with intent-driven policies. This allows organizations to scale across different regions without worrying about managing the complexity of peering across different regions.
Solution Architecture
Deployment Steps
Step 1) (Optional) Prepare AWS environment and deploy SD-WAN VPC
1. Log into your AWS Console and navigate to the VPC console
2. Create the required VPC resources for the SD-WAN VPC as mentioned on the AWS VPC getting started guide.
3. Also, ensure that you have a transit gateway with attachments in your account. For more information, see Getting Started with Transit Gateways.
This step can be skipped if there is an existing VPC that can be used for the vMX deployment.
Step 2) Deploy vMXs from AWS Marketplace
The steps for deploying virtual MXs from the AWS marketplace are out of scope for this document. For more information about deploying virtual MXs on AWS, please refer to the vMX Setup Guide for AWS.
These vMXs will be used to extend the Meraki SD-WAN fabric to AWS. As part of the post-deployment, please keep a note of the following, they would be used in the subsequent steps:
Name: The name of the vMX instance, example: meraki-vmx-cw-1
Instance ID: The EC2 instance ID for the vMX, example: i-0c204d801d9408270
IP Address: The private IP address of the vMX instance, example: 192.168.4.3
A pair of vMXs should be deployed for each region you want to extend the Meraki SD-WAN fabric to. The next step is for us to enable Auto VPN (set the vMX to be an Auto VPN Hub on the site to site VPN page). For more information, please refer to the Meraki Auto VPN guide.
Step 3) Setting up AWS Cloud WAN
1. The first step in setting up AWS Cloud WAN is to create a global network. Navigate to the AWS Network Manager console and choose Global Networks. Click on Create global network and enter a Name and Description for your global network.


2. Once, the global network has been created, the next step is to create a core network within the global network. Select the Global network created in the previous step and under Core network, click on Create core network. 
3. To setup the Core network:
- Enter Name and Description identifying the core network under General settings
- Under Core network policy settings, set the beginning and ending Autonomous System Number (ASN) ASN range.
- Choose Edge locations
- Enter a Name identifying the segment. You can start by having two segments, one for SD-WAN and one for your workloads.
-
Choose Next to review the global network details. Choose Edit to make any changes.
-
Choose Create core network.

4. After, your core network is created and the default core network policy is LIVE, you can begin to add attachments to your core network. To add the SD-WAN (vMXs) and the Workload VPCs as attachments to the core network:
- On the AWS Network manager console, navigate to the global network that was created in the previous steps.
-
In the navigation pane, choose Attachments.
-
Choose Create attachment.
-
Enter a Name identifying the attachment.
-
From the Edge location drop-down list, choose the location where the attachment is located.
-
Choose the VPC with the vMXs deployed.
-
Repeat the above steps for the workload VPCs and other vMXs/SD-WAN VPCs in different regions.

5. Next update the core network policy, to allow sharing between the SD-WAN and other segments and also to add routes for the MX branch sites and the workload subnets.
- On the AWS Network Manager console, choose the core network created in the above steps and navigate to Policy versions.
- Select the latest policy version and click Edit.
- Navigate to the Segment Actions tab and under Routes, choose Create.
-
From the Segment dropdown list, choose one of your core network segments that you want to share. Example, sd-wan segment and workload segment.
-
Enter a static route in the Destination CIDR Block field. You can enter multiple CIDR blocks by clicking Add for each block you want to add. Click Remove for any you don't want.
-
In our case, there would be two kinds of static routes:
-
Connectivity to Meraki branch sites, with segment as sd-wan, destination CIDR as the subnets for the branch sites and the attachment as the SD-WAN VPC with the vMXs deployed.
-
Connectivity to workloads, with segment as workloads, destination CIDR as the workload subnets and the attachment as the workload VPC.
-
-
Choose Create segment route
-

-
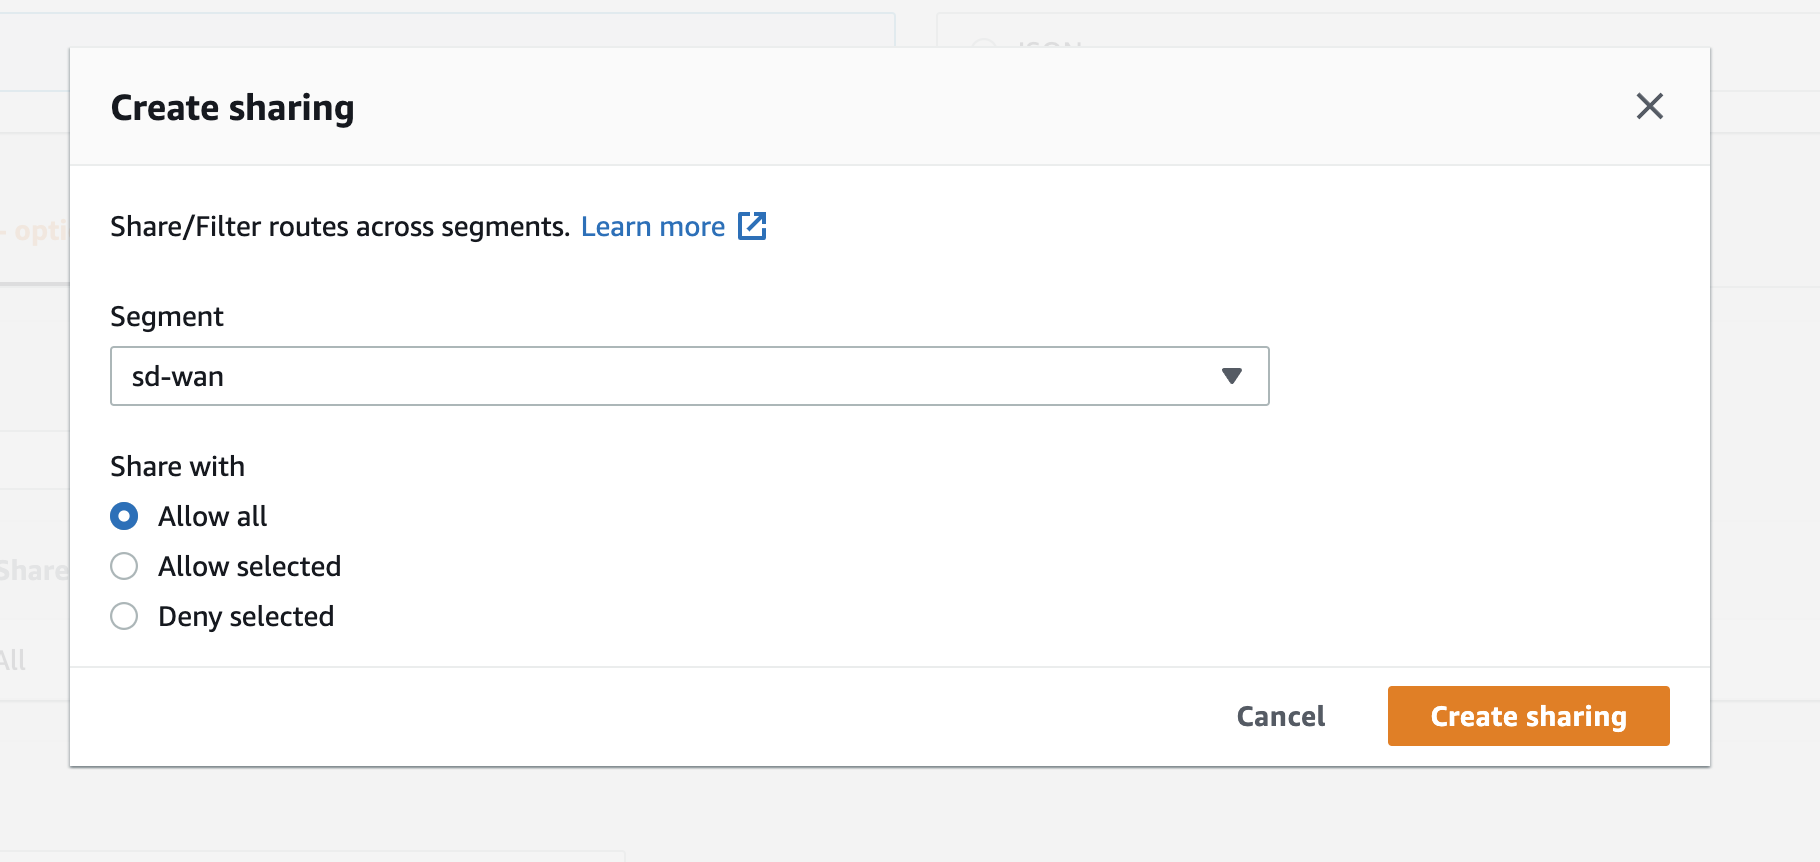
Next, navigate to the Segment Actions tab and under Sharing section, choose Create.
-
From Segment dropdown list, choose the sd-wan segment.
-
From the Segment filter, choose Allow All, to allow all shared routes from other segments.
-
Choose create sharing
-
- Create an attachment policy for the Meraki SD-WAN fabric from the Attachment policies tab
- Choose Create
- For the Rule number, enter the rule number to apply to this attachment. Rule numbers determine the order in which rules are run.
-
Enter an optional Description identify the attachment policy.
-
In the Action section, choose the Segment name as sd-wan segment
-
In Conditions, set the conditional logic
-
From Type dropdown list select Tag value
-
From the Operator dropdown list, choose Contains
-
From the Condition values, enter the values that uniquely identify all your workload VPCs. For example, each workload VPC can be postfixed with a meraki tag.
-
Choose Create attachment policy.
-

6. After the core network policy has been created, proceed to applying it to the core network.
- Navigate to Policy versions, under Core Network on the AWS Network Manager Console.
- Select the LATEST Policy and select Apply change set

Step 3) Setting up AWS VPC Route Tables
The next step after setting up AWS Cloud WAN, is to add routes to the SD-WAN VPC and the workload VPCs to point to the AWS corenetwork for the appropriate routes.
- For SD-WAN VPC
- Navigate to the Amazon VPC console.
- In the navigation pane, choose Route Tables associated with the SD-WAN VPC.
- Choose Actions, Edit routes.
- To add a route, choose Add route. For Destination enter the destination CIDR block for the Workload VPCs (example: 172.32.0.0/24). For Target, select Core Network and choose the ARN of the core network deployed in the steps above.

- For Workload VPCs
- Navigate to the Amazon VPC console.
- In the navigation pane, choose Route Tables associated with the SD-WAN VPC.
- Choose Actions, Edit routes.
- To add a route, choose Add route. For Destination enter the destination CIDR block for the Meraki Branch Sites (example: 10.198.0.0/24). For Target, select Core Network and choose the ARN of the core network deployed in the steps above.
